Table of Contents
Advertisement
Quick Links
Dear Customer,
Thank you for having chosen one of our products. We would like to remind you that pellet boiler are the
most innovative heating solution generated by the most advanced technology, characterised by high-
quality manufacturing as well as a simple and elegant design. Ideal for any type of room, these products
contribute to comfort thanks to the cosy heat that only flames can radiate.
The boilers, functioning exclusively with wooden pellets of 6 mm in maximum diameter, are equipped
with a heat exchanger with vertical tubes. Pellet boilers are fitted with a timer-thermostat that ensures
an autonomous management of the Boiler as it can be programmed to turn on and off up to 4 times
per week. Pellet boilers take the heat to the radiators in the heating system, with a thermal power that
is adjusted according to the space to be heated: just set the heating system water temperature manually.
Recommended temperature: between 60° and 70°.
Pellet boilers have been equipped with highly advanced automatic devices and control and safety systems
that ensure efficient and practical operation.
The first two or three times your pellet boiler is started, fumes emitted by the varnish may cause unpleasant
smells due to hardening. Therefore, it is advisable to air the room properly, and avoid staying long in front
of the pellet boiler.
Installation is prohibited in bedrooms or in rooms with running hot.
ATTENTION: This warning sign indicates that the message to which it refers should
be carefully read and understood, because failure to comply with what these
notices say can cause serious damage to the Boiler and put the user's safety at risk.
INFORMATION: This symbol is used to highlight information which is important for
proper boiler operation. Failure to comply with these provision will compromise
use of the boiler and its operation will not be satisfactory.
Installation should be carried out by qualified personnel, who will be fully responsible for installing the
product and ensuring its proper operation. The Manufacturer shall not be responsible in case of installation
by unqualified personnel or without complying with the general warnings and installation instructions.
This instruction booklet is an integral part of the product: make sure that it always accompanies the
appliance, even in case of transfer to another owner or in the case of transfer to another place. In the
event of damage or loss, request a copy from the area technician. Prior to first ignition must receive
adequate instructions from the installer.
Before using, installing or servicing the product, read the indications contained in this manual
carefully.
Prior to first ignition must receive adequate instructions from the installer.
This pellet boiler should only be used for the intended use it has been designed for. Therefore, the user
shall be responsible for any damage to people, animals or things resulting from misuse of the product.
The entire range of products is manufactured in accordance with the directives and standards:
2014/30 UE (regulation EMCD), 2006/42/CE, 2014/35 UE (Low Voltage Directive), 2011/65/EU; EN 61000-
6-2; EN 61000-6-3; EN 60335-1; EN 60335-2-102; EN 62233; EN 50581; EN 303-5-2012
Compact Boiler 20/24/28/32
Cod. 001118
1
Advertisement
Table of Contents

Summary of Contents for AMG Adler Compact 20
- Page 1 Compact Boiler 20/24/28/32 Dear Customer, Cod. 001118 Thank you for having chosen one of our products. We would like to remind you that pellet boiler are the most innovative heating solution generated by the most advanced technology, characterised by high- quality manufacturing as well as a simple and elegant design.
- Page 2 Regulations After unpacking the unit, check all the parts are require original spare parts in good conditions and that no item is missing. - periodically check and clean the flue gas exhaust Otherwise, contact the dealer from which you ducts purchased your pellet boiler.
- Page 3 • Use only wood pellets; • Keep / store the pellets in a cool dry place; • Never pour pellets directly on the hearth; • The boiler must only be fed with quality 6 mm diameter pellets, A1 certifi ed according to the UNI EN ISO 17225-2 regulations;...
- Page 4 Instructions for safe and efficient use • The device can be used by children that are not • The system must be of adequate electrical less than 8 years old and people with reduced power declared the Boiler; physical, sensory or mental capabilities, or lack of experience or knowledge, provided being under •...
- Page 5 Water Characteristics The characteristics of the water used to fi ll the system are very important to prevent the build-up of mineral salts and the formation of incrustations along the pipes, in the boiler and in the heat exchangers. Therefore, please get your plumber’s advice concering: •...
- Page 6 Technical Specification Boiler 20_24 3/4" 3/4" Pass Ø80mm 1/2 " Pre-tranciato tubo Ø50mm A1 = heating water delivery A2 = heating water return C = safety valve D = reintegration E = system emptying F = position main power switch to G = the control panel H = water temperature sensor I = pressure...
- Page 7 CPC200 CPC240 UNIT PARAMETERS CPC200-AUTO CPC400-AUTO OF MEASUR. CPC200-PA CPC240-PA Heat input 23,0 Nominal heat output 17,51 21,0 Reduced heat output 5,21 CO concentration at nominal reference (10% O mg/m 19,3 CO concentration at reduced reference (10% O mg/m Nominal efficiency 92,13 91,1 Reduced efficiency...
- Page 8 Technical Specification Boiler 28_32 3/4"M 3/4"M 1/2" Ø100 Ø60 A1 = heating water delivery A2 = heating water return C = safety valve D = reintegration E = system emptying F = position main power switch to G = the control panel H = water temperature sensor I = pressure N.B.
- Page 9 CPC280 UNIT CPC340-AUTO PARAMETERS CPC280-AUTO CPC320 OF MEASUR. CPC340-PA CPC280-PA Heat input 27,10 31,5 33,2 Nominal heat output 25,0 29,0 31,2 Reduced heat output CO concentration at nominal reference (10% O mg/m 38,0 CO concentration at reduced reference (10% O mg/m 228,2 228,2...
-
Page 10: Installation
Installation For all the information and any further not be in the same room as extractor fans, gas clarification, please refer to the UNI 10683: appliances and type B or devices which the local 2012. depression - the internal section of the chimney must be Boiler room uniform, preferably circular, square or rectangular sections must have rounded edges with a radius... - Page 11 Connection to the flue pipe The flue pipe must have internal dimensions not larger than 20x20 cm, or diameter 20 cm. In the event of larger dimensions, or of the flue pipe being in poor condition ( for example cracks, poor insulation, etc.), it is advisable to fit a stainless steel pipe of suitable diameter inside the flue pipe throughout its length, right up to the top.
- Page 12 Distance to objects The boiler should be inspected on all sides, so you have to keep a distance of at least 40 cm at the back and sides. It is also recommended to keep the pellets and all fl ammable materials at a suitable distance 40 cm 40 cm...
-
Page 13: Plumbing System Connection
In order to achieve the test report results, please load the performance parameters retained by the manufacturer and the qualifi ed technician. They will use these parameters once verifi ed that, during the installation, it is possibile to reproduce the laboratory conditions. Plumbing system connection The connection of the boiler to the plumbing system must be made ONLY by specialized personnel who are capable of carrying out installation properly,... - Page 14 Connection diagram for boiler equipped with kit for domestic hot water production WATER WATER WATER WATER DELIVERY FLOW RETURN RETURN PIPE PIPE PLATE HEAT EXCHANGER Scambiatore SMOKE FAN a piastre A1 = heating water delivery 3/4 “ M The boiler can also be equipped with a full kit for the production of domestic hot water.
- Page 15 This operation must be carried out with caution following these steps: LOCKED • open the vent’s valve of the radiator ,of the boiler and the system; • Gradually open the filling tap of the system TAP ONE ROUND LOOSENED checking that the automatic vent’s valves, placed on the system, are regularly working;...
- Page 16 Confi guration of the hydraulic diagram of the boiler BY A SPECIALIZED TECHNICIAN Before starting the boiler, it is necessary to confi gure the hydraulic scheme on which we want to work. The boiler is set up to receive the clean contact of an external thermostat (open / closed, the thermostat must not give tension to the back.
- Page 17 Per il tecnico specializzato: To confi gure the hydraulic diagram, press the SET key and then scroll to the “Technical settings” menu with the power key. PPress the SET key again to enter the menu and enter the access key in possession of only the technician authorized by the manufacturer.
- Page 19 19 19...
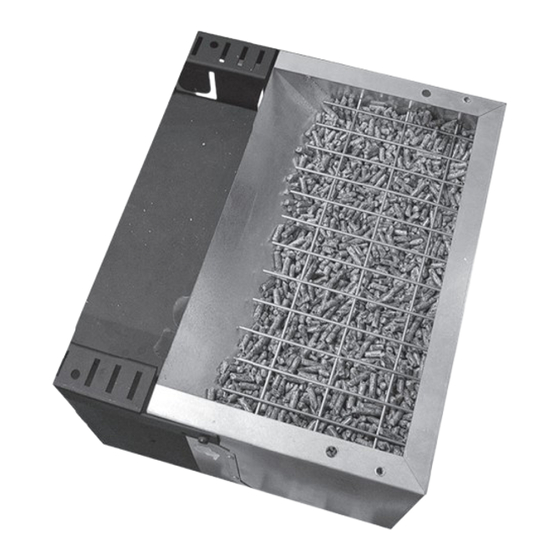
- Page 30 Ignition Remove any components which might burn from the firebox and from the glass (various instructions and adhesive labels) Charge pellet Fuel is loaded from the upper part by opening a door. Pour the pellets in the hopper. When empty, this is easier if performed in two steps: •...
-
Page 31: Information On The Display
Preliminary checks Before switching on the machine, make sure that the pellet hopper is full, the combustion chamber is clean, the glass door is closed, the power supply plug is connected and the switch on the back is set to “1.” Information on the display TURNED OFF BRAZIER CLEANING... -
Page 32: Programming Menu
Programming menu Menu 02 SET CLOCK To access the set clock option, press the “SET” button (3), with the button (5) scroll through the submenus until MENU 02 - SET CLOCK and with buttons 1 and 2 select the current day. Press the “SET”... - Page 33 level 1 level 2 level 3 level 4 value 03 - set thermostat 01 - activate thermos. 01 - activate thermos. on/off 02 - day programme 01 - daily thermostat on/off 02 - start 1 day hour 03 - stop 1 day hour 04 - start 2 day hour...
- Page 34 Menu 03 SET CHRONO Submenu 03 - 01 - activate thermostat M-3-1-01 This allows you to activate and deactivate all of the enable functions of the thermostat thermos 08 : 15 Submenu 03 - 02 - daily programme M-3-2-02 This allows you to enable, disable, and set the daily START 1 functions of the thermostat.
- Page 35 PROGRAMME 1 PROGRAMME 2 menu level selection meaning possible values menu level selection meaning possible values 02-03-02 START PROGRAM 1 activation time time - OFF 03-03-11 START PROGRAM 2 activation time time - OFF 02-03-03 STOP PROGRAM 1 shut-off time time - OFF 03-03-12 STOP PROGRAM 2...
- Page 36 Menu 05 - stand-by mode menù level Menu 05 - stand-by mode menù level Press the SET key. Using the key (2), go to Press the SET key. Using the key (2), go to menu 05 and confirm with the SET key. Using the menu 05 and confirm with the SET key.
-
Page 37: Alarm Signals
Alarm signals In the event of a working defect, the system informs the user about the type of failure occurred. The following table summarises the alarms, kind of problem and possible solution: Display Kind of problem Solution As soon as the power supply is back, the Boiler ALAR 1 BLACK OUT There is no power supply... - Page 38 Failure on electrical devices Mancata accensione If the flame does not light up during the switching on or if the smokes temperature does not reach a suitable value in the foreseen time gap, the Boiler switches off and you will read the words “ ”.
-
Page 39: Safety Devices
Safety devices Reduction motor: if Flue gas temperature Electrical safety: Water temperature the motor stops for sensor: thermocouple the Boiler is protected probe: if the water signaling that measures against violent surges of temperature approaches “ “ A L A R - D E P - A L A R - D E P - temperature current (ex. -
Page 40: By The User
Maintenance and cleaning / Boiler with cast iron brazier All cleaning of all parts must be carried out with the Boiler completely cold and unplugged to avoid burns and thermal shock. The boiler does not need much maintenance if used with certifi ed quality pellet. The need for maintenance varies depending on the conditions of use (switching on and off repeatedly) and depending on the performance required. - Page 41 Cleaning exchanger - boiler off Fouling act as insulation and the thicker they are, the lower the heat that is transmitted to the water and to the structure generally. Therefore very important to perform the cleaning of the tube bundle, said exchanger also, to prevent the fouling of the same and prevent clogging and jamming of the cleaning device.
- Page 42 Lower ash drawer cleaning Check every 7 days Clean bottom ash from the fallen debris during operation. You can access the ash pan by loosening the two wing nuts that hold the drawer inspection. Remove the tray, empty and clean the wall and only the corners with a suction device or with dedicated tooling.
- Page 43 Maintenance and cleaning / Boiler with self-cleaning brazier All cleaning of all parts must be carried out with the Boiler completely cold and unplugged to avoid burns and thermal shock. The boiler does not need much maintenance if used with certifi ed quality pellet. The need for maintenance varies depending on the conditions of use (switching on and off repeatedly) and depending on the performance required.
- Page 44 Check every 2/3 days Cleaning the ash collection compartment Clean and empty the ash tray being careful with hot ash. The ash must be completely cold for a vacuum cleaner to be used to remove it. Only if the ash is completely cold, you can also use a canister vacuum cleaner suitable for picking up particles of a certain size.
- Page 45 Clean the brazier from the ash and any rest with the appropriate tool. They could obstruct the air passages. If the pellet in the tank is exhausted, there might be a residual unburnt pellets in the brazier. If the pellet in the tank is exhausted, there might be a residual unburnt pellets in the brazier.
- Page 46 Maintenance and cleaning / Boiler with ash-compactor All cleaning of all parts must be carried out with the Boiler completely cold and unplugged to avoid burns and thermal shock. The boiler does not need much maintenance if used with certifi ed quality pellet. The need for maintenance vari- es depending on the conditions of use (switching on and off repeatedly) and depending on the performance required.
- Page 47 Check every 2/3 days Cleaning the ash collection compartment Clean and empty the ash tray being careful with hot ash. The ash must be completely cold for a vacuum cleaner to be used to remove it. Only if the ash is completely cold, you can also use a canister vacuum cleaner suitable for picking up particles of a certain size.
- Page 48 in the tank is exhausted, there might be a residual unburnt pellets in the brazier. If the pellet in the tank is exhausted, there might be a residual unburnt pellets in the brazier. It’s also important to clean the ash accumulated inside of the combustion room around the brazier.
- Page 49 Maintenance and cleaning for all models Cleaning the steel flame-shell Every 2-3 days it is important to remove the steel flame-shell in order to clean it and remove the dirty that may fall during the cleaning of the exchange pipes. Shutting the Boiler down In the period when the Boiler is out of use it must be disconnected from the electricity mains.
- Page 50 To do this, the horizontal pin can be pulled through a hole in the wall of the boiler body. Now the upper section to the heat exchanger is free from any encumbrance so as to allow a perfect cleaning. Once a year is also recommended to clean the upper compartment of the exchanger.
- Page 51 We recommend that an annual maintenance service is carried out, preferably under a programmed service contract. The essential part of this service is a visual and functional check on the following components: • reduction motor • smoke expulsion fan • smoke sensor •...
-
Page 52: Problems And Solutions
Problems and solutions All repairs must be carried out exclusively by a specialised technician, with the Boiler completely cold and the electric plug pulled out. Is prohibited from any unauthorized modification to the device and the replacement of parts with other non-original. The operations marked in bold type must be carried out by specialised personnel. - Page 53 PROBLEM POSSIBLE CAUSE SOLUTION 1. Refill pellet hopper If it is first ignition the fuel, having to go the route that goes from the tank to the brazier, may not be able to arrive on time and in the right amount programmed 2.
- Page 54 1. Check the supplay voltage and the protection fuse 1. No electrical supply to 2. Check the motor and capacitor and replace the Boiler The smoke extraction 2. The motor is broken if necessary motor does not work 3. Defective electronic board 3.
- Page 55 PROBLEM POSSIBLE CAUSE SOLUTION 1. Set the Boiler to a higher temperature. The maximum water temperature in the boiler is 65 ° C and can not be set below 40 ° C or above 80 ° C. It is advisable to never adjust the temperature below 60 °...
- Page 57 LISTA RICAMBI CPC20-24 Posizione Numero documento Titolo Quantità 321016 VALVOLA DI SFOGO ARIA AUTOMATICA 1/2 MKV 0251210 PER TERMOS 321018 VALVOLA DI SICUREZZA 3 BAR MSV/E 0207525 PER 4790173 SCHEDA ELETTR 410002LCD DISPLAY STUFA NEUTRO 410005 VENTOLA ESPULSIONE FUMI R2E150-AN91-22 4790060 PRESSOSTATO FUMI HUBA TARATURA 60 PASCAL 410009C TERMOSTATO 100°C LS1 8025 2.5A T85 CON CAPILLARE 1,5 METRI 4790069 RESISTENZA X ACC.300W CERAMICA PSX-2-240-B...
- Page 59 LISTA RICAMBI CPC28-32 Posizione Numero documento Titolo Quantità 321016 VALVOLA DI SFOGO ARIA AUTOMATICA MKV 0251210 PER TERMOS 321018 VALVOLA DI SICUREZZA 3 BAR 1/2'' F/F 4790173 SCHEDA ELETTR 410002LCD DISPLAY STUFA NEUTRO 4790060 PRESSOSTATO FUMI HUBA TARATURA 60 PASCAL 410009 TERMOSTATO 100°C LS1 8025 2.5A T85 4790069 RESISTENZA X ACC.300W CERAMICA PSX-2-240-B 410011 MODULO ALIMENTAZIONE POLYSNAP BZ01001...
- Page 60 NOTES...
- Page 61 NOTES...
Need help?
Do you have a question about the Adler Compact 20 and is the answer not in the manual?
Questions and answers