Advertisement
Quick Links
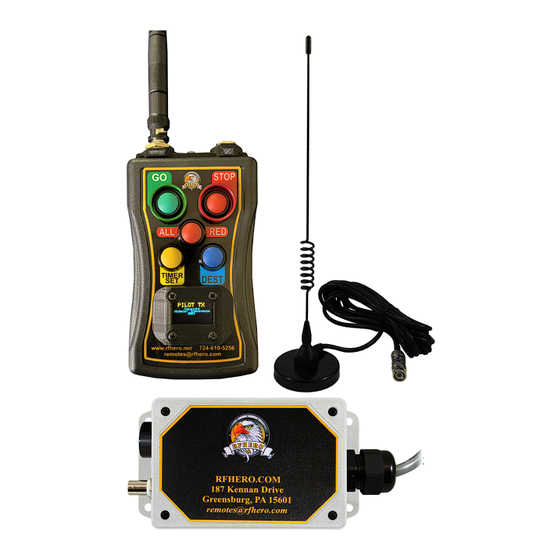
Pairing the Pilot TLC Receiver and Transmitter
1.
If the receiver is powered on, please remove the power and then power it back up.
2.
Insert batteries into the transmitter.
3.
On the receiver, press and hold the green button next to the power input.
4.
Check the destination address. This is programmable by using the DEST button on the
lower right. Each press will add a location up to 10.
5.
On the transmitter, press and hold the GO button
6.
The transmitter and Pilot TLC receiver are now paired to the Destination shown.
7.
When operating it is important to reset the destination to the TLC being controlled.
Basic Troubleshooting
If the transmitter's LED flashes slowly along with an audible tone, several times then
stops, the batteries should be replaced or recharged.
Make sure that the green Power LED on the RX Control Box is lit when the Pilot TLC
receiver is plugged in.
Check the antenna for fraying or loose connection.
Verify that the Pilot TLC receiver is in the proper mode and is paired with the transmit-
ter. (See the "Operating Instructions" section on the previous page).
Please visit
http://www.rfhero.com/
help.
Contact us for more troubleshooting help. Should the unit need to be sent in for ser-
vice we can arrange a return for you.
Sample image of Flagger and Pilot with Destination Location
Flagger Mode Destination 2
Flagger Mode Destination 10
and click on the Troubleshooting link for more
Pilot Mode-30 Sec Destination 1
Traffic LighT conTroLLer
Version 1.0
Provided by:
Nichols Electronics, Inc.
www.rfhero.com
remotes@rfhero.com
RFHERO
Industrial Controls
TM
Advertisement

Summary of Contents for RFHERO Pilot TLC
- Page 1 If the transmitter’s LED flashes slowly along with an audible tone, several times then stops, the batteries should be replaced or recharged. Make sure that the green Power LED on the RX Control Box is lit when the Pilot TLC receiver is plugged in. ...
- Page 2 Using Modes: 4. Batteries: (2) NiMH rechargeable batteries and charger Flag Mode 5. Control Cable: Prewired to operate the RFHERO TLC The flag mode starts with a RED light To change to a green light, press the GO Button...
Need help?
Do you have a question about the Pilot TLC and is the answer not in the manual?
Questions and answers