Advertisement
Quick Links
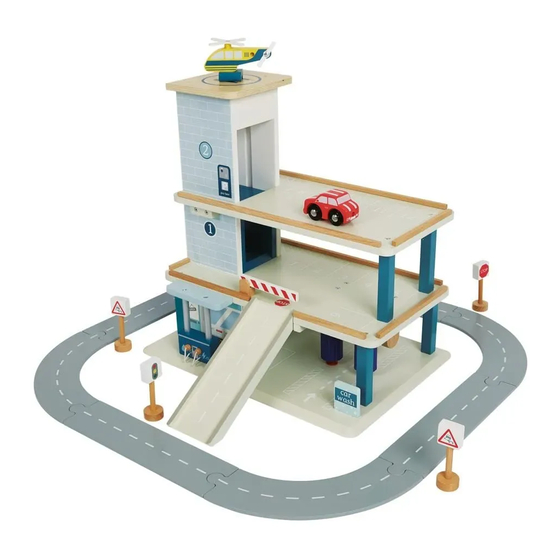
Wooden Toy Garage with Track
L5171
Assembly Difficulty
one-person job
easy
- medium - hard
Thank you for shopping with GLTC, we hope you enjoy
having this product in your home.
We know assembling furniture, toys or accessories is not everyone's
favourite way to spend their time, so we've tried to make assembling
this item as quick and painless as possible.
A few important pointers before you start:
•
Please read the instructions right through before you start, and
check that all the components have been included in the pack;
we find separating all the hardware into piles makes it easier to
be sure that everything is present and correct.
•
Make sure you have the right tools. Allen keys are provided
if required, but screw drivers and other tools are not. You'll
find details of the tools you need at the beginning of the
instructions.
•
It's a good idea to build the unit in the room where you are
going to be using it, to avoid the need to move it after it's been
assembled.
•
Do not throw away any packing materials until assembly is
complete, just in case you accidentally discard smaller parts or
hardware.
V1
28/04/2021
1
Advertisement

Subscribe to Our Youtube Channel
Related Manuals for Great Little Trading Wooden Toy Garage with Track


Summary of Contents for Great Little Trading Wooden Toy Garage with Track
- Page 1 We know assembling furniture, toys or accessories is not everyone’s favourite way to spend their time, so we’ve tried to make assembling this item as quick and painless as possible. Wooden Toy Garage with Track A few important pointers before you start: L5171 •...
-
Page 2: Safety Warnings
Safety Warnings: Customer Service: • Adult assembly required. • If you find that any components are missing or damaged, please do not begin assembly and do not use the item. Please contact GLTC • Not suitable for children under 3 years due to small parts that may Customer Services on 0344 848 6000 immediately. -
Page 3: Component Checklist
Component Check List You will need (not supplied) Phillips Head 32x Screws 21mm Screwdriver... - Page 4 Hardware for Step 3: 2x #1 Screws STEP 3: STEP 1: Attach assembled parts from Step 1 and 2 to panel E using 2x screws (#1). Using the pre-inserted dowels on panels B and C, attach side panel A. Hardware for Step 4: 2x #1 Screws STEP 2: STEP 4:...
- Page 5 Hardware for Step 7: Hardware for Step 5: 1x #1 Screws 4x #1 Screws STEP 5: STEP 7: Find pre-assembled part H, and slot components G and I onto either end of Attach the lift shaft structure to panel M using 4x screws (#1) the rod.
- Page 6 STEP 11: STEP 9: Hardware for Step 9: Insert parts R (car wash rollers) into base Attach 2x P pillars onto the top of panel panel E. One end of the rollers will have a M (these are the larger of the 4) using 2x larger dowel piece, this end goes into the screws (#1).
- Page 7 T to the pillars using 2x screws (#1). Add part U (car wash sign) to front of garage. Copyright© 2021 G.L.T.C. Ltd. All rights reserved. Great Little Trading Company and GLTC are registered trade marks of G.L.T.C. Limited.
Need help?
Do you have a question about the Wooden Toy Garage with Track and is the answer not in the manual?
Questions and answers