Table of Contents
Advertisement
Quick Links
Advertisement
Table of Contents

Related Manuals for Stryker SR-94HPC

Summary of Contents for Stryker SR-94HPC
- Page 1 www.strykerradios.com...
- Page 3 LIMITED WARRANTY Stryker Amateur Radio warrants this product to be free of defects for a period of three (3) year from the original date of purchase. You must activate your warranty online at http://strykerradios.com/registration- form/ This warranty is non-transferable.
- Page 4 WARNING In order to comply with RF exposure requirements for mobile transmitting devices, a minimum distance of 20cm must be maintained between the antenna and all persons.
-
Page 5: Table Of Contents
CONTENTS FUNCTIONS AND CHARACTERS ..............1 STANDARD ACCESSORIES ................2 OPTIONAL ACCESSORIES ................2 INSTALLATION ....................2 Microphone Connection ................2 Antenna Connection ..................3 Power Connection ..................3 Fuse Replacement ..................3 Intall Microphone Hanger ................4 Intall External Speaker ................. 4 GETTING ACQUAINTED .................. -
Page 6: Functions And Characters
1. FUNCTIONS & FEATURES ● FTF LCD display ● 12/24V voltage(4W version only) ● Full alloy body for heat radiation ● Programmable keypad ● CTCSS/DCS (optional) ● Wireless microphone control(optional) ● Cell-phone APP control (optional) ● AM/FM multi band ● Flexible menu and programming software ●... -
Page 7: Standard Accessories
2. STANDARD ACCESSORIES FUNC Radio Microphone Install bracket Pads Screws Microphone Hanger Adjusting screws non-slip mat Fuse(5A 250V) 3. OPTIONAL ACCESSORIES 8 ohm speaker PC cable 4. INSTALLATION Choose a idea location to install the radio. 1. Mark the location for screws by intall racket. 2. -
Page 8: Antenna Connection
4.02 Antenna connection Note: Never press PTT before install the antenna, it might burn the final transistor. 1. Screw on the antenna into antenna jack. 2. To make full use of this radio, it is necessary to locate the antenna in a well grounded place, and well adjust the SWR. -
Page 9: Intall Microphone Hanger
4.05 Intall Microphone hanger 1. Choose idea location and mark for screw point. 2. Fix the hanger by the srews in accessory list. 4.06 Intall external speaker This radio adopt 4-8 ohm, 4W external speaker. 1. Install the external speaker in idea location. 2. -
Page 10: Getting Acquainted
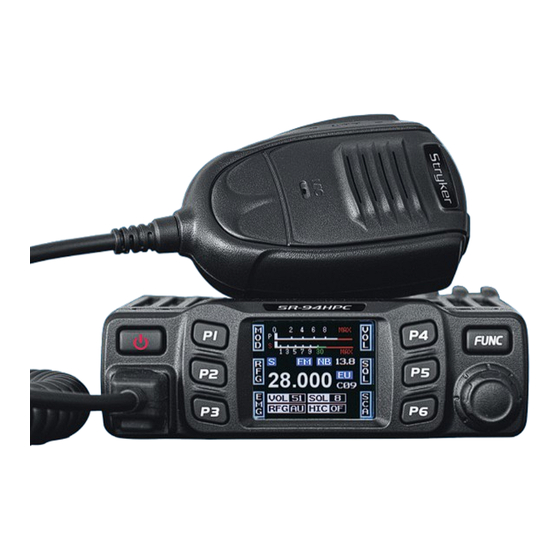
5. GETTING ACQUAINTED 5.01 Front Panel FUNC Functions Power On/Off/Mute Programmable Key 1 (Default: Mode AM or FM) Programmable Key 2 (Default: RF Gain) Programmable Key 3 (Default: EMG 9 & 19) Programmable Key 4 (Default: Volume) Programmable Key 5 (Default: Squelch) Programmable Key 6 (Default: Power) -
Page 11: Microphone
5.03 Microphone Channel Down Channel UP Connector Microphone cable 6. KEY FUNCTION OPERATION 1. Short press key, the radio emit a prompt and LCD display on. 2. Power off radio: hold key, until LCD display off. 3. when radio is powered on, short press key, LCD displays AUDIO:MT, the radio volume will mute. - Page 12 1.Short to switch between 3 groups of self define funciton keys. 2.Long press to enter background function menu. [P1]~[P6] This radio has 6 self define keys ,each key can set 3 functions. P1~P3 matching the 3 function display in left side LCD, P4~P6 matching the functions display in the right side of the LCD;...
- Page 13 VOL: Volume level control 1.Short press key to choose programmed function group. 2.Short press the programmable key which allocated as VOL function, LCD displays VOL: 3.Turn channel switch to adjust volume level. 4.Press [PUSH] key or key to store setting and exit. SQL~ASQ: Short press: Squelch level control 1.Short press...
- Page 14 MEM~STORE: Short press: use memory channel 1.Short press key to choose programmed function group. 2.Short press the programmable key which allocated as MEM function to enter memory channel, turn channel switch to choose memory channels. 3.Short press it again to store setting and exit. Long press: Memory channel store position 1.Choose a channel 2.Short press...
-
Page 15: Background Function Menu Operation
RB: RB function 1.Short press key to choose programmed function group. 2.Short press the programmable key which allocated as RB function, LCD displays RB:XX. 3.Short press it again or turn channel switch to choose RB group 4.Press [PUSH] key or key to store setting and exit. - Page 16 2. TOT: Time out timer 1.Enter FUNC MENU, choose NO. 2 function menu. 2.Press [PUSH] key to enter function setting, the chosen menu value in LCD will turn to green color. 3.Turn channel switch to choose wanted setting. This radio has OFF~30Min, total 30minutes available.
- Page 17 7. RFG: RF gain 1.Enter FUNC MENU, choose NO. 7 function menu. 2.Press [PUSH] key to enter function setting, the chosen menu value in LCD will turn to green color. 3.Turn channel switch to choose wanted level, This radio has AU. OFF~30 total 12 levels available.
- Page 18 12. AOP: Automatic power on 1.Enter FUNC MENU, choose NO. 12 function menu. 2.Press [PUSH] key to enter function setting, the chosen menu value in LCD will turn to green color. 3.Turn channel switch to choose wanted setting. ON: Turn on Automatic power on. OFF: Turn off Automatic power on.
-
Page 19: Public Data Function Menu Operation
8. PUBLIC DATA FUNCTION MENU OPERATION How to enter public menu: 1.Long press key to enter main MENU interface. 2.Short press key, key or channel switch to move cursor, to choose menu group. (Note: short press key can fast turn page) 3.Press [PUSH] key to enter PUD MENU . -
Page 20: Channel Function Menu Operation
9. CHANNEL FUNCTION MENU OPERATION How to enter channel menu: 1.Long press key to enter main MENU interface. 2.Short press key, key or Turn channel switch to move cursor, to choose menu group.(Short press key can fast turn page). 3.Press [PUSH] key enter channel menu . 4.Short press key, key or Turn channel switch to move cursor to choose wanted... -
Page 21: Dtmf Encode Setting
Note: Only when current channel has store DMTF group, the Call setting will work (Refer to DTMF MENU setting) 10. DTMF ENCODE SETTING How to enter DTMF encode setting: 1.Long press key to enter main MENU interface. 2.Short press key, key or Turn channel switch to move cursor, to choose menu group.(Short press key can fast turn page). - Page 22 4. PRE-T: Pre-loading time setting 1.Enter DTMF MENU, choose NO. 4 function menu. 2.Press [PUSH] key to enter function setting, the chosen menu value in LCD will turn to green color. 3.Turn channel switch to choose group, This radio has 100ms~2500ms total 25 levels available.
-
Page 23: Self -Define Key Setting
11. SELF –DEFINE KEY SETTING 1.Long press key to enter main MENU interface. short press key, key or Turn channel switch to move cursor, to choose menu group.(Short press key can fast turn page). 2.Press [PUSH] key to KEY MENU . 3.Turn channel switch to choose wanted function 4.Short press [PUSH] key to choose Key function group. -
Page 24: Specifications
12. SPECIFICATIONS GENERAL Modulation Mode AM/FM 28.000 ~ 29.700MHz (FM) Frequency Range 28.000 ~ 29.700MHz (AM) Frequency Tolerance ±5.0ppm Input Voltage 12/24V Dimensions(in mm) 124(W) x 163(D) x 39(H) Weight Approx.670g Ferquency Control PLL Synthesizer Operating Temperature Range -20° C TO + 55° C Transmit 2A MAX Current Drain...
Need help?
Do you have a question about the SR-94HPC and is the answer not in the manual?
Questions and answers