Table of Contents
Advertisement
Quick Links
Aussie Legend
OPERATING INSTRUCTIONS
Serial Number of Heater: ____________ Model: ___________________
Coonara
Revised: 13/05/2021
INSTALLATION
&
WOODHEATERS ARE AUSTRALIAN OWNED AND
MANUFACTURED BY
SH SH SH SHAMI
AMIC SHEE
AMI
AMI
C SHEETMETAL
C SHEE
C SHEE
TMETAL
TMETAL
TMETAL
PO BOX 8, KILSYTH, VIC. 3136
PH: 03 9737 5300
https://shamic.com
1 of 13
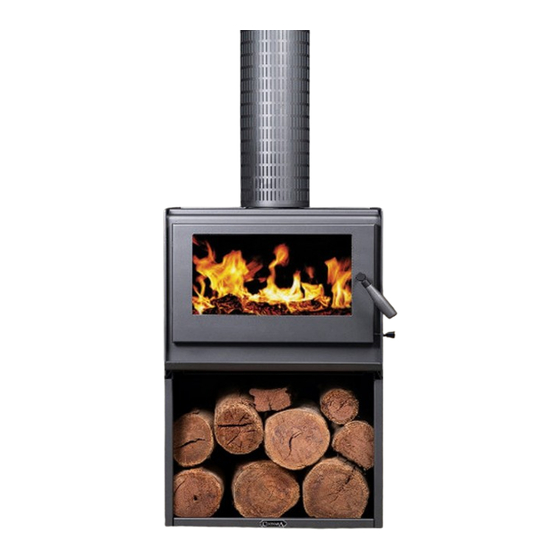
Aussie Legend Stacker
(AUST.) PTY. LTD.
Printed: 14/10/2021
Advertisement
Table of Contents

Related Manuals for Coonara Aussie Legend


Summary of Contents for Coonara Aussie Legend
- Page 1 Aussie Legend Aussie Legend Stacker INSTALLATION & OPERATING INSTRUCTIONS Serial Number of Heater: ____________ Model: ___________________ Coonara WOODHEATERS ARE AUSTRALIAN OWNED AND MANUFACTURED BY SH SH SH SHAMI AMIC SHEE C SHEE C SHEE C SHEETMETAL TMETAL TMETAL TMETAL (AUST.) PTY. LTD.
- Page 2 The heater should be checked for scratches/dents prior to installation. Once the heater has been installed scratches or dents may not be covered by warranty. Coonara Woodheaters should not be modified in any way. Do not operate the heater with the door open for extended periods.
- Page 3 2918:2018 3.3.2). The floor protector for the Aussie Legend should extend 500mm in front of the appliance door and be placed centrally in the 840mm width. The floor protector for the Aussie Legend with Stacker option should extend 355mm in front of the appliance door and be placed centrally in the 840mm width.
- Page 4 Aussie Legend Stacker Assembly To install stacker, parts must be fitted using this procedure: 1. Remove legs (retain 6 nuts). 2. Make sure you have 6 nuts (item 2). 3. Drop heater onto stacker making sure item 1 (heatshield) is used.
-
Page 5: First Fire
FIRST FIRE YOUR HEATER HAS BEEN SPRAYED WITH HIGH TEMPERATURE PAINT. TO ENSURE THAT THE PAINT IS PROPERLY “CURED IN”, PLEASE FOLLOW THESE STEPS WHEN LIGHTING THE FIRST FIRE IN THE HEATER: • ENSURE THE AIR CONTROL SLIDE IS FULLY OPEN. •... -
Page 6: Operating Information
Close the door securely. Loading When the start up wood is well alight add a load of firewood. Coonara Your heater will burn any diameter logs which fit in the firebox. Large logs will take longer to ignite but will burn longer. - Page 7 Just start or rebuild the fire with the firebox at least 2/3 full, set the air inlet control to high and let the heater operate in this manner for at least 90 minutes. Replacement parts Coonara Consult your Dealer regarding any of the normally replaceable components of the heater i.e.
-
Page 8: Maintenance
NOTE: Do not use abrasive cleaners or harsh solvents (such as methylated spirits). Should you experience scuffing or scratching, or discolouration due to incomplete curing, the high temperature Coonara paint can be touched up and matching spray cans may be purchased from your dealer. -
Page 9: Door Adjustment
Door Adjustment The door is unlikely to become misaligned unless it is knocked and attempts at adjustment may cause rather than solve a problem. Always consult your Coonara dealer before attempting any adjustment to the door. 1. Remove door by opening fully and lifting door up off the hinge. (Freestanding models require top panel to be propped up prior to lifting door). -
Page 10: Baffle Plate Removal
Baffle plate removal The baffle plate is held in place with four locating tabs – 2 either side, front and rear of the firebox. WARNING: ALLOW THE HEATER TO COOL IF HOT BEFORE ATTEMPTING BAFFLE PLATE REMOVAL. DO NOT USE HEATER IF TOP BAFFLE IS DAMAGED Steel Baffle –... - Page 11 TABLE 1: FIREWOOD SPECIES AND THEIR PROPERTIES Firewood Forest Type Heat Density Splitting Ignitability Coals Sparks Avail. Species Avail. (Dry Air) Per Unit Ib/ft3/ Volume Kg/m3 Mallee Roots Mallee Difficult Poor Excellent Good Belah, Buloke Mallee 70 / Good Poor Excellent Limited Box-Ironbark...
-
Page 12: How To Make A Warranty Claim
How to Make a Warranty Claim Coonara, Heatcharm and Arrow Heaters. The full Warranty Statement for your heater is contained in the Installation and Operating Instructions booklet that was provided with the product. 1. Check the details of the warranty statement 2. - Page 13 (1) year from date of purchase, excluding door glass. If this Coonara heater is found to be defective in material or workmanship Shamic will repair or replace such defects in the Coonara heater at Shamic’s option in accordance with Coonara’s warranty policy during the period on this warranty. If the defect is found not to meet the Consumer Guarantee requirements and constitutes a major failure, the purchaser may be able to choose to repair or replace the defective heater or part or obtain a refund.
Need help?
Do you have a question about the Aussie Legend and is the answer not in the manual?
Questions and answers