
Related Manuals for EcoSmart ES50LVP


Summary of Contents for EcoSmart ES50LVP
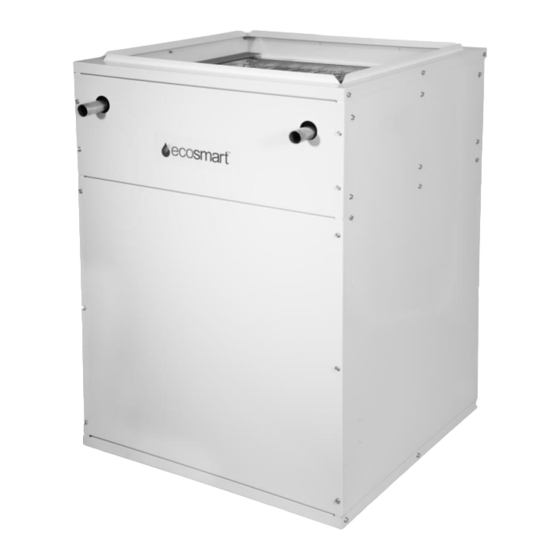
- Page 1 ES50LVP/ES90LVP/ES120LVP MODULATING AIR HANDLER Installation, Operation and Maintenance Manual Ecosmartair 105 Haist Avenue, Unit 10 Vaughan, ON L4L 5V6 905-857-9755 ecosmartair.com P/N 14000E...
-
Page 2: Table Of Contents
QUICK START-UP PROCEDURES ..................13 INSTALLATION ......................14 Clearances ............................14 Freeze Protection ..........................14 Rear Piping Connections ........................14 Ecosmart Mounting ..........................15 Plumbing ............................. 15 Drain Pan ............................. 16 Pump ..............................16 PIPING DIAGRAMS ...................... 18 Tankless Water Heater Piping ......................18 Combi-Boiler Piping .......................... - Page 3 Heat CFM (50LVP) ..........................26 Heat CFM (90LVP) ..........................27 Heat CFM (120LVP) ..........................27 Options (50LVP, 90LVP and 120LVP) ....................27 Cool CFM (50LVP) ..........................28 Cool CFM (90LVP) ..........................28 Cool CFM (120LVP) ..........................28 SEQUENCE OF OPERATION ................... 29 Full Modulation ...........................
- Page 4 External pump is noisy at start-up ...................... 36 Pump and fan run continuously (test mode off and no call for heat/cool) ........36 REMOVING BLOWER/CONTROL ASSEMBLY ..............36 LVP CONTROL ASSEMBLY LAYOUT ................37 LVP CONTROL ASSEMBLY LEGEND ................38 Final Assembly –...
-
Page 5: Safety Information
SAFETY INFORMATION It is the responsibility of the installer to ensure the installation complies with all national and local building codes and standards, in addition to the instructions outlined in this manual. All applicable codes take precedence over any instructions made in this document. This symbol indicates safety alerts. -
Page 6: Introduction
The ecosmart hydronic furnace is designed to maximize performance and comfort in residential or light commercial applications. The ecosmart can be used with a variety of heat sources such as boilers and water heaters and can be implemented in combo systems that provide domestic hot water as well as space heating. -
Page 7: Step Modulating Mode
100% until the thermostat is satisfied. If the pump is controlled by the ecosmart, its speed will be adjusted accordingly as the ecosmart goes through its stages. If the pump is controlled by the heat source, it will function according to the heat source control strategy. - Page 8 PERFORMANCE RATINGS 50LVP Performance Data - Hot Water Capacities (BTUH) @ 70°F Entering Air Temperature Entering Water Temperature Water PD 110°F 120°F 130°F 140°F 150°F 160°F 170°F 180°F feet WC @140°F 10,700 13,400 16,100 18,810 21,520 24,240 26,960 29,680 2.32 10,970 13,730 16,500...
- Page 9 90LVP Performance Data - Hot Water Capacities (BTUH) @ 70°F Entering Air Temperature Entering Water Temperature Water PD 110°F 120°F 130°F 140°F 150°F 160°F 170°F 180°F feet WC @140°F 18,930 23,720 28,530 33,350 38,180 43,020 47,860 52,710 1.96 19,890 24,920 29,960 35,010 40,070...
- Page 10 120LVP Performance Data - Hot Water Capacities (BTUH) @ 70°F Entering Air Temperature Entering Water Temperature Water PD 110°F 120°F 130°F 140°F 150°F 160°F 170°F 180°F feet WC @140°F 31410 39480 47600 55760 63960 72180 80410 88660 3.13 35030 44000 53020 62070 71160...
-
Page 11: Specifications
SPECIFICATIONS PHYSICAL DATA - INCHES Supply Overall Dimensions Piping Model Opening Side Return W x D x H Location W x D 50LVP 14.0 21.0 29.0 11.8 17.8 18.3 14.3 90LVP 21.0 21.0 29.0 18.8 17.8 18.3 14.3 120LVP* 24.0 21.0 29.0 21.8... - Page 12 MODEL 50LVP 90LVP 120LVP * DX Cooling Capacity (tons) 1 to 2 1.5 to 3.5 3.5 to 5 Power (Volts/Phase/Hz) 120/1/60 120/1/60 120/1/60 Cabinet Size W x D x H (in) 14 x 21 x 29 21 x 21 x 29 24 x 21 x 29 Supply Air Opening W x D (in) 11.8 X 17.8...
- Page 13 90LVP ECM blower performance (CFM/amps) SWITCH 0.1” 0.2” 0.3” 0.4” 0.5” 0.6” 0.7” 0.8” SETTING 600 CFM 0.82 1.02 1.25 1.49 1.95 2.19 2.44 700 CFM 1.04 1.26 1.47 1.76 1.99 2.23 2.53 2.79 800 CFM 1.22 1.58 1.92 2.28 2.58 2.98 3.25...
-
Page 14: Quick Start-Up Procedures
Set the design water temperature to deliver the necessary amount of BTUs to the air handler. 5. Once all air has been purged, turn on the power to the ecosmart and set the room thermostat to heat and set the temperature high enough to initiate a call for heat. This will energize the air handler an in turn the fan and pump. -
Page 15: Installation
It is not recommended to install the ecosmart in an unheated space. Should the ecosmart be installed in an area where the ambient temperature may fall below freezing, ethylene or propylene glycol should be added into the hydronic heating system to protect against damage, which would not be covered under warranty. -
Page 16: Ecosmart Mounting
The ecosmart can be installed in up flow, down flow and left or right horizontal applications. Install the ecosmart with the door in place to make sure the cabinet remains square. Flip the unit for down flow applications so that the top of the unit is now the bottom. No modification is required for any configuration. -
Page 17: Drain Pan
Pump A pump is not included inside the ecosmart. Whether you are using an external pump or an internal built-in pump, it should be sized for the system. Pumps supplied with the heat generating units can be used as the sole pump provided it meets the needs of the system. This is especially the case in retrofit applications where a much larger pump may have previously been used in the system. - Page 18 • When set up in basic mode, the pump will operate as a single-speed pump • The ecosmart controller has a built-in pump timer that exercises the pump for 1 minute every 24 hours to prevent the possibility of ‘sticking’ due to sediment and comply with...
-
Page 19: Piping Diagrams
PIPING DIAGRAMS Tankless Water Heater Piping 18 | P a g e... -
Page 20: Combi-Boiler Piping
Combi-Boiler Piping 19 | P a g e... -
Page 21: Electrical
Electrical Information The ecosmart wiring diagram is located on the cover of the electrical box behind the lower front panel. Ratings data is located on the lower front panel. • The ecosmart operates on 120VAC 60Hz single phase line voltage •... -
Page 22: Lvp Main Wiring
LVP Main Wiring 21 | P a g e... - Page 23 LVP Main Wiring Information When using a water heater and domestic hot water (DHW) priority is required, connect a normally open (NO) flow switch. If there is a call FLOW for DHW, fan and pump will shut down after 1 minute.
-
Page 24: Lvp Wiring Diagram
LVP Wiring Diagram 23 | P a g e... -
Page 25: Lvp Miscellaneous Wiring
LVP Miscellaneous Wiring Output for variable speed pump control. Provides: 0-10V or PWM output. VARIABLE PUMP Connect between COM and PWM for PWM output. (ADDITIONAL CONTROL INTERFACE) Connect between COM and 0-10V for variable voltage output. Active when heating. PUMP RELAY 24VAC power to activate relay for standard 120VAC pump. -
Page 26: Lvp Indicator Lights
LVP Indicator Lights Lights when fan activity signal is present. Intensity varies with fan speed. POWER Lights when 24VAC power is present. PUMP Lights when pump is on. HEAT Lights when heating. COOL Lights when cooling. DIP SWITCH OPTIONS Switch Locations Four DIP switches are located on the top, mid-section of the control board. -
Page 27: Outdoor Temperature Select
Outdoor Temperature Select Select lowest possible expected outdoor temperature. DESIGN TEMP °C DESIGN TEMP °F SWITCH 1 SWITCH 2 SWITCH 3 < -18 < 0 -17 to -10 1 – 14 -9 to 0 15 – 32 1 to 10 33 –... -
Page 28: Heat Cfm (90Lvp)
Heat CFM (90LVP) CFM @ 0.5” WC SWITCH 1 SWITCH 2 SWITCH 3 1000 1100 1200 1300 Heat CFM (120LVP) CFM @ 0.5” WC SWITCH 1 SWITCH 2 SWITCH 3 1300 1400 1500 1600 1700 1800 1900 2000 Options (50LVP, 90LVP and 120LVP) Select required system parameters. -
Page 29: Cool Cfm (50Lvp)
(2) Normal Fan Cooling runs at rate set by COOL CFM switch. Dehumidification Fan Cooling runs at 85% of COOL CFM rate for 10 min. ON EACH COOLING CYCLE and then reverts back to rate set by COOL CFM. (3) Normal Continuous Fan runs at rate set by HEAT CFM switch. Low speed Continuous Fan runs at 50% of rate set by HEAT CFM switch. -
Page 30: Sequence Of Operation
• After a 15 second delay to allow for system water to heat up coil, fan ramps up to HEAT CFM speed • ecosmart control automatically adjusts fan and pump speeds to meet the outdoor temperature conditions Thermostat is satisfied •... -
Page 31: Basic Modulation Mode
• Pump turns off and fan speed ramps down to zero, extracting any remaining heat in the coil Basic Modulation Mode Heating Mode – (ecosmart outdoor sensor not installed) Thermostat calls for heat • R is connected to W • Heat generator is turned on •... -
Page 32: Dehumidification
40°F or lower the ecosmart will bring on the circulating fan and energize the pump. If in cooling mode, the ecosmart will also turn on the condenser by breaking the C connection. -
Page 33: Pump Exerciser
Pump Exerciser • The circulating pump is exercised for 1 min every 24 hr when the ecosmart is OFF, COOLING (Y), COOLING2 (Y2) or FAN (G) to prevent the possibility of ‘sticking’ due to sediment and to meet local codes. -
Page 34: Troubleshooting
If the ecosmart does not run when the thermostat is calling, remove the thermostat connections at the ecosmart and jumper R to W for heating, or R to Y (Y2) to verify if the problem is with the thermostat or ecosmart control. Note that some thermostats have a delay (typically five minutes) before they will re-start cooling. -
Page 35: Heating During Standby Mode
The contactor in the condenser shuts off because it requires more current to stay on. Solution: replace with a modern thermostat which has no heat anticipator. -
Page 36: External Pump Does Not Run (Sticking Issue)
External pump does not run (sticking issue) In areas where hard water is present the pump may stick and fail to run. Often, closing the isolation valve on the return leg and opening the drain port so that water flows through the pump can free this. -
Page 37: External Pump Is Noisy At Start-Up
REMOVING BLOWER/CONTROL ASSEMBLY Blower and control assembly can be removed as a single piece: • Turn off power to ecosmart • Disconnect AIR OUT temperature sensor (white plug/socket) just above front centre plate and pull up out of the way to prevent damage to the cable when sliding out assembly •... -
Page 38: Lvp Control Assembly Layout
LVP CONTROL ASSEMBLY LAYOUT 37 | P a g e... -
Page 39: Lvp Control Assembly Legend
LVP CONTROL ASSEMBLY LEGEND 120VAC 60Hz single phase power input 120VAC 250W Max. pump output from relay Thermostat connection: R, R, G, Y2, Y, W, CT, CC (R=transformer 24VAC) (CT=thermostat 24VAC com) (CC=interrupted condenser 24VAC com) 0-10VDC and PWM output for variable speed pump Auxiliary 24VAC accessory output –... -
Page 40: Final Assembly - Exploded View
Final Assembly – Exploded View 39 | P a g e... -
Page 41: Electrical Box - Exploded View
Electrical Box – Exploded View 40 | P a g e... -
Page 42: Blower & Heating Coil - Exploded View
Blower & Heating Coil – Exploded View 41 | P a g e... -
Page 43: Replacement Parts
16035 16035 arm) ELECTRICAL PCA Ecosmart Pump Controller 15018 15018 15018 Door Switch 18000 18000 18000 PCA Ecosmart LVP Controller 24V 1501550 1501590 15015120 Transformer 120VAC 24VAC 40VA 18001 18001 18001 Motor EC Perfect Speed 1200 18007 18002 18021 Barrier block 20A 4 pos... -
Page 44: Warranty
Bushing snap 0.875 blk 20018 20018 20018 Cable assy. Pump Controller 22000 22000 22000 Outdoor Temp. Sensor 10K MISC Ecosmart LVP Installation, Operation 14000 14000 14000 and Maintenance Manual Ecosmart LVP brochure 14003 14003 14003 WARRANTY Warranty is 3 years’ parts. Visit ecosmartair.com for full details.
Need help?
Do you have a question about the ES50LVP and is the answer not in the manual?
Questions and answers