
Summary of Contents for BPE BPE-HI-3.6kW
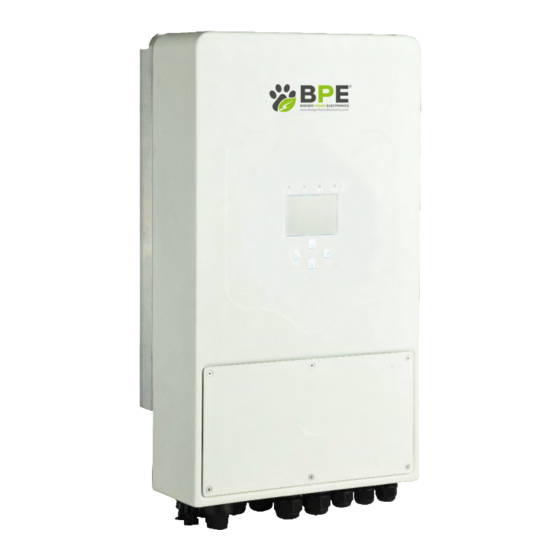
- Page 1 Hybrid Inverter User Manual BPE-HI-3.6kW BPE-HI-5kW Solar - Storage - Wind - Back-up Generator...
-
Page 2: Table Of Contents
Contents Programming Quick Start Guide...........1 Wi-Fi/GPRS Configuration & Monitoring App User Manual ............29 1. Safety Instructions............2 1. Download the APP..........30 2. Product Introduction............2 2. Wi-Fi Logger............31 2.1. Product Overview............2 2.1. Installation Type 1........31 2.2. Product Features............3 2.2. Installation Type 2........32 2.3. -
Page 3: Programming Quick Start Guide
Press the tick button at the bottom of the screen to save your selection. Battery Setting Home Screen > Battery Settings Installing the hybrid inverter with a BPE 4.8 kWh battery with integrated BMS Select “Lithium” Set the battery parameters as in the image Select “Activate Battery”... -
Page 4: Safety Instructions
1. Safety Instructions • This chapter contains important safety and operating instructions. Read and keep this manual for future reference. • Before using the inverter, please read the instructions and warning signs of the battery and corresponding sections in the instruction manual. •... -
Page 5: Product Features
2.2 Product Features • 230V Single phase pure sine wave inverter. • Self-consumption and feed-in to the grid. • Auto restart while AC is recovering. • Programmable supply priority for battery or grid. • Programmable multiple operation modes: On-grid, off-grid and UPS. •... -
Page 6: Installation
Please check the equipment before installation. Please ensure nothing is damaged in the package. You should receive the items below: Parts List: Number Description Quantity BPE Hybrid Inverter 3.6/5 kW Stainless Steel Mountain Screws M6*12 Stainless steel expansion bolts M8*80 User Manual Wi-Fi Plug Current Transformer CT (Optional) -
Page 7: Mounting Instructions
3.2 Mounting Instructions Installation Precaution This Hybrid inverter is designed for outdoor use (IP65). Please make sure the installation site meets the below criteria: • Not in direct sunlight. • Not in areas where highly flammable materials are stored. • Not in potential explosive areas. - Page 8 Mounting the Inverter: The inverter should be installed vertically, as shown, installation procedure shown below: 1. Position the bolts on the appropriate wall according to the bolt positions on the mounting shelves and mark the holes. The installation site must be suitable for expansion bolt installation. 2.
-
Page 9: Battery Connection
3.3 Battery Connection For safe operation and compliance, a separate DC over-current protector or disconnect device is required between the battery and the inverter. In some applications, switching devices may not be required but over-current protectors are still required. Refer to the typical amperage in the table below for the required fuse or circuit breaker size. -
Page 10: Battery Temperature Connection
3.3.2 Battery Temperature Connection Temperature Sensor... -
Page 11: Ac Input/Output Connection
3.4 AC Input/Output Connection • Before connecting to AC input power source, please install a separate AC breaker between the inverter and AC input power source. This will ensure the inverter can be securely disconnected during maintenance and fully protected from over current of AC input. The recommended AC breaker is 25A for 3.6kW and 32A for 5kW. -
Page 12: Pv Connection
3.5 PV Connection Before connecting to PV modules, please install a separate DC circuit breaker between the inverter and PV modules. It is very important for system safety and efficient operation to use the appropriate cable for PV module connection. To reduce risk of injury, please use the recommended cable size as below. Model Wire Size Cable (mm²) -
Page 13: Ct Connection
3.6 CT Connection 3.7 Earth Connection (Mandatory) Ground cable shall be connected to ground plate on grid side to prevent electric shock if the original protective conductor fails. 3.8 Wi-Fi Connection For the configuration of the Wi-Fi Plug, please refer to illustrations of the Wi-Fi Plug at the end of this user manual. -
Page 14: Wiring System For Inverter
3.9 Wiring System for Inverter 3.10 Three Phase Parallel Inverter... -
Page 15: Single Parallel Connection Diagram
3.11 Single Phase Parallel Connection Diagram... -
Page 16: Operation
4. Operation 4.1 Power ON/OFF Once the unit has been correctly installed and the batteries are connected, simply press the On/Off button (located on the bottom of the inverter) to turn the unit on. When a system without a battery is connected, and connected with either PV or grid, and the ON/OFF button is switched off, the LCD will still light up (Display will show OFF), in this setup, press the ON/OFF button and select no battery and the system can still be operated. -
Page 17: Lcd Display Icons
5. LCD Display Icons 5.1 Main Screen The LCD is touchscreen and is displayed below showing the overall information of the inverter. 1. The icon in the centre of the home screen indicates that the system is in Normal operation. If it displays “comm./F01~F64”, this means the inverter has communication errors or other errors, the error message will be displayed under this icon (F01-F64 errors, detailed error info can be viewed in the System Alarms menu). -
Page 18: Lcd Operation Flow Chart
5.1.1 LCD Operation Flow Chart... -
Page 19: Solar Power Curve
5.2 Solar Power Curve Solar Panel Details Page 1. Solar Power Generation 2. Voltage, Current, Power for each MPPT 3. Solar Panel generation for Day and Total Pressing the ‘Energy’ button will take you to the power curve page. Inverter Details Page 1. -
Page 20: Curve Page-Solar + Load & Grid
The three screens displayed are for the Battery details page. If you are using a Lithium Battery, you can enter the BMS page here. 5.3 Curve Page-Solar + Load & Grid Solar power curve for daily, monthly, yearly and total can be checked on the LCD screen. For more accurate power generation, please view the online monitoring system. -
Page 21: System Setup Menu
5.4 System Setup Menu System Setup Page 5.5 Basic Setup Menu Basic Setup page Beep - Deselecting Beep will silence any alarms. Auto Dim - (recommended) Selecting this will automatically dim the LCD display when not in use. Factory reset all settings. Lock out all changes - This will allow you to set a 4-digit passcode to prevent any changes to the inverter’s current configuration. - Page 22 Grid Signal - Disable. Off-Grid Battery Setup Lithium Mode - This is BMS protocol. Please reference the document (Approved Battery-BPE) Shutdown 10% - Indicates the inverter will shutdown if the SOC falls below this value. Low Batt 20% - Indicates the inverter will sound an alarm if the SOC falls below this value.
-
Page 23: System Work Mode Setup Menu
There are 3 stages of charging the battery. This is for professional installers, this is only relevant if you are not using a recommended Li-iron battery 2 storage system with compatible battery management software (BMS) Shutdown - The inverter will shutdown if the Voltage is below this value. -
Page 24: Grid Setup Menu
All points must be higher then the previous. Select if you are using string 1 or 2. Always use a BPE wind controller to connect the wind turbine. You can have the following combination of... -
Page 25: Generator Port Use Setup Menu
5.10 Generator Port Use Setup Menu The Generator port can only be used for one input/output. It can be used for a generator input OR smart load output OR micro inverter input. Generator Input - If connected to a generator. Gen connected to Grid input - In off-grid applications the generator can also be connected to the Grid input port. -
Page 26: Device Info Setup Menu
Factory Restart: 9999 Lock out all changes: 7777 5.13 Device Info Setup Menu This page shows the Inverter ID, Inverter version and alarm codes. HMI: LCD version MAIN: MCU version 6. Mode Mode I: Basic Mode II: With Wind Turbine Mode III: With Generator Mode IV: With Smart Load... -
Page 27: Fault Information And Processing
Mode V: Microinverter Input / AC Coupled Unit The 1st priority power of the system is always the PV power,then 2nd and 3rd priority power will be the battery bank or grid according to the settings. The last power backup will be the generator if it is available. 7. -
Page 28: Limitation Of Liability
Error Code Fault Information Diagnosis and Solution Working_Mode_Change Inverter working mode change, please wait one minute. AC side over current fault; Please check the UPS load and grid Tz_Ac_OverCurr_Fault connection. DC side over current fault; Please check solar connection and Tz_Dc_OverCurr_Fault battery connection;... -
Page 29: Datasheets
9. Datasheets 9.1. 3.6kW Hybrid Inverter Datasheet Specification BPE-HI-3.6kW Battery Type Lead Acid or Li-iron Battery Voltage Range (V) 40 - 60 Max. Charging Current (A) Battery Input Max. Discharging Current (A) Data Curve Charging 3 Stages / Equalisation External Temperature Sensor... -
Page 30: 5Kw Hybrid Inverter Datasheet
9.2. 5kW Hybrid Inverter Datasheet Specification BPE-HI-5kW Battery Type Lead Acid or Li-iron Battery Voltage Range (V) 40 - 60 Max. Charging Current (A) Battery Input Max. Discharging Current (A) Data Charging Curve 3 Stages / Equalisation External Temperature Sensor... -
Page 31: User Manual
Hybrid Inverter Wi-Fi/GPRS Configuration & Monitoring APP User Manual Solar - Storage - Wind - Back-up Generator... -
Page 32: Download The App
Warning 1. Never remove the Wi-Fi logger until the inverter has powered off completely. Notice 1. Download the APP iPhone App Store Search: “SOLARMAN” Scan the QR below for quick setup... -
Page 33: Wi-Fi Logger
2. Wi-Fi Logger 2.1. Installation Type 1 Step 1: Attach the logger to the inverter’s communication interface as shown below. Step 2:... -
Page 34: Installation Type 2
2.2. Installation Type 2 Step 1: Attach the logger to the inverter’s communication interface as shown in the diagram. Step 2: Install/Remove... -
Page 35: Logger Status
3. Logger Status 3.1 Check Indicator Lights Lights Implication Status (All Lights are Green) 1. Light off : Connection to the router failed. 2. (Slow flash) : Connection to the router successful. Communication with router 3. Solid green : Connection to the server successful. 4. -
Page 36: Abnormal Status Processing
4. Abnormal State Processing If the data on the platform is abnormal when the stick logger is running, please check the table below and according to the status of the indicator lights perform the troubleshooting below. If the problem persists or the indicator lights status do not show in the table below, please contact Customer Support. -
Page 37: Usage Methods & Reset Methods
5. Usage Methods & Reset Method Key Press Status Description Light Status Short Press (1s) SMARTLINK rapid networking status. NET light flashes fast for 100ms. Long Press (5s) Rebooting the stick logger. All lights are extinguished immediately. 1.All lights are extinguished after 4s. Long Press (10s) Resetting the stick logger. -
Page 38: Solarman App User Manual
APP User Manual... -
Page 39: Registration
1. Registration Click [Register] to create new account. You can use your email to register. -
Page 40: Create Plant
2. Create Plant Click [+] and select [Create Plant]. Then scan the serial number of the stick logger, or manually enter the serial number. Edit plant information. 1. Confirm your plant location (GPS function will automatically locate the plant site; if you want to modify the location, click the “map”... - Page 41 Input Plant Name It is suggested to create a plant name like “location + name + capacity” (e.g., Home IGEN 8.1 KW), then click [Done].
-
Page 42: Wi-Fi Connection Configuration
You should now be able to see your new plant on your homepage 3. Wi-Fi Connection Configuration Select the plant which the Wi-Fi logger needs to be configured, click “Device”, then “Connect”, choose the Wi-Fi logger SN that needs to be configured. -
Page 43: Smart Link Configuration
Smart Link Configuration Enter networking page-short press reset button for 1S-NET light flashing-Entering configuration mode. Make sure the phone is connected to the Wi-Fi network, enter the Wi-Fi password, starting to configure. - Page 44 The signal lights will slowly flash or remain on indicating that the network has been successfully accessed, if not, please check again in a few minutes. If the signal lights are still not normal, please reconfigure it. NOTICE: 1. During configuration, it will show configuration tips. 2.
-
Page 45: App Configuration
APP Configuration Please make sure that the phone is connected to the Wi-Fi network and enter the Wi-Fi password. APP will automatically get the current mobile phone Wi-Fi account, type in the Wi-Fi password to enter the configuration process. If the network is not the one logger needs to be configured too, switch network. When switching the account, you can manually enter your network account. - Page 46 NOTICE: If it is unable to find an AP_XXXXX(S/N) in wireless network list, please make sure the distance between Wi-Fi router and stick logger is less than 10 meters. If there is any problem during the connection or setting process, you can repeat the above steps.
- Page 47 Once you have successfully created your account and connected to the inverter you can also view your plant on the dedicated web browser located at https://www.solarmanpv.com/portal/ LoginPage.aspx Warning: Please make sure the stick logger is working correctly before you leave the site. If there is anything abnormal, please contact customer service.
Need help?
Do you have a question about the BPE-HI-3.6kW and is the answer not in the manual?
Questions and answers