Advertisement
Quick Links
Setup Guide
Document Date: 03/23/24, Version 1.4
Technical Specifications
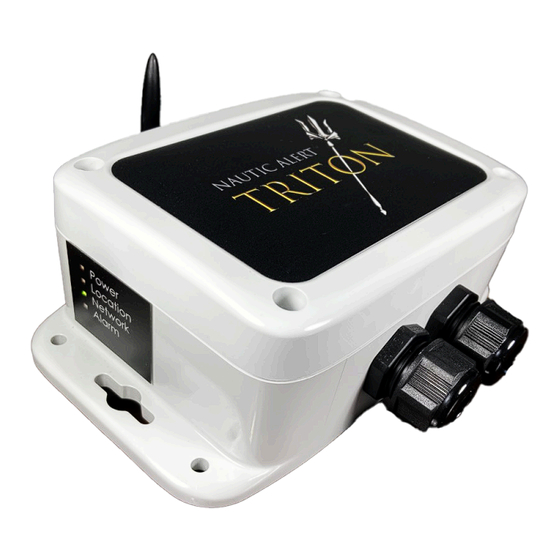
DC Input Voltage: 6-37V
Backup DC Input Voltages: 6-37V
Nominal Current: 80mA (12V), does not include switch output or 12V output
Alarm Terminals: 12V 12V Regulated Output: 500mA max including switch output
Operating Temperature: -20 to 60C
Enclosure: IP67 when cable glands properly sealed
Note: Follow ABYC standards for installation.
Note: Incorrect wiring may damage Triton or external devices and voids warranty.
On occasions, this document may be updated.
1
Advertisement

Summary of Contents for Nautic Alert TRITON
- Page 1 Alarm Terminals: 12V 12V Regulated Output: 500mA max including switch output Operating Temperature: -20 to 60C Enclosure: IP67 when cable glands properly sealed Note: Follow ABYC standards for installation. Note: Incorrect wiring may damage Triton or external devices and voids warranty. On occasions, this document may be updated.
-
Page 2: Quick Start
Steps 2 - 12 to avoid component damage and to prevent voiding the warranty. Run GPS and SAT cables from where Triton will be mounted to the location where the GPS and SAT antenna will be mounted. The antennas are suitable for outdoor installation or under an unobstructed fiberglass deck with no emi interference. - Page 3 Note: If not lit based on your options, program alarm zones using Mode and Set buttons. 15. Turn power source off to Triton and fasten Triton cover to enclosure, permanently mount Triton, and permanently fasten antennas. a. Note: See antenna connector waterproofing bulletin.
- Page 4 Triton Block Diagram Arrangement Mode and Set Buttons to Configure Zone Settings Triton contains four alarm zones, which can be configured with the “Mode” and “Set” buttons. Mode moves the LED cursor from top to bottom to select the zone setting to change on the circuit board.
- Page 5 Antenna Connector Waterproofing Bulletin Cables should be stress relieved and not subject to vibration or oscillation Two rounds of Splicing tape (3M-130C), wound so that it tightens the connector (clockwise looking at the connector). 3M Splicing tape needs to be stretched and they recommend that the tape should be installed with the sticky side up.
Need help?
Do you have a question about the TRITON and is the answer not in the manual?
Questions and answers