
Related Manuals for KB Racking AEROGRID

Summary of Contents for KB Racking AEROGRID
- Page 1 INSTALLATION MANUAL KB Racking Inc. 1050 King St W, Toronto, ON M6K 0C7 Phone: 1-888-661-3204 info@kbracking.com www.kbracking.com VERSION 10 – JUNE 2024...
-
Page 2: Table Of Contents
Accessory Bracket & Ballast Tray Installation……………..……..16 Installing Ballast Trays on Supports……………………………….17 Installing Splice & Remaining Rails……………….……………..18 Installing Remaining Rows……………………………………….19 Page 2 KB Racking Inc. | 1050 King St W, Toronto, ON, M6K 0C7 | 1 (888) 661-3204 | info@kbracking.com | www.kbracking.com... -
Page 3: Introduction & Safety
KB Racking is not liable for claims related to improper storage and such claims are not covered by the product warranty. Page 3 KB Racking Inc. | 1050 King St W, Toronto, ON, M6K 0C7 | 1 (888) 661-3204 | info@kbracking.com | www.kbracking.com... -
Page 4: Ul2703 List Of Approved Modules
UL2703 MODULE COMPATABILITY AeroGrid may be used to ground and/or mount a PV module complying with UL1703 and/or UL61703 only when the specific module has been evaluated for grounding and/or mounting in compliance with the included instructions. The following list of modules specifying “xxx” refers to the PV module power unless otherwise specified. -
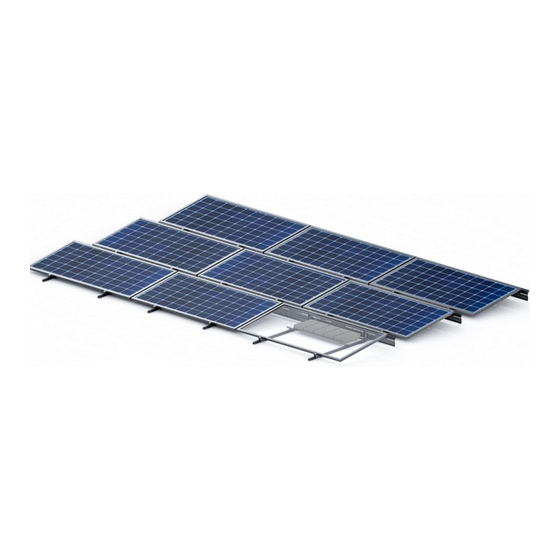
Page 5: System Overview
System Overview Page 5 KB Racking Inc. | 1050 King St W, Toronto, ON, M6K 0C7 | 1 (888) 661-3204 | info@kbracking.com | www.kbracking.com... -
Page 6: System Components & Hardware
KB00-AL-01-XX G00-GS-05 G00-GS-06 GXX-GS-07-OM-L/XL 1/4”-20 Hex Nut 1/4”-20 x 5/8” Hex Bolt Roof Protection Mat 9211-1420-SS0 9111-1420-580-SS0 G00-RBR-01 Page 6 KB Racking Inc. | 1050 King St W, Toronto, ON, M6K 0C7 | 1 (888) 661-3204 | info@kbracking.com | www.kbracking.com... -
Page 7: System Accessories
9/16” Hex Socket (Only required for Anchor Attachments) Torque Values Component Connection Torque [In-lb] Torque [N-m] All System Connections Anchor Attachments 10.2 Page 7 KB Racking Inc. | 1050 King St W, Toronto, ON, M6K 0C7 | 1 (888) 661-3204 | info@kbracking.com | www.kbracking.com... -
Page 8: Quickstart Installation Guide
3. Repeat steps 1-2 to complete first row assembly of array. Fasten Rails together with Splice, install remaining rows. Page 8 KB Racking Inc. | 1050 King St W, Toronto, ON, M6K 0C7 | 1 (888) 661-3204 | info@kbracking.com | www.kbracking.com... -
Page 9: How To Use Your Spacing Diagram
96” rails, one 48” rail and one 24” rail as seen in the illustration below. 96” 96” 24” 48” Page 9 KB Racking Inc. | 1050 King St W, Toronto, ON, M6K 0C7 | 1 (888) 661-3204 | info@kbracking.com | www.kbracking.com... -
Page 10: Spacing Jig & Spacer Stick Construction
Diagram. Spacer Sticks Component 2 ¼-20 Bolt (3X) Component 3 Component 1 (3X) N/S Support Spacing Inter-Row Spacing Page 10 KB Racking Inc. | 1050 King St W, Toronto, ON, M6K 0C7 | 1 (888) 661-3204 | info@kbracking.com | www.kbracking.com... -
Page 11: Roof Protection Mats Installation
Rail. Refer to the Mat Table to determine quantities per Rail. NOTE: Space the Roof Protection Mats equidistant with a max of 32” apart. Page 11 KB Racking Inc. | 1050 King St W, Toronto, ON, M6K 0C7 | 1 (888) 661-3204 | info@kbracking.com | www.kbracking.com... -
Page 12: How To Begin Assembly, Installing First Row Of Rails
Use Spacing Jigs to ensure adjacent Rails are parallel to each other and equally spaced apart. Rail, 96” Spacing Jig Origin Spacing Jig Page 12 KB Racking Inc. | 1050 King St W, Toronto, ON, M6K 0C7 | 1 (888) 661-3204 | info@kbracking.com | www.kbracking.com... -
Page 13: Bottom Support Installation
Refer to page 19 for placement of Bottom Supports along remaining rows. Support Tab Rail Flange Rail Wall 6” Page 13 KB Racking Inc. | 1050 King St W, Toronto, ON, M6K 0C7 | 1 (888) 661-3204 | info@kbracking.com | www.kbracking.com... -
Page 14: Top Support Assembly And Installation
5-Degree Support Windshield Stud Rail Flange Support Tab Rail Wall Top Support Sleeve Windshield Hook ¼”-20 Bolt Page 14 KB Racking Inc. | 1050 King St W, Toronto, ON, M6K 0C7 | 1 (888) 661-3204 | info@kbracking.com | www.kbracking.com... -
Page 15: Ballast Tray Assembly Overview
E/W Inter-Column Spacing Origin South Edge Discontinuous (No Ballast Tray) Additional Ballast Tray - Project Specific (Green Module Locations) Page 15 KB Racking Inc. | 1050 King St W, Toronto, ON, M6K 0C7 | 1 (888) 661-3204 | info@kbracking.com | www.kbracking.com... -
Page 16: Accessory Bracket & Ballast Tray Installation
Use Spacing Jig to align Ballast Tray and ensure equidistance from Supports. TORQUE ALL CONNECTIOND TO 75 IN-LB. Ballast Tray Spacing Jig Page 16 KB Racking Inc. | 1050 King St W, Toronto, ON, M6K 0C7 | 1 (888) 661-3204 | info@kbracking.com | www.kbracking.com... -
Page 17: Installing Ballast Trays On Supports
3. Fasten Ballast Trays to Top Support Stud. TORQUE ALL CONNECTIONS TO 75 IN-LB. ¼”-20 Nut Spacing Jig Spacing Jig Page 17 KB Racking Inc. | 1050 King St W, Toronto, ON, M6K 0C7 | 1 (888) 661-3204 | info@kbracking.com | www.kbracking.com... -
Page 18: Installing Splice & Remaining Rails
96’’. 48”, and 24” Rails will be used in combination at the north edge of the Rail column. Splice Stud Splice Studs Fitted Through Rail Wall Page 18 KB Racking Inc. | 1050 King St W, Toronto, ON, M6K 0C7 | 1 (888) 661-3204 | info@kbracking.com | www.kbracking.com... -
Page 19: Installing Remaining Rows
Accessory Brackets and Top Supports. REPEAT FOR REMAINING ROWS TO COMPLETE THE ARRAY. N/S Support Spacer Stick Inter-row Spacer Stick Page 19 KB Racking Inc. | 1050 King St W, Toronto, ON, M6K 0C7 | 1 (888) 661-3204 | info@kbracking.com | www.kbracking.com... -
Page 20: Installing Ballast Stones
Ballast Layouts are specific to each installation. Green module locations require an additional Ballast Tray along the inter-column. Additional Ballast Tray Large Ballast Stone: 4”x8”x16” 32 lbs. Page 20 KB Racking Inc. | 1050 King St W, Toronto, ON, M6K 0C7 | 1 (888) 661-3204 | info@kbracking.com | www.kbracking.com... -
Page 21: Installing Pv Modules
NOTE: All Modules are to be clamped immediately after installation. Refer to page 22 for installing KB Konnect End Clamps. Bottom Support Rest Tab E/W Module Spacing Page 21 KB Racking Inc. | 1050 King St W, Toronto, ON, M6K 0C7 | 1 (888) 661-3204 | info@kbracking.com | www.kbracking.com... -
Page 22: Installing Kb Konnect End Clamps
Clip onto bolt and repeat installation steps. NOTE: Bonding Pin pierces the anodization layer on the Module frame Page 22 KB Racking Inc. | 1050 King St W, Toronto, ON, M6K 0C7 | 1 (888) 661-3204 | info@kbracking.com | www.kbracking.com... -
Page 23: Installing Windshields
Align Windshields with the Module edge, ensuring the Windshield does not interfere with the roof setback area. Windshields will overlap each other. Page 23 KB Racking Inc. | 1050 King St W, Toronto, ON, M6K 0C7 | 1 (888) 661-3204 | info@kbracking.com | www.kbracking.com... -
Page 24: Installing Etl Certified Grounding Lugs
TE Connectivity Grounding Clip Ilsco Grounding Lug Part Numbers: Part Number: SGB-4 1954381-2 1954381-3 Page 24 KB Racking Inc. | 1050 King St W, Toronto, ON, M6K 0C7 | 1 (888) 661-3204 | info@kbracking.com | www.kbracking.com... -
Page 25: Product Maintenance
It is also important to consider environmental conditions that may require additional inspections when necessary. highly recommended that projects are inspected after any severe weather event. Page 25 KB Racking Inc. | 1050 King St W, Toronto, ON, M6K 0C7 | 1 (888) 661-3204 | info@kbracking.com | www.kbracking.com... -
Page 26: Appendix A | Mlpe Installation
¼-20 Bolt ¼-20 Bolt Accessory Bracket MLPE Bracket Assembled in front of Ballast Tray Windshield Stud Windshield Stud Page 26 KB Racking Inc. | 1050 King St W, Toronto, ON, M6K 0C7 | 1 (888) 661-3204 | info@kbracking.com | www.kbracking.com... -
Page 27: Appendix B | Anchor Installation
Mark Anchor location on roof and check for Anchor alignment 3/8” Serrated Flanged ahead of installation. Hex Nut Page 27 KB Racking Inc. | 1050 King St W, Toronto, ON, M6K 0C7 | 1 (888) 661-3204 | info@kbracking.com | www.kbracking.com...
Need help?
Do you have a question about the AEROGRID and is the answer not in the manual?
Questions and answers