Advertisement
Thank you for purchasing our automatic vending machine.
● Please read carefully this instruction and make sure you fully understand it before using this
machine in case of accidents or other possible danger.
This is a picture of the machine. This picture is for reference only! Machine function and operating
This is a picture of the machine and it is for reference only! Machine function and operating instruction
contents are subject to change without prior notice. After reading the User Manual, please keep it well for
future reference.
Model JI-ICE-D2-133(22SP)
User Manual for
Automatic Ice Cream Vending Machine
Contents
1.
4. 7" screen debugging function details
7. Error code
9. Parts
10. Certificate of quality/packing list
Advertisement
Table of Contents

Summary of Contents for JUCE JI-ICE-D2-133
-
Page 1: Table Of Contents
User Manual for Automatic Ice Cream Vending Machine Model JI-ICE-D2-133(22SP) Thank you for purchasing our automatic vending machine. ● Please read carefully this instruction and make sure you fully understand it before using this machine in case of accidents or other possible danger. -
Page 2: Safety Warnings
Safety warnings Please carefully read the safety warnings for proper use of the machine. Categories and Meanings of Warning Signs Precautions in the User Manual indicate important rules related to safety and shall be strictly observed. Categories and meanings of warning signs are as follows: ●... - Page 3 1. Safety warnings Please carefully read the safety warnings for proper use of the machine. Warnings Unpacking, installation and handling of the No disassembling machine by professionals. 。 Risk of accidents Improper installation might cause toppling, electrical shock, fire or burn.
- Page 4 1. Safety warnings Please carefully read the safety warnings for proper use of the machine. Warnings Do not put a wet hand on an electric Do not damage or pull the power cable machine hard Damage of the power socket Risk of electrical shock or the power cable might cause fire disaster or...
- Page 5 1. Safety warnings Please carefully read the safety warnings for proper use of the machine. Warnings Discuss with professionals how to place it in any of Up to the rated power supply capacity the following places ●A place where sea wind or Risk of fire disaster if not up to the rated power supply capacity or if corrosive gas erodes...
- Page 6 1. Safety warnings Please carefully read the safety warnings for proper use of the machine. Warnings Do not sell flammable or explosive Be careful when closing the door commodities Risk of explosion, electrical Risk of pinching hands shock and fire disaster. Do not sell unlisted commodities Management of daily sanitation Risk of acciden...
- Page 7 1. Safety warnings Please carefully read the safety warnings for proper use of the machine. Warnings Lock for safekeeping of the automatic Make warning signs legible to customers vending machine Risk of accidents Please clean and change them regularly. Accidents cannot be avoided if warning signs are illegible.
-
Page 8: Instructions For Use
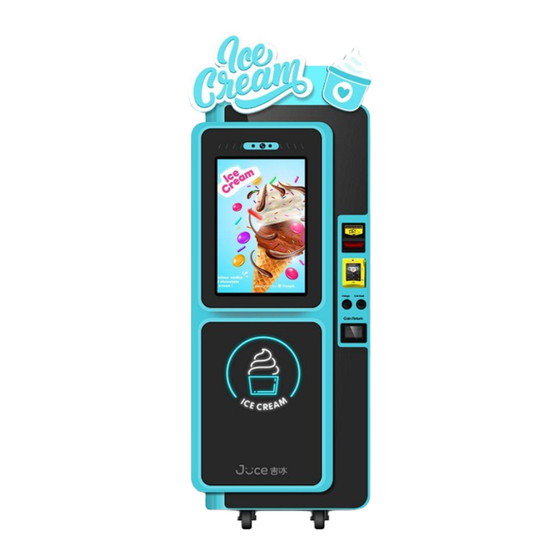
Instructions for use Name of each part (1) External names Light box(optional) Camera(optional) 21.5”touch screen Bill validator(optional) Card reader(optional) Coin changer(optional) Coin returning slot Pick-up door Wheels (图片仅供参考,操作时以实际机器为准) - Page 9 =740mm*852mm*1880mm Machine length * width * height Voltage: AC 120V Rated power: 2000W (图片仅供参考,操作时以实际机器为准)
- Page 10 2.Instructions for use Name of each part (2) Internal parts...
- Page 11 2.Instructions for use What to do before use After receiving the machine, firstly check whether package is in good condition. In case of breakage, please negotiate with logistics and call the Company. Please remove all packaging materials before use, such as wood plate, protective film, foam and ribbon.
- Page 12 2. Instructions for use Safety precautions 2. A reliably grounded three-pin socket shall 1. AC 220V/50Hz power supply shall be used. Over be used, otherwise there might be electrical 200-240V voltage might cause machine halt. shock. After the machine is installed in place, make sure that the socket is easy to plug and unplug.
- Page 13 Machine settings Description of goods choosing and buying interface Choose a jam Choose a topping Machine ID Network state The jam and top image needs to be prepared in advance and ① ① stored in the machine's local disk, as described in Section 3.14. ②...
-
Page 14: Machine Setting
Description of goods choosing and buying interface 3. Machine setting Reduce the quantity of ice cream selected Increase the quantity of the ice cream selected Dear! Spoon at the bottom Making ice cream, please wait... The machine starts to make the ice cream when the payment is done Ice cream is made, please take it. - Page 15 Login menu 3. Machine setting Press and hold the machine number position to pop up the following keyboard interface. Keep your finger at the location in the box after entering password, and the login interface will pop up. Enter the password Click the administrator to log in Enter the login password, click the “login”...
- Page 16 Machine status display 3.Machine setting After logging in to the menu interface,click on the "Machine Settings" icon / click on "Status" Non-professional 1、“Auto”:when machine is working normally it has to be “Auto” mode; 2、”Preservation”:lower the starting frequency and the working time of the compressor and keep the ice cream fresh, it’s for energy-saving purpose and customers can’t buy from the machine under this model.
- Page 17 Regular mode switch 3.Machine setting After logging in to the menu interface, click on the "Machine Settings" icon / click on " Timing on/off" Mode selection Mode switch time setting The machine can be shifting from one working mode to another for up to 4 times within 24 hours and there are 3 different working modes, when the working modes are selected, the shifting times are set and the switch is turned on, the machine will automatically shift working modes when the configured time comes.
- Page 18 3. Machine setting Machine status display After logging in to the menu interface,click on the "Machine Settings" icon / click on "Status" Through the status display interface, you can query the working status of each part of the machine, as shown in the figure above.
- Page 19 3. Machine setting Event log After logging in to the menu interface, click on the "Machine Settings" icon / click on "The Event Log" You can see the latest 10 machine status from the event records, when there is an error it will be recorded in this page.
- Page 20 3. Machine setting Event log Original login password: 000000 Original password to enter the login interface: 73194653...
- Page 21 3. Machine setting Feeding & statistics After logging in to the menu interface, click on the "Feeding and Statistics" icon You can revise the names of the jam and the nuts here and the content for each cup, also the prices of them. Click the “Test”...
- Page 22 3. 9 3. Machine setting Formula & price setting After logging in to the menu interface, click on the "Recipe management" icon to enter the recipe and price settings. 例如:点击草莓奥利奥冰淇淋,进入下方图片库,选择对应的图片即可。 1. Click the 16 ice creams to enter the the garage. 2.
- Page 23 3.10 3. Machine setting Information configuration After logging in to the menu interface, click the "Information Configuration" icon to enter the information configuration interface. When the machine is connected for the first time, the backstage supporter will automatically generate an ID number (2-figure year +2-figure month +2-figure date + 4-figure serial number).
- Page 24 3.11 3. Machine setting Payment system setting After logging in to the menu interface, click on the "Payment System" icon to enter the payment system settings interface. Payment switches 开启后,最多可以一次性购买5杯 Turn on the corresponding payment switch according to the actual payment type of the machine.
- Page 25 3.12 3. Machine setting Program update/log upload After logging in to the menu interface, click the "Program Update" icon to enter the program update interface. 1. Click the "Update" button in the "Program Update" interface and follow the prompts to complete the update; 2.
- Page 26 3.13 3. Machine setting Log in the application interface In the menu we click “Exit system” and there will be a dialog box for another password(you need to turn off “Check APP foreground” first) and click that “Settings” icon to enter it. Input the application login password(zj8716).
- Page 27 3.14 3. Machine setting Product advertising images and advertising setting Save the ice cream image to ImageGoods in advance, deposit the topping image of the jam into ImageBurden, save the video to ImageScreen, insert the USB flash drive, and enter the resource manager 存储路径...
- Page 28 3.15 Volume setting 3. Machine setting Click the “Settings” icon on the application interface, and the following interface will pop up. Click the “Sound & notification” icon, and the following interface will pop up. Move the media volume slider to an appropriate location and click the return button to exit. The operation will be saved automatically.
- Page 29 3.16 3. Machine setting Language setting Click the “Settings” icon on the application interface, and the following interface will pop up. Click the “Language & input” icon, and the following interface will pop up. Click the “Language” option, and the language selection interface will pop up. On the language selection interface, select the language required to set and click the return button to exit.
- Page 30 4.1 Functions of the main interface 4.7” screen functions 4.1主界面部分功能介绍 机器开机后,会显示此界面,用手往左边滑动翻页。 Dispense ingredient: click and the opening will open, take the ingredients with a container below, when cleaning the machine you need to use this and when cleaning is finished you need to “Stop” it to close the opening. Automatic dispensing: click and the machine will give a cup of ice cream and then close the opening automatically.
- Page 31 4.1 Functions of the main interface 4.7” screen functions don’t have to change it. There is a row of lights below and if the lights are red that means the corresponding functions are not activated, green means they are. For example, the light under “Ingredient 1”...
- Page 32 4.1 Functions of the main interface 4.7” screen functions 4.2 Status information If the machine fails to give a cup of ice cream, come to this page and find out the exact reason and then ask the technicians for advice on how to fix them.
- Page 33 4.3 Debugging and settings 4.7” screen fuctions The values of X/Y/Z robot arms moving to the left, right, above or below the different locations. The starting point of X is on the left and the value is 0, Y at the bottom and value is 0, Z is the inside the machine and the value is 0.
- Page 34 4.3 Debugging and settings 4.7” screen fuctions from our technicians. Each time when the machine is rebooted the robot arm will be at the starting points of X/Y/Z axis.
- Page 35 4.3 Debugging and settings 4.7” screen fuctions All parameters will be set before the machines leave our factory, unless instructed by our technicians please do not revise them. Click “Turn on/off the pick up door”, “Turn on/off the robot arm”, “Turn on/off the machine door”, the machine will open or close the related parts.
- Page 36 4.3 Debugging and settings 4.7” screen fuctions The lights at the starting points of X/Y/X are green means the robot arm is at its starting point, if one of the lights is red that means the robot arm is moving on that direction.
- Page 37 Troubleshooting 1、Not powered up Reason 1: Machine’s plug not plugged to power supply correctly. Solution: Plug it correctly according to the manual. Reason 2: Power switch not Solution: Turn on the power switch 2、Machine locked because of not cleaning the machine Reason 1: not setting the limitation in the back-end system.
- Page 38 Troubleshooting 7、Lack of ingredient warning Reason 1: there is little milk in the milk tank. Solution: load more milk to the tank. Reason 2: the air valve on the milk tube is too large and milk cannot be extracted to the refrigerating tank. Solution: rotate the valve clockwise to lessen the air that goes into the tube.
-
Page 39: Cleaning And Maintenance
Daily cleaning and maintenance Machine cleaning: Frequency: every up to 5 days. Step 1: Unfrozen the ingredients inside, if there is not milk or the machine has stopped refrigeration for more than 10 minutes you can skip this step. Step 2: Get a basin of clean water and put those two pipes in the milk tank. - Page 40 Daily cleaning and maintenance tank after cleaning. 4、Be cautious while cleaning the machine in case the water goes to the electric boards and cause unnecessary errors. To clean other parts: 1、Jam bottles: replace with a new one; 2、Silicone tubes: a. disassemble and clean; b.Put on of the heads in a water basin and clean.
- Page 41 Matters needing attention As a vending machine with complicated structures and advanced technologies, it requires certain expertise and skills in using and maintaining the machine. Before using a new machine please read carefully all instructive videos and while using the machine, other causes might lead to machine errors: 1、The rated power of the machine is 2000W, the power cord/power socket must be 2.5m2 copper wire or better, if there is a 16A air switch you need to use...
- Page 42 Matters needing attention 7、After cleaning the machine and the first time of loading ingredients, shift the working mode to “Refrigerating(Auto)”, once it says ice cream 100% formed, which usually takes 10-15 minutes, start selling. 8、Make sure there is water or oil in the machine leg’s anti-ant devices so that the ants can’t go into the machine, plant oil is suggested because it won ’t evaporate and has better performance.
- Page 43 Trouble code If the machine fails, you can log in the menu at the machine end, enter the machine management, click the fault query, and the machine will display the fault code according to the fault type. Cup dispenser error Lack of jam Z motor time out Ice maker not...
- Page 44 Trouble code blocked Cup dispenser not Door lock time out responding Not detected after cup EEPROM storage error dispensed Door motor open circuit Door motor over current Foreign matters in cup slots Protection cover running time out Pick up door time out...
- Page 45 Machine parts Canisters for nuts In the first picture, the part where the arrow goes is the switch to open/close the dispensing opening of the nuts and it is rotatable. The picture in the middle is open and on the right is closed, if you want to load nuts to the canister, you need to open it first.
-
Page 46: Warranty Card
Warranty card Maintenance clauses: Products under warranty are produced by our company. Users are entitled to enjoy after-sales service of free maintenance during warranty period (the warranty period is one year, and the starting date is subject to the date in purchase invoice) if product is damaged in normal use. In case of any man-made or force majeure factors (such as earthquake, flood, fire disaster and lightning stroke, etc.), the damage will not be within the warranty scope as follows: 1. - Page 47 Keys Antenna...
Need help?
Do you have a question about the JI-ICE-D2-133 and is the answer not in the manual?
Questions and answers