Table of Contents
Advertisement
Quick Links
Advertisement
Table of Contents

Subscribe to Our Youtube Channel
Related Manuals for Cello C1624F


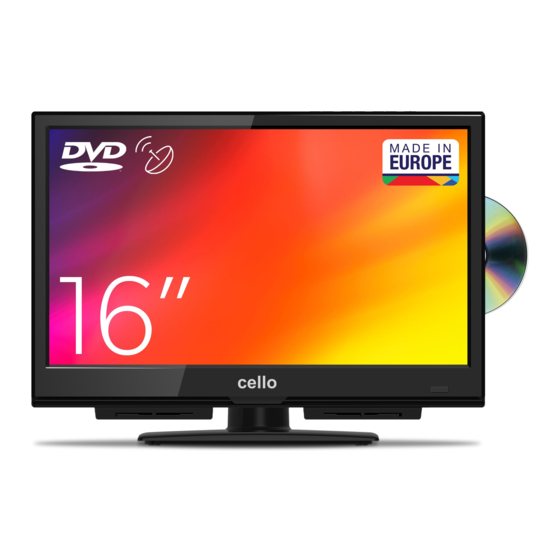
Summary of Contents for Cello C1624F
- Page 1 C1624FS Instruction Book Digital LED TV Model: C1624F...
-
Page 2: Table Of Contents
Contents Unpacking the TV / Accessory’s Installing / Removing the Base Stand Front / Right Side View and Controls Rear View and Sockets Remote Control Installing Batteries in the Remote Control Remote Control Operation Range Making Video and Audio Connections Connecting an AV Device with an HDMI Cable Connecting a Computer with a VGA Cable Connecting an AV Device with a Component (YPbPr) cable... -
Page 3: Unpacking The Tv / Accessory's
16 " HD LED TV. Thank you for purchasing your new 16" Full HD LED TV. 16 " HD LED TV. 16 " HD LED TV. 16 " HD LED TV. 16 " HD LED TV. 16 " HD LED TV. Your new TV has many features and incorporates the latest technology to enhance your viewing experience. -
Page 4: Installing / Removing The Base Stand
Installing / Removing the Base Stand The parts The Parts The parts The parts Stand& Screws(ST4 x 10) TV set TV Set Stand& Screws(ST4 x 10) Stand& Screws(ST4 x 10) TV set Installation Installation Installation Place the TV face down on a soft and flat surface (blanket, foam, cloth, etc.) to prevent any damage to the TV. Place the TV face down on a soft and flat surface (blanket, foam, cloth, etc.) to prevent any damage to the TV. -
Page 5: Front / Right Side View And Controls
Front / Right Side View and Controls Insert disc according to the label next to the disc slot Item Description 1. IR (Infrared Receiver) Receives IR signals from the remote control. Do not put anything near the sensor, as its function may be affect- 2. -
Page 6: Rear View And Sockets
Rear View and Sockets Socket Description Socket Description 1 Headphone out To connect to the earphones. 1. Headphone out To connect to the earphones. 2 Digital Audio Out Digital output to audio system. 2. Digital Audio Out Digital output to audio system To connect to a DVD player, Digital Set-Top-Box, or other AV devices with 3 Video / AUDIO (L / R) composite (AV) video and audio output sockets. -
Page 7: Remote Control
Rear View and Sockets Remote Control Dependant on the Model of the TV some keys will have no function Sound base / Sound bar On/Off Power Turn on or standby Power Turn on or standby S-Vol+ DTV Switch to DTV Switch to DTV Volume up S-Vol-... - Page 8 Remote Control Remote Control Functions of remote control buttons Dependant on the model of the TV some keys will have no function Radio Switch between TV & Radio Quickstart Searches all ATV and DTV Channels Number Buttons Press 0-9 to select a TV channel directly when you are watching TV.
-
Page 9: Installing Batteries In The Remote Control
Installing Batteries in the Remote Control 1. Press and lift the back cover to open the battery compartment of the remote control. 2. Insert two 1.5V AAA size batteries. Make sure to match the (+) and (-) ends of the batteries with the (+) and (-) ends indicated in the battery. -
Page 10: Making Video And Audio Connections
Making Video and Audio Connections Not all AV devices have the ability to connect to a TV, please refer to the owner’s manual of your AV device for compatibility and connection procedures. When connecting any external AV device, do not connect the main cable to the main socket until all other connections are complete. -
Page 11: Connecting A Computer With A Vga Cable
Connecting a Computer with a VGA Cable 1. Use a VGA cable to connect the TV’s PC input Rear View of TV socket to a computer’s VGA output socket. Use an audio cable to connect the TV’s PC AUDIO Common Interface HDMI MINI YPbPr PC AUDIO... -
Page 12: Connecting An Av Device With Composite Cable
Making Video and Audio Connections 1. Use an AV cable to connect the TV’s Mini AV in- Rear View of TV put sockets to an external AV device’s compos- ite audio/video sockets. (Video=yellow, Audio Left=white, and Audio Right=red) 2. Plug the connected devices into the main socket. -
Page 13: Connecting A Digital Audio Receiver
Connecting a Digital Audio Receiver For better sound quality, you may want to play the audio through your multi-channel audio receiver. Rear View of TV 1. Use an audio cable to connect the TV’s Digital Audio out socket to an external audio receiver’s audio coaxial input socket. -
Page 14: Turning The Tv On For The First Time
Turning the TV on for the First Time 1. Connect one end of the RF coaxial cable to the aerial socket on the wall and other end of the cable to the aerial socket at the rear bottom of your TV. Do not connect the TV to the main supply until you have completed all the connections. -
Page 15: Basic Operation
Selecting the Input Source 1. Press the Source button on the TV or the Source button on the remote control to display the input source list. 2. Press the ▲▼ buttons to select the input source that you want. 3. Press OK button to confirm your selection. If you do not press Radio the OK button to confirm, the TV will automatically confirm the Radio... -
Page 16: Osd Menu
Making Video and Audio Connections Allows you to set your preferred picture mode. 1. Press the Menu button and then press the ◄► buttons to select the PICTURE menu. 2. Press the OK or buttons and then press the buttons to ▼... -
Page 17: Picture Setting
Picture Setting This selection will allow you to This selection will allow you to view a picture with an original view a picture with an original 4:3 aspect ratio. Black bars will 4:3 aspect ratio. Black bars will appear on both the left and right appear on both the left and right of the screen. -
Page 18: Sound Setting
Sound Setting Allows you to select an audio-enhancement technique. 1. Press the Menu button and then press the ◄► buttons to select the SOUND menu. Radio 2. Press the OK or buttons and then press the buttons to ▼ ▲▼ select the following sound options and then press the OK button. - Page 19 Channel Setting (ATV, DTV or Radio Mode) Allows you to setup a variety of channel options Allows you to set up a variety of channel options. 1. Press the Menu button and then press the ◄► buttons to select Allows you to set up a variety of channel options. the CHANNEL menu.
- Page 20 DVB-T Manual Tuning Channel Setting (ATV, DTV or Radio Mode) 1. Select DVB-T Manual Tuning, press the OK button to confirm. DVB - T Manual tuning How to search Digital Channels manually. DVB-T Manual Tuning 1. Select DVB-T Manual Tuning, press the OK button to confirm. 2.
- Page 21 Channel Setting (TV, DTV or Radio Mode) Satellite Edit If you do not have a fixed dish aligned to Astra 19.2E Satellite name: Press the OK button to open the edit menu as below image. fitted with universal LNB you will need to use this section.
- Page 22 Channel Setting (TV, DTV or Radio Mode) Edit Transponder Menu Press OK button to edit the Transponder Motor: Control of multi-satellite polar (Require the user device support DiSEqC 1.2 or DiSEqC 1.3 protocol), left and right buttons to select DiSEqC 1.2 / DiSEqC 1.3 / None.
-
Page 23: Channel Setting
Channel Setting Programme Edit Programme Edit Use up/down keys to select program edit. Press OK or Use up/down keys to select program edit. Press OK or Right button to Right button to enter the menu. Use up/down buttons to enter the menu. Use up/down buttons to navigate through the menu. navigate through the menu. - Page 24 Lock Setting Lock Setting 1. Press the Menu button and then press the ▲▼ buttons to se- lect the Lock menu. Lock 2. Press the OK or ▼ buttons and then press the ▲▼ buttons to select the feature options and then press OK button. Lock System Lock System 1.
-
Page 25: Lock Setting
Lock Setting Hotel Mode Press the up/down buttons to select the “Hotel Mode” option and then press right button to choose be- tween the options ON or OFF. Source Lock Press the up/down buttons to select the “Source Lock” option and then press OK to enable the menu. Press the right button to toggle between ON and OFF.All signal sources labelled ON will not be available any more in the signal source selection menu. -
Page 26: Time Setting
Time Setting Time Setting 1. Press the Menu button and then press the ▲▼ buttons to se- lect the Time menu. Time 2. Press the OK or ▼ buttons and then press the ▲▼ buttons to select the feature options and then press OK button. Clock Clock Press the OK button to set date and time. -
Page 27: Option Setting
Option Setting Option Setting 1. Press the Menu button and then press the ▲▼ buttons to se- lect the Option menu. 2. Press the OK or ▼ buttons and then press the ▲▼ buttons to Option select the feature options and then press OK button. OSD Language Allows you to select the on screen display menu language. -
Page 28: Connecting A Usb Storage Device
Connecting a USB Storage Device 1. Switch off the TV before connecting any USB storage device. 2. Connect your USB storage device to the USB port of your TV. 3. Plug the connected devices into the mains socket USB Cable 4. -
Page 29: Multimedia Operation
Multimedia Operation Multimedia Operation Basic Operation Multimedia Operation 1.Press the SOURCE button on tje remote control to display the input source menu,select the USB source with Basic Operation the up/down buttons and press the OK button to enter the Multimedia menu below. 1.Press the SOURCE button on tje remote control to display the input source menu,select the USB source with Basic Operation the up/down buttons and press the OK button to enter the Multimedia menu below. - Page 30 1.Photo 1.Photo Photo viewing Photo viewing 1. Photo Photo Viewing Press left/right buttons to select the option on the Press left/right buttons to select the option on the menu,and press the OK button to activate. Press left/right buttons to select the option on the menu, and menu,and press the OK button to activate.
-
Page 31: Watching Movies
3.Movie 3. Movie 3.Movie Watch a film Watch a Film Watch a film Press left/right buttons to select the option on Press left/right buttons to select the option on the the menu, and press the OK button to activate. menu,and press the OK button to activate. Press left/right buttons to select the option on the menu,and press the OK button to activate. -
Page 32: Dvd Operation
DVD Operation Press the STANDBY button on the TV or the remote control, and select “DVD” source by the SOURCE. If there is no disc in the DVD player the screen will show “No Disc”. Insert Disc according to picture next to disc slot. Do not touch the playing surface. - Page 33 OSD Language This is used to select the OSD language. Screen Saver Start the screen saver, the screen saver image will appear when the player stops or the picture is paused for a few minutes. This saver can keep the screen from being damaged. •...
- Page 34 Preference Setup You must press STOP twice to enter the Preference settings. TV Type • PAL This is selected when the player is connected to a PAL System TV. • Multi The player will set the TV system according to the disc in the tray. •...
- Page 35 Disc Care About Disc Terms Title Generally, pictures or music compressed on a DVD are divided into several sections, “title”. Chapter The smaller section unit of picture or music in a DVD under the title, usually one title is comprised of one or more chapters and each of them is numbered for easy searching, but some discs may not have a recording chapter.
-
Page 36: Maintenance
Maintenance Careful and regular cleaning can prolong the life of your TV. Be sure to Disconnect the mains cable from the mains socket before any cleaning. Use a soft dry cloth to wipe away the dust from the screen and surfaces. - Page 37 The audio function does not work Picture OK but no sound • Press the VOL + / - buttons. • Sound muted? Press the Mute button. • Try another channel. The problem may be caused by the broadcaster. No output from one of the speakers •...
-
Page 38: Display Modes
Display Modes The screen resolution has been optimised during production for the display modes listed below. YPbPr Mode Resolution Vertical Frequency (Hz) Aspect Ratio 480i:720 x 480 480P:720 x 480 576i: 720 x 576 576P: 720 x 576 4:3 / 16:9 / Zoom1 / Zoom2 720P: 1280 x 720 1080i: 1920 x 1080 1080P: 1920 x 1080... -
Page 39: Specifications
Specifications Panel System 16 inch LED Panel Panel System 16 inch LED Panel Display Resolution 1920 pixels (horizontal) x 1080 pixels (vertical) Display Resolution 1920 pixels (horizontal) x 1080 pixels (vertical) Television System PAL I / BG / DK / SECAM BG/DK Television System PAL I / BG / DK / SECAM BG/DK Brightness... -
Page 40: Safety Warnings
Safety Warnings • Read all the instructions carefully before using the unit Safety and keep them for future reference. • Always disconnect the unit from the mains supply • Retain the manual. If you pass the unit onto a third before connecting / disconnecting other devices or party make sure to include this manual. - Page 41 Safety Warnings Headphones Service • Listening to loud sounds for prolonged periods of time • To reduce the risk of electric shock, do not remove may permanently damage your hearing. screws. The unit does not contain any user-service- • Before putting on headphones, turn the volume down able parts.
- Page 42 Waste Electrical Recycling Correct disposal of Product This sign indicates that this product may not be disposed of with your regular household waste. The recycling and separate collection of such products is your responsibility. Please drop off the above mentioned waste at a designated place for recycling waste electrical and electronic equipment.
Need help?
Do you have a question about the C1624F and is the answer not in the manual?
Questions and answers