Table of Contents
Advertisement
Available languages
Available languages
Quick Links
Advertisement
Table of Contents

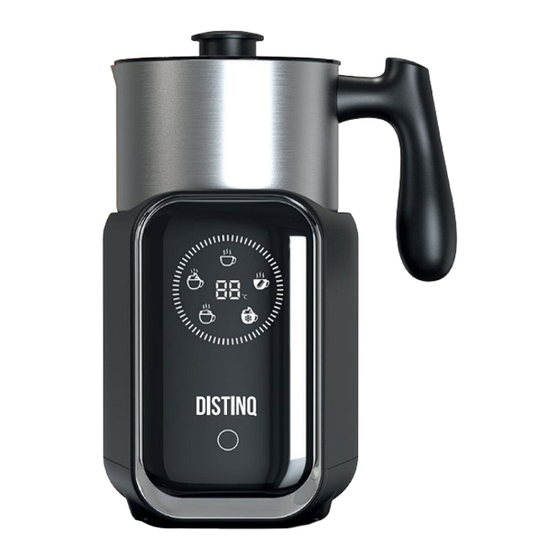
Summary of Contents for DISTINQ DQMF04BK
- Page 1 Handleiding super lekker...
- Page 2 INHOUDSOPGAVE Handleiding - Nederlands Pagina 3 instruction manual - English Pagina 10 Semaco B.V. Maaiveldweg 16 2661 CX Bergschenhoek The Netherlands...
- Page 3 veiligheidsinstructies Lees deze handleiding aandachtig door voordat u deze melkopschuimer gebruikt en bewaar deze hand- leiding op de juiste manier voor toekomstig gebruik. Dit product kan alleen worden gebruikt door degenen die bekend zijn met de volgende instructies: • Lees alle instructies. •...
-
Page 4: Voorbereiding Voor Gebruik
• Zorg ervoor dat u de stekker uit het stopcontact haalt wanneer u deze melkopschuimer niet gebruikt of voordat u deze melkopschuimer schoonmaakt; koel de onderdelen van deze melkopschuimer voordat u ze installeert of verwijdert. • Gebruik deze melkopschuimer niet als het netsnoer of de stekker beschadigd is; gebruik deze melkop- schuimer niet nadat deze fout is gegaan of beschadigd is, en het is noodzakelijk om hem voor inspec- tie en reparatie naar de dichtstbijzijnde geautoriseerde servicefaciliteit te sturen. - Page 5 Onderdelen 1. Doorzichtig bekerdeksel 2. Siliconen afdichtring van bekerdeksel 3. Kunststof handvat 4. Roestvrijstalen bekerlichaam 5. Kunststof voet 6. Scherm weergeven 7. AAN/UIT-knop 8. Opschuimen en roergarde Gebruik Product Functie Werkwijze Giet 300 ml melk in de beker. Druk eenmaal op dan wordt inge- schakeld.
- Page 6 Giet 600 ml melk in de beker. Druk DRIEMAAL op dan wordt inge- schakeld. Nadat het lampje drie keer knippert stopt de motor na (250 ~ 400 Warme seconden) met draaien. Dan maakt de zoemer een geluid (gedurende melk 1 seconde), wat de voltooiing van het schuim betekent. De melktemperatuur ligt tussen 60 °...
-
Page 7: Tips Voor Gebruik
foutcodes Oplossingen Foutcode Mogelijke oorzaken 1. De garde is niet in de metalen beker 1. Monteer de garde correct op de as van de metalen beker. geïnstalleerd. 2. De metalen beker wordt niet in de 2. Plaats de metalen beker op de juiste manier in de basis. basis geplaatst. -
Page 8: Reiniging En Onderhoud
reiniging en onderhoud Voordat u deze machine reinigt moet u de melkkan scheiden van de basis, het deksel van de kan verwij- deren. De basis nooit onderdompelen in water. Voor de melkkan: Reinig deze met koud water en een geschikte hoeveelheid mild schoonmaakmiddel, evenals een zachte handdoek die geen haar verliest om het voorzichtig schoon te maken en veeg het vervolgens droog met een droge handdoek;... -
Page 10: Safety Instructions
Safety instructions Please read this Manual carefully before using this Milk Frother, and keep it properly for future reference. This product can be used only by those who are familiar with the following instructions. • Please read all the instructions. •... - Page 11 39. In case of any damage caused by improper use or failure to comply with these instructions, we will not undertake any responsibility. Preperations for use It is necessary to carefully open its packaging box, keep all the packaging materials inside it, take the Milk Foam Machine out and then carefully read its manual to check whether or not its parts are complete;...
- Page 12 Parts 1. Transparant cup cover 2. Silicone sealing ring of cup cover 3. Plastic handle 4. Stainless-steel cup body 5. Plastic base 6. Display screen 7. On/Off button 8. Frothing and stirrer whisk usage Product Function Operating method Pour 300ml milk in the cup, Press once when turned on , “...
- Page 13 Pour 600ml milk in the cup, Press three times when turned on , “ ” Start working after the light flashes three times; The motor will stop after turning for (250~400) seconds; at the moment, its buzzer will make a milk sound (for 1 second), meaning the completion of work;...
-
Page 14: Fault Alarm Handling
Fault alarm handling Solution Fault code Possible cause 1. Please mount the whisk correctly onto the shaft of metal cup. 1. The whisk is not installed in the metal cup. 2. Please put the metal cup correctly into the base. 2. -
Page 15: Cleaning And Maintenance
Cleaning and maintenance Before cleaning this machine, please separate the cup body from the base of the power supply base, take out the cover of the cup body, and do not immerse the power-supply base in water. For the cup body: Clean it with cold water and an appropriate amount of mild detergent as well as a soft towel not losing hair to gently clean it and then wipe it dry with a dry towel;...

Need help?
Do you have a question about the DQMF04BK and is the answer not in the manual?
Questions and answers