Advertisement
Quick Links
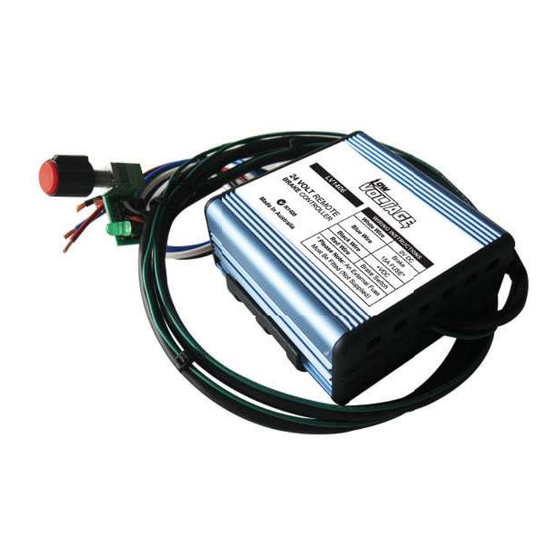
The LV1405 and LV1406 are a new generation of brake controllers utilising microprocessor based technology.
It is a compact, rugged, all electronic brake controller and is easily installed with the connection of four wires and the
mounting bracket supplied. Easily adjustable via the remote control which can be located up to 1m from the controller.
Both models also incorporate an over-ride function for manual control. Designed for both single and dual axle trailers
using negative earth (ground) systems only. Available in 12V & the new 24V version eliminating the need for a separate
reducer on 24V systems.
Features :
• LED remote indication for brake connected and brake on.
• Easy adjustment via knob rotation in remote
• Convenient Over-Ride via knob push in remote
Product comes with:
1x Retaining Nut ( On Unit )
1x Washer ( On Unit )
1x LED Plastic Cover
1x Control Knob
1x Product Sticker
2x Mounting Screws
Note : The LV1406 is load activated and can not be tested without load. At no load, output reading of 24V will register.
Please note that the output voltage is PULSED, so it cannot be measured with a volt meter or test light.
Installation:
1. Disconnect the vehicle's NEGATIVE battery terminal.
2. Determine a suitable mounting location. The unit must be mounted securely to a solid surface.
3. Hold the mounting bracket in the selected position and mark the hole location through the holes in the bracket.
4. Using a suitable drill bit, drill holes in the marked locations.
5. Secure bracket in position with self tapping screws being careful not to strip the holes by over-tightening.
6. Mount the brake control unit in the bracket by snapping into position.
7. Drill two holes in mounting panel to the sticker template and insert control know and LED through holes.
8. Fix locking nut over shaft of control and tighten. Insert supplied LED lens over LED.
9. Connect brake wiring as per wiring instructions and test unit.
CUT HERE
DRILLING TEMPLATE FOR DASHBOARD MOUNTING
Image of Product Sticker
12V and 24V
Remote Brake Controllers
Installation & Operating Instructions
Please read these instructions before use
• Small dashboard mounted remote with 1m cable
• 2 Axle 12A Output Capability
• Top Or bottom Mounting Via The Multi Position Bracket
• Can Be Mounted On Any Angle
Specifi cations
Minimum Input Voltage
Nominal Input Voltage
Maximum Input Voltage
Output Voltage
Suitable For 12V Trailer Brakes
No Current Load
Maximum Load
Dimensions
Weight
Models:
LV1405 & LV1406
Page 1 of 2
LV1405
LV1406
9 VDC
18 VDC
12 VDC
24 VDC
15 VDC
30 VDC
12V
12V
Yes
Yes
30 mA
2 Axel / 12A Avg
40mm x 79mm x 81mm
200gm
Drilling Hole Sizes
Left Circle (LED) = 6.4 mm
Right Circle (Control Knob) = 7.3 mm
CUT HERE
Advertisement

Summary of Contents for Low Voltage LV1405
- Page 1 Please read these instructions before use The LV1405 and LV1406 are a new generation of brake controllers utilising microprocessor based technology. It is a compact, rugged, all electronic brake controller and is easily installed with the connection of four wires and the mounting bracket supplied.
- Page 2 No representative is authorised to assume for the seller any other liability in connection with the seller’s products. 12V and 24V Remote Brake Controllers Models: LV1405 & LV1406 Installation & Operating Instructions Please read these instructions before use Page 2 of 2...
Need help?
Do you have a question about the LV1405 and is the answer not in the manual?
Questions and answers