
Related Manuals for RAMPART L148-TMS

Summary of Contents for RAMPART L148-TMS
- Page 1 L148 L148 ® ABLE OUNTED HIELD L148 ® ULTI URPOSE HIELD UIDE L148-UIG, Rev. C LBL-085 , Rev. C Date of Issue: October 2023...
- Page 2 This user guide includes assembly and instructions for use for the L148 table- mounted shield system, the L148-MPS, and the L148-TMS purchased with the L148-MPS. L1 48- TM S 4 5 ° C o n f i g u r a t i o n L1 48- TM S + L1 4 8- M P S 4 5 °...
-
Page 3: Manufacturer
All rights under the copyright laws are expressly reserved by Rampart Within the bounds of legal requirements, the manufacturer is only responsible for the technical safety characteristics of this device if the maintenance, repairs, and... -
Page 5: Table Of Contents
Operating Environment ....................9 Conditions for Shipping and Storage ................9 Identification Tag ......................9 System Overview ......................10 L148-TMS Components .................... 10 Key Characteristics ....................... 11 L148-TMS Assembly ..................12 What Comes Out of the Box ..................12 Mounting the Curtain Bars ..................12 Head ......................... -
Page 7: Overview
SAFETY & LIABILITY Rampart assumes no liability for the safe and reliable use of the L148-TMS and L148-MPS shield systems where: • Modifications or repairs are not performed by Rampart... -
Page 8: Safety & General Symbols
• Repairs must only be performed by Rampart authorized personnel. • The shielding of the L148-TMS and L148-MPS must not be altered in any way and must be used only as outlined in this user guide. The L148-TMS and L148-MPS systems are MR-unsafe. MR-unsafe items should not be brought into MRI scanner rooms. -
Page 9: Technical Specifications
14°F (-10°C) to 104°F (40°C). IDENTIFICATION TAG The identification tag for the L148-TMS can be found on the back of the large curtain bar assembly. The identification tag for the L148-MPS can be found on the side of the shield opposite the Rampart logo. -
Page 10: System Overview
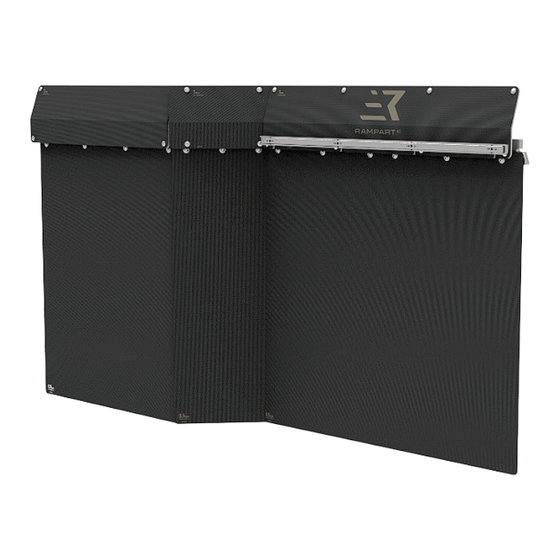
SYSTEM OVERVIEW The L148-TMS and L148-MPS are lead-free, protective radiation shields designed to provide lower body protection for users. The L148-TMS is comprised of seven individual shields: four (4) soft-shielding curtains which provide 0.5 mm of lead equivalency and three (3) rigid abdominal shields which offer 1.0 mm of lead equivalency. -
Page 11: Key Characteristics
L148-TMS and L148-MPS Component Key Large Curtain Bar Assembly: This curtain bar and its accompanying panels attach to the table’s accessory rail and serve as the foundation for mounting the L148’s other curtain bars and shielding. This assembly can easily be adapted for use on 7.7 mm, 9.0 mm, and 10.0 mm accessory rails. -
Page 12: L148-Tms Assembly
Locate the large, medium, and small curtain bar assemblies and prepare to install them onto the procedure table’s accessory rail. Note: The L148-TMS is designed to be compatible with 7.7 mm, 9.0 mm, and 10.0 mm bed rails. If the system needs to be adjusted for use with a... -
Page 13: Head
Install the small curtain bar assembly onto the large curtain bar assembly by gently inserting the pivot pin into the machined hole on the large curtain bar until Install the medium curtain bar assembly onto the small curtain bar assembly by gently inserting the pivot pin into the machined hole on the small curtain bar until... -
Page 14: Installing The Abdominal Shields
Installing the Abdominal Shields Affix the large abdominal shield to the large curtain bar assembly by sliding the shield onto the curtain bar so that the two (2) shield clips securely clamp onto the large curtain bar. Note: The four (4) access slots on the bottom of the shield should rest over the four (4) accessory rail stand-offs. - Page 15 Note: Ensure that the two (2) shield clips are fully seated on the curtain bar. Install the small abdominal shield onto the small curtain bar assembly by sliding the shield onto the curtain bar so that the two (2) shield clips securely clamp onto the small curtain bar.
- Page 16 Note: Ensure that the two (2) shield clips are fully seated on the curtain bar. Install the medium abdominal shield onto the medium curtain bar assembly by sliding the shield onto the curtain bar so that the two (2) shield clips securely clamp onto the medium curtain bar.
- Page 17 Note: Ensure that the two (2) shield clips are fully seated on the curtain bar. Verify that all abdominal shield clips are fully engaged on the curtain bars and ensure that the soft shielding of the small abdominal shield overlaps the medium and large abdominal shields.
-
Page 18: L148-Tms Disassembly
Note: Removal of L148-TMS is the reverse of installation. Remove one (1) L148- MPS, the three (3) abdominal shields, followed by the three (3) curtain bar assemblies. -
Page 19: L148-Mps Overview
L148-MPS Overview The L148 multi-purpose shield is a 0.5 mm lead equivalent shield that is designed to optimize radiation protection in the event that the shape of the procedure table or individual user need necessitates supplemental protection. The following images depict various ways in which the shield can be positioned. -
Page 20: Quality Check
Quality Check Refer to the following criteria to ensure that the L148-TMS and L148-MPS are properly installed and assembled: Large curtain bar assembly is securely attached to the table’s accessory • rail and is set to the correct accessory rail size (7.7 mm, 9.0 mm, or 10.0 mm). -
Page 21: L148-Tms System Adjustment
The L148 table-mounted shield is a reconfigurable system that is designed to attach to 7.7 mm, 9.0 mm, and 10.0 mm patient table rails. The L148-TMS is also equipped with a preinstalled and adjustable accessory rail that allows for the attachment of various control systems and accessories. - Page 22 Using a 4.0 mm hex wrench, remove the six (6) screws that secure the two soft shielding panels to the large curtain bar. 4x M6x16 Using a 2.5 mm hex wrench, remove the four (4) bolts, four (4) spacers, four (4) washers, and four (4) locknuts that attach the spaced and the fixed accessory rails to the large curtain bar.
- Page 23 After setting aside the accessory rails and accompanying hardware, use a 2.5 mm hex wrench to remove the four (4) bolts that secure each mounting bracket to the large curtain bar. 4x M3x16 Once the mounting brackets are removed, reposition them to align with the desired procedure table rail size by moving left or right and seating them within the applicable grooves on the large curtain bar.
- Page 24 Reposition the two (2) mounting brackets so that their alignment corresponds to the desired accessory rail size. Mounting bracket set to 7.7 mm accessory rail size. Mounting bracket set to 9.0 mm accessory rail size. Mounting bracket set to 10.0 mm accessory rail size.
- Page 25 Apply temporary thread-locking compound, such as Loctite ® Threadlocker Blue 242 ® , to bolt threads and reinstall the four (4) bolts that secure the two (2) mounting brackets. Torque bolts to 2.0 Nm. 4x M3x16 Note: Ensure that both mounting brackets are set to the same accessory rail size.
-
Page 26: Adjusting The Accessory Rail
Adjusting the Accessory Rail After adjusting the mounting brackets on the large curtain bar, the accessory rail will also need to be adjusted in order to attain the desired rail size. before reassembling the large curtain bar, adjust the accessory rail by following the steps below: With the accessory rail assembly removed, reposition the spaced accessory rail to the desired rail size by moving left or right, and engage it with the fixed accessory rail. - Page 27 11. Ensure the accessory rail is set to desired size by using the etched indications on the accessory rail as a guide. Accessory rail set to 7.7 mm size. Accessory rail set to 9.0 mm size. Accessory rail set to 10.0 mm size.
-
Page 28: Instructions For Use
30. Maintenance and Care INTENDED USER GROUP The intended user group for the L148-TMS and L148-MPS include physicians and their staff. INTENDED PATIENT POPULATIONS The L148-TMS and L148-MPS are designed to function with compatible procedure table rails to provide radiation protection at table level and below. Compatible procedure table rail thicknesses include 7.7mm, 9.0 mm, and 10.0 mm. -
Page 29: Sample Configurations
SAMPLE CONFIGURATIONS Note: The small and medium curtain bar assemblies of L148-TMS have the ability to pivot in a variety of angles in order to meet the specific requirements of procedure tables and the individual needs of the user. The following sample configurations depict two common configurations, but do not show all possible curtain bar angles. -
Page 30: Maintenance And Care
ABDOMINAL SHIELD CLEANING/DISINFECTION The L148-TMS’s abdominal shields are designed to be disassembled to ensure that all shielding material can be cleaned and disinfected appropriately. The following section outlines the procedure for removing the soft shielding material from their respective shield structures in order to facilitate cleaning and disinfection. -
Page 31: Shield Cleaning
Shield Cleaning Small Abdominal Shield Cleaning Unsnap the four (4) snap fasteners that secure the soft shielding to the front of the rigid abdominal shield frame. Clean/disinfect both the soft shielding material and the rigid frame of the small abdominal shield per the Cleaning and Disinfection section on page 30. - Page 32 Medium Abdominal Shield Cleaning Unsnap the four (4) snap fasteners that secure the soft shielding to the front of the rigid abdominal shield frame. Clean/disinfect both the soft shielding material and the rigid frame of the medium abdominal shield per the section Cleaning and Disinfection on page 30.
- Page 33 Large Abdominal Shield Cleaning Unsnap the eight (8) snap fasteners that secure the soft shielding to the front of the rigid abdominal shield frame. Clean/disinfect both the soft shielding material and the rigid frame of the large abdominal shield per the section on Cleaning and Disinfection page 30.
-
Page 34: Storage
STORAGE When not in use, the L148-TMS and L148-MPS can remain installed in the lab. If removal is required, follow these steps to ensure the L148-TMS and L148-MPS are stored safely and securely. Remove all abdominal shields, curtain bar assemblies, and the multi- purpose shield from the bed according to on p. - Page 36 L148 1500 Urban Center Drive, Suite 140, Birmingham, Alabama USA (205) 236-3000 Office, (833) 978-0052 Technical Support info@RampartIC.com www.RampartIC.com...
Need help?
Do you have a question about the L148-TMS and is the answer not in the manual?
Questions and answers