Table of Contents
Advertisement
Quick Links
Advertisement
Table of Contents

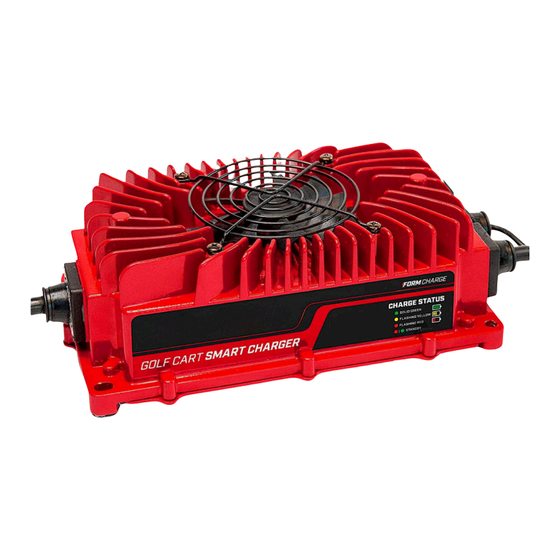
Summary of Contents for Form F36V18A201
- Page 1 OWNERS MANUAL...
-
Page 2: Table Of Contents
TABLE OF CONTENTS EXTERNAL MOUNTED QUICK START INSTRUCTIONS...... 2 Mounting Instructions.................2 Operating Instructions................3 ONBOARD MOUNTED QUICK START INSTRUCTIONS...... 5 Mounting Instructions.................5 Operating Instructions................6 CHARGER OPERATIONS................8 Charger LED Codes..................8 Product Specifications................8 Troubleshooting And FAQs..............10 Important Safety Instructions.............. 12... -
Page 3: External Mounted Quick Start Instructions
EXTERNAL MOUNTED QUICK START INSTRUCTIONS MOUNTING INSTRUCTIONS Option A: Freestanding Instructions Our golf cart chargers offer versatile storage options: they can stand freely or be mounted on the wall. While we offer mounting hardware for these external chargers, it's not required to mount them. Option B: Wall Mount Instructions If you choose to do so, the charger and plug holder may be mounted to the wall. -
Page 4: Operating Instructions
Step 5: For those mounting to drywall, insert the drywall anchors into the holes. Step 6: Line up the charger with the predrilled holes. Secure with screws. OPERATING INSTRUCTIONS Step 1: Plug the 3-prong connector of the input power cord into a compatible electrical outlet. - Page 5 Step 4: Keep your battery charging until the CHARGE STATUS light turns green, indicating that your cart is fully charged. Step 5: Store your FORM Golf Cart Battery Charger in a dry environment. NOTE: It is important to check the water level of lead-acid batteries approximately every 30 days.
-
Page 6: Onboard Mounted Quick Start Instructions
ONBOARD MOUNTED QUICK START INSTRUCTIONS MOUNTING INSTRUCTIONS Step 1: Turn the ignition key to the OFF position. Step 2: Locate the TOW/RUN Toggle Switch on your golf cart and turn it to TOW mode (TOW/RUN switch is located under the seat in the battery compartment). -
Page 7: Operating Instructions
Step 8 Attach the red lead of the charger (marked with red heat shrink) to the main battery Positive (+). Applying Dielectric grease around the connections will help prevent corrosion. Step 9: Locate the battery with the main NEGATIVE (-) terminal in the electrical series on your cart batteries. - Page 8 Color Description Battery Level Flashing Red Deep Charge Flashing Yellow Absorption Charge Solid Green Charged Flashing Red / Green Charger Not Detected Step 4: Keep your battery charging until the CHARGE STATUS light turns green, indicating that your cart is fully charged. Step 5: Remove the input power plug from the wall.
-
Page 9: Charger Operations
OBC (Circle Plug) (Flashes x4) / (Flashes x2) / Fan Off / Repeat If you have additional questions about the LED Codes, please contact the FORM Charge Product Specialist at www.FORMCharge.com/help Product Specifications Specification 36 Volt Charger 48 Volt Charger... - Page 10 Charging Algorithm Designed to protect and preserve your batteries automatically. The 6-stage smart charging algorithm is designed around optimal conditions for charging lead acid golf cart batteries. Lead Acid Charge Curve Graph VOLTS AMPS Stage 1 Stage 2 Stage 3 Stage 4 Stage 5 Stage 6...
-
Page 11: Troubleshooting And Faqs
Troubleshooting And FAQs 1. The charge status light continues to flash Red/Green when plugged into the golf cart. A. Check if the output plug is fully inserted into the golf cart. B. Check if there are any loose or corroded connections on your battery terminals. - Page 12 5. How loud should the charger be? The noticeable sound of rushing air from the fan is a normal part of the cooling process on your FORM rapid charger. 6. How warm do FORM chargers get? The FORM battery chargers can reach 140 F.
-
Page 13: Important Safety Instructions
8. Why does the LED on my FORM charger stay illuminated for a period of time after unplugged from AC power? This is normal and does not affect your batteries. It is simply a function of the precision charging, ensuring the charger is disconnected prior to terminating the charge cycle. - Page 14 14. CAUTION – Even though the FORM charger is capable of operating in a high ambient temperature environment, a minimum of six inches of unobstructed area should be allowed on all sides of the unit for proper air circulation and cooling.
- Page 15 FEDERAL COMMUNICATIONS COMMISSION (FCC) STATEMENT This equipment has been tested and found to comply with the limits for a Class A digital device, pursuant to Part 15 of the FCC Rules. These limits are designed to provide reasonable protection against harmful interference when the equipment is operated in a commercial environment.
- Page 16 WE ARE HERE TO HELP! www.formcharge.com/help Frequently Asked Questions ● Helpful Videos ● Troubleshooting Guides ● Product Support ● Appointments...
Need help?
Do you have a question about the F36V18A201 and is the answer not in the manual?
Questions and answers