Advertisement
Available languages
Available languages
Advertisement
Table of Contents

Summary of Contents for DNA Professional CST
- Page 1 USER MANUAL INSTRUKCJA OBSŁUGI...
-
Page 2: Quick Start
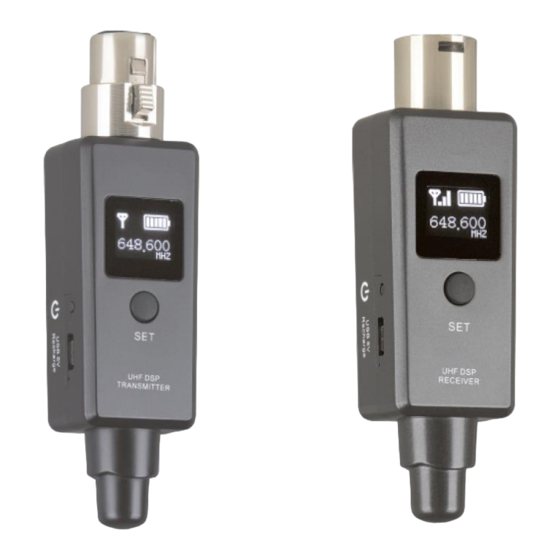
ENGLISH QUICK START 1. Plug the Transmitter into the XLR dynamic microphone and battery-powered condenser mi- crophones. 2. Plug the Receiver into the mixer or power speaker... - Page 3 3. Press the power button, turn 4.Confirm the transmitter 5. Check the connection by on the Transmitter and the re- talking through the micro- switch , select the ceiver, the OLED will lights the phone. check the frequency if same. BASIC OPERATION TRANSMITTER 1.
-
Page 4: Specifications
3. PAIRING For both of transmitter unit and receiver unit, press and hold the SET button for 2 seconds, OLED dis- play: PAIRING. Transmitter unit will keep paring action for 30 seconds, user can pair more receiver units if he wants. Or in this period, user can quit pairing action by press SET button one time. The system if pairing successful, the receiver OLED display: PAIRING FINISH APPLICATION SCENE SPECIFICATIONS... - Page 5 • Ensure that the Transmitter and Receiver are on the same channel. • The Receiver can be paired with one Trans- mitter at a time. Signal instability: RF LED • See, Tips and methods to Improve wireless flickering, or off completely system performance page Unable to switch the channel •...
-
Page 6: Szybki Start
POLSKI SZYBKI START 1. Podłącz Transmiter do dynamicznego mikrofonu XLR oraz mikrofonów pojemnościowych zasi- lanych bateryjnie. 2. Podłącz odbiornik do miksera lub kolumny aktywnej. - Page 7 3. Wciśnij przycisk, włącz trans- 4.Potwierdź na przełączniku 5. Sprawdź połączenie mówiąc miter i odbiornik, OLED za- do mikrofonu. transmitera , wybierz świeci się aby sprawdzić czy częstotliwość jest zgodna. PODSTAWOWA PRACA TRANSMITER 1. TRANSMITTER Wtyk XLR Wyświetlacz OLED Przycisk zasilania Gniazdo ładowania USB 5V Ustawienie funkcji Przełącznik Microphone/music...
-
Page 8: Rozwiązywanie Problemów
3. PAROWANIE Zarówno na odbiorniku jak i transmiterze wciśnij i przytrzymaj przycisk Set przez 2 sekundy, wyświe- tlacz OLED: PAIRING. Transmiter będzie kontynuował proces parowania przez 30 sekund, jeśli chcesz możesz dopasować więcej odbiorników. Jeśli nie chcesz parować większej ilości odbiorników możesz zakończyć... - Page 9 • Sprawdź czy odbiornik i transmiter mają włą- czone zasilanie • Upewnij się, że odbiornik i transmiter mają ten sam kanał • Odbiornik może być sparowany tylko do jed- nego transmitera Brak możliwości zmiany kanału • Zmiana kanału jest blokowana po 15 sekun- dach.
Need help?
Do you have a question about the CST and is the answer not in the manual?
Questions and answers