Table of Contents
Advertisement
Advertisement
Table of Contents

Summary of Contents for VGC VR-N76
- Page 1 VERO China Menu VR-N76 User Manual...
-
Page 2: Table Of Contents
Table Of Contents 1,Download The APP-------------------------------------------------------- 2,Connect The Radio-------------------------------------------------------- 3.What’s In The Box---------------------------------------------------------- 4.Product Overview---------------------------------------------------------- 5. Introduc on to basic func ons----------------------------------------- 5.1 Turn on/off the radio-------------------------------------------------- 5.2 Volume adjustment--------------------------------------------------- 5.3 Split screen display---------------------------------------------------- 5.4 Main and sub channel switching------------------------------------ 5.5 VFO/Channel switching----------------------------------------------- 5.6 Locked The KeyPad ---------------------------------------------------- 5.7 Set the VFO frequency-------------------------------------------------... - Page 3 5.11 Frequency Scanning-------------------------------------------------- 5.12 Tone Scanning--------------------------------------------------------- 5.13 Bulk air copy----------------------------------------------------------- 5.14 FM Radio--------------------------------------------------------------- 6. Signaling Se ngs--------------------------------------------------------- 7. APRS se ngs-------------------------------------------------------------- 7.1 Digital Mode ----------------------------------------------------------- 8.Programmable Bu ons Descrip on----------------------------------- 9. Two Way Radio Menu List----------------------------------------------- 10. Technical Specifia ons---------------------------------------------------...
-
Page 4: 1,Download The App
APP 2. Radio Connect With The APP 2.1,installed APP,Open the APP, Selected [Pairing ] on the VR-N76 main menu, App will show”Detected new device VR-N76,do you want to link now”, Click [Yes],App is connec ng the radio. a dialog box will pop up to requiring Bluetooth authoriza on.(as shown in Figure 1) Click [Pair] Then connect... - Page 5 OR Click “Bind new device", Then let the radio enter Pair Status, pop up (walkie talkie, wireless PTT) to select the device you want to bind, a er confirma on, the system prompts to turn on the Bluetooth func on and click [Allow] to pair the device(Figure 1), some mobile phones do not [Allow] pairing prompt will pop up, please pull the phone from the top down to the mobile phone system no fica on bar (Figure 2), open the [Allow] pairing prompt and allow it.
-
Page 6: What's In The Box
3. What’s In The Box Please carefully remove the radio from the packaging box. We recommend that you verify that the items listed in the table above are in the box before discarding the packaging materials. If any items are lost or damaged during transporta on, please contact your dealer immediately.。... -
Page 7: Product Overview
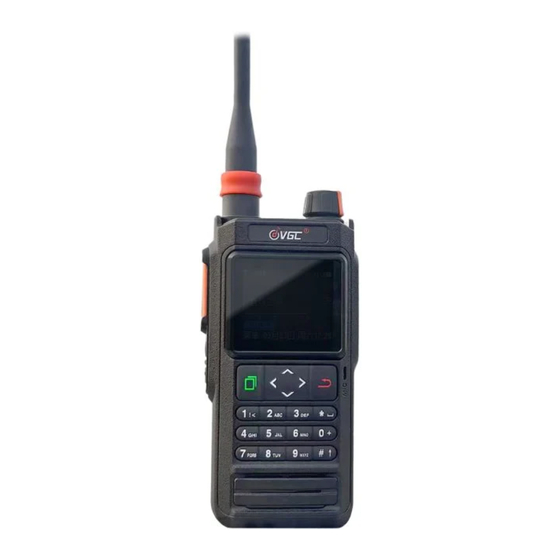
4.P roduct Overview Bu on defini on ① Menu/Confirm key; ② In standby mode, press the le and right bu ons to switch the screen display state. Press the up and down bu ons to switch frequencies or channels up and down; ③Return bu on. -
Page 8: Introduc On To Basic Func Ons
5. Introduc on to basic func ons 5.1 Turn on/of the radio Turn on the radio: When the radio is off, turn the [Power/Volume] switch clockwise. A er the radio makes a "click", the power of the radio is turned on The screen displays the model of the radio. -
Page 9: Split Screen Display
5.3 Split screen display (Figure 3) (Figure 4) (Figure 5) In standby mode, press the le and right arrows to switch the standby display. 1.A er turning on GPS posi oning and receiving satellites, the speed and al tude informa on of the aircra will be displayed on this interface. The second icon in the upper le corner is the satellite icon and satellite signal strength. - Page 10 select key to view the caller's detailed informa on. Please note: The call history displays the last 30 entries and will not be saved a er shu ng down. Only the latest one with the same ID is displayed. Electronic compass *This radio has a built-in electronic compass sensor, please do not approach...
-
Page 11: Main And Sub Channel Switching
② Sensor prompt icon. The "8" icon in the middle of the electronic compass indicates that it is disturbed by the external environment. You need to enter the menu [Compass] and perform correc on opera ons according to the screen prompts.At this me, a er entering the menu [Compass], the screen will prompt "Please calibrate the sensor according to the figure 8 rota ng device".At this me, please hold the device and stretch it forward, and draw the figure eight (ie "... -
Page 12: Vfo/Channel Switching
5.5 VFO/Channel switching In standby mode, press and hold the * key to switch between VFO and channel. 5.6 Locked the Keypad In standby mode, long press the # key to lock the keyboard, long press the # key again to unlock the keyboard. 5.7 Set the VFO frequency ※... -
Page 13: Storage Frequency
5.8 Storage frequency In VFO mode, enter the frequency you want through the number keyboard, such as 438.500, press OK to confirm, press the menu "save tochannel", select a blank channel to save. 5.9 Saving frequencies with CTCSS/DCS In VFO mode, input the frequency you want through the number keyboard, such as 438.500,press OK to confirm,Open the radio se ng menu, enter the transmit TX/RX subtone menu, select the required subtone frequency. -
Page 14: Frequency Scanning
5.11 Frequency Scanning Open the frequency scan menu, input the start frequency that you want, * key to switch the input frequency step, # key to switch the scan step, press the le and right arrows to start scanning, le to scan the frequency down, and right to scan the frequency up. -
Page 15: Signaling Se Ngs
6. Signaling Se ngs ID: Please input your call sign or your ID Allow Check:Allow your partner to send instruc ons to check your current loca on, and your loca on will be feedback to the partner's device. Signaling Preamble : When sending signaling, add a preset code to make the end tone sound more rounded. -
Page 16: Aprs Se Ngs
7. APRS Se ngs Call Sign: Please input your Call Sign. Path:Choose the path for APRS . Password:If you don't know the verifica on code for your call sign, please send an email to info@verotelecom.com and a ach the call sign cer ficate. 7.1 Digital Mode Enable: Turn On/Off... -
Page 17: Programmable Bu Ons Descrip On
8. Programmable Bu ons Descrip on Programmable Bu ons, different shortcut opera ons can be realized through programming [PF1] key/[PF2] key, this func on can only be operated through APP,Some bu on states will restrict each other, so a er se ng, please confirm that all func ons are available Factory default se ngs are: [PF1] key: Short Press Turn On /Off... - Page 18 In standby mode, press the button programmed as " Toggle Toggle Scan Scan " to quickly turn on/off the scanning function. In standby mode, press the button programmed as "Toggle Toggle Talk Talk Around" to quickly switch between the talk -around Around mode and the repeater mode.
- Page 19 Prev Channel / Next In standby mode, press the button programmed as " Channel Prev Channel / Next channel" to quickly switch to the Prev/Next channel Prev Channel In standby mode, press the button programmed as Group/ Next "Prev Channel Group / Next Channel Group " to Channel Group quickly switch to previous / Next Channel Group T-CALL...
-
Page 20: Two Way Radio Menu List
9. Two Way Radio Menu List First level menu Second level menu Third level menu (the up and down buttons to switch Channel Edit the AB Band, and the left and right buttons to switch channels) Send Message: (a paragraph of text needed) Call: (Usename or Callsign needed ) (Usename or Callsign needed ) - Page 21 Dual Watch Scan Talk Around Power TX Subtone RX Subtone Radio Settings Offset Channel Group Squelch Level TX Time Limit Tail Elimination PTT Follow PTT Release...
- Page 22 Pariring Scanning Connection; Paired Devices Send ID Signaling Settings ; Allow Check General Settings Signaling Preamble Call Sign Path APRS Settings, Password Enable Share Location Digital Mode; Digital Channel Format...
- Page 23 Mid Gain BT Mic Gain Sound Settings; Keep Connected Tone Language Brightness Screen Timeout Display Settings; Time Zone Imperial Units Low Power Mode Reset Settings Restore Factory Settings Send Channels Sync Settings Receive Channels...
- Page 24 * key to switch the step of the input frequency, # key to Frequency Scan switch the scanning step Tone Scanning Enter and start working Click the menu button to switch the positioning system GPS status or turn off the positioning system compass Calibrate the compass with a figure -of-eight rotation Status...
-
Page 25: Technical Specifia Ons
10. Technical Specifica ons General VHF:136-174MHz (144-148 Ham Band) Frequency Ranges: UHF:400-470MHz (430-440 Ham Band) 300-550MHz*(RX Only) FM :87-108MHz* AM:108-136MHz* *(RX Only) Channel Steps: 2.5KHz/5KHz/6.25 KHz/ 10KHz/ 12.5 KHz/25 KHz/50 KHz/100 KHz Channel Bandwidth 12.5/25 kHz Frequency Stability: ±2.5ppm Number Of Channels 16*12 Battery Voltage 7.4V... - Page 26 Receiver Sensitivity:(12dB SINAD) 0.16uV adjacent channel selectivity ≥68dB Intermodulation Immunity ≥65dB Spurious Response Immunity ≥65dB Audio distortion ≤3% audio output power Transmitter RF output power ≤5W adjacent channel power suppression ≤-68dB Clutter and Harmonics ≤-60dB FM noise 45 dB FM distortion ≤3% Note: All specifica ons are subject to change without no ce or responsibility.
- Page 28 is the trademark or registered trademark of VERO Global Communica on Co.Ltd ©2024 VERO Global Communica on Co.Ltd. All Rights Reserved. Address:No.4 Chongmin St, Qingmeng Area,QuanzhouFujian, P.R.C Postcode:362006 h p:www.vero-china.cn...
Need help?
Do you have a question about the VR-N76 and is the answer not in the manual?
Questions and answers
i dont see where to send morse code or SCTV. Ive seen it on videos but cant find it on my phone