Advertisement
Quick Links
Advertisement

Summary of Contents for APEXFORGE MA1
- Page 1 User Manual Flexible Shaft Model: MA1...
-
Page 2: Installation Instructions
Flexible Shaft Attachment Instructions Safety Rules for Flexible Shaft Do not operate the flexible shaft with a sharp or multiple bends. Ensure that there are no sharp residual bends or kinks in the flexible shaft before the operation. Over bending the shaft can generate excessive heat on the jacket or hand piece and may cause the flexible shaft to disengage from the tool. - Page 3 Step 1. Press the Shaft lock button, unscrew and remove the collet nut. Step 2. Unscrew the housing cap from the tool. Housing Cap Collet(inside) Step 3. Remove the collet. Note: If the collet nut and collet are not removed from the motor shaft, the tool will not function properly.
- Page 4 Step 4. Install the driver cap on the motor shaft and tighten. Driver Cap Motor Shaft Note: To prevent damage to tool, do not overtighten driver cap. Tighten the driver cap with finger and then tighten an additional 1/3 turn with the wrench. Step 5.
- Page 5 Collet and Accessory Assembly The collet assembly consists of a collet nut and collet. Take the collet nut and collet that were removed from your tool, or just the one in the shaft, and insert them into the tip of the flexible shaft handpiece. Insert an accessory or bit as deeply as possible to avoid wobble during use.
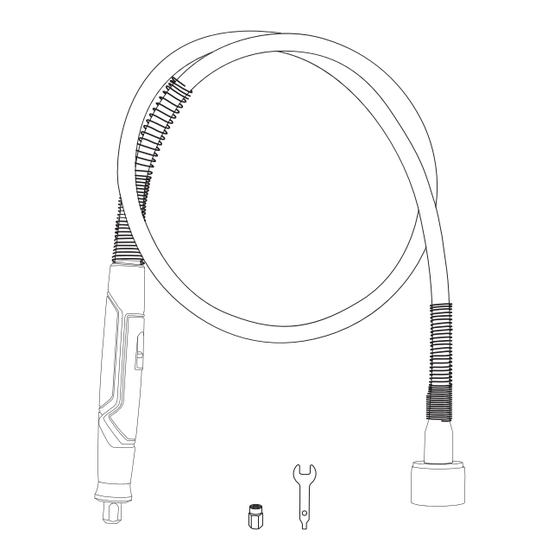
- Page 6 Too much grease will cause the unit to overheat. Reattach the flexible shaft to the rotary tool. Contents of MA1 Flaxible Shaft Attachment 1 x Flaxible Shaft Assembly(with 1/8” collect and collect nut) 1 x Driver Cap...
- Page 8 +1 516-896-6611 Mon-Fri 9AM-5PM(ET) support@apex-forge.com Shenzhen Taiduoqian Technology Co., Ltd. 406, Unit 1, Building 15, Tao Garden, No.86, Taoyuan Road, Sunxi Community, Sungang Street, Luohu District, Shenzhen Guangdong China 518000 Made in China...
Need help?
Do you have a question about the MA1 and is the answer not in the manual?
Questions and answers