Table of Contents
Advertisement
Quick Links
Advertisement
Table of Contents

Related Manuals for THOMSON 43UG4S14

Summary of Contents for THOMSON 43UG4S14
-
Page 2: Table Of Contents
SMART TV IMPORTANT Please read this manual carefully before installing and operating the TV. Keep this manual handy for further reference. Contents Safety Information ..............................6 Markings on the product .......................... 7 Warning ................................7 Wall mounting warnings ........................... 8 Simplified EU declaration of conformity ..................... - Page 3 6.4.6 Choose your subscriptions ....................... 20 6.4.7 Region or country selection ......................21 6.4.8 Disclaimer ............................... 22 Set up basic TV ............................22 6.5.1 Select your Wi-Fi network ........................ 22 6.5.2 Region or country selection ......................22 6.5.3 Disclaimer ............................... 23 Channel installation ............................
- Page 4 10.4.3 Other options ........................... 57 10.4.4 Ethernet options..........................57 10.5 Accounts and sign-in ..........................57 10.6 Privacy ................................58 10.7 Apps ................................59 10.8 System ................................59 10.8.1 Accessibility ............................60 10.8.2 About..............................60 10.8.3 Date and Time..........................61 10.8.4 Language ............................
- Page 5 11.2.3 Remove Favorite ..........................76 11.2.4 Open Favorites ..........................77 11.2.5 Audio Language ..........................78 11.2.6 Channel Options ..........................78 Multimedia Player App ..........................83 Troubleshooting ............................. 84 Technical specifications ..........................85 14.1 Country restrictions ..........................87 14.2 Licenses ................................ 87...
-
Page 6: Safety Information
1 Safety Information In extreme weather (storms, lightning) and long inactivity periods (going on holiday) disconnect the TV set from the mains. The mains plug is used to disconnect the TV set from the mains and therefore it must remain readily operable. -
Page 7: Markings On The Product
WARNING • Batteries must not be exposed to excessive heat such as sunshine, fire or the like. • Excessive sound pressure from earphones or headphones can cause hearing loss. ABOVE ALL - NEVER let anyone, especially children, push or hit the screen, push anything into holes, slots or any other openings in the case. -
Page 8: Wall Mounting Warnings
• NEVER place the television set on tall furniture (for example, cupboards or bookcases) without anchoring both the furniture and the television set to a suitable support. • NEVER place the television set on cloth or other materials that may be located between the television set and supporting furniture. -
Page 9: Data Protection
1.6 Data protection The application providers and the providers of the services may collect and use technical data and related information, including but not limited to technical information about this device, system and application software and peripherals. They may use such information to improve products or to provide services or technologies which do not personally identify you. -
Page 10: Installation
Models with Side Feet 2.2 Installation All images are for reference only. Please refer to the product itself and the QIG, which is inside the box, for more details. Models with Central Swivel Stand... - Page 11 Models with Side Feet Your TV is prepared for a VESA-compliant wall mount bracket. This is not supplied with your TV. Contact your local dealer to purchase the recommended wall mount bracket. Holes and measurements for wall mount bracket installation: W (mm) H (mm) D (mm) L (mm) 43”...
-
Page 12: Tv Buttons And Connections
3 TV buttons and connections Caution: If you want to connect a device to the TV, make sure that both the TV and the device are turned off before making any connection. After the connection is done, you can turn on the units and use them. Do not touch or be close to the HDMI, USB terminals, and prevent electrostatic discharge from disturbing these terminals while in USB operation mode, or it will cause the TV to stop working or cause an abnormal status. -
Page 13: Connections
3.2 Connections... -
Page 14: Remote Control
4 Remote Control Power button/Standby: Quick Standby / Standby / On Source/Input: Select the input of the TV Numeric buttons: Switch the channel in Live TV mode, enter a number or a letter in the text box on the screen TEXT Open and close teletext (where available in Live TV mode) Turn subtitles on and off (where available) -
Page 15: Tv Installation
5 TV installation 5.1 Set your TV Put your TV on a firm place which can handle the weight of the TV. To avoid danger, please do not position the TV near water or heat sources (such as light, candle, heater), do not block the ventilation at the back of the TV. -
Page 16: Initial Setup
6 Initial setup For the first initial setup, the on-screen setup wizard will guide you through setting up your TV. Please follow the instructions carefully to setup your TV correctly. 6.1 Pairing Bluetooth remote Press the BACK and Home buttons simultaneously on your remote control to enter the Bluetooth pairing mode. -
Page 17: Tv Setup Selection
6.3 TV setup selection Use up/down directional buttons to select your TV setup option, then press OK to confirm. Note: If you select Set up Google TV, you will require a Google account to proceed with the installation. You can use an existing Google account or create a new one. Note: Please select the Set up basic TV option if you only want to use your TV to watch TV or listen to radio programs via terrestrial antenna, cable, or satellite antenna and if you do not want to connect your TV to the internet so that you can watch video contents from streaming Apps... -
Page 18: Set Up Google Tv
6.4 Set up Google TV 6.4.1 Set up with the Google Home App To set up with the Google Home app, it is necessary to have a mobile device (smartphone or tablet) with the Google Home app installed. To install the Google Home app, please scan the QR code on your TV or search for Google Home in the app store on your mobile device. -
Page 19: Sign-In With Your Google Account
6.4.3 Sign-in with your Google account To sign in with your Google account, enter your email address and your password. 6.4.4 Google Terms of Services Before you continue, please take the time to read the General Terms and Conditions, the Terms of Use for Games, the Privacy Policy, and the available Google services. -
Page 20: Confirm Or Reject Google Services And Features
6.4.5 Confirm or reject Google services and features Carefully read through the services and functions that your TV offers. If you don’t want to activate one or more of the offered services, you can reject them by clicking No, thanks. 6.4.6 Choose your subscriptions Select which streaming applications you would like to install automatically. -
Page 21: Region Or Country Selection
6.4.7 Region or country selection Select the country you are located in to perform the installation correctly. This is important because the availability in the Google Play store and installation procedure of many applications depends on the geographic location (Geo-location). This is why certain applications are available for one country and not for others. -
Page 22: Disclaimer
6.4.8 Disclaimer Please carefully read through the Terms of Service & Privacy Policy and accept them by clicking on Next. 6.5 Set up basic TV Please select the installation option Set up basic TV if you only want to use your TV to watch TV or listen to radio programs via terrestrial antenna, cable, or satellite antenna and if you do not want to connect your TV to the internet so that you can watch video contents from streaming Apps like YouTube or Netflix. -
Page 23: Disclaimer
6.5.3 Disclaimer Please carefully read through the Terms of Service & Privacy Policy and accept them by clicking on Next. 7 Channel installation Select your TV reception type Tuner to install TV/Radio channels. The reception type options Terrestrial Aerial, Cable and Satellite are available. Highlight the available TV signal reception type option and press OK or click on the right directional button to continue. -
Page 24: Tuner Mode
If you select Skip scan, you can finish the first installation process of the TV without installing the TV channels. You can subsequently install the TV channels in the TV Settings Menu. 7.1 Tuner mode 7.1.1 Antenna If the Antenna option is selected, the TV will search for digital terrestrial and analogue broadcasts. -
Page 25: Cable
7.1.2 Cable If the Cable option is selected, the TV will search for digital cable channels. In most cable channel networks, only digital channels are available. Select Digital to continue the scan. Operator Scan: If available, the cable operators will be listed on the screen. Highlight the desired operator and press OK. -
Page 26: Satellite
Note for the installation of satellite channels for Thomson TVs installed in Austria or Germany: Our Thomson TVs have the Satellite Channels Preset function, which can only be selected and executed during the initial installation of the TVs. This function is only available if Austria or Germany was selected as installation countries during the initial installation. - Page 27 To activate it, follow the installation steps below: 1. Tuner mode menu - select Satellite as the installation option. 2. Select Satellite Channels Preset 3. Press the OK button to confirm your selection. Satellite Installation Select the installation option Digital to continue with the installation of the satellite channels. M7 Operators The M7 Operators are Pay-TV operators that offer culture- and language-specific packages for eight countries: Netherlands, Belgium, Germany, Austria, Czech Republic, Slovakia, Romania and...
- Page 28 If your TV is connected to a satellite system for reception of multiple satellites, select Yes and press OK to continue. If you are connected to the satellite system with satellite reception, select No and follow the installation instructions on the screen. To perform an automatic DiSEqC port detection, press the Yellow button on the remote control and then press the Blue button to start the channel scan.
- Page 29 If you want to cancel the ongoing search, press the Back button. The channels that have already been found will be stored in the channel list. When the initial setup is completed, results will be displayed. Press OK to finish the setup. Local satellite operator installation If available, select an operator from the list for your installation location country.
- Page 30 Column - Satellite: Choose your preferred satellite from the list and use the OK button to select it. Column - Transponder: Select and mark individual transponders from the list if you do not want to scan the entire satellite but only certain transponders.
- Page 31 Column – Reception Characteristics: Set the reception characteristics of the satellite you chose, for example Unicable On / Off or DiSEqC position of the selected satellite. By default, this column is set to single satellite reception. Note: The functionality of the Color buttons is labelled at the bottom of the screen. Press the Red button to delete a Satellite or Satellite transponder from the list.
-
Page 32: Check Settings
8 Check settings Please, verify the tuner mode settings in the system settings. If you wish to change the country/region or the channel installation type, highlight the corresponding menu option and press OK. Refer to the previous installation paragraph to set up the settings. If the installation settings are set correctly, press Start now to proceed with the final installation, Please, wait for the TV to complete the setup process. -
Page 33: Home Screen
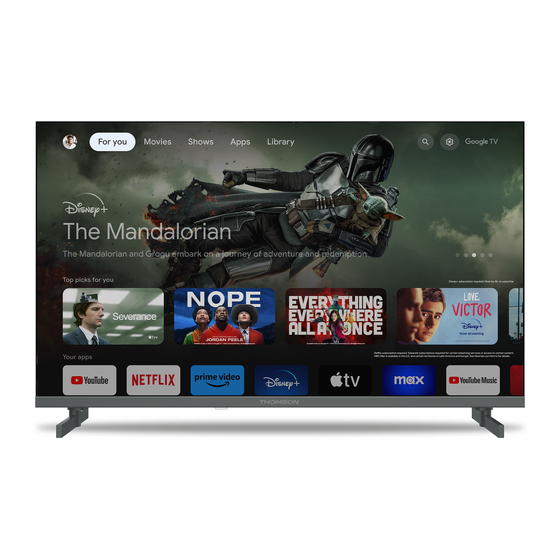
9 Home screen The Home screen is the centrepiece of your TV. From the Home screen, you can launch any installed Application, launch the Live TV application to watch TV broadcasts, watch a movie from various streaming applications or switch to a device connected to the HDMI port. You can also exit the operation of any application at any time and return to the Home screen by pressing the Home button on the remote control. -
Page 34: Google Account
Note: Depending on the settings of your TV set and your country selection during the initial setup, the Home menu may contain different elements. The second (Your apps) row is the row of applications. The most important applications for streaming services such as Netflix or YouTube as well as live TV and MMP (multimedia player) can be found here. -
Page 35: Apps
9.2 Apps Select the Apps tab on the Home screen to display applications installed on your TV. To install an application, go to the search bar and type in the name of the app. This will start a search in the Google Play Store. -
Page 36: Google Tv Search
9.4 Google TV search The search tools are located at the top right of the screen. You can either enter a word to start a search using the virtual keyboard or try voice search using the microphone built into your remote control. -
Page 37: Notification
Keyboard search – Select the search bar and press OK. The virtual Google keyboard will appear on the screen. Type the question you want answered. 9.5 Notification The notification button appears only when there is one or more unread notifications. To check them, please, navigate to the Settings icon, which will open the submenu. -
Page 38: Set Your Device Name
* The above pictures are for reference only, please refer to the product for details. 10.1 Set your device name In this menu you have the option to select the name of your TV from the list of suggested names. You can also assign a customized name for your TV. This is important for operating the Chromecast function, so your TV will be identified with the correct name. -
Page 39: Channels
10.2.1 Channels Select Tuner Mode and press OK to proceed. Then highlight one of the available options: Antenna, Cable or Satellite. Press OK and then press Back on your remote control to see the tuning options. Depending on your tuner mode choice, there will be various tuning options. Note: Before scanning for channels, you might be required to enter your PIN code to proceed. - Page 40 10.2.1.1.2 Cable Select Cable in the Tuner Mode submenu and press the Back button to return to the Channel Scan menu. Select the Cable Auto Scan or Cable Manual Scan submenu and press OK. Enter your PIN code to continue with the channel scan. Cable Auto Scan Select your Cable operator or select Others and press the OK button on your remote control to perform the automatic search for digital and analogue DVB-C channels.
- Page 41 Note for the installation of satellite channels for Thomson TVs installed in Austria or Germany: Our Thomson TVs have a Satellite Channel Preset function, which can only be selected and executed during the initial installation of the TVs. This function is only available if Austria or Germany were selected as installation countries during the initial installation of the TV.
- Page 42 The detailed explanation for the satellite installation can be found in chapter 7.3 of this User Manual. 10.2.1.2 Digital Channel Setup 10.2.1.2.1 Subtitle Setup Subtitle Setting: Set this option as Off, Basic or Hearing Impaired. If Hearing Impaired is • selected, it provides subtitles with additional descriptions for deaf and hearing impaired viewers.
- Page 43 Secondary Preferred Language: Set one of the listed languages as the second digital • subtitle language preference. If the primary selected language in the digital subtitle language option is not available, the subtitles will be displayed using this setting. 10.2.1.2.2 Teletext Setup Preferred Teletext: Set the teletext language for digital broadcasts.
- Page 44 Audio Type: Select the option Hearing Impaired, if the TV is intended to be used by a • person with hearing problems. Audio Format: Select Stereo or Multi Channel, depending on your audio system setup. • Primary Preferred Language: Set one of the listed language options as your first audio •...
- Page 45 10.2.1.2.5 Auto Service Update By setting the Auto service update to On, the TV will update and add new digital channels or services automatically. 10.2.1.2.6 HbbTv Settings Enable: Turn HbbTv On or Off. • Do Not Tracking: When it is On, it disables tracking on channels with the HbbTv feature. •...
- Page 46 10.2.1.3 Electronic Program Guide (EPG) By pressing OK on your remote control the TV redirects you to the Live TV app and opens the EPG. Experience the convenience of the Electronic Program Guide (EPG) feature on your TV, enabling you to effortlessly browse the schedule of channels currently available in your channel list.
- Page 47 Please note that the guide will not be accessible if the TV input source is locked. You can lock/unlock the input source by going to Live TV Settings > TV Options > Channel Options > Parental Controls > Source Locked. 10.2.1.4 Favorite 10.2.1.4.1...
- Page 48 • Select the channel you wish to remove • Press the Settings button on your remote control and proceed to Channels and inputs > Channels > Favorite • Select Remove from Favorites and choose from which list to remove this channel. Alternatively, you can remove channels from your favorite list in the Live TV app menu.
- Page 49 10.2.1.6 Channel Organizer To edit the channel list, first make sure the LCN function is disabled in the Digital Channel Settings menu by following these steps. For more information about the LCN function, refer to chapter 10.2.1.2.4. • Open Live TV app •...
- Page 50 10.2.1.6.2 Channel SWAP Switch the position of channels in the channel list. • Select a channel and press OK. • Select Swap in the pop-up menu and press OK to enter swapping mode. • Select the channel you wish to change the position of and press OK. •...
-
Page 51: External Inputs
Note: The number of channels will be automatically updated according to the made changes. 10.2.1.6.6 Channel MOVE Rearrange the position of channels in the channel list. • Select a channel and press OK. • Select Move in the pop-up menu and press OK. •... - Page 52 10.2.2.1 HDMI CEC Settings If the HDMI CEC (Consumer Electronics Control) function is activated, you can operate the external device connected to one of your HDMI connections using the TV remote control. For it to work properly, the connected external device also has to support the HDMI CEC function, it has to be activated and the operation of the HDMI CEC function of the connected external device has to be synchronised with the HDMI CEC function of the TV.
- Page 53 10.2.2.2 HDMI Signal Format This menu is only available if the source is set to HDMI, and it allows you to choose between three available signal formats: Standard Format: If you select this format, some high resolutions may not be supported •...
-
Page 54: Display And Sound
10.3 Display and Sound Adjust Picture, Screen, Sound and Audio output settings. Use the directional buttons to select one of the options on the right side of the screen and confirm your choice by pressing OK. 10.3.1 Picture Picture mode In the initial installation of the TV, by default, the TV is set to Eco picture mode. -
Page 55: Screen
o Picture reset: Reset the picture settings to factory default settings. o ALLM: Auto Low Latency Mode (ALLM) is a function that automatically switches between low latency mode and high picture quality mode depending on the source input from an HDMI-connected device, such as a gaming device. This menu option is only available when a PC or game console is connected to the TV. -
Page 56: Network And Internet
• Passthrough: The audio signal is forwarded to the AV receiver without TV modulation. • Auto: The TV audio output is automatically configured according to the connected AV receiver. Digital Audio Delay (ms) Set the delay of the audio output. Digital Audio Volume Set the volume level of the audio output. -
Page 57: Other Options
10.4.3 Other options • Add new network: Add networks with hidden SSID’s. • Scanning always available: You can let the location service and other apps scan for networks, even when the Wi-Fi function is turned off. Press OK to turn it on and off. 10.4.4 Ethernet options •... -
Page 58: Privacy
10.6 Privacy Change and adjust your privacy settings and app permissions. Device settings: Location: Select whether Google may collect location data according to your Wi-Fi. It is • important that you provide Google with your location because the installation of many applications depends on the Geo-location. -
Page 59: Apps
10.7 Apps Use the options in this Menu to manage the applications installed on your TV. Recently opened apps: Recently opened apps are displayed here. See all apps: Select See all apps and press OK to display a comprehensive list of all installed apps on your TV. -
Page 60: Accessibility
10.8.1 Accessibility • Captions: Turn on/off captions, adjust their language and text size and choose a caption style. • High-contrast text: Enable or disable high-contrast text. • Text to speech: Enable or disable Google’s text to speech function. This function will automatically voice text displayed on your screen. -
Page 61: Date And Time
• Model: Shows you the model of your TV. • Android TV OS version: Shows you which OS version is installed on your TV. • Android TV OS security patch level: Shows the date of the security patch installed on your TV. 10.8.3 Date and Time Set the date and time on your TV. -
Page 62: Cast
• Energy saver: Adjust the time of inactivity, after which the TV turns itself off automatically. 10.8.9 Cast When running the Chromecast function from the mobile device that is in the same network as your TV, your TV will be recognised as a Google Cast device and allows the Google Assistant and other services to wake up your TV and respond to connected Chromecast devices. -
Page 63: System Running Time
Network Standby: In network standby mode, the standby mode of your ▪ TV can be controlled via Special apps or other network services. Activating this function causes more power consumption. o Recording Storage: View the connected external storage device used for the recording function. -
Page 64: Help And Feedback
10.10 Help and feedback Do you have any questions or want to leave some feedback regarding Google TV? Visit Google TV Help at g.co/tv/help. 11 Live TV Select the Live TV application on the Home screen and press OK to start it. When you start Live TV for the first time after installing the TV, you will be guided through several dialog screens. -
Page 65: Channels Menu
11.1 Channels Menu 11.1.1 Program Guide Experience the convenience of the Electronic Programme Guide (EPG) feature on your TV, enabling you to effortlessly browse the schedule of channels currently available in your channel list. Please note, the availability of this function depends on the programme. To access the electronic programme guide while in Live TV mode, simply select the corresponding menu option or press the EPG button on your remote control. -
Page 66: New Channels Available
On the right side of the screen, you can see View, Timer REC or Reminder selection boxes. View: Select this box and press OK to view the current programme. • Timer REC: Select this box to set a timer recording option for the selected programme. •... -
Page 67: Recorded Programs
11.1.3 Recorded Programs Note: Connect an external storage device like a USB stick or HDD/SSD to one of the TV’s USB ports to store your recorded TV broadcast. Please note that the USB stick or HDD/SSD has to be formatted in FAT32 or NTFS file systems and should have at least 32 GB for convenient recording. - Page 68 11.1.3.1 Current Recordings View programs that are currently being recorded. 11.1.3.2 Scheduled Recordings View a list of all future programs that are scheduled to be recorded.
- Page 69 11.1.3.3 Recorded Programs View all programs that have already been recorded and are stored on a connected external storage device. 11.1.3.4 Recording Error List View a list of recordings that might be faulty. 11.1.3.5 Reminders View a list of all TV programs for which a reminder has been set.
-
Page 70: Start Recording
11.1.4 Start Recording Select Start Recording and press OK to start recording the current channel. Optionally select the recording duration. Select Stop Recording and press OK to stop the ongoing recording. -
Page 71: Start Time Shift
11.1.5 Start Time Shift Start the Time Shift function. Select the Pause symbol and press the OK button. The current TV programme will be paused. To resume playback, select the Play symbol and press the OK button. - Page 72 If you want to cancel the Time Shift function and resume watching the current TV broadcast service in real time, press the Back button on the remote control and confirm your choice in the dialog screen on the TV.
-
Page 73: Tv Options
11.2 TV Options To view the TV Options, press OK in Live TV mode and use the directional buttons to scroll to the TV Options menu. 11.2.1 Subtitle Language View the available subtitle options of the current TV program. Select your preferred option and confirm your choice with the OK button. -
Page 74: Add Favorite
11.2.2 Add Favorite Create favorite lists and add your preferred channels to it. Note: You only have four favorite lists available. Select one of the lists and press the OK button to add the current channel to the selected favorite list. In Live TV mode, press the Left directional button to display the TV channel lists broadcast sources and favorite lists. -
Page 76: Remove Favorite
11.2.3 Remove Favorite Remove the current TV channel from one or all of your favorite lists. -
Page 77: Open Favorites
11.2.4 Open Favorites Display the created favorite lists. -
Page 78: Audio Language
11.2.5 Audio Language Some TV channels offer multiple audio languages. Select your preferred audio language in this menu. 11.2.6 Channel Options 11.2.6.1 Customize channel list Select channels from the list that you do not want to have displayed in the channel list. For this use the right directional button on your remote control. - Page 79 11.2.6.2 Parental Controls Set various parental control options. To access them, you’ll need to enter the PIN code you set after opening the Live TV app for the first time. Enabled / Disabled: Enable or disable the parental control function. •...
- Page 80 11.2.6.3 CI CAM Pin Code Activate or deactivate the CI CAM PIN code entering function if available or required for the connected CI CAM module. 11.2.6.4 Common Interface Access the connected CI module Menu by pressing the OK button.
- Page 81 11.2.6.5 Select recording storage device Determine which of the connected external USB storage devices like a USB Stick or HDD/SSD will be used when recording a TV program.
- Page 82 11.2.6.6 Open-source licenses View information about open-source licenses. 11.2.6.7 Version View the software version of the TV device.
-
Page 83: Multimedia Player App
12 Multimedia Player App If you want to play multimedia content such as movies, music or photos from external storage devices connected to the USB port, launch the multimedia player app from your Home screen. Note: Connected USB storage devices, such as HDD/SDD or USB sticks have to be formatted in FAT32 or NTFS. -
Page 84: Troubleshooting
Dolby Atmos is not o Confirm that your AV Receiver / Amplifier supports Dolby Atmos. working with o Connect your Thomson TV using the HDMI eARC port to the HDMI In connected streaming port on your AV Receiver / Amplifier. -
Page 85: Technical Specifications
14 Technical specifications Thomson Google TV UHD Side Feet 43UG4S14 50UG4S14 55UG4S14 65UG4S14 AC 100-240V AC 100-240V AC 100-240V AC 100-240V Operating Voltage 50/60Hz 50/60Hz 50/60Hz 50/60Hz Audio Output Power 2 x 8 2 x 10 2 x 10 2 x 10... - Page 86 Thomson Google TV QLED Central Stand 43QG5C14 50QG5C14 55QG5C14 65QG5C14 75QG5C14 AC 100-240V AC 100-240V AC 100-240V AC 100-240V AC 100-240V Operating Voltage 50/60Hz 50/60Hz 50/60Hz 50/60Hz 50/60Hz Audio Output Power 2 x 8 2 x 10 2 x 10...
-
Page 87: Country Restrictions
All rights reserved. ©2024 StreamView GmbH, Franz-Josefs-Kai 1, 1010 Vienna, Austria. This product has been manufactured and sold under the responsibility of StreamView GmbH. THOMSON, and the THOMSON logo are trademarks used under license by StreamView GmbH – further information at www.thomson-brand.com.
Need help?
Do you have a question about the 43UG4S14 and is the answer not in the manual?
Questions and answers
Is it possible to use the fast forward button in the TimeShift service?