
Related Manuals for brena TWW01C

Summary of Contents for brena TWW01C
- Page 1 Face &Vehicle Detection Surveillance System User Manual Model:TWW01C brena.uk Visit our website for a more detailed explanation of our products where you can watch our videos and be setup within minutes...
-
Page 2: Table Of Contents
Content Warrantee Terms & Conditions..............................Page 1 Camera and DVR Specifications..............................Page 2-3 Power Adapter Safety Instructions...............................Page 4 Dvr and Camera installation................................Page 5 Camera Cover replacement and Camera Bracket adjustments....................Page 6 Password Setup....................................Page 7-8 General Settings.....................................Page 8-9 Network Settings...................................Page 9-10 Email Alerts.....................................Page 10-11 Record Settings....................................Page 12 Motion Detection Settings................................Page 13 Playback......................................Page 14-15... -
Page 3: Warrantee Terms & Conditions
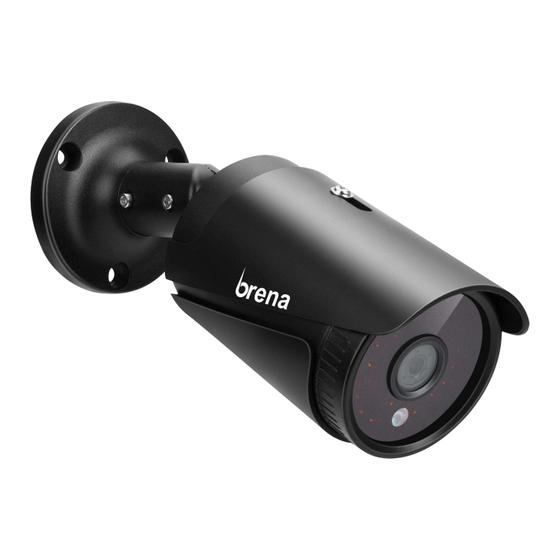
Brena. The end user is responsible for all freight charges incurred to send the product to Brena's repair center. The end user is responsible for all shipping costs incurred when shipping from and to any country other than the country of origin. - Page 4 Camera Specifications: Key features: Parameters: Specifications 5MP(2560x1920)FHD resolution ⚫ XC5209+2336 Zero-latency data transmission, full real-time, high fidelity ⚫ Sensor Long transmission distance, coaxial transmission up to 500 meters 2/3 inch CMOS ⚫ Support UTC, enable OSD by the back-end Signal format AHD/TVI/CVI/CVBS ⚫...
- Page 5 DVR Specifications: Model: DVR-BR0108C Audio Audio G.711A compression Intercom Support Record Record mode Manual>alarm>motion detection>timing & Local Playback 4ch(coaxial input mode) Board:Model AHB8008T-LY playback Search mode Search by time, calendar, event, channel System Main processor Technical grade embedded chip NT98321 Storage Video storage HDD, network...
- Page 6 POWER ADAPTER SAFETY INFORMATION Safety Instructions: Operating Instructions: Specifications: • Please note the charger can become warm during • Plug charger into wall socket • Model: SA0241-1202000BB - 12V/2A 24W operation • Connect to CCTV equipment • Input 100-240Vac, 50/60Hz •...
-
Page 7: Dvr And Camera Installation
DVR and Camera Installation... - Page 9 DVR Password Setup By default the DVR has a random username and password created at production. For safety reasons please click on Modify Pwd to change these credentials and create your own Username & Password MAIN MENU Username Password of your choice and click Username Password on the...
-
Page 10: Password Setup
DVR Password Setup (Continued) Password setup is successful, click on OK. You can now login with your new credentials General Settings: Main Menu System General... -
Page 11: Network Settings
General Settings(Continued) Network Settings Main Menu System DHCP Enable Network Net Test... -
Page 13: Email Alerts
Email Alerts(Continued) Email Net Service smtp.gmail.com Your Gmail Address Your Gmail Password Any Name(Example: Home) Your Gmail as above Alarm Message (or anything you want) -11-... -
Page 16: Playback
Playback Playback Search Refresh -14-... -
Page 17: Hard Drive Setup
Playback(Continued) Hard Drive Setup Time Main Menu, Advanced Storage -15-... - Page 18 Mobile Phone Setup For Remote Viewing Via App Main Menu Info Version XMEYE XMEYE PRO...
- Page 19 Mobile Phone Setup For Remote Viewing Via App(Continued) Xmeye Xmeye -17-...
- Page 20 Mobile Phone Setup For Remote Viewing Via App(Continued)
- Page 21 Mobile Phone Setup For Remote Viewing Via App(Continued) -19-...
-
Page 22: Usb Backup
USB Backup 2.Select the type of playback you want to backup(example: 1. Connect a usb to one of the usb ports at the back of the dvr . Playback Common Playback), select date and press Right click on the mouse and go to 4. - Page 23 USB Backup(Continued) 5. Select the usb drive you want to copy to and click on the 6. Select the start-finish time and the backup format (H26X, BACKUP button AVI,MP4) You have successfully backed up your data, remove the usb from the dvr START 7.
-
Page 24: Hard Disk Installation
Hard Disk Installation Our systems come complete with a pre installed hard drive (you do not have to do this part) This is for future reference if you ever decide to upgrade or increase your storage/memory To see whether hard drive is working, please refer to the hard drive setup section in the manual -22-... - Page 25 1. No interface displayed on the monitor after the device has started up. 2. No camera images showing up on the DVR after the device has started up. then t n alternative adaptor adaptor 3. You can not view on the mobile phone and computer. -23-...
-
Page 26: Faq & Troubleshooting
FAQ & Troubleshooting(Continued) 4. No image displayed on some cameras 5. Video can not be recorded. Make sure you have correctly chosen the record mode and not stopped recording by mistake If you still have no recordings check that the hard drive cables are installed correctly and that the hard drive is available in the storage section 6. - Page 27 Web: brena.uk Email: support@brena.uk brena.uk@gmail.com Address: 61 Bridge Street, Kington HR5 3DJ -25-...
- Page 28 Brena Address: 61 Bridge Street, Kington HR5 3DJ...
Need help?
Do you have a question about the TWW01C and is the answer not in the manual?
Questions and answers