Table of Contents
Advertisement
AV Receiver
TX-SR504
Instruction Manual
Thank you for purchasing an Onkyo AV Receiver.
Please read this manual thoroughly before making
connections and plugging in the unit.
Following the instructions in this manual will enable
you to obtain optimum performance and listening
enjoyment from your new AV Receiver.
Please retain this manual for future reference.
Contents
Introduction ..................................... 2
Connection .................................... 16
Turning On & First Time Setup..... 32
Basic Operation
Playing your AV components ....... 36
Listening to the Radio .................. 38
Enjoying the Listening Modes ..... 48
Advanced Operation ..................... 54
Troubleshooting ............................ 62
E
n
Advertisement
Table of Contents

Related Manuals for Onkyo TX-SR504S


Summary of Contents for Onkyo TX-SR504S
-
Page 1: Instruction Manual
Instruction Manual Listening to the Radio ....38 Enjoying the Listening Modes ..48 Thank you for purchasing an Onkyo AV Receiver. Please read this manual thoroughly before making connections and plugging in the unit. Following the instructions in this manual will enable you to obtain optimum performance and listening enjoyment from your new AV Receiver. -
Page 2: Important Safety Instructions
Leave 20 cm (8") of free space at the top and sides 14. Refer all servicing to qualified service personnel. and 10 cm (4") at the rear. The rear edge of the shelf Servicing is required when the apparatus has been or board above the apparatus shall be set 10 cm (4") -
Page 3: Precautions
This is normal. out the permission of the copyright holder. • If you do not use this unit for a long time, it may not work properly the next time you turn it on, so 2. AC Fuse—The AC fuse inside the unit is not user- be sure to use it occasionally. -
Page 4: Supplied Accessories
ASTA or BSI to BS1362 and have the same ampere rating as that indicated on the plug. Check for the ASTA mark or the BSI mark on the body of the fuse. If the power cord’s plug is not suitable for your socket Power-plug adapter outlets, cut it off and fit a suitable plug. -
Page 5: Features
Features Amplifier • 7-channel amplifier • 75 watts per channel rms into 8 ohms, 2 channels Manufactured under license from Dolby Laboratories. driven, 20 Hz to 20 kHz, less than 0.08% total har- “Dolby”, “Pro Logic” and the double-D symbol are regis- tered trademarks of Dolby Laboratories. -
Page 6: Enjoying Home Theater
Enjoying Home Theater Speaker Sets A and B You can use two sets of speakers with the AV receiver: speaker set A and speaker set B. Speaker set A should be used in your main listening room for up to 7.1-channel playback. -
Page 7: Table Of Contents
Assigning Digital Inputs to Input Sources ..33 Changing the Input Display ......33 Troubleshooting ........62 Minimum Speaker Impedance Setup If you can’t resolve an issue, try resetting the AV (not North American model)......34 receiver by holding down the [VIDEO 1] button Speaker Configuration.........34 and pressing the [STANDBY/ON] button. -
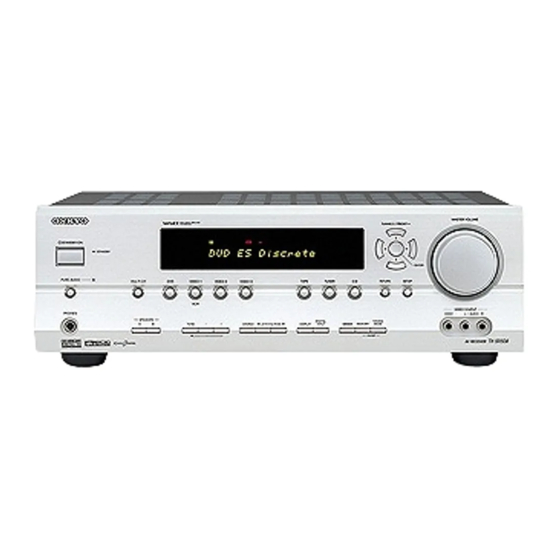
Page 8: Front Panel
(see page 39). With the setup menus, they Lights up when the AV receiver is on Standby and work as arrow buttons and are used to select and set flashes while a signal is being received from the items. The ENTER button is also used with the remote controller. - Page 9 Lights up when XM radio is selected. A and B speaker indicators (6, 36) Indicator A lights up when speaker set A is on. Indi- MEMORY (39): Lights up when presetting radio cator B lights up when speaker set B is on.
-
Page 10: Rear Panel
A DVD player, TV, or other component that sup- The VIDEO 1 inputs and outputs can be used to ports component video can be connected here. connect a VCR. The VIDEO 2 inputs can be used to connect another video source (e.g., cable/satellite AM ANTENNA receiver, set-top box, etc). -
Page 11: Remote Controller
• Don’t mix new and old batteries or different types of batteries. • If you intend not to use the remote controller for a long time, remove the batteries to prevent damage from leakage or corrosion. • Expired batteries should be removed as soon as possi-... -
Page 12: Using The Remote Controller
RECEIVER/TAPE mode is used to control the AV used to control up to seven different components. The receiver. It can also be used to control an Onkyo cassette remote controller has a specific operating mode for use recorder connected via with each type of component. - Page 13 Used to select AM and FM radio stations and XM SP A/B button (6, 36) radio channels directly. Used to turn speaker sets A and B on or off. CH +/– button (39) Used to select radio presets. Arrow [ ] and ENTER buttons Used to select and adjust settings.
- Page 14 Remote Controller—Continued ON/STANDBY button DVD Mode Sets the DVD player to On or Standby. By default, the remote controller is set to control an Number buttons Onkyo DVD player. Used to enter title, chapter, and track numbers and times for locating specific points.
- Page 15 Used to enter track numbers and times for locating specific points on CD/MD players. To select the input source, press: DISC/ALBUM +/– button Selects discs on a CD changer, or the next or previ- CD player ous album on an HDD-compatible component. RECEIVER...
-
Page 16: Connection
The supplied speaker labels are also color-coded and you should attach them to the positive (+) side of each speaker cable in accordance with the above table. All you need to do then is to match the color of each label to the corresponding speaker terminal. - Page 17 Make sure that the terminals are gripping the bare wires, not the insulation. Note: While speaker set B is on, speaker set A is reduced to 5.1-channel playback. Connecting a Powered Subwoofer Using a suitable cable, connect the AV receiver’s SUB- WOOFER PRE OUT to the input on your powered sub- woofer.
-
Page 18: Connecting Antennas
This section explains how to connect the supplied indoor Connecting the AM Loop Antenna FM antenna and AM loop antenna, and how to connect commercially available outdoor FM and AM antennas. The supplied indoor AM loop antenna is for indoor use only. -
Page 19: Connecting An Outdoor Fm Antenna
■ Using a TV/FM Antenna Splitter It’s best not to use the same antenna for both FM and TV reception, as this can cause interference problems. If cir- cumstances demand it, use a TV/FM antenna splitter, as shown. -
Page 20: Connecting Your Components
Analog audio Left (white) Left (white) The AV receiver’s optical digital jacks have shutter-type covers that open when an optical plug is inserted and Right (red) Right (red) close when it’s removed. Push plugs in all the way. Composite video... -
Page 21: Connecting Audio And Video Signals To The Av Receiver
Connecting Audio and Video Signals to the AV Receiver By connecting both the audio and video outputs of your DVD player and other AV components to the AV receiver, you can switch the audio and video signals simultaneously simply by changing the input source on the AV receiver. -
Page 22: Connecting A Tv Or Projector
If your TV has no audio outputs, connect an audio output from your VCR or cable or satellite Hint! receiver to the AV receiver and use its tuner to listen to TV programs through the AV receiver (see pages 25 and 27). -
Page 23: Dvd Player
• To enjoy Dolby Digital and DTS, use connection . (For recording, use , or • If your DVD player has main left and right outputs and multichannel left and right outputs, be sure to use the main left and right outputs for connection Connection AV receiver Signal flow... - Page 24 L/R, CENTER, SURROUND L/R, SURR BACK L/R, and SUBWOOFER jacks to the 7.1-channel analog audio output on your DVD player. If your DVD player has a 5.1-channel analog audio output, don’t connect anything to the AV receiver’s SURR BACK L/R jacks.
-
Page 25: Vcr Or Dvd Recorder For Playback
Connecting Your Components—Continued Connecting a VCR or DVD Recorder for Playback With this hookup, you can use your VCR’s tuner to listen to your favorite TV programs via the AV Hint! receiver, useful if your TV has no audio outputs. -
Page 26: Vcr Or Dvd Recorder For Recording
Step 1: Choose a video connection that matches your VCR or DVD recorder ( ), and then make the connec- tion. The video source to be recorded must be connected to the AV receiver via the same type of connection. Step 2: Make the audio connection... -
Page 27: Satellite, Cable, Set-Top Box, Or Other Video Source
Connecting Your Components—Continued Connecting a Satellite, Cable, Set-top box, or Other Video Source With this hookup, you can use your satellite or cable receiver to listen to your favorite TV programs Hint! via the AV receiver, useful if your TV has no audio outputs. -
Page 28: Cd Player Or Turntable
CD player built-in phono preamp • With connection , you can listen to and record audio from your CD player or turntable and listen via speaker set B. • To connect the CD player digitally, use connection . (For recording, use... -
Page 29: Hdd-Compatible Component
Connecting Your Components—Continued Connecting an HDD-compatible Component As of this printing, the Onkyo Remote Interactive Dock is the only HDD-compatible component available. ■ For HDD-compatible components that ■ For HDD-compatible components that don’t support video support video Connect your HDD-compatible component’s analog Connect your HDD-compatible component’s analog... -
Page 30: Cassette, Cdr, Minidisc, Or Dat Recorder
FRONT CENTER SPEAKERS SPEAKERS A SPEAKER The other component’s power switch can then be left in the ON position so that it turns on or off when the AV AC OUTLET AC 120V 60Hz SWITCHED TOTAL 120W 1A MAX. receiver is set to On or Standby. -
Page 31: Connecting Onkyo Components
When you start playback on a component connected via , if the AV receiver is on Standby, it will automatically turn on and select that component as the input source. Similarly, when the AV receiver is set to Standby, all compo- nents connected via will also go on Standby. -
Page 32: Turning On The Av Receiver
Smooth Operation in a Few Easy Steps To ensure smooth operation, here’s a few easy steps to help you configure the AV receiver before you use it for the very first time. These settings only need to be made once. -
Page 33: First Time Setup
Press the [DIGITAL INPUT] but- HDD can be selected for the TAPE input selector or ton repeatedly to select COAX, DIGITAL VIDEO 2 input selector, but not both at the same time. INPUT OPT1, OPT2, OPT3, or “– – – –” (analog). -
Page 34: Minimum Speaker Impedance Setup (Not North American Model)
(not North American model) Use the Up and Down [ buttons to select “1. SP Config,” If the impedance of any of the connected speakers is 4 ohms or more but less than 6, set the minimum speaker and then press [ENTER]. - Page 35 To turn off the test tone, press the [TEST speakers are large. TONE] button again. None: Select if no surround back • If the test tone is not produced by a speaker, or it’s speakers are connected. produced by a speaker other than that shown on Notes: the display, you may have wired the speakers •...
-
Page 36: Playing Your Av Components
See page 6 for more information about speaker sets A and B. Start playback on the source component. To watch a DVD or other video source, on your TV, select the video input that’s con- nected to the AV receiver’s MONITOR OUT jack. -
Page 37: Using The Multichannel Dvd Input
*1 When AM or FM radio is used, the band, preset num- ber, and frequency are displayed. *2 If the input signal is analog, or AM or FM radio is Using the Multichannel DVD Input selected, no format information is displayed. If the... -
Page 38: Listening To The Radio
The American model changes FM frequency in 0.2 MHz steps, 10 kHz steps for AM. For other models it’s Press the [SETUP] button, use the Up 0.05 MHz steps for FM and 9 kHz (or 10 kHz) steps for and Down [ ] buttons to select “0. -
Page 39: Presetting Am/Fm Stations And Xm Channels
MODE CLEAR TUNING MODE MEMORY You can store a combination of up to 40 of your favorite AM/FM radio stations and XM channels as presets. Tune into the AM/FM station or XM channel that you want to store as a preset. - Page 40 (e.g., This is not a malfunction. Jazz, Rhythm and Blues, Folk, • If the signal from an RDS station is weak, RDS data Country, and Reggae). may be displayed intermittently or not at all. Alarm...
- Page 41 INPUT RT/PTY/TP MEMORY MODE CLEAR • If the message “No Text Data” appears on the display, no RT information is available. You can search for stations that broadcast traffic news. Finding Stations by Type (PTY) Use the [TUNER] input selector TUNER 3–5...
-
Page 42: Listening To Xm Satellite Radio ® (North American Models Only)
ENTER MULTI CH VIDEO VIDEO VIDEO TAPE TUNER RETURN SETUP There is a world beyond AM and FM. It is XM Satellite VIDEO 3 INPUT PHONES VIDEO AUDIO Radio. XM offers more than 160 digital channels of SPEAKERS DIGITAL TUNING... - Page 43 Before you can use XM Satellite Radio, you must first followed by the [ENTER] button sign up for an account. You’ll need a major credit card to select “Channel Search” and your XM Satellite Radio ID, which you can get from mode.
- Page 44 Artist Song title Remote controller Listening mode RETURN Notes: • If the category, artist, or song title is not available, “- - -” will be displayed instead. • The listening mode is displayed only when speaker set A is on.
- Page 45 The XM Passport System is not connected properly. Check the connection. SETUP Positioning the XM Passport System You can check the signal strength of the XM radio signal and adjust the position of the XM Passport System The XM user encryption code is being updated. Please accordingly.
-
Page 46: Common Functions
–10 dB to +10 dB in 2 dB steps. ■ Treble You can boost or cut high-frequency sounds output by LISTENING MODE the front speakers from –10 dB to +10 dB in 2 dB steps. STEREO SURROUND AUDIO... -
Page 47: Using The Sleep Timer
Common Functions—Continued Using the Sleep Timer Adjusting Speaker Levels With the sleep timer, you can set the AV receiver so that You can adjust the volume of each speaker in speaker set it turns off automatically after a specified period. -
Page 48: Using The Listening Modes
CLEAR ■ LISTENING MODE [ ] buttons Pressing these buttons repeatedly cycles through all PURE AUDIO of the listening modes that can be used with the cur- STEREO rent input source. LISTENING MODE ■ [PURE AUDIO] button (not North American model) This button selects the Pure Audio listening mode. - Page 49 Full Mono *1. In the Pure Audio and Direct listening modes, 32 kHz, 44.1 kHz, and 48 kHz PCM is processed at 64 kHz, 88.2 kHz, and 96 kHz respectively. In listening modes other than Pure Audio, Direct, and Stereo, 64 kHz, 88.2 kHz, and 96 kHz PCM is processed at 32 kHz, 44.1 kHz, and 48 kHz respectively.
-
Page 50: About The Listening Modes
This is the most common digital surround- high fidelity and stunning surround sound. sound format, and it’ll put you right in the middle of the action, just like being in a movie theater or concert hall. The illustration shows which speakers are active in each listening mode with 7.1 channel speaker sys-... - Page 51 The center speaker outputs the sound as it is, DVDs that bear the DTS-ES logo, especially those with while reverb is applied to the sound output by the other a DTS-ES Matrix soundtrack. speakers, giving presence to even mono material.
-
Page 52: Using The Late Night Function
• The effect of the Late Night function depends on the Dolby Digital material that you are playing, and with some material there will be little or no effect. • The Late Night function is set to Off when the AV receiver is set to Standby. - Page 53 DVD input. sound field forward. Lower settings move it backward. You can select 0 dB (default), +5 dB, +10 dB, or +15 dB. If the stereo image feels too wide, or there’s too much If you find that your subwoofer is too loud, try the surround sound, move the sound field forward to...
-
Page 54: Recording
See pages 20–31 for information on connecting your AV components. In the following example, audio from the CD player con- nected to the CD IN jacks, and video from the camcorder Use the input selector buttons to connected to the VIDEO 3 INPUT VIDEO jack are... -
Page 55: Advanced Setup
This function can only be set if in the Speaker Configuration on page 34, the Sub- woofer setting is set to Yes (step 3), and the Front setting is set to Large (step 4). Use the Down [ ] button to select “Double Bass,”... - Page 56 • The Surround and Surround Back distances can be set up to 5 ft. (1.5 m) more or 15 ft. (4.5 m) less than the Measure and make a note of the Front distance. For example, if the Front distance is set distance from each speaker to to 20 ft.
-
Page 57: Digital Input Signal Formats
DIMMER MEMORY MODE CLEAR • A quick way to adjust the speaker levels is to press the remote controller’s [TEST TONE] button to turn on the test tone, use the [LEVEL–] and [LEVEL+] but- DIGITAL INPUT tons to adjust the levels, and use the [CH SEL] button to select the speakers. -
Page 58: Correcting Sound And Picture Sync
Correcting Sound and Picture Sync When using progressive scanning on your DVD player, you may find that the picture and sound are out of sync. With this setting, you can correct this by delaying the audio signals. You can set it from 0 to 100 milliseconds (ms) in 20 millisecond steps. -
Page 59: Controlling Other Components
[DISPLAY] button tion explains how to enter the necessary remote control for 3 seconds. code for the component that you want to control (e.g., M D/CDR The REMOTE MODE button lights up. DVD player, TV, or VCR). -
Page 60: Remote Control Codes For Onkyo Components Connected Via
While holding down the REMOTE receiver, not the component. This allows you to control MODE button that you want to components that are out of view, in a rack, for example. REMOTE MODE reset, press the [L NIGHT] button for 3 seconds. - Page 61 Controlling Other Components—Continued To control another component, point the remote controller at it and use the buttons explained below. (You must select the appropriate remote control mode first.) With some AV components, certain buttons may not work as expected, and some may not work at all.
-
Page 62: Troubleshooting
• Specify the speaker distances and adjust the individual speaker levels (pages 56, 57). • Make sure that the power cord is plugged into the wall • The input signal format is set to PCM or DTS. Set it to outlet properly. Auto (page 57). - Page 63 Can’t get 6.1- or 7.1-channel playback • The AV receiver does not convert between formats, so • While speaker set B is on, speaker set A is reduced to if a video source component is connected to a compo- 5.1-channel playback.
- Page 64 Others The remote controller doesn’t work The sound changes when I connect my head- • Make sure that the batteries are installed with the cor- phones rect polarity (page 11). • When a pair of headphones is connected, the listening •...
- Page 65 [SETUP] back in again. button. 2. Use the Up and Down [ ]/[ ] buttons to select a setting (see below). Onkyo is not responsible for damages (such as CD rental fees) due to unsuccessful recordings caused by 3.
-
Page 66: Specifications
European: AC 230-240 V, 50 Hz per channel, 8 ohm loads, 2 channels Others: AC 120/220-240 V, 50/60 Hz driven from 20 Hz to 20 kHz, with a AC 230-240 V, 50Hz maximum total harmonic distortion of AC 220-230 V, 50/60 Hz 0.08%... - Page 67 Memo...
- Page 68 Sales & Product Planning Div. : 2-1, Nisshin-cho, Neyagawa-shi, OSAKA 572-8540, JAPAN Tel: 072-831-8023 Fax: 072-831-8124 ONKYO U.S.A. CORPORATION 18 Park Way, Upper Saddle River, N.J. 07458, U.S.A. Tel: 201-785-2600 Fax: 201-785-2650 http://www.us.onkyo.com/ ONKYO EUROPE ELECTRONICS GmbH Liegnitzerstrasse 6, 82194 Groebenzell, GERMANY Tel: +49-8142-4401-0 Fax: +49-8142-4401-555 http://www.eu.onkyo.com/...
- Page 69 [DISPLAY] [DISPLAY] durant 3 secondes. durante 3 segundos. 2. Entrez les 4 chiffres du code de télécommande avec 2. Utilice los botones de número para introducir el les boutons numériques. código de 4 dígitos para control remoto.
- Page 70 DVD Codes DVD Player DVD Player DVD Player Acoustic Solutions 0730, 0713 Kreisen 1421 Thomson 0551 Advent 1016 1321 Toshiba 1045, 1154, 1510 Aiwa 0641 Lecson 1533 TRANS-continents 1321 Akai 0899, 1115 Lenoxx 0838 Umax 0690 Akura 0898 0801 Vizio...
- Page 71 Fisher 0179, 1325 1373 Garrard 0393 1208 Genexxa 0426 1208 GoldStar 1208 Onkyo 1322(RI), 1323 1296 Pioneer 1062, 1087, 0192 Harman/Kardon 0173, 0426, 1202 0053 0192 Sony 0100, 1364 Inkel 0180 1208 1294 Yamaha 0888, 1292 Kenwood 0826, 0028, 0037...
- Page 72 TV Codes 0264 Brandt 0109, 0335 Cybertron 0218 Acura 0009 Broksonic 0236, 0463, 0180 0154, 0451, 0180, 0030, 0037, 0634, 0653, 0108, 0092, 0218 Addison 0108, 1150, 0880, 1150 0037, 0698, 0218, Daewoo Bush 0700, 0672, 0661, Admiral 0463, 0163...
- Page 73 0047, 0051, 0451, ICeS 0218 1265, 0060, 0030, 0180, 0030, 1447, 0037, 0714, 0108, Imperial 0370, 0418 1454, 0560, 0092, 0001, 0056, 0442, 0264, 0001, 0009, Imperial Crown 1147, 1347 0644, 0700, 0856, 0374, 0661 1148, 1378 0037 Indiana 0037 Liesenk &...
- Page 74 TV Codes 0154, 0156, 0051, 0037, 0264, 0009, Seleco 0163 Protech 0053, 0030, 0264, 0418 Semivox 0180 0508, 0009, 0056, 0030, 0001, 0009, Semp 0156, 1356 Proton 0170, 1150, 1182, 0056, 0644 Sentra 0035 1378, 1456 Pulsar 0017 Shancha 0264...
- Page 75 0037, 0698, 0712, White 0463, 0037, 0623 Teac 0264, 0009, 0418, Westinghouse 1149 Xenius 0661 Technics 0250, 0051 0698, 0264, 0009, Xiahua Technisson 0714 0773 Techwood 0051, 0056 Xianghai 0009 0051, 0264, 0218, Xiangyang 0264 Teco 0653, 0009, 0092 Xiangyu...
- Page 76 VCR Codes 1972 GoldHand 0072 Mind 1972 Admiral 0209, 0479 0209, 0226, 0225, Mitsubishi 0041, 0807, 1343 GoldStar 0480, 1237 0348, 0307, 0352, Motorola 0035 Aiwa 0124, 0479, 1291 Goodmans 0072, 0637 Multitech 0072 Akai 0041, 0315, 0175 Graetz 0041...
- Page 77 DBS/PVR Combination TV/VCR Combination 0047, 0046, 0159, Hughes Network Aiwa 0479 Sanyo 0739 1330 Systems Broksonic 0002, 0479, 1479 Saville 0352 Philips 0739 Citizen 1278 Schaub Lorenz 0041 Samsung 0739 Colt 0072 Schneider 0072 Curtis Mathes 1035 Scott 0184, 0121...
- Page 78 Canal Digital 0853 Vortex View 0883 Funai 0019 Canal+ 0853 Zenith 0000, 0525, 0899 Gehua 0476 CanalSatellite 0853, 1339, 1853 General Instrument 0476, 0810, 0003 Chaparral 0216 Cable/PVR Combination GoldStar 0144 1367 Americast 0899 Hamlin 0009, 0273 Comag 1412 Digeo...
- Page 79 Satellite Receiver Satellite Receiver Satellite Receiver Hirschmann 0173 Preisner 0132, 0262 0887 Hisense 1535 Proscan 0392, 0566 1075, 1232, 1334, Zehnder 1412 0819, 1250, 1284, Proton 1535 Hitachi 1525 Zenith 1856 1367, 1404 0775, 1775 Radiola 0200 Hughes 0749, 1749, 1442...
- Page 80 Sales & Product Planning Div. : 2-1, Nisshin-cho, Neyagawa-shi, OSAKA 572-8540, JAPAN Tel: 072-831-8023 Fax: 072-831-8124 ONKYO U.S.A. CORPORATION 18 Park Way, Upper Saddle River, N.J. 07458, U.S.A. Tel: 201-785-2600 Fax: 201-785-2650 http://www.us.onkyo.com/ ONKYO EUROPE ELECTRONICS GmbH Liegnitzerstrasse 6, 82194 Groebenzell, GERMANY Tel: +49-8142-4401-0 Fax: +49-8142-4401-555 http://www.eu.onkyo.com/...
Need help?
Do you have a question about the TX-SR504S and is the answer not in the manual?
Questions and answers
How to hook speakers up correctly and get sound
To connect speakers to the Onkyo TX-SR504S and get sound:
1. Speaker Setup:
- Connect up to 7 speakers and a powered subwoofer.
- Use speakers with impedance:
- North American models: 6–16 ohms.
- Other models: 4–16 ohms (set minimum impedance to "4 ohms" if any speaker is under 6 ohms).
2. Speaker Channels (based on number of speakers):
- 2 speakers: Front Left, Front Right.
- 3 speakers: Add Center.
- 4 speakers: Add Surround Left and Right.
- 5-7 speakers: Add Surround Back as needed.
3. Wiring Instructions:
- Strip insulation (Set A: 5/8" or 15 mm; Set B: 3/8" or 10 mm).
- Twist bare wires tightly.
- Insert bare wire into terminal:
- Set A: Unscrew terminal, insert wire, then tighten.
- Set B: Press lever, insert wire, release lever.
- Attach color-coded labels to positive (+) wire and match to terminal.
4. Speaker Settings:
- In setup menu, specify if speakers are Small, Large, or None.
- “Large” only available if Front speakers are set to Large.
5. Testing Sound:
- Press [TEST TONE] on the remote to confirm all speakers are working.
This answer is automatically generated