Samsung Galaxy Tab S7+ Disassembly & Assembly Manual
Hide thumbs
Also See for Galaxy Tab S7+:
- User manual (167 pages) ,
- Manual (156 pages) ,
- User manual (10 pages)
Advertisement
Confidential
Rev1.1
Disassembly & Assembly Guide
[ Galaxy Tab S7+ ]
HHP Global CS team
Rev 1.1
This material is a property of Samsung Electronics Co., Ltd. Any unauthorized use of this material can be punished
under applicable International and/or domestic law.
- This document cannot be used without Samsung's Authorization -
Confidential
Advertisement
Table of Contents

Subscribe to Our Youtube Channel
Related Manuals for Samsung Galaxy Tab S7+


Summary of Contents for Samsung Galaxy Tab S7+
- Page 1 HHP Global CS team Rev 1.1 This material is a property of Samsung Electronics Co., Ltd. Any unauthorized use of this material can be punished under applicable International and/or domestic law. - This document cannot be used without Samsung’s Authorization -...
- Page 2 Revision History Rev1.1 Date Comments Pages 2020.06.09 - Initial version 2020.07.23 - Add Window pressing PAD B 20,30 - This document cannot be used without Samsung’s Authorization - Confidential...
- Page 3 Samsung reserves the right to make changes to this guide and the product described herein, at anytime, without obligation on Samsung Electronics to provide notification of such change.
-
Page 4: Table Of Contents
Contents Rev1.1 1. Disassembly - Pre-requisite - Parts for disassembly - Disassembly 2. Assembly - Pre-requisite - Non-reusable parts for reassembly - Parts for assembly - Assembly - This document cannot be used without Samsung’s Authorization - Confidential... -
Page 5: Disassembly
Rev1.1 Disassembly - This document cannot be used without Samsung’s Authorization - Confidential... -
Page 6: Pre-Requisite
Cotton Swab Spuit (about 95%) Tablet disassembly ※ Ethyl Alcohol can be used only for battery detaching & swollen battery. GH81-16435A (220V) GH81-12712S (33pi) GH81-12712N GH81-12712P IMK 1108948200 GH81-16595A (110V) - This document cannot be used without Samsung’s Authorization - Confidential... -
Page 7: Parts For Disassembly
Parts for Disassembly Rev1.1 1. OCTA 2. Bracket 3. Side PBA & SUB-PBA (USB Connector) 4. Main PBA 5. 4 Speakers 6. Battery - This document cannot be used without Samsung’s Authorization - Confidential... - Page 8 1) Check if the back glass/OCTA is swollen or not. Back glass/OCTA status Swollen or deformed Normal The device can be heated under standard. Never heat the device. Use ethyl alcohol only. - This document cannot be used without Samsung’s Authorization - Confidential...
- Page 9 ※ Battery level(SOC) should be under 68%. ※ The Display part for TAB S7+ is very thin, so it must be handled very carefully. ※ Keep the pre-heating condition to prevent quality issue during repair. - This document cannot be used without Samsung’s Authorization - Confidential...
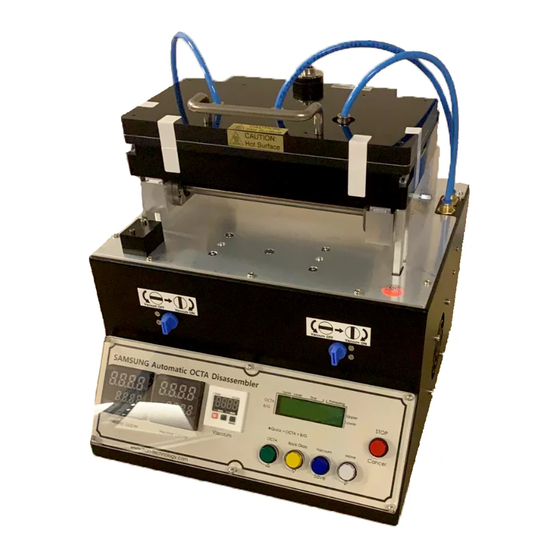
- Page 10 Align the device with suction line on the Upper Plate like a picture below. 5) Put the upper plate down, and press the vacuum button. And then check the vacuum working status. Press the OCTA button and it will be disassembled automatically. - This document cannot be used without Samsung’s Authorization - Confidential...
- Page 11 Disassembly – Display (4/4) Rev1.1 5) Open 2 connectors before disassembling OCTA completely. 6) Remove 4 adhesive tapes which are located outside of OCTA. ☞ Window adhesive tapes CAN NOT be re-used. - This document cannot be used without Samsung’s Authorization - Confidential...
- Page 12 ※ Do NOT forget remove the SIM tray before disassembling. Screws for BRK (2.5mm, small head) Screws for SPK (2.5mm, small head) points ※ The Bracket part is very thin, so it must be handled very carefully. - This document cannot be used without Samsung’s Authorization - Confidential...
- Page 13 3) Open the coaxial cable con(Yellow circle) and disassemble the Mini-PBA & SUB-PBA(USB). ※ Note : The screw length on the PBA is different compared to front bracket screws. (Color is same. –silver-) Please ensure that the screw is never mixed. - This document cannot be used without Samsung’s Authorization - Confidential...
- Page 14 Disassembly – Camera & Main PBA Rev1.1 1) Remove the camera and main PBA. * Place the Camera with the lens facing up. - This document cannot be used without Samsung’s Authorization - Confidential...
- Page 15 Disassembly – 4 Speaker & SIM socket Rev1.1 1) Remove the 4 speaker modules (include mini-PCB). 2) Remove the SIM socket - This document cannot be used without Samsung’s Authorization - Confidential...
- Page 16 When you replace the speaker, mini-PCB on the speaker also should be replaced. Code for mini PCB on the speakers - TOP Left : GH96-13639A - TOP Right(Camera side) : GH96-13638A - BTM Right : GH96-13641A - This document cannot be used without Samsung’s Authorization - Confidential...
- Page 17 If the battery is not properly removed, it may lead to damage to the phone and battery. Only authorized service providers with the instructions provided can remove the battery. - This document cannot be used without Samsung’s Authorization - Confidential...
- Page 18 Do not touch any print area on the Battery pouch. There are below information: - Production vendor - Production date - Production line - Serial number - Lot / Batch Number - This document cannot be used without Samsung’s Authorization - Confidential...
-
Page 19: Assembly
Rev1.1 Assembly - This document cannot be used without Samsung’s Authorization - Confidential... -
Page 20: Pre-Requisite
GH81-14437A GH81-11926A Window Window Window Battery pressing pad pressing jig pressing pad A Pressing pad B Lower 2 ea (for Tablet) GH81-19522A GH81-19522A GH81-11903A GH81-14967A (Same Code) - This document cannot be used without Samsung’s Authorization - Confidential... -
Page 21: Non-Reusable Parts For Reassembly
Battery adhesive tapes (It needs when the Battery is replaced.) Item (Non-reusable) Quantity SVC Code TAPE DOUBLE FACE- GH02-21193A BATTERY SIDE Part Code TAPE DOUBLE FACE- GH02-21338A BATTERY TB - This document cannot be used without Samsung’s Authorization - Confidential... -
Page 22: Parts For Assembly
Parts for Assembly Rev1.1 1. Battery 2. 4 Speakers 3. Main PBA and Small PBA for WIFI & Sub-PBA 4. Bracket 5. OCTA - This document cannot be used without Samsung’s Authorization - Confidential... - Page 23 Pressing pad Lower for battery (GH81-14967A) Battery Rear Metal Pressing pad Lower for battery (GH81-14967A) [ Notice ] Do NOT press a battery over 5 seconds to prevent display damage. - This document cannot be used without Samsung’s Authorization - Confidential...
- Page 24 ※ All speakers, they should be assembled with mini-PCB. 3) Tighten 5 screws for speakers. - Torque force kgf·㎠ ± 7% (1.21~1.39) - Screw Specification : 1.4 * 2.5, Head 2.5 6 ea 5 screws for speakers - This document cannot be used without Samsung’s Authorization - Confidential...
- Page 25 ± 7% (1.21~1.39) - Screw Specification : 1.4 * 1.7, Head 3.5 3 ea 3 screws Attach a tape (GH02-21164A, reusable) for Sub,Wifi PBA Brown cable is upper than red cable - This document cannot be used without Samsung’s Authorization - Confidential...
- Page 26 3) Tighten 3 screws for Main PBA. - Torque force kgf·㎠ ± 7% (1.21~1.39) - Screw Specification : 1.4 * 1.7, Head 3.5 3 ea 3 screws White is upper than blue for Sub,Wifi PBA - This document cannot be used without Samsung’s Authorization - Confidential...
- Page 27 - Screw Specification : 1.4 * 2.5, Head 2.5 3 ea 44 screws for Bracket ※ The Bracket part is very thin, so it must be handled very carefully. - This document cannot be used without Samsung’s Authorization - Confidential...
- Page 28 If wrong screws are applied on the PBA, deformation will occur in the rear metal case. 2.5mm 1.7mm Length 1.7mm Head 2.5mm Head 3.5mm Length 2.5mm PBA Screw PBA Screw Bracket Screw Bracket Screw - This document cannot be used without Samsung’s Authorization - Confidential...
- Page 29 2 OCTA connector and gently press all adhesive parts of tape using hands. ① ③ ④ ② [ Notice ] Fit the tapes precisely to the guide of tapes. - This document cannot be used without Samsung’s Authorization - Confidential...
- Page 30 - Pressing force : (It is set on the pressing jig in advance) - Pressing time : 1 minute 3) Take the device out, and do the visual inspection again. - This document cannot be used without Samsung’s Authorization - Confidential...
- Page 31 No part of this guide may be reproduced, distributed, translated, or transmitted in any form or by any means, electronic or mechanical, including photocopying, recording, or storing in any information storage and retrieval system, without the prior written permission of Samsung Electronics.
Need help?
Do you have a question about the Galaxy Tab S7+ and is the answer not in the manual?
Questions and answers