
Summary of Contents for CIE PROJECT
- Page 1 PROJECT MODULAR FURNITURE SYSTEM ASSEMBLY INSTRUCTIONS CIE ITALIA SRL Via dell’Industria 23/A – 20080 Albairate (MI) Italy info@cie-italia.it - www.ordenaproject.com...
- Page 2 FIXING THE WALL SPACER TO THE POLE 1. Attach the 'L' connector to the wall spacer using the screws provided 3. The spacer is now ready to be fixed to the wall CIE ITALIA SRL Via dell'Industria 23/A – 20080 Albairate (MI) Italy info@cie-italia.it - www.ordenaproject.com...
- Page 3 FIXING THE “HIGH LOAD” FOOT TO THE POLE 1. Attach the foot to the base of the pole using the screws provided 3. The pole is now ready to put in position CIE ITALIA SRL Via dell’Industria 23/A – 20080 Albairate (MI) Italy info@cie-italia.it - www.ordenaproject.com...
- Page 4 3. Slide the wall spacer and pole into the adaptor plate and secure it with the bolts provided CIE ITALIA SRL Via dell’Industria 23/A – 20080 Albairate (MI) Italy info@cie-italia.it - www.ordenaproject.com...
- Page 5 When installing on a ceiling, the pole must be 45mm shorter than the height of the ceiling (attachment + foot = 40mm). CIE ITALIA SRL Via dell’Industria 23/A – 20080 Albairate (MI) Italy info@cie-italia.it - www.ordenaproject.com...
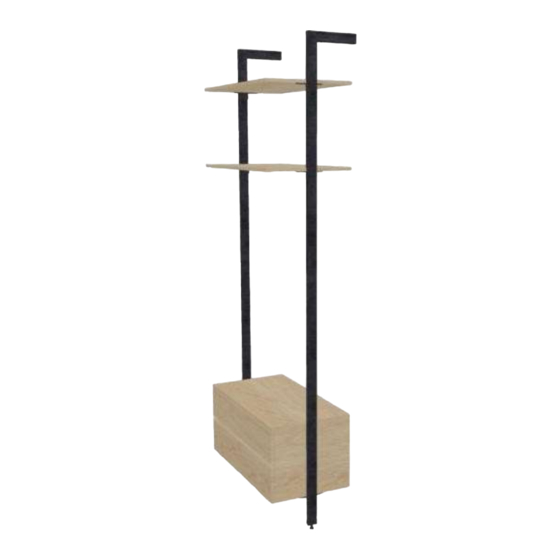
- Page 6 1. Insert the fastening screw into the T-nut in the shelf bracket 3. Use an Allen key to lock the T-nut and secure the shelf bracket CIE ITALIA SRL Via dell’Industria 23/A – 20080 Albairate (MI) Italy info@cie-italia.it - www.ordenaproject.com...
- Page 7 1. Insert the fastening screw into the T-nut in the shelf bracket at the desired angle 3. Use an Allen key to lock the T-nut and secure the shelf bracket CIE ITALIA SRL Via dell’Industria 23/A – 20080 Albairate (MI) Italy info@cie-italia.it - www.ordenaproject.com...
- Page 8 FIXING THE REINFORCEMENT CROSSBAR 1. Attach the adaptor plate to the wall using the screw anchor provided 3. Slide the reinforcement crossbar downwards into the adaptor plate CIE ITALIA SRL Via dell’Industria 23/A – 20080 Albairate (MI) Italy info@cie-italia.it - www.ordenaproject.com...
- Page 9 3. Screw the fixing plate to the drawer bracket 1. Insert the fixing plate vertically into the slot in the pole CIE ITALIA SRL Via dell’Industria 23/A – 20080 Albairate (MI) Italy info@cie-italia.it - www.ordenaproject.com...
Need help?
Do you have a question about the PROJECT and is the answer not in the manual?
Questions and answers