Table of Contents
Advertisement
Quick Links
Advertisement
Table of Contents

Related Manuals for SOIL SCOUT Hydra100 Scout

Summary of Contents for SOIL SCOUT Hydra100 Scout
- Page 1 Soil Scout User Manual...
-
Page 2: Table Of Contents
11. Hydra100 Sensor Overview and Operation ....15 12. Field Installation of Hydra100 Sensors ......16 13. Field Installation of Dual Depth Sensors (HydraDDS)..18 14. Soil Scout Hub ..............19 15. Site View (Main Page) ............20 16. Viewing Graphs ..............21 17. -
Page 3: Introduction
Soil Scout User Manual Introduction Thank you for becoming a Soil Scout user! You now have the most advanced wireless soil monitoring equipment at your disposal. Please read through this manual to get full benefit from the unprecedented opportunities the system can provide. -
Page 4: Getting Started
Log into the Soil Scout Hub at https://soilscouts.fi with the user name and password provided to you by your Soil Scout representative. Select "Add Site" from the upper hand thee lines menu. This will pop up the New Site dialogue. Give the Site a friendly and informative name. -
Page 5: How To Add Base Station And Echo (Or Edit)
Soil Scout User Manual 2. How to Add Base Station and Echo (or Edit) On the Receivers Page you can enter a New Base and Echos to your Site. Every Site needs at least one Base Station and may have multiple of them. -
Page 6: How To Add Scouts (Or Edit)
Soil Scout User Manual 3. How to Add Scouts (or Edit) On the Scouts page , add your sensors to your Site by creating New > Scout. Later on, clicking on the pen book symbol on the device list will open a window where you can edit the device specific properties. -
Page 7: Receiver Overview And Operation
Soil Scout User Manual 4. Receiver Overview and Operation The Receiver units are fully plug and play, the power switch being the only user input. Base Stations come with a built-in SIM and are pre-configured for your regional settings. The Receivers have a few common main parts; a... - Page 8 Soil Scout User Manual Base Stations also have a two-row text display. This display provides detailed information on the cellular network, received packets, upload progress etc. For power saving reasons, the display backlight is only operational for the first 60 minutes after a power-up. Later on, the display will continue displaying data but depending on ambient light brightness it may be difficult to read.
-
Page 9: Pre-Assembly Of Receiving Equipment
NOTE: Information regarding screws and bolt types are provided with best available accuracy, but may change without notice. All Soil Scout devices are ready for use when delivered. The Receivers have been tested during manufacture and there is no way to adjust the operation – you just need to switch them on. -
Page 10: Plan Before Installing Any Equipment
Set up your site in the Soil Scout Hub as outlined in the Hub Manual. Power up your Base Station and check that it reports to the online Hub properly – detailed instructions for this are found in the Receivers chapter of this manual. -
Page 11: Field Installation Of A Receiver
Soil Scout User Manual 7. Field Installation of a Receiver Receivers should always be installed upright, so that all connectors point directly downwards. The solar panel should be directed in the direction of best sunlight, typically this is directly south in the northern hemisphere and directly north in the southern hemisphere. Close to the equator the direction can be chosen freely (and based more on local obstacles) since sunlight is more abundant. -
Page 12: Receiving Antenna Placement
When choosing locations for Receivers and mounting their Antennas, it's good to understand a few aspects regarding radio wave propagation: The deeper a Soil Scout Hydra100 sensor is buried, the closer the Receiver must be The higher the Receiving Antenna is elevated, the longer a range can be expected ... -
Page 13: Echo Repeater Operation
The Line-of-Sight for a radio wave needs some clearance around the straight line. 9. Echo Repeater Operation The purpose of an Echo Repeater is to expand a Soil Scout site to wider areas than just the reception range of a single Base Station. An Echo boosts the signal level of any packets it receives by a retransmission, but it does not alter the information in any way. -
Page 14: Base Station Power Management
Base Station Power Management The Base Station is the gateway that uploads soil measurements to the Soil Scout Hub server over a cellular mobile network. A Base has several internal operating modes that the unit employs depending on the battery charge level. -
Page 15: Hydra100 Sensor Overview And Operation
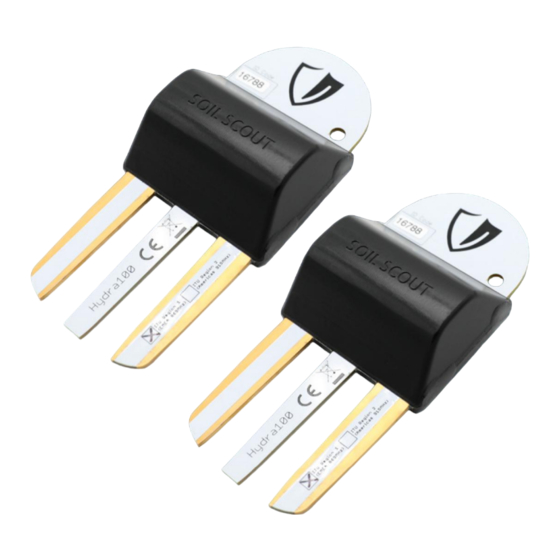
Each sensor unit has a unique ID on a sticker on the front face, which is used to distinguish the data source in the Soil Scout Hub. The Hydra has an embedded antenna, battery, electronics and sensors. The antenna is in the semi-circular end, while the soil sensor head is the set of three prongs in the other end. -
Page 16: Field Installation Of Hydra100 Sensors
Soil Scout User Manual Field Installation of Hydra100 Sensors Dig an installation hole to the desired installation depth only. Digging too deep will disturb the bottom soil. Leave approx. 1 cm (0.4") of loose soil on the bottom of the pit to allow for firm soil contact with the device. - Page 17 Soil Scout User Manual Replace all of the removed soil back into the installation pit. Preserving the original order of soil layers, if possible, is recommended. Pile any extra soil into a mound on top of the pit. Do not leave a depression on the surface, as it will collect excessive surface water and may affect moisture measurements in the future.
-
Page 18: Field Installation Of Dual Depth Sensors (Hydradds)
Soil Scout User Manual If you choose to push the sensing head pins into the undisturbed soil wall, be absolutely sure to have the sensor flat and firm on the bottom of the pit. Any loose soil beneath the sensor will compact back over time, causing a high risk of breaking the sensing head pins. -
Page 19: Soil Scout Hub
Soil Scout User Manual 14. Soil Scout Hub The Hub is the web-based online dashboard to view, analyze, manage and share your soil measurements. The Hub requires a login name and password, which you will obtain from your Soil Scout representative. -
Page 20: Site View (Main Page)
Soil Scout User Manual Site View (Main Page) This page presents all the main information regarding your soil measurements. The top bar contains quick access to all core functionalities. The Device List on the left presents both sensor groups and individual sensors with general information. -
Page 21: Viewing Graphs
Soil Scout User Manual Viewing Graphs The Entire Site graph is a plot of all devices on the device list. The solid line is the moving average, while the shaded tube represents the min and max values. More importantly, when you select one or more Groups for comparison by clicking their... -
Page 22: Water Balance Graph
"Bulk conductivity" in the Salinty graph options menu. More detailed information on the Salinity and EC with interpretation guidelines can be acquired from Soil Scout. Water Balance Graph While the Moisture (%) graph presents the volumetric water content, the Water Balance graph indicates plant water availability, based on Scout specific Field Capacity (FC) and Wilting Point (WP) settings. -
Page 23: Analysis Page
Soil Scout User Manual With your local knowledge, zoom the Scout Moisture Graph to a moment, where you know the soil has been properly wetted, over irrigated or received heavy rain. You will observe, that every time after such a wetting event, the moisture will settle down to a certain moisture level. - Page 24 Soil Scout User Manual This Analysis example is showing two moisture graphs from the Group "25 cm Scouts" from two seasons beginning at different dates. The Analysis can have as many graphs you wish, but too many will make the graph unclear.
-
Page 25: Map Page
Soil Scout User Manual Map Page The Map interface is built on the ArcGIS API for JavaScript library. Here are a few notes on how to interpret and operate the Map: The symbols for Scout , Base and Echo Repeater are similar to their corresponding symbols in the Device List. -
Page 26: Alerts
Soil Scout User Manual Alerts The automatic Alert system enables you to set predefined measurement value conditions, which will trigger the Alert and send an according notification email, if desired. The Alert can only target a Group, but you can create a group of one Scout. -
Page 27: Maintenance
Soil Scout User Manual Maintenance All Soil Scout devices are maintenance free. Troubleshooting Receivers No light on the LED If power is switched on but the LED is not blinking, the battery has gone fully empty. Recharging the unit in bright sunlight or using an external power supply for a couple of hours will resume operation. -
Page 28: Miscellaneous Notes
Soil Scout User Manual Moisture reading doesn’t change during heavy watering event (rain or irrigation cycle) Percolation speed through the soil is largely dependent on soil type, installation depth and the crop growing. If the readings don’t change, chances are that it’s because the conditions at sensor level don’t change - meaning that the sensor is actually working correctly. -
Page 29: Compliance Statements And Disclaimer
Scout product, safety of a third party product or service as well as any other liabilities related to or arising from a third party product or service. Soil Scout ltd. / Soil Scout Oy shall not be liable for any data transfer fees or any other fees which might be due to or related to the use of Soil Scout products. -
Page 30: Technical Specifications
26. Technical Specifications Specifications subject to change without notice. For additional information, please contact the Soil Scout team at info@soilscout.com Hydra100 Scout (Periodically Transmitting Undergound Sensor Unit) Radio power 27.0 dBm (500 mW) ERP, Bandwidth <250 kHz, duty cycle <0,001%. - Page 31 50 mm (2") pole mount / wall mount Operating time extension With Echo: 6-8 weeks, With Base: 2-3 weeks Freezing and hot ambient temperatures will decrease operating time. Soil Scout Hub (Online Monitoring and Analysis Service) Connectivity Web based HTTPS browser interface at https://soilscouts.fi Preferred browsers...
- Page 32 Soil Scout User Manual...
Need help?
Do you have a question about the Hydra100 Scout and is the answer not in the manual?
Questions and answers