Table of Contents
Advertisement
Quick Links
Notes for operators and responsible maintenance personnel
★ Please read through this Instruction Manual carefully prior to use.
★ Keep this Instruction Manual together with the system with care to
make it available anytime.
.
Transvaginal Probe
EUP‐VV731
INSTRUCTION MANUAL
Tokyo, Japan
© Hitachi, Ltd. 2013, 2017 All rights reserved.
Q1E‐EP1167‐6
0123
Advertisement
Table of Contents

Related Manuals for Hitachi EUP-VV731


Summary of Contents for Hitachi EUP-VV731
- Page 1 Transvaginal Probe EUP‐VV731 INSTRUCTION MANUAL Notes for operators and responsible maintenance personnel ★ Please read through this Instruction Manual carefully prior to use. ★ Keep this Instruction Manual together with the system with care to make it available anytime. Tokyo, Japan Q1E‐EP1167‐6 © Hitachi, Ltd. 2013, 2017 All rights reserved. 0123 ...
- Page 2 Manufacturer: Hitachi, Ltd. 2‐16‐1, Higashi‐Ueno, Taito‐ku, Tokyo, 110‐0015, Japan +81‐3‐6284‐3668 http://www.hitachi.com/businesses/healthcare/index.html European Representative: Hitachi Medical Systems GmbH Otto‐von‐Guericke‐Ring 3 D‐65205 Wiesbaden, Germany EU Importer: Hitachi Medical Systems Europe Holding AG Address: Sumpfstrasse 13 CH‐6300 Zug, Switzerland Local Distributor: (1) Q1E‐EP1167 ...
- Page 3 About this manual This instruction manual shall provide instructions for using, cleaning, and disinfecting the HITACHI ultrasound probes. It also describes safety considerations, maintenance. For instructions for operating the main unit, refer to the operation manual for it. Before using the probe, thoroughly read this manual and keep this book for future reference. If you have any questions concerning the manual, please contact a service support. The following conventions are used throughout the manual to denote information of special ...
- Page 4 Graphical Symbols for Use in Labeling of Hitachi Ultrasound Probes Some graphical symbols that are used in labeling of Hitachi Ultrasound Probes are compliant with EN980:2008 standard. Refer to the following table about the meanings of them. Explanation of Symbol Symbol Descriptive Content Hitachi,Ltd Manufacturer Company 2‐16‐1, Higashi‐Ueno,taito‐ku, Name and Address Tokyo,110‐0015,Japan Authorized Hitachi Medical Systems GmbH Representative in The Otto‐von‐Guericke‐Ring 3 D‐65205 Wiesbaden, European Community Germany Store the probe in a cool, dustproof and dark, Keep away from dry environment to avoid high temperature Sunlight and humidity and direct sunlight. ...
- Page 5 Definition of symbol The following symbol is also used for HITACHI Ultrasound Probes. Location Symbol Definition Probe This instrument complies with Directive 93/42/EEC relating to connector Medical Device and Directive 2011/65/EU relating to RoHS Probe IPX7 mark IPX7 connector See section 1.5. Probe Type BF APPLIED PART connector Probe General warning sign connector Probe Warning; dangerous voltage connector Probe Caution; Biohazard connector Follow the instruction manual to operate this instrument. If not ...
-
Page 6: Table Of Contents
CONTENTS Page Introduction ∙∙∙∙∙∙∙∙∙∙∙∙∙∙∙∙∙∙∙∙∙∙∙∙∙∙∙∙∙∙∙∙∙∙∙∙∙∙∙∙∙∙∙∙∙∙∙∙∙∙∙∙∙∙∙∙∙∙∙∙∙∙∙∙∙∙∙∙∙∙∙∙∙∙∙∙∙∙∙∙∙∙∙∙∙∙∙∙∙∙∙∙∙∙∙∙∙∙∙∙∙∙∙∙∙∙∙∙∙∙∙∙∙∙∙∙∙∙∙∙∙∙∙∙∙∙ 1 Features ∙ ∙∙∙∙∙∙∙∙∙∙∙∙∙∙∙∙∙∙∙∙∙∙∙∙∙∙∙∙∙∙∙∙∙∙∙∙∙∙∙∙∙∙∙∙∙∙∙∙∙∙∙∙∙∙∙∙∙∙∙∙∙∙∙∙∙∙∙∙∙∙∙∙∙∙∙∙∙∙∙∙∙∙∙∙∙∙∙∙∙∙∙∙∙∙∙∙∙∙∙∙∙∙∙∙∙∙∙∙∙∙∙∙∙∙∙∙∙∙∙∙∙∙∙∙∙ 1 Principles of operation ∙∙∙∙∙∙∙∙∙∙∙∙∙∙∙∙∙∙∙∙∙∙∙∙∙∙∙∙∙∙∙∙∙∙∙∙∙∙∙∙∙∙∙∙∙∙∙∙∙∙∙∙∙∙∙∙∙∙∙∙∙∙∙∙∙∙∙∙∙∙∙∙∙∙∙∙∙∙∙∙∙∙∙∙∙∙∙∙∙∙∙∙∙∙∙∙∙∙∙∙ 1 Intended Use ∙ ∙∙∙∙∙∙∙∙∙∙∙∙∙∙∙∙∙∙∙∙∙∙∙∙∙∙∙∙∙∙∙∙∙∙∙∙∙∙∙∙∙∙∙∙∙∙∙∙∙∙∙∙∙∙∙∙∙∙∙∙∙∙∙∙∙∙∙∙∙∙∙∙∙∙∙∙∙∙∙∙∙∙∙∙∙∙∙∙∙∙∙∙∙∙∙∙∙∙∙∙∙∙∙∙∙∙∙∙∙∙∙∙∙∙∙∙ 1 Composition ∙ ∙∙∙∙∙∙∙∙∙∙∙∙∙∙∙∙∙∙∙∙∙∙∙∙∙∙∙∙∙∙∙∙∙∙∙∙∙∙∙∙∙∙∙∙∙∙∙∙∙∙∙∙∙∙∙∙∙∙∙∙∙∙∙∙∙∙∙∙∙∙∙∙∙∙∙∙∙∙∙∙∙∙∙∙∙∙∙∙∙∙∙∙∙∙∙∙∙∙∙∙∙∙∙∙∙∙∙∙∙∙∙∙∙∙∙∙∙ 2 Construction∙∙∙∙∙∙∙∙∙∙∙∙∙∙∙∙∙∙∙∙∙∙∙∙∙∙∙∙∙∙∙∙∙∙∙∙∙∙∙∙∙∙∙∙∙∙∙∙∙∙∙∙∙∙∙∙∙∙∙∙∙∙∙∙∙∙∙∙∙∙∙∙∙∙∙∙∙∙∙∙∙∙∙∙∙∙∙∙∙∙∙∙∙∙∙∙∙∙∙∙∙∙∙∙∙∙∙∙∙∙∙∙∙∙∙∙∙∙ 2 Inspection before Use ∙∙∙∙∙∙∙∙∙∙∙∙∙∙∙∙∙∙∙∙∙∙∙∙∙∙∙∙∙∙∙∙∙∙∙∙∙∙∙∙∙∙∙∙∙∙∙∙∙∙∙∙∙∙∙∙∙∙∙∙∙∙∙∙∙∙∙∙∙∙∙∙∙∙∙∙∙∙∙∙∙∙∙∙∙∙∙∙∙∙∙∙∙∙∙∙∙∙∙∙∙∙∙∙∙∙∙∙∙∙ 3 Inspection for Appropriate Connection ∙ ∙∙∙∙∙∙∙∙∙∙∙∙∙∙∙∙∙∙∙∙∙∙∙∙∙∙∙∙∙∙∙∙∙∙∙∙∙∙∙∙∙∙∙∙∙∙∙∙∙∙∙∙∙∙∙∙∙∙∙∙∙∙∙∙∙∙∙∙∙∙∙ 3 Inspection for Material Surface ∙∙∙∙∙∙∙∙∙∙∙∙∙∙∙∙∙∙∙∙∙∙∙∙∙∙∙∙∙∙∙∙∙∙∙∙∙∙∙∙∙∙∙∙∙∙∙∙∙∙∙∙∙∙∙∙∙∙∙∙∙∙∙∙∙∙∙∙∙∙∙∙∙∙∙∙∙∙∙∙∙∙∙∙∙∙ 3 Operation Procedure ∙∙∙∙∙∙∙∙∙∙∙∙∙∙∙∙∙∙∙∙∙∙∙∙∙∙∙∙∙∙∙∙∙∙∙∙∙∙∙∙∙∙∙∙∙∙∙∙∙∙∙∙∙∙∙∙∙∙∙∙∙∙∙∙∙∙∙∙∙∙∙∙∙∙∙∙∙∙∙∙∙∙∙∙∙∙∙∙∙∙∙∙∙∙∙∙∙∙∙∙∙∙∙∙∙∙∙∙∙∙∙ 4 Cleaning and Disinfection ∙∙∙∙∙∙∙∙∙∙∙∙∙∙∙∙∙∙∙∙∙∙∙∙∙∙∙∙∙∙∙∙∙∙∙∙∙∙∙∙∙∙∙∙∙∙∙∙∙∙∙∙∙∙∙∙∙∙∙∙∙∙∙∙∙∙∙∙∙∙∙∙∙∙∙∙∙∙∙∙∙∙∙∙∙∙∙∙∙∙∙∙∙∙∙∙∙∙∙∙∙∙ 5 Point of use (Pre‐cleaning) ∙ ∙∙∙∙∙∙∙∙∙∙∙∙∙∙∙∙∙∙∙∙∙∙∙∙∙∙∙∙∙∙∙∙∙∙∙∙∙∙∙∙∙∙∙∙∙∙∙∙∙∙∙∙∙∙∙∙∙∙∙∙∙∙∙∙∙∙∙∙∙∙∙∙∙∙∙∙∙∙∙∙∙∙∙∙∙∙∙∙∙∙∙∙∙ 6 Containment and transportation ∙∙∙∙∙∙∙∙∙∙∙∙∙∙∙∙∙∙∙∙∙∙∙∙∙∙∙∙∙∙∙∙∙∙∙∙∙∙∙∙∙∙∙∙∙∙∙∙∙∙∙∙∙∙∙∙∙∙∙∙∙∙∙∙∙∙∙∙∙∙∙∙∙∙∙∙∙∙∙∙∙∙∙ 6 Manual Cleaning and disinfection ∙∙∙∙∙∙∙∙∙∙∙∙∙∙∙∙∙∙∙∙∙∙∙∙∙∙∙∙∙∙∙∙∙∙∙∙∙∙∙∙∙∙∙∙∙∙∙∙∙∙∙∙∙∙∙∙∙∙∙∙∙∙∙∙∙∙∙∙∙∙∙∙∙∙∙∙∙∙∙∙ 7 Drying ∙∙∙∙∙∙∙∙∙∙∙∙∙∙∙∙∙∙∙∙∙∙∙∙∙∙∙∙∙∙∙∙∙∙∙∙∙∙∙∙∙∙∙∙∙∙∙∙∙∙∙∙∙∙∙∙∙∙∙∙∙∙∙∙∙∙∙∙∙∙∙∙∙∙∙∙∙∙∙∙∙∙∙∙∙∙∙∙∙∙∙∙∙∙∙∙∙∙∙∙∙∙∙∙∙∙∙∙∙∙∙∙∙∙∙∙∙∙∙∙∙∙∙∙∙∙∙∙ 8 Inspection ∙∙∙∙∙∙∙∙∙∙∙∙∙∙∙∙∙∙∙∙∙∙∙∙∙∙∙∙∙∙∙∙∙∙∙∙∙∙∙∙∙∙∙∙∙∙∙∙∙∙∙∙∙∙∙∙∙∙∙∙∙∙∙∙∙∙∙∙∙∙∙∙∙∙∙∙∙∙∙∙∙∙∙∙∙∙∙∙∙∙∙∙∙∙∙∙∙∙∙∙∙∙∙∙∙∙∙∙∙∙∙∙∙∙∙∙∙∙∙∙∙∙ 8 Maintenance and Safety Inspection ∙ ∙∙∙∙∙∙∙∙∙∙∙∙∙∙∙∙∙∙∙∙∙∙∙∙∙∙∙∙∙∙∙∙∙∙∙∙∙∙∙∙∙∙∙∙∙∙∙∙∙∙∙∙∙∙∙∙∙∙∙∙∙∙∙∙∙∙∙∙∙∙∙∙∙∙∙∙∙∙∙∙∙∙∙∙∙∙ 9 Daily check ∙∙∙∙∙∙∙∙∙∙∙∙∙∙∙∙∙∙∙∙∙∙∙∙∙∙∙∙∙∙∙∙∙∙∙∙∙∙∙∙∙∙∙∙∙∙∙∙∙∙∙∙∙∙∙∙∙∙∙∙∙∙∙∙∙∙∙∙∙∙∙∙∙∙∙∙∙∙∙∙∙∙∙∙∙∙∙∙∙∙∙∙∙∙∙∙∙∙∙∙∙∙∙∙∙∙∙∙∙∙∙∙∙∙∙∙∙∙∙∙ 9 Safety Precautions ∙∙∙∙∙∙∙∙∙∙∙∙∙∙∙∙∙∙∙∙∙∙∙∙∙∙∙∙∙∙∙∙∙∙∙∙∙∙∙∙∙∙∙∙∙∙∙∙∙∙∙∙∙∙∙∙∙∙∙∙∙∙∙∙∙∙∙∙∙∙∙∙∙∙∙∙∙∙∙∙∙∙∙∙∙∙∙∙∙∙∙∙∙∙∙∙∙∙∙∙∙∙∙∙∙∙∙∙∙∙∙∙∙∙ 10 Specifications ∙∙∙∙∙∙∙∙∙∙∙∙∙∙∙∙∙∙∙∙∙∙∙∙∙∙∙∙∙∙∙∙∙∙∙∙∙∙∙∙∙∙∙∙∙∙∙∙∙∙∙∙∙∙∙∙∙∙∙∙∙∙∙∙∙∙∙∙∙∙∙∙∙∙∙∙∙∙∙∙∙∙∙∙∙∙∙∙∙∙∙∙∙∙∙∙∙∙∙∙∙∙∙∙∙∙∙∙∙∙∙∙∙∙∙∙∙∙∙∙∙∙ 11 Probe ∙∙∙∙∙∙∙∙∙∙∙∙∙∙∙∙∙∙∙∙∙∙∙∙∙∙∙∙∙∙∙∙∙∙∙∙∙∙∙∙∙∙∙∙∙∙∙∙∙∙∙∙∙∙∙∙∙∙∙∙∙∙∙∙∙∙∙∙∙∙∙∙∙∙∙∙∙∙∙∙∙∙∙∙∙∙∙∙∙∙∙∙∙∙∙∙∙∙∙∙∙∙∙∙∙∙∙∙∙∙∙∙∙∙∙∙∙∙∙∙∙∙∙∙∙∙∙∙ 11 Suppliers List ∙∙∙∙∙∙∙∙∙∙∙∙∙∙∙∙∙∙∙∙∙∙∙∙∙∙∙∙∙∙∙∙∙∙∙∙∙∙∙∙∙∙∙∙∙∙∙∙∙∙∙∙∙∙∙∙∙∙∙∙∙∙∙∙∙∙∙∙∙∙∙∙∙∙∙∙∙∙∙∙∙∙∙∙∙∙∙∙∙∙∙∙∙∙∙∙∙∙∙∙∙∙∙∙∙∙∙∙∙∙∙∙∙∙ 12 Disposal of the probe ∙ ∙∙∙∙∙∙∙∙∙∙∙∙∙∙∙∙∙∙∙∙∙∙∙∙∙∙∙∙∙∙∙∙∙∙∙∙∙∙∙∙∙∙∙∙∙∙∙∙∙∙∙∙∙∙∙∙∙∙∙∙∙∙∙∙∙∙∙∙∙∙∙∙∙∙∙∙∙∙∙∙∙∙∙∙∙∙∙∙∙∙∙∙∙∙∙∙∙∙∙∙∙∙∙∙∙∙∙∙ 12 ... -
Page 7: Introduction
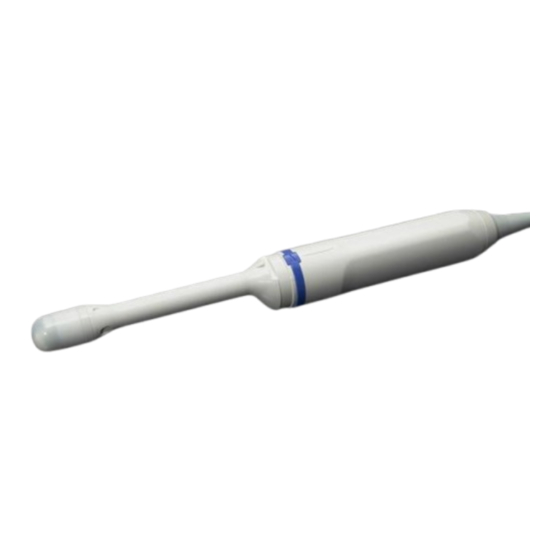
3) The transducer is also used to receive reflected ultrasonic waves. The transducer vibrates mechanically due to the received ultrasonic waves and converts mechanical vibrations into electric energy. Electric signals are converted to shades of brightness by brightness modulation to obtain an image. Intended Use The Transvaginal Probe EUP‐VV731 is designed for observation and diagnosis mainly of the following regions by connecting with the HITACHI ultrasound scanner. Transvaginal Transrectal ... -
Page 8: Composition
1) Probe EUP‐VV731 ∙∙∙∙∙∙∙∙∙∙∙∙∙∙∙∙∙∙∙∙∙∙∙∙∙∙∙∙∙∙∙∙∙∙∙∙∙∙∙∙∙∙∙∙∙∙∙∙∙∙∙∙∙∙ 1 piece 2) Instruction Manual∙∙∙∙∙∙∙∙∙∙∙∙∙∙∙∙∙∙∙∙∙∙∙∙∙∙∙∙∙∙∙∙∙∙∙∙∙∙∙∙∙∙∙∙∙∙∙∙∙∙∙∙∙ 1 copy 3) EUP‐VV731 Correct Backlash CD‐ROM ∙ ∙∙∙∙∙∙∙∙∙∙∙∙∙∙∙∙ 1 piece CAUTION 1) Sterilization has not been made to the probe, shipped from the factory. Prior to use of the probe, be sure to clean and disinfect the probe. 2) This CD‐ROM is important for loading specific parameter of the probe to the ultrasound scanner by Hitachi engineer during the installation. Avoid missing it and keep it certainly. Construction Immersible part (IPX7) Un‐Immersible part 150mm from the tip of head Head Applied ... -
Page 9: Inspection Before Use
2. Inspection before Use Prior to use, the probe must be carefully inspected that it is appropriate for use. If not, do not use the probe and immediately contact a service support. Inspection for Appropriate Connection 1) Check that the system is correctly operating. Refer to the instruction manual for the Ultrasound diagnostic scanner. 2) Never attach or connect unauthorized devices or instruments on the probe, such as unauthorized biopsy attachments. Inspection for Material Surface 1) Visually check the surface of the probe head, housing, cable and connector for any crack, scratch or denaturalization. ... -
Page 10: Operation Procedure
3. Operation Procedure 1) Confirm that the probe is cleaned and disinfected. 2) Connect the probe, operate the Main unit, and adjust the image according to the instructions given in the operation manual for the main unit. 3) Relationship between direction of the probe and Index mark the right‐left orientation mark on the image is (Projection) shown in Fig. 2. 4) Before a diagnosis, put sterilized acoustic jelly to Right‐left ... -
Page 11: Cleaning And Disinfection
4. Cleaning and Disinfection The probe and accessory must be reprocessed after each use. Refer to the reprocessing instruction in this chapter. ‐ The probe is delivered unsterile. Prior to the first use, reprocess the probe. WARNINGS ‐ Temperature should not exceed 50°C during reprocessing. ‐ Probe connector is not water resistant. The probe is not completely submersible. The immersible part is Limitations on shown in Fig. 3. The un‐immersible part should be disinfected by wipe reprocessing disinfection. Sterilization is not possible for this probe. The probe should be packed in a sterile pouch or container to transport Transportation from Central Sterile Supply Department (CSSD) to an operating room. before using Be careful not to damage the sterile pouch or container during transportation. Levels of reprocessing requirements: Depending on the application of the product and with regard to risk evaluation, the user has to classify the medical device according to the current Medical Device Directive for processing of medical devices as uncritical, semi‐critical or critical. Supporting information concerning this topic is listed in the table below. The user is responsible for correct classification of the medical device. Classification Definition Processing Cleaning ... -
Page 12: Point Of Use (Pre-Cleaning)
The flowchart of the reprocessing process of this probe is as follows. Manual cleaning and disinfection Point of use Manual Cleaning Drying (Pre‐cleaning) Rinsing after manual cleaning Containment and transportation Manual Disinfection Rinsing after manual disinfection Point of use Point of use (Pre‐cleaning) (Pre‐cleaning) Pre‐cleaning should be done immediately after each use. The procedure is as follows: 1) Remove the protective cover. 2) Clean the probe of all patient’s blood or fluid with running tap water until the surface of the probe looks visually clean. 3) Wipe the whole surface of the probe with gauze pad and remove superficial visible impurities. ... -
Page 13: Manual Cleaning And Disinfection
Manual Cleaning and disinfection Prepare following items before manual cleaning and disinfection: a) Detergent: Cidezyme (Johnson & Johnson, #2258) or another cleaning agent with approved material compatibility for this medical device b) Disinfectant: Cidex OPA (Johnson & Johnson, # 20391) or another disinfectant with approved material compatibility for this medical device c) Two tanks, one for cleaning and one for disinfection ‐ optional: 1 additional tank for rinsing with deionized/tap water (sufficient size for immersion of the immersible part of the probe at full length) d) Soft, fluff free cloth or single use towel e) Personal protective equipment (gloves, water repellent protective skirt, face protection mask or protective glasses, see also instructions of the manufacturer for the detergent and the disinfectant) Manual Cleaning: Prepare the detergent solution in a tank with cold water (please follow the instructions of the detergent manufacturer regarding application, dilution and contact time). 1) The temperature of the detergent solution should be between 15‐30°C, concentration is 1.6%. Please note the minimum contact time of the detergent in the manufacturer’s instruction. ... -
Page 14: Drying
Manual disinfection: 1) Prepare the disinfectant solution in a tank with cold water (please follow the instructions of the disinfectant manufacturer regarding application, concentration, microbiological efficiency, service life and contact time). 2) Confirm the concentration of the disinfectant before immersing the probe. Although ® Cidex OPA does not need to be diluted, it is recommended to use test strips to verify ... -
Page 15: Maintenance And Safety Inspection
5. Maintenance and Safety Inspection Daily check 1) Visually check the surface of the probe head, housing, cable and connector for any crack, scratch or denaturalization. If you find damage, do not use the probe and immediately contact a service support. 2) After using the probe, it should be cleaned and disinfected according to “4. Cleaning and disinfection”, then store it in a cool and dark place avoid high temperature and humidity, direct sunlight. ... -
Page 16: Safety Precautions
6. Safety Precautions WARNING 1) If you find that the probe head, housing or cable are cracked or damaged, stop use of the probe immediately. Please contact a service support. 2) Warning in case of using probe covers which latex is contained to. The latex may cause such allergic reactions as itching, rubor, urticaria, swelling, fever, anhelation, wheezing, depression of blood pressure, shock and so on. For the patients suspected of latex allergy, do not use the latex‐containing medical devices. If your patient shows any of above mentioned symptoms during the operation, stop the use of the latex‐containing ... -
Page 17: Specifications
7. Specifications Probe Type: EUP‐VV731 Transvaginal probe Center frequency: 5.5MHz Technology: Convex Array Probe Dimensions: See Fig. 4. Weight: Approx. 1.0kg (including cable and connector) Scanning angle: 140° Volume sweep angle: 80° Probe materials: Biocompatible allergy free components Acoustic output: According to IEC 60601‐2‐37 (See Main Unit manual) Applicable systems: Depending on production and upgrade status. For detailed information, contact a service support. Classification: MDD classification IIa. Cleaning: Applicable detergents are listed in the suppliers list Disinfection: Applicable disinfectants are listed in the suppliers list Operating conditions: Ambient temperature: +15 to +40°C Contact surface temperature ... -
Page 18: Suppliers List
Suppliers List The products listed below are seriously tested and approved for use with the Transvaginal Probe EUP‐VV731. Product name Manufacturer Purpose CIDEZYME® Johnson&Johnson Cleaner Cidex® Johnson&Johnson Disinfectant Cidex® OPA Johnson&Johnson Disinfectant PERASAFETM DuPont Disinfectant CIV‐FlexTM 610‐006 CIVCO Probe cover CIV‐FlexTM 610‐007 CIVCO Probe cover Please contact your local distributor for a current version of the ʺDisinfectant/Sterilization Method Compatibility for Ultrasound Probe and Accessory List”. 8. Disposal of the probe Recycle or dispose equipment properly in compliance with your organizational rules and your local laws. CAUTION Before disposing equipment, disinfect or take other infection‐prevention measures. Disposal ... - Page 19 Unit: mm Fig. 4 Dimensions of EUP‐VV731 ‐13‐ Q1E‐EP1167 ...
Need help?
Do you have a question about the EUP-VV731 and is the answer not in the manual?
Questions and answers