
Summary of Contents for UltraPower Facelift
- Page 1 SERVICE MANUAL UltraPower Facelift Floor Care Number of Ultrapower FL publication battery stick cleaner 9031523 Factory: XX - XXXXXX (YY) Edition: 2015-04 Publication number 9031523 Rev. 01 04/2015 PR - 1/19...
-
Page 2: Table Of Contents
TABLE OF CONTENTS General description ............................ 3 1.1 Exploded view ..................Hiba! A könyvjelző nem létezik. ACCESSABILITY ............................5 Levels of electronic control………………………………………………………………………………………15 3.1.1. Basic Software functionality………………………………………………………………………………..15 3.1.2. Motor power regulation and LED functionality…………………………………………………………...15 3.1.3. Charging and LED functionality …………………………………………………………………………..16 3.1.4. -
Page 3: General Description
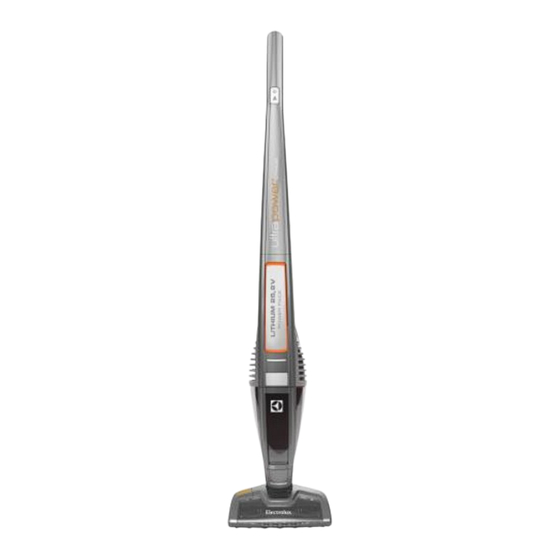
1 General description Publication number 9031523 Rev. 01 04/2015 PR - 3/19... -
Page 4: Exploded View
1.1 Exploded view Available spare parts: Publication number 9031523 Rev. 01 04/2015 PR - 4/19... -
Page 5: Accessability
ACCESSABILITY After this move it’s easily to dispart the handle from the body: Publication number 9031523 Rev. 01 04/2015 PR - 5/19... - Page 6 Publication number 9031523 Rev. 01 04/2015 PR - 6/19...
- Page 7 Publication number 9031523 Rev. 01 04/2015 PR - 7/19...
- Page 8 Publication number 9031523 Rev. 01 04/2015 PR - 8/19...
- Page 9 Remove the srcews from the side frame. Remove the side frame. Publication number 9031523 Rev. 01 04/2015 PR - 9/19...
- Page 10 Remove 6 screws. Turn the unit upside down and release the hose by pressing the two buttons ont he sides and pulling it out of the main body. Take out the screw underneath. Publication number 9031523 Rev. 01 04/2015 PR - 10/19...
- Page 11 Bend the nozzle to reach the two screws underneath. Remove them. Then remove the lid. Lift the boss with one hand and release the snappers on both sides to remove it. Publication number 9031523 Rev. 01 04/2015 PR - 11/19...
- Page 12 Now you can reach the DCPM. Publication number 9031523 Rev. 01 04/2015 PR - 12/19...
- Page 13 To reach the handle PCB do as follows: Remove the rubber pads first, by using a screwdriver. Remove 6 screws. Publication number 9031523 Rev. 01 04/2015 PR - 13/19...
- Page 14 Remve the screws from handle PCB holder. Be aware of the screw nut, not be loosen. Publication number 9031523 Rev. 01 04/2015 PR - 14/19...
-
Page 15: Levels Of Electronic Control
Levels of electronic control 3.1.1 Basic Software functionality ON/OFF button. When started by pressing On/off button, the cleaner runs in Normal mode. Using Power Regulation Button, the Power can be increased to Booster mode or decrease to Silent Mode. Booster mode has highest power level and Silent mode has lowest power level. Brush roll Clean Pedal is used for cleaning of brush roll. -
Page 16: Charging And Led Functionality
3.1.3 Charging and LED-functionality 4. Unit is kept at charging stand and connect with correct adapter as recommended. - Battery starts charging and LED starts indication as below: During CC mode, the 3 charging LEDs shall be in running state as shown in the diagram below: 1 LED 2 LEDs... -
Page 17: Electronic System Structure
3.1.4 Electronic system structure Publication number 9031523 Rev. 01 04/2015 PR - 17/19... -
Page 18: Troubleshooting
Troubleshooting Problem Checks Discharging LED Status Following reasons could trigger a RED alarm on power up Battery pack temperature is more than 60 ° Celsius Allow the unit to cool down for some time and then restarts Battery pack temperature is below 0 degree Celsius The cleaner is not supposed to run below 0 °... - Page 19 While the unit is put on Check if the adaptor is present, powered on and is physically connected to charging stand and the charging stand none of the LED’s If adaptor is present check the contacts between cleaner mechanical and neither RED nor Yellow charging stand mechanical LED’s turn on...
Need help?
Do you have a question about the Facelift and is the answer not in the manual?
Questions and answers