
Related Manuals for BROHN BRO9001

Summary of Contents for BROHN BRO9001
- Page 1 Please read this manual carefully before using, and keep it for future reference. User Manual 60 cm Ceramic Cooktop, Model Code: TRC600 90 cm Built-in Electric Oven, Model Code: BRO9001...
- Page 2 P a g e INSTRUCTION MANUAL 90cm Built-in Electric Oven BRO9001 web: brohn.com.au...
-
Page 3: Table Of Contents
KEEP YOUR OVEN IN SHAPE ....................26 STEAM CLEANING ........................26 REPLACING OVEN LAMP ......................27 DISASSEMBLING/ASSEMBLING OVEN DOOR ..............27 CLEANING OVEN GLASS ......................28 TROUBLESHOOTING ........................29 TECHNICAL SPECIFICATIONS ......................31 DISPOSAL ............................32 CUSTOMER CARE ........................33 web: brohn.com.au... -
Page 4: Package
This instruction manual has been prepared jointly for multiple models. Some of the specifications explained in the manual, may be slightly different or not be included in your appliance. Pay attention to the explanations with illustrations while reading the manual. web: brohn.com.au... -
Page 5: Safety Warnings
Ensure that no cables come into contact as the oven may become hot. Do not install oven next to soft furnishings or curtains. If power cord is damaged, it must be replaced immediately by a qualified electrician to avoid hazard. web: brohn.com.au... -
Page 6: Usage Conditions And Restrictions
Place the oven shelves and a tray correctly on the wire racks. The shelve or tray shall be between two rails and balanced. Always use an oven mitt when removing anything from the oven. web: brohn.com.au... -
Page 7: Electrical Safety
If the cord melts, this may cause the oven to short circuit and increase risk of a fire. Unplug the unit during installation, service, maintenance, cleaning and repair. Cut off all supply circuit connections before accessing the terminals. web: brohn.com.au... - Page 8 An omnipolar switch capable to disconnect power supply to the appliance is required for installation. Disconnection from power supply shall be provided with a switch or an integrated fuse, circuit breaker installed on fixed power supply according to wiring regulations and building code. web: brohn.com.au...
-
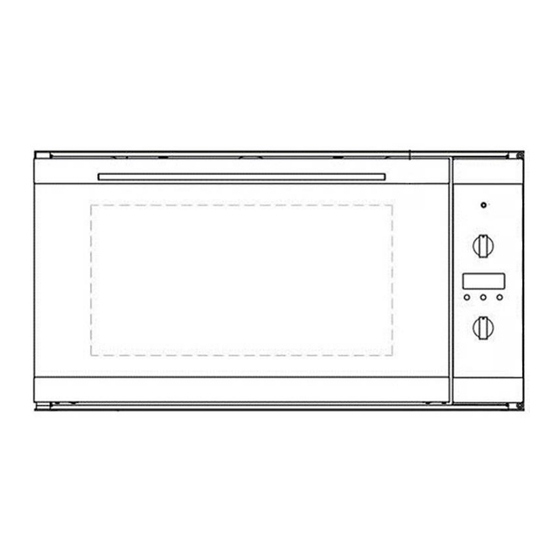
Page 9: Product Overview
Never place objects directly on the bottom of the oven or cover it with aluminium foil as this will prevent the enamel coating from being damaged. Place cookware on the oven racks. web: brohn.com.au... - Page 10 E - Function Light. When the light is on, it indicates that the oven is heating. It will turn off when the temperature setting has been reached. F - Glass oven door Optional Accessories: Deep Tray Tray Big Shelf Telescopic Rail Grill Rack Tray Handle web: brohn.com.au...
-
Page 11: Installation
In accordance with safety standards, once the appliance has been mounted, there must be no possible contact with electrical parts. Any protective parts must be secured so that they can only be removed with the use of tools. web: brohn.com.au... -
Page 12: Fastening The Oven
Screws mustn't be over tightened. Otherwise, screw sockets may be worn. Check that oven doesn't move after mounting. If oven isn't mounted in accordance with instructions, there is a risk of tilt over during operation. web: brohn.com.au... -
Page 13: Electrical Connection
The hard wiring connection: Remove terminal cover plate from rear panel of the oven. Fit wires through and connect to the appropriate terminals. Engage wires into plastic clip. Secure plastic clip. Replace cover plate onto rear panel. web: brohn.com.au... - Page 14 Electrical supply authorities. Building regulations. Local government and council authorities. AS/NZS 5601.1 (particular attention to clause 6.10.1, including figure 6.3 and subclause 6.10.1.11). AS/NZS 3000 (particular attention to clauses 4.7.1 and 3.9) web: brohn.com.au...
-
Page 15: Operation
Can be used for grilling meat products such as steak, sausages, chicken and fish. This will allow the heat to penetrate into the food and helps avoid food surfaces overcooking. Do not set the web: brohn.com.au... - Page 16 Therefore, if high temperatures are needed, we recommend that you use the Conventional setting. Interior oven light: When the selector knob is in any position other than off ”O”, the oven light comes on. web: brohn.com.au...
-
Page 17: Multi Skewer Rotisserie
5.2 MULTI SKEWER ROTISSERIE Multi skewer rotisserie operates in functions: Maxi Grill Rotisserie fan forced Grill, Rotisserie fan forced Maxi Grill, Rotisserie web: brohn.com.au... -
Page 18: Key Electronic Timer Setting
After 5 seconds, the flashing will stop and the clock will display set time. The appliance is now ready to use. The “CLOCK“ can only be adjusted and time of the day changed if neither of the automatic functions “COOK TIME” or ”END TIME” have been set. web: brohn.com.au... - Page 19 “END TIME” are set. 4. When the cooking time has ended, turn the oven function and temperature dial back to the OFF position. Switching ON/OFF the time display: Hold down any two buttons until the display becomes dark. web: brohn.com.au...
- Page 20 When the time has elapsed, the function indicator will flash, an acoustic signal will sound for 2 minutes and the oven will switch itself off. Press any button to switch off the signal and the program. web: brohn.com.au...
- Page 21 The oven will automatically switch itself ON when the set time comes up and will switch itself off when the cooking time set has elapsed. In this example: 14:05 o’clock minus 1-hour web: brohn.com.au...
-
Page 22: First Time Use Oven
Try not to cook multiple dishes simultaneously in the oven. You may cook at the same time multiple dishes. Turn off the oven a few minutes before the expiration time of cooking. In this case, do not open the oven door. Defrost the frozen food before cooking. web: brohn.com.au... -
Page 23: Cooking Guidelines
Batters must not be too runny, as this will result in prolonged cooking times. Possible issues when baking and optional solutions: Issue Solution Pastry is too dry Increase the temperature by 10℃ and reduce the cooking time. web: brohn.com.au... - Page 24 For savory roasts, especially duck and wild game meats, dress the meat with lard or bacon on the top. Cooking times may vary according to the nature of the foods, its homogeneity and volume. web: brohn.com.au...
- Page 25 The outside is over cooked high Lower the temperature and and the inside not cooked temperature increase cooking time enough The outside is too dry even Increase the temperature and though of the right color temperature reduce cooking time. web: brohn.com.au...
-
Page 26: Cleaning And Maintenance
5. Open the oven door, wipe the chamber inside with a cloth or sponge and wash using warm water with washing liquid. Caution! Possible moisture or water resides under the cooker can result from steam cleaning. After cleaning the oven chamber wipe it dry. web: brohn.com.au... -
Page 27: Replacing Oven Lamp
Ensure that seat “D” is hooked perfectly onto the edge of the slot (move the oven door backwards and forward slightly); Keep the oven door open fully, unhook the 2 levers “B” downwards and then shut the door again. web: brohn.com.au... -
Page 28: Cleaning Oven Glass
Ensure that fixing profile is seated properly in place. Installing and removing wire racks To remove wire racks, press the rack’s clips and first remove the lower than the upper side from installation location. To install wire racks; reverse the procedure for removing wire rack. web: brohn.com.au... -
Page 29: Troubleshooting
Make sure light bulb is not Internal light is dim or cooking loose, try to move and tighten it. does not operate Replace with a lamp of same Lamp might be failed specifications. No proper grounding web: brohn.com.au... - Page 30 Do not open oven door frequently, if the Oven door is opened food you are cooking does not require Oven does not cook frequently during turning. If you open the door frequently well cooking internal temperature drops and therefore cooking result will be influenced. web: brohn.com.au...
-
Page 31: Technical Specifications
These values may differ depending on the use and ambient conditions. Figures in this guide are schematic and may not be exactly matching your product. We continually strive to improve our products. The specifications and designs might be changed without notice. web: brohn.com.au... -
Page 32: Disposal
10 DISPOSAL This appliance requires special waste disposal. For further information regarding the treatment, recovery and recycling of this product please contact your local council, household waste disposal service or the store of purchase. The packaging materials are recyclable. web: brohn.com.au... -
Page 33: Customer Care
For further information on the appliance, service, spare parts or to obtain dimension and installation information, please contact our customer service or visit website. Please have above information and documents on hands before contacting customer service Phone: 1300 615 001 Email: info@brohn.com.au Web: brohn.com.au web: brohn.com.au...
Need help?
Do you have a question about the BRO9001 and is the answer not in the manual?
Questions and answers