Table of Contents
Advertisement
Quick Links
ITEM #5519816
5519821
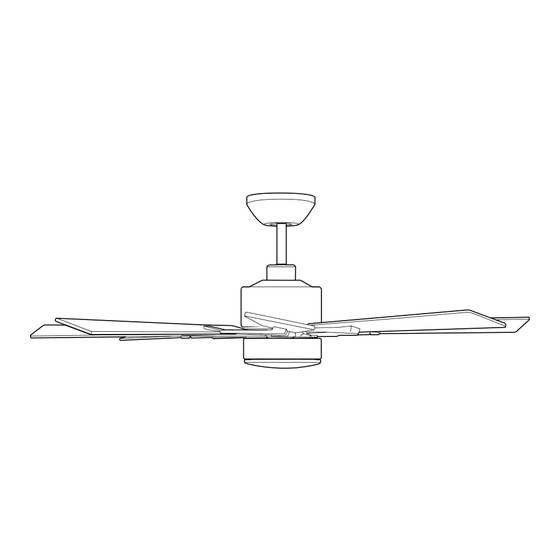
OZARK LED CEILING FAN
MODEL # OZ52MBK8LR
OZ52BNK8LR
Español p. 21
ATTACH YOUR RECEIPT HERE
ADJUNTE SU RECIBO AQUÍ
4007498
APPROVED FOR USE
Purchase Date
IN DAMP LOCATIONS
Questions, problems, missing parts? Before returning to your retailer, call our customer
service department at
800-527-1292, 8:30 a.m. - 5 p.m., CST, Monday - Friday.
1
Advertisement
Table of Contents

Summary of Contents for Ozark OZ52MBK8LR
- Page 1 ITEM #5519816 5519821 OZARK LED CEILING FAN MODEL # OZ52MBK8LR OZ52BNK8LR Español p. 21 ATTACH YOUR RECEIPT HERE ADJUNTE SU RECIBO AQUÍ 4007498 APPROVED FOR USE Purchase Date IN DAMP LOCATIONS Questions, problems, missing parts? Before returning to your retailer, call our customer service department at 800-527-1292, 8:30 a.m.
-
Page 2: Table Of Contents
TABLE OF CONTENTS Safety Information ......................... 2 Package Contents ......................... 5 Hardware Contents ............................ 6 Preparation ........................... 6 Initial Installation ........................... 6 Downrod-Style Fan Mounting ....................... 8 Closemount-Style Fan Mounting ....................10 Wiring ............................11 Final Installation .......................... 13 Operating Instructions ........................ 17 Care and Maintenance ....................... - Page 3 SAFETY INFORMATION READ AND SAVE THESE INSTRUCTIONS Please read and understand this entire manual before attempting to assemble, install or operate the product. Review the accompanying assembly diagrams. • Do not discard fan carton or foam inserts. Should this fan need to be returned to the factory for repairs, it must be shipped in its original packaging to ensure proper protection against damage that might exceed the initial cause for return.
- Page 4 SAFETY INFORMATION WARNING To reduce the risk of fire or electrical shock, do not use the fan with any solid state speed control device or control fan speed with a full range dimmer switch. To reduce the risk of fire, electrical shock or personal injury, do not bend the blades when installing or balancing them or when cleaning the fan.
-
Page 5: Package Contents
PACKAGE CONTENTS PART DESCRIPTION PART DESCRIPTION QUANTITY QUANTITY Mounting Bracket Blade Arm Blade Bar Canopy Mounting Screw (preassembled) Shade Downrod Remote Pack Pin (preassembled) LED Light Kit Clip (preassembled) Remote Control Receiver Canopy Motor Screws/Lock Washers Fitter Plate (preassembled) +1 extra Motor Plate Screws Yoke Cover (preassembled) -
Page 6: Hardware Contents
HARDWARE CONTENTS (shown actual size) Blade Bar Blade Fiber Screw/Lock Wire Screw Washer Washer Connector Qty. 16 Qty. 16 Qty. 6 Qty. 8 + 1 extra + 1 extra + 1 extra PREPARATION Before beginning assembly of product, make sure all parts are present. Place motor on carpet or on foam to avoid damage to finish. - Page 7 INITIAL INSTALLATION 2. Determine mounting method to use. A. Downrod mount (standard or angled ceiling). 20° max. B. Closemount (standard ceiling only). IMPORTANT: If using the angle mount, check to make sure the ceiling angle is not steeper than 20°. *Helpful Hint: Downrod-style mounting is best suited for ceilings 8 ft.
-
Page 8: Downrod-Style Fan Mounting
INITIAL INSTALLATION 5. Remove motor screws/lock washers (Q) from underside of motor housing (I) and save for blade arm (K) attachment later on. [If there are plastic motor blocks installed with the motor screws/lock washers (Q), discard the plastic motor blocks.] For DOWNROD-STYLE FAN MOUNTING, Plastic proceed to Step 1 below. - Page 9 DOWNROD-STYLE FAN MOUNTING Slip downrod (C) into yoke, align holes and re-install pin (D) and clip (E). Tighten downrod set screws and then tighten nut. Set Screw and Nut Depending on the length of downrod you use, you may need to cut the lead wires back to simplify the wiring.
-
Page 10: Closemount-Style Fan Mounting
DOWNROD-STYLE FAN MOUNTING Install hanging ball of downrod (C) into opening of mounting bracket (A). Align the slot in hanging ball with the tab in mounting bracket (A). DANGER: Failure to align slot in hanging ball with the tab in mounting bracket (A) may result in serious injury or death. -
Page 11: Wiring
CLOSEMOUNT-STYLE FAN MOUNTING 3. Pull wires up through hole in the middle of the Screw canopy (F) and attach canopy (F) to motor Lock Washer housing (I) using the three screws/lock washers previously removed. Temporarily hang fan on the tab on the mounting bracket (A) using one of the non-slotted holes in the canopy (F). - Page 12 WIRING IMPORTANT: Make the necessary wiring connections for Wire remote control operation as detailed below and in the Connectors accompanying drawing. For each wire connection, use wire connectors from the remote pack (N), making sure to screw each wire connector on in a clockwise direction. Connect all GROUND (GREEN) wires from fan GROUND (GREEN OR BARE) WHITE SUPPLY WIRE...
-
Page 13: Final Installation
WIRING Wrap electrical tape (not included) around each individual wire connector (DD) down to the wire. WARNING: Make sure no bare wire or wire strands are visible after making connections. Place GREEN and WHITE connections on opposite side of the outlet box from the BLACK and BLUE (if applicable) connections. - Page 14 FINAL INSTALLATION DANGER: To reduce the risk of serious bodily injury, DO NOT use power tools to assemble the blades (J). If screws are overtightened, blades (J) may crack and break. Partially insert two blade screws (AA) along with two fiber washers (BB) into first two holes in blade (J) to attach blade arm (K) to blade (J).
- Page 15 FINAL INSTALLATION Connect each blade (J) using the blade bars (L). On the topside of the blade (J), place the bent portion of the blade bar (L) directly over the opening above the end of the blade arm (K), aligning the holes.
- Page 16 FINAL INSTALLATION 6. Remove one fitter plate screw (S) from underside of fitter plate (G) and partially loosen the other two fitter plate screws (S). Connect WHITE wire from motor housing (I) to WHITE wire from LED light kit (O). Connect BLACK (or BLUE) wire from motor housing (I) to BLUE wire from LED light kit Molex...
-
Page 17: Operating Instructions
OPERATING INSTRUCTIONS CAUTION: The remote control transmitter can be programmed to multiple receivers or fans. If this is not desired, turn wall switch off to any other programmable receiver or fan. FCC Compliance Notice for Remote Control and LED Light Kit CAUTION: Changes or modifications not approved by the party responsible for compliance could void the user's authority to operate the equipment. -
Page 18: Care And Maintenance
OPERATING INSTRUCTIONS 2. Restore electrical power. IMPORTANT: To prevent damage to remote control transmitter, remove the batteries if not used for long periods. Store the remote control transmitter away from excess heat or humidity. NOTE: If fan and/or remote control fail(s) to operate or you have purchased a new remote control transmitter, make sure to turn the power off first. -
Page 19: Troubleshooting
TROUBLESHOOTING WARNING: Before beginning work, shut off the power supply to avoid electrical shock. PROBLEM POSSIBLE CAUSE CORRECTIVE ACTION Fan does not move. 1. Power is off or fuse is blown. 1. Turn power on or check fuse. 2. Faulty wire connection. 2. -
Page 20: Limited Lifetime Warranty
LIMITED LIFETIME WARRANTY Set forth below, the manufacturer warrants the fan motor for this ceiling fan to be free from defects in workmanship and material for the life of the product. Also, subject to the limitations below, the manufacturer warrants all ceiling fan parts (“ceiling fan parts” excludes the motor and parts made in whole or in part with glass) to be free from defects in workmanship and material for a period of one year after the date of purchase by the original purchaser at retail.
Need help?
Do you have a question about the OZ52MBK8LR and is the answer not in the manual?
Questions and answers