Table of Contents
Advertisement
Quick Links
Advertisement
Table of Contents

Summary of Contents for Hidrotermal HT-IVP-70V
- Page 1 Installation & Operation Manual Swimming Pool Heat Pump with DC Inverter Model No.: HT-IVP-70V HT-IVP-100V HT-IVP-130V HT-IVP-170V HT-IVP-210V HT-IVP-300V HT-IVP-300V-3 HT-IVP-350V HT-IVP-350V-3 Please read and keep this manual carefully before installing and using the heat pump.
- Page 2 Fluorinated greenhouse gas – (R32) The device contains the fluorinated greenhouse gas (R32) which is required for the device to work. Industrial designation HFC-32 Common designation Global warming potential (GWP) Further information can be found on the device itself or the Specifications. WARNING! Risk of fire and explosion through leaking finned heat exchanger! The refrigerant circuit of the finned heat exchanger contains highly pressurised, easily flammable,...
-
Page 3: Table Of Contents
- Do not open the housing. Leave repairs to qualified specialists. Liability and warranty claims are excluded in the event of repairs carried out on your own, improper operation. - Ensure that children do not insert any objects into the fan blade and heat pump. - Ensure that the electrical system to which the heat pump is connected has an earth conductor. -
Page 4: Accessories Description
1. Accessories description Each unit produced by our factory is with the following accessories: Name Qty. Instruction Manual 1 PC Guide users to install the system Drain-pipe 1 PC Used for draining the condensate water Drain-pipe connector 1 PC Connect the drain pipe to the heat pump unit Rubber shock absorber 4 PCS Reduce vibration and reduce noise... -
Page 5: Attention For Safety
2. Attention for safety Range of application: 1.Power supply: 380V/1/50/60Hz. 2.Environment temperature: -15°C 43°C 〜 3.Water temperature range: 8°C~40°C in Heating function 8°C~28°C in Cooling function Confirm the ground connection, if the ground connection is not correctly done, it may cause ●... -
Page 6: Installation Of The Unit
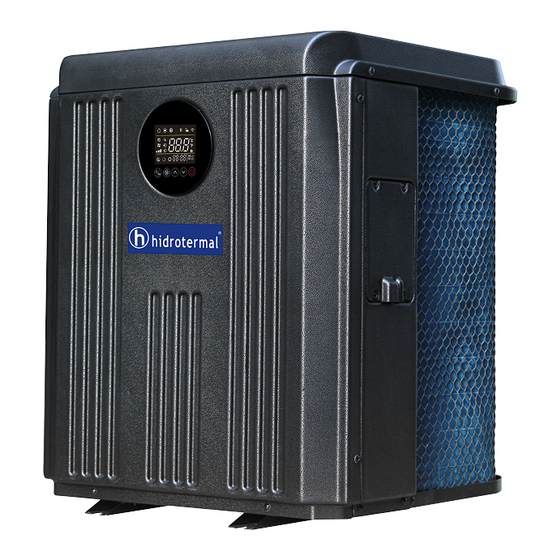
3. Installation of the unit 3.1 Installation Illustration Above illustration is just for the reference, please take the advice of authorized installers. 3.2 Advised installation space Keep the following indicated space for operation and maintenance when make the installation. 3.3 Additional By-pass kits The additional By-pass kits is suggested to be put into the piping system to get the better adjustment of water flow. - Page 7 3.4 Heat pump Exploded View Parts Parts Parts Display Top frame Wire clip Front panel Bolt Terminal Side panel Top cover Pillar Pillar Ventilation Compressor Pillar Pillar Base tray Water flow switch Back frame Four-way valve Pressure gauge Evaporator Titanium heat exchanger Sensor clip Wire cover Electric box...
- Page 8 3.5 Electrical connection Suggested power cable specification Model Power Cable Specification Inverter Plus 3*2.5 mm² Top-07/010/013/017 Inverter Plus 3*4 mm² Top-021/030 Inverter Plus Top-035 3*6 mm² Inverter Plus 5*4 mm² Top-030H/035H Terminal Terminal cable max. 6 mm² Electrical connection Position L,N and is for the power connection of our heat pump.
-
Page 9: Specifications
4. Specifications 4.1 Specifications HT-IVP- HT-IVP- HT-IVP- HT-IVP- HT-IVP- HT-IVP- HT-IVP- HT-IVP- HT-IVP- Model No. 170V 210V 300V-3 100V 130V 300V 350V 350V-3 Advised pool 15~40 20~50 30~60 35~70 45~90 60~120 65~130 60~120 65~130 volume(m³) Container loading 120/246 120/246 48/102 48/102 48/102 42/90... - Page 10 Air Flow Horizontal Direction Kind of defrost by 4 way valve Working temp. -15~43 range (℃) Casing Material Water Proof IPX4 Level Noise level 1m 41~51 42~54 44~55 45~57 47~58 49~60 51~61 49~60 51~61 dB(A) Pipe Connection 48.3 (mm) Noise level 21~31 22~34 24~35...
-
Page 11: Electrical Wiring
5. Electrical wiring 5.1 Electric wiring diagram... -
Page 12: Instruction Of Operation
6.Instruction of operation 6.1 Wire controller interface 6.2 Start up & Locking Hold the button for 1 second to switch the heat pump on or off. This button is also used to return back to the main interface. Hold the button for 3 seconds to lock or unlock the display. - Page 13 situation is in Cooling, it will show 6.4 Operation mode selected Under main interface, press to change the below three modes each time under Heating or Cooling function. Silent mode: Choose this mode that the heat pump operates silently. Eco mode: Choose this mode that the heat pump operates smartly.
- Page 14 Water Inlet Water outlet Fan motor Defrosting Wi-Fi Note: Under main interface, the Water inlet temp. and Water outlet temp. will display alternately. 6.8 Manual defrosting Hold for 3 seconds to start Manual defrosting function. 6.9 Factory setting recovery Hold for 5 seconds to recover factory setting.
-
Page 15: Adjusting And Initial Operation
7.Adjusting and Initial operation 7.1 Attention ● Open the valve of water system, inject water into the system, and exhaust air inside. ● Do adjustment after electrical safety inspection. ● After the power is switched on, start the test running of heat pump, to check if it can function well. ●... -
Page 16: Operation And Maintenance
8. Operation and maintenance 8.1 To ensure the well functioning, the system should be checked and maintained after a period of time. During the maintenance, please pay attention to some points below: ● When you need open the cabinet and make inside inspection, please do cut off the electricity power in advance. - Page 17 avoid frozen oil leakage. ● Remove the compressor air suction and exhausting pipe. ● Remove the compressor power cables. ● Remove the compressor fixing screws. ● Remove the compressor. 8.6 Conduct regular maintenance according to the user manual instruction, to make sure the unit running in good condition.
-
Page 18: Error Codes & Solutions
9. Error codes & Solutions Code Description Potential reasons Solutions Check the water circuit system, the Insufficient water flow opening of by-pass kits, the running of water pump Water flow protection Check the wiring and reconnect water Water flow switch disconnected flow switch Water flow switch defective Change a new one... - Page 19 module Defective Driver module Change a new driver module Check the water circuit system/ water Insufficient water flow flow switch Lack of gas Check if there is a gas leakage Exhause temp. too high Piping system jammed Check the piping system Exhause piping temp.
- Page 20 9.Wireless / remote control WIFI Function WiFi Icon Step1: WIFI connection: The WIFI icon will flash to enter the WIFI connection status after power on. It means the WIFI is successfully connected if the WIFI icon can be lighted over 5S. You can check the connection status in your mobile APP.
- Page 21 User registration When using the "smart life" software for the first time, user registration is required. Click the "Create New User" link to enter the registration interface. If you already have an account, just click login. After entering the registration page, please follow the instructions on the page to register。...
- Page 22 set password Enter confirmation code Enter the phone number you wa nt to register and click Next User login After successful registration, the software will jump to the login interface or directly log in successfully, enter the correct "user name" and "password" to log in. Choose the country Enter the username Enter password...
- Page 23 Need to select "Agree" The phone needs to be connected to the network through the WIFI network...
- Page 24 Turn "WLAN" Connect to available Wi-Fi networks This WIFI is not the WIFI in the module but the WIFI that can be connected to the Internet; After users log in to the software, they can add devices Device binding Click "+" or "Add Device" in the upper right corner to bind.
- Page 25 Click to enter the "Add Device Type" interface Choose "Icon Logo" After completing the "Select Device Type", enter the "Add Device Interface", and the network configuration methods are divided into "default mode (WI-FI fast connection)" and "compatibility mode (hotspot distribution network)" Default mode (WI-FI fast connection):...
- Page 26 Enter Wi-Fi password The remote controller simultaneously press the up key + mode key Enter for 3 seconds to enter and click the "default mode" distribution network confirm Device name modified Enter the password and confirm it will jump to the connection interface Click Finish to...
- Page 27 If the network distribution fails, the APP will display the page as shown in the figure, you can choose to re-add or view the help. Compatibility mode Select "Other Ways" : in the Add Device interface Press and hold the timing key +,down key +,power key simultaneously...
- Page 28 Click Go to connect and jump to the Wi-Fi interface, select Wi-Fi with the words After selecting and connecting, SmartLife-xxxx return to the APP interface and enter network distribution process...
- Page 29 Enter correct password and click confirm Control introduction Successfully bound device Click to enter control...
- Page 30 Equipment details Set temperature, and current inlet water temperature display temperature adjustment Timing setting, can Switch machine set the timing on or control Equipment working mode selection...
- Page 31 10.Adjusting and Initial operation 10.1 Attention ●Do adjustment after electrical safety inspection. ●After the power is switched on, start the test running of heat pump, to see if the function is well. ●Forced operation is forbidden, because it is very dangerous to work without protector. 10.2 Preparation Before Adjustment ●Check that the system is installed correctly.
- Page 32 11. Operation and maintenance 11.1 The heat pump should be installed and operated by qualified engineers. To ensure the continued correct functioning of the system it is recommended that it should be checked and maintenance should be carried out at regular. During maintenance, please pay attention to the points below: ●Check that all parameters are normal during system operation.
- Page 33 ●Remove the compressor air suction and exhaust pipe. ●Remove the compressor power cables. ●Remove the compressor fixing screws. ●Remove the compressor. 11.5 Conduct regular maintenance according to the user manual instruction, to make sure the unit running is in good condition. ●If there is a fire, disconnect the power immediately and put the fire out with fire extinguisher.
- Page 34 12.Fault analysis and elimination method...
- Page 35 13.After-sale service If your heat pump does not operate normally, please turn off the unit and cut off the power supply at once, then contact our service center or technical department.
Need help?
Do you have a question about the HT-IVP-70V and is the answer not in the manual?
Questions and answers