
Summary of Contents for Thermics EASY-TOUCH
- Page 1 EASY - TOUCH TOUCH SCREEN DISPLAY WITH INTEGRATED WI-FI MODEM AND TEMPERATURE AND HUMIDITY SENSOR USER MANUAL...
-
Page 2: Table Of Contents
INDEX 1. INTRODUCTION___________________________________________________________________3 2. WEEKLY PROGRAMME _____________________________________________________________5 3. SUMMER / WINTER AND SWITCHING THE SYSTEM ON / OFF ______________________________8 3.1 Turning the System On and Off _________________________________________________8 3.2 Summer / Winter switching __________________________________________________10 4. DOMESTIC HOT WATER ___________________________________________________________ 12 5. ALLARMS______________________________________________________________________ 15 6. -
Page 3: Introduction
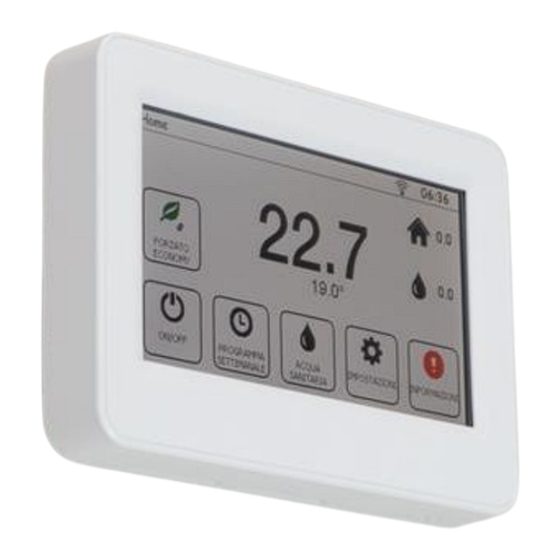
Use and Maintenance Manual 1. INTRODUCTION The EASY - TOUCH display is a user-friendly interface that allows you to control the PDC with which it is connected. The display has a Wi-Fi modem on board to connect to the remote management portal and a temperature and humidity sensor to manage a zone of the system in which it is installed. - Page 4 Use and Maintenance Manual Note It is not necessarily the case that all buttons and icons shown are always displayed, this depends on the type of system. For example: If the system does not include domestic hot water production, the corresponding button and the domestic hot water tank temperature icon will not be displayed;...
-
Page 5: Weekly Programme
Use and Maintenance Manual 2. WEEKLY PROGRAMME Click on the Weekly Programme button to enter the screen for managing the PDC during the week. Image 2: 'Weekly Schedule' screen By selecting the Edit Programme button, changes can be made to the desired days: Image 3: Screen for selecting days to be edited Six different programmes can be set for each day (or group of days), e.g: - 6:00 - Economy programme... - Page 6 Use and Maintenance Manual Image 4: Screenshot within the day group [Mon-Fri] to be edited Una volta apportate le variazioni in Imposta Variazione selezionare il Pulsante Conferma per tornare alla schermata precedente salvando le modifiche o il Pulsante Annulla per cancellarle: Increase the hour or Indication of selected minutes...
- Page 7 Use and Maintenance Manual Once the 6 daily programmes have been reached, the Add Variation button disappears: Image 6: Screen where all 6 daily programmes have been set Press the Confirm button to return to the Weekly Schedule screen. Click the Edit Parameter Button to edit Saturday and Sunday separately.
-
Page 8: Summer / Winter And Switching The System On / Off
Use and Maintenance Manual 3. SUMMER / WINTER and SWITCHING THE SYSTEM ON / OFF 3.1 Switching the Plant On and Off To switch the system on (ON) or off (OFF), it is necessary from the Home screen to press the bottom left button (indicated by the arrow): Image 9: Home screen with indication of system off Within the "System On"... - Page 9 Use and Maintenance Manual Note to the installer The switching on and off of the system may depend on various factors. Indicate to the end user which of these influence the system ON/OFF in the specific case: Presence of a calendar Presence of an external contact Outside temperature User setting from the touch screen display...
-
Page 10: Summer / Winter Switching
Use and Maintenance Manual 3.2 Summer - Winter switching Summer/winter switching is only possible if the PDC to which the display is connected has been programmed to manage both seasons. If one of the two seasons is not set, selecting the button at the bottom left of the Home screen and entering the "System start-up"... - Page 11 Use and Maintenance Manual Image 17: "System switch-on" screen of a Summer and Winter system in OFF Once the desired season has been selected, press the Exit button to return to the Home screen. You will notice that the button at the bottom left of the Home screen will have changed from Winter (snowflakes) to Summer (sunshine) or vice versa: Image 18: Home screen of a system in summer mode Note to the installer...
-
Page 12: Domestic Hot Water
Use and Maintenance Manual DOMESTIC HOT WATER The Domestic Hot Water button is displayed in the centre of the Home screen. Image 20: Home screen with domestic water system Clicking the Domestic Hot Water button from the Home screen opens the 'Domestic Hot Water Setting' screen: Image 21: 'Domestic Hot Water Setting' screen in Comfort 12 | 31... - Page 13 Use and Maintenance Manual From this screen you can: - By pressing the DHW Enable button selector, it is possible to enable (ON) or disable (OFF) domestic hot water production by simply clicking on the selector; - By selecting the Comfort button, and then pressing the '+' and '-' buttons, the set point can be set in Comfort working mode (previous picture);...
- Page 14 Use and Maintenance Manual Once the desired settings have been selected press the Confirm button to save the changes or the Cancel button to discard them. In case DHW is OFF the DHW Settings screen will be blank except for the Enable DHW button: Image 25: 'Domestic hot water setting' screen in OFF And on the Home screen you will see the following image with the crossed-out drop icon in the Sanitary...
-
Page 15: Allarms
Use and Maintenance Manual 5. ALARMS The Alarms button is only displayed if there are unresolved alarms present. Image 28: 'Home' screen with alarms in progress Clicking on the Alarms Button will list all alarms present. Once resolved by returning to the Home screen the But- ton will disappear. - Page 16 Use and Maintenance Manual Pressing the Information button will show the main performance of the PDC at that moment. Image 31: 'Home' screen without alarms in progress Pressing the alarm button will display the screen with the words "no error present". Image 32: Screen without alarms in progress Pressing the 'RESET PDC' button will manually reset the alarms in the machine.
-
Page 17: Settings
Use and Maintenance Manual 6. SETTINGS Clicking on Settings will take you to the User Settings screen: Image 34: User Settings Screen The Wi-Fi Connection Button will be discussed in “Connections WI-FI” at the end of this document, the Ad- vanced Settings Button in the next chapter. - Page 18 Use and Maintenance Manual After pressing the Winter Correction button, the values can be set. Image 37: Screen shot "Set Winter Correction Value". After pressing the Summer Correction button, the values can be set. Image 38: Screen "Set Summer Correction Value". If an installer password has been set (System Settings) this will be required to continue: Image 39: Installer password input screen 18 | 31...
- Page 19 Use and Maintenance Manual Once entered, it is not prompted for five minutes, even if you return to the Central Heating Home page. Image 40: Installer Settings Screen Clicking on the climate curves button will open the following screen: Image 41: Winter Circuit Screen Clicking on the Summer button will result in: Image 42: Summer Circuit Screen 19 | 31...
- Page 20 Use and Maintenance Manual This menu allows you to view certain information about the circuit and to change the water temperature set points in both winter and summer. The pictures above show that in winter the circuit is managed by a climatecurve, in summer by a fixed point.
- Page 21 Use and Maintenance Manual By clicking on the Change button, if the Summer button is selected, only the Economy and Comfort set point can be changed: Image 45: Setting summer fixed point values Press Confirm if you want to save the changes made or Cancel to delete them. By clicking on the Adjustment Mode we could go to enable or disable PDC control functions.
- Page 22 Use and Maintenance Manual By pressing the 'Setpoint Humidity' button, we can change the relative humidity setpoint of the PDC. Image 48: Screen shot "Set Relative Humidity Setpoint". By pressing the 'Integration Offset' button, we can go to display/change the Integration values in Comfort and Economy.
-
Page 23: Screen Brightness
Use and Maintenance Manual Image 51: "Zone 2 Programme" screen Image 52: Screen "Set working mode". 6.2 Screen brightness Click on Screen Brightness to increase '+' or decrease '-' brightness: Image 53: Screen brightness change screen 23 | 31... -
Page 24: Wi - Fi Connections
Use and Maintenance Manual WI-FI CONNECTION Within the User Settings screen accessible from the Home screen: Image 54: User Settings Screen Selecting the Wi-Fi Connection button accesses the Wi-Fi Connection Management screen: Image 55: Wi-Fi Connection Management screen In the image above, the parameters "Plant Code" and "Plant Password" are required during the registration phase of the plant on the portal by the remote management (for which please refer to the relevant manual). - Page 25 Use and Maintenance Manual The display scans the available networks: Image 57: Scanning for available Wi-Fi networks Once the Select Wi-Fi Network screen is displayed using the 'UP' and 'DOWN' buttons, select the network you wish to connect to and select 'SELECT' or 'EXIT' to return to the previous screen: Image 58: Screen showing available Wi-Fi networks If you click on the Choose button, the Wi-Fi password prompt for the selected network will appear.
- Page 26 Use and Maintenance Manual Once 'OK' is clicked (if the password is correct), the display shows the Wi-Fi Connection Management screen again. Various texts will appear under the Status parameter: WIFI OFF [Online]: means that the target is going Online (this is because the modem in the default touch display is set to Online), while the initial state is WIFI OFF;...
-
Page 27: Advanced Settings
Use and Maintenance Manual 7.2 Advanced Settings By clicking on Advanced Settings, two further buttons appear: 'Address Setting' and 'Modem Management'. Image 62: Screen that appears after clicking Advanced Settings from the screen shown in Image 61. Note: If you need to change these settings, you should contact your IT technician and/or system installer. Under Default Address Setting you will find DHCP set to 1, which means that IP address, NetMask and Gateway are automatically acquired by the router, while DNS1 and DNS2 remain valid as entered by default, as shown in the following image. - Page 28 Use and Maintenance Manual It is recommended not to change the DHCP setting unless the network to which the display modem is to be connected is corporate or private with high levels of security: - By setting DHCP active to 2 (Full DHCP), all parameters (IP, NetMask, Gateway, DNS1 and DNS2) are acquired from the company or private router.
- Page 29 Use and Maintenance Manual As shown in the image above if you click on WIFI OFF, WIFI ACTIVE DISCONNECTED or WIFI ACTIVE CONNECTED the Wi-Fi icon will always be crossed out even if the Wi-Fi network has been set up. If you click on ONLINE the Wi-Fi icon will only turn blue without a bar if the modem in the display can communicate with the remote man- agement portal.
-
Page 30: Summary Table Of Errors
Use and Maintenance Manual ERROR SUMMARY TABLE Last Error Description Solution No error No connection to the network for 40 Connection time-out Check network signal seconds Incorrect password The password used is incorrect Enter the correct password Network not recognised SSID network does not exist Check network SSID The network exists, but there are problems... - Page 31 Thermics Energie s.r.l. Operational Headquarters: Via C. Pascoletti 2 – 33040 Povoletto (UD) Tel. (+39) 0432 823600 – Fax. (+39) 0432 825847 www.thermics-energie.it | info@thermics-energie.it All rights reserved. Thermics-Energie reserves the right to amend and update this document...
Need help?
Do you have a question about the EASY-TOUCH and is the answer not in the manual?
Questions and answers