Table of Contents
Advertisement
Available languages
Available languages
Quick Links
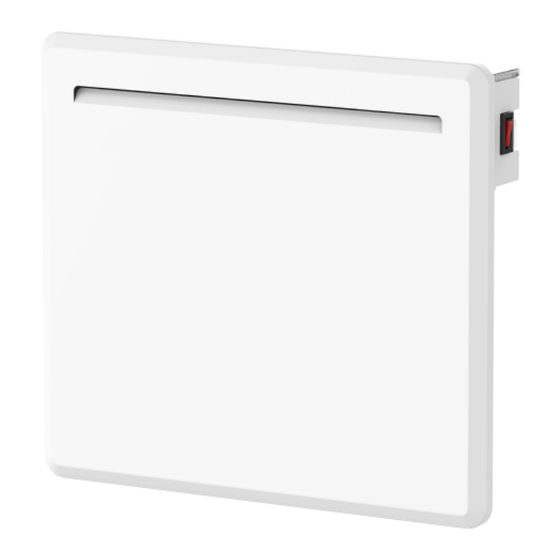
Panel Heater
Panelovn
Models: CA600DN, CA750LDN, CA1200DN
ASSEMBLY AND INSTRUCTION MANUAL (EN: PAGE 1-13)
BRUKSANVISNING (NO: SIDE 14-27)
Seasonal Energy Efficiency (ERP) information (page: 28-30)
Please read the instructions carefully before use. Take good care of this manual for later use.
Vennligst les bruksanvisningen nøye før bruk. Ta godt vare på denne bruksanvisningen for senere bruk.
0
Advertisement
Chapters
Table of Contents

Related Manuals for CALOR CA600DN

Summary of Contents for CALOR CA600DN
- Page 1 Panel Heater Panelovn Models: CA600DN, CA750LDN, CA1200DN ASSEMBLY AND INSTRUCTION MANUAL (EN: PAGE 1-13) BRUKSANVISNING (NO: SIDE 14-27) Seasonal Energy Efficiency (ERP) information (page: 28-30) Please read the instructions carefully before use. Take good care of this manual for later use.
-
Page 2: Table Of Contents
CONTENT Important safety information........................2 Specifications………………………………………………………………………………..7 Before first use……………………………………………………………………………..7 First use…………………………………………………………………………………...…7 Description of heater……………......................7 Assembly…………………………………………………………………………………….8 Usage..…………………………………………………………………………….…….8 Resetting the heater…………………………………………………………………………12 Maintenance………………………………………………………………………………..12 Warranty…………………………………………………………………………………….13 Waste disposal………………………………………………………………………………13... -
Page 3: Important Safety Information
Important safety information You must obey common safety guidelines when using electrical products, especially in the presence of children. WARNING! To avoid electric shock or damage due to the heat, always make sure the plug is pulled out before the heater is moved or cleaned. •... - Page 4 • Always turn off the heater and unplug it when not used for a long time. • Pay special attention if the heater is used in rooms where children, the handicapped or elderly reside. • The heater should not be set up directly beneath an electrical socket outlet.
- Page 5 • Never cover the air vents on the heater. Avoid potential fire hazards by making sure the air intakes are not blocked or covered. The heater should be used in rooms with normal flat floors. • The heater must be fixed to the wall before using it. •...
- Page 6 • Avoid overloading the mains (the circuit) where the heater is connected. The heater may overload the electrical circuit if other electrical devices are plugged into the same socket outlet. • The device cannot be used by children under 8 years of age and persons with reduced physical or mental abilities or lack of experience and knowledge unless they have been given supervision or instruction in the...
- Page 7 in the safe use of the device and understand the hazards involved. WARNING: Do not use this heater in small rooms when they are occupied by persons not capable of leaving the room on their own, unless constant supervision is provided.
-
Page 8: Specifications
Specifications Power Model Thermostat Color Height Width Amperage rating CA600DN Electronic White 40,0 cm 45,0 cm ~230V/50Hz IPx4 CA750LDN Electronic White 20,0 cm 75,0 cm ~230V/50Hz IPx4 CA1200DN Electronic White 40,0 cm 66,0 cm ~230V/50Hz 1200 IPx4 Before first use After unpacking the heater, check to make sure the product was not damaged during transport. -
Page 9: Assembly
Assembly Make sure the heater is placed according to the minimum safety distances in illustration above. 1. Drill holes in the wall according to the dimensions in the supplied illustration sheet. 2. Fasten the wall-bracket to the wall with the supplied screws as in illustration 2. 3. - Page 10 If the temperature sensor is not functioning properly, you will see the symbol below on the display. Please contact the dealer or importer. Start using - Turn on the power switch, the heater enter into standby mode, and show on display. - Press button to turn on the heater, and the heater will enter into factory default state as the first use.
- Page 11 Heating mode 4 modes: Free mode (Fr), Weekly program (P1), Weekly program (P2), Anti-frost mode (AF) - Press button to select running mode: Fr→P1→P2→AF→Fr - Free mode: Temperature set 5 ~35℃ by pressing button. - Weekly program: Please note if the week and time settings are not finished, the first time you enter ⚫...
- Page 12 For better understanding, please see below example: Tuesday ⚫ 00:00 to 07:00, requested temperature 20℃ ⚫ 07:00 to 17:00, requested temperature 10℃ ⚫ 17:00 to 24:00, requested temperature 25℃ ⚫ Setting as below: In P2 mode, press and hold 3 seconds → Press and select d2(Tuesday)→...
-
Page 13: Resetting The Heater
open window function off, display show , then press button to save setting, or wait 15 seconds to save automatically. - Open window function description: 1. If you open a window widely in the space where the heater is located and the temperature drops 2 ℃... -
Page 14: Warranty
Warranty The warranty is valid for 2 years. The heater will be repaired or replaced during this time should any malfunction occur. The warranty applies if the heater is used according to these instructions and the customer can present a purchase receipt. If the heater malfunctions in any way, please contact the store where it was purchased or the importer. - Page 15 INNHOLDSFORTEGNELSE Viktig sikkerhetsinformasjon........................15 Spesifikasjoner……………………………………………………………………………….20 Før førstegangsbruk………………………………………………………………………….20 Førstegangsbruk……………………………………………………………………………...20 Beskrivelse av ovnen…………………………………………………………………………21 Montering……………………………………………………………………………………21 Bruk……………………………………………………………………………………….…22 Tilbakestille varmeapparatet til fabrikkinnstillinger…………………………………………...26 Vedlikehold…………………………………………………………………………………..26 Garanti……………………………………………………………………………………….26 Avfallshåndtering…………………………………………………………………………….27...
-
Page 16: Viktig Sikkerhetsinformasjon
Viktig sikkerhetsinformasjon Vanlige sikkerhetsregler må alltid følges ved bruk av elektriske artikler, spesielt når barn er tilstede. ADVARSEL! For å unngå elektrisk støt eller skader på grunn av varme, pass alltid på at støpselet er trukket ut før ovnen flyttes eller rengjøres. •... - Page 17 • Vær spesielt oppmerksom hvis ovnen er i bruk i rom hvor barn, handikappede eller eldre oppholder seg • Ovnen må ikke stilles rett under et elektrisk kontaktpunkt • Ledningen må ikke legges under tepper av noe slag. Påse at den ligger på en slik måte at ingen kan snuble i •...
- Page 18 • Ovnen må ikke plasseres under eller i nærheten av brennbart materiale. Avstand til brennbart materiale må være minimum 1,2 meter • Ovnen blir varm ved bruk og kan forårsake brannskader ved berøring • Bruk aldri ovnen i nærheten av en dusj, badekar eller badebasseng •...
- Page 19 • Ovnene må ikke brukes i rom hvor det oppbevares eller brukes brannfarlige stoffer som maling, lakk eller gass • Påse at ledningen ligger bak ovnen og ikke i front foran varmeelementet • Vær oppmerksom på at ovnen over tid kan samle støv. Ansamling av støv i ovnen kan føre til brann •...
- Page 20 • Barn i alderen 3 til 8 år kan kun slå AV/PÅ produktet, forutsatt at ovnen er montert slik monteringsanvisningen viser, og barna har fått instruksjon eller tilsyn vedrørende bruk av produktet på en sikker måte og forstår farene som er involvert ADVARSEL: Bruk aldri ovnen i små...
-
Page 21: Spesifikasjoner
Specifications Effekt Modell Termostat Farge Høyde Lengde Strømstyrke IP-grad CA600DN Elektronisk Hvit 40,0 cm 45,0 cm ~230V/50Hz IPx4 CA750LDN Elektronisk Hvit 20,0 cm 75,0 cm ~230V/50Hz IPx4 CA1200DN Elektronisk Hvit 40,0 cm 66,0 cm ~230V/50Hz 1200 IPx4 Før førstegangsbruk Etter utpakking av ovnen, kontroller om det er noen transportskader på produktet. Skulle det være synlige skader på... -
Page 22: Beskrivelse Av Ovnen
Beskrivelse av ovnen Luftuttak topp Luftuttak forside Kontrollpanel Frontpanel Strømbryter Bakplate Temperatursensor Montering Sørg for at varmeapparatet er plassert i henhold til minimumsavstandene i illustrasjonen ovenfor. 1. Bor hull i veggen i henhold til målene i illustrasjonsarket som medfølger. 2. Fest veggbraketten til veggen med de medfølgende skruene som vist i illustrasjon 2. 3. -
Page 23: Bruk
ADVARSEL! Før du starter produktet, må du kontrollere at det er riktig festet til veggen. Hvis produktet ikke er riktig montert, kan det oppstå problemer. Bruk Display Indikatorlampe for oppvarming Indikatorlampe for tidsur Indikatorlampe for modus Knapp for økning Knapp for reduksjon Knapp for modus Timer-knapp På/Standby-knapp... - Page 24 Innstilling av ukesprogram Vær oppmerksom på at du må stille inn uke og klokkeslett første gang du bruker varmeapparatet. Følg trinnene nedenfor for å aktivere innstillingene for uke og klokkeslett: 1. Trykk og hold inne knappen i 3 sekunder, displayet viser og blinker.
- Page 25 P2: Programmet kan endres. Standardinnstillingene er som følger. ⚫ Innstilling: 1. I P2-modus, trykk og hold inne knappen i 3 sekunder, displayet viser 2. Trykk på nappen for å velge fra d1 til d7 (mandag til søndag). 3. Trykk på knappen for å...
- Page 26 Innstilling som nedenfor: I P2-modus, trykk og hold inne i 3 sekunder → Trykk og velg d2(Tirsdag) → ⚫ Trykk → Trykk og velg 20 → Trykk → Trykk og velg 7 (00:00 to 07:00, 20℃) Fortsett å trykke → Trykk og velg 10 →...
-
Page 27: Tilbakestille Varmeapparatet Til Fabrikkinnstillinger
1. Hvis du åpner et vindu i rommet der varmeapparatet er plassert, og temperaturen faller 2 ℃ eller mer enn 2 ℃ på to minutter, vil en sensor registrere det kraftige temperaturfallet. Varmeapparatet slås automatisk av og vises i displayet. 2. -
Page 28: Avfallshåndtering
Avfallshåndtering Symbolet angir at dette produktet ikke skal kastes sammen med vanlig husholdningsavfall. For å hindre mulig skade på miljø eller helse, må dette produktet leveres til resirkulering av elektrisk og elektronisk utstyr. Din lokale el. forretning eller miljøstasjon har en ordning for å ivareta en miljøriktig destruksjon og resirkulering av slike produkter. - Page 29 SEASONAL ENERGY EFFICIENCY Information requirement for the electric local space heaters Model identifier(s): CA600DN Item Symbol Value Unit Item Unit Heat output Type of heat input, for electric storage local space heaters only (select one) Nominal heat output Pnom manual heat charge control, with integrated thermostat...
- Page 30 SEASONAL ENERGY EFFICIENCY Information requirement for the electric local space heaters Model identifier(s): CA750LDN Item Symbol Value Unit Item Unit Type of heat input, for electric storage local space heaters only (select Heat output one) Nominal heat output Pnom 0.75 manual heat charge control, with integrated thermostat manual heat charge control with room and/or outdoor Minimum heat output (indicative)
- Page 31 SEASONAL ENERGY EFFICIENCY Information requirement for the electric local space heaters Model identifier(s): CA1200DN Item Symbol Value Unit Item Unit Heat output Type of heat input, for electric storage local space heaters only (select one) Nominal heat output Pnom manual heat charge control, with integrated thermostat manual heat charge control with room and/or outdoor Minimum heat output (indicative) Pmin...
Need help?
Do you have a question about the CA600DN and is the answer not in the manual?
Questions and answers