Table of Contents
Advertisement
Quick Links
技术要求:
148
210
1.成品规格:
x
mm;
2.印刷方式:
单面印刷 ;
双面印刷;
3.装订方式:
骑马钉;
单面对折;
4.材质:
70g双胶纸;
108g铜板纸;
5.印刷颜色:
色;
单黑
6.有条码的话,刷码等级需达到B级;
7.检验工具:卷尺,尺寸单位均为mm
Electric Vehicle DC Charger
Installation Instructions
EVD100/030(EU)
版本号
修订原因
线条图提供者
吴斌源
2023.3.21
排版者
庄妍妍
2023.3.21
文件翻译者
陈凌云
2023.3.21
修订人 修订日期
签名
日期
说明书
设计者
吴斌源
2023.3.21
审核者
2023.3.21
吴旭
批准者
1:1
吴斌源
2023.3.21
签名
EVD100/030(EU)
1.0
Advertisement
Table of Contents

Summary of Contents for Joint EVD100/030
- Page 1 Electric Vehicle DC Charger Installation Instructions EVD100/030(EU) 说明书 技术要求: 线条图提供者 设计者 1.成品规格: mm; 吴斌源 吴斌源 2.印刷方式: 单面印刷 ; 双面印刷; 2023.3.21 2023.3.21 3.装订方式: 骑马钉; 单面对折; EVD100/030(EU) 排版者 审核者 4.材质: 70g双胶纸; 108g铜板纸; 庄妍妍 2023.3.21 2023.3.21 吴旭 5.印刷颜色: 色; 单黑 6.有条码的话,刷码等级需达到B级; 批准者 文件翻译者...
- Page 2 Electric Vehicle DC Charger Installation Instructions EVD100/030(EU)
-
Page 3: Table Of Contents
USER MANUAL USER MANUAL WARNING & CAUTION WARNING & CAUTION TABLE OF CONTENTS 1. Important Safety Instructions 1.1 Overall Warnings & Cautions 1. IMPORTANT SAFETY INSTRUCTIONS ........2 WARNING: To avoid fire, injury or death, carefully read and follow the instructions during 1.1 Overall Warnings &... -
Page 4: Installation Requirements
USER MANUAL USER MANUAL WARNING & CAUTION 2. Product Introductions 1.2 Installation Requirements 2.1 Introductions WARNING: Disconnect electrical power prior to installing the charging station. 2.1.1 function WARNING: Be sure to preview the user manual and ensure local building and electrical codes are Charge reviewed before installing the DC charger. -
Page 5: Dimensions
USER MANUAL USER MANUAL Remote IOT function Convenient • Wireless or wired communication mode, flexible networking • The charger has the function of IOT with the equipment cloud platform to monitor numerous • 7 "touch screen LCD display, friendly interactive interface parameters in real time. -
Page 6: Basic Interface
USER MANUAL USER MANUAL 2.3 Basic Interface 2.4 Direction of Cooling Airflow Front Cover Exhaust Grille Air Out Air Out 7" Information Screen Indication Light CCS2 Cable Outlet Air In RFID Card Reader 2.5 Light Codes Emergency Stop Main Cabinet Status AC Cable Inlet Stand by... -
Page 7: Specification
USER MANUAL USER MANUAL 2.6 Specification 2.7 Charging Curve 2.7.1 Ambient temperature power limit curve Number of phase / wire 3ph / L1, L2, L3, N, PE Voltage Rating 400V±10% Max. Input Amperage AC Input 55℃, 30KW Frequency 50 / 60Hz Power factor PF≥0.98@Rated load Efficiency... -
Page 8: Installation
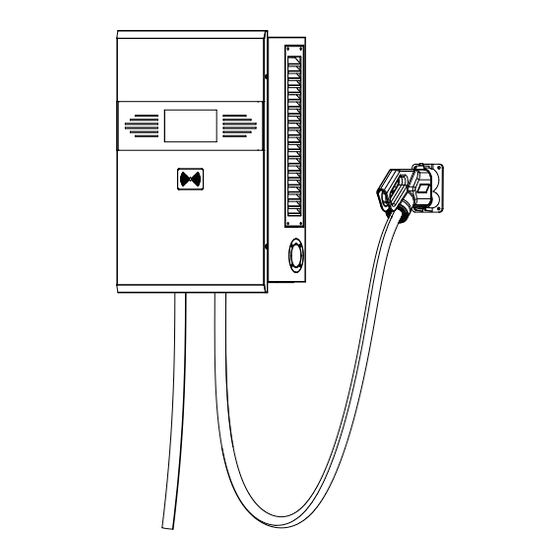
USER MANUAL USER MANUAL 3. Installation M6 Spring Washer 3.1 Unpacking M6 Nut Check the box to ensure you have this installation guide and these parts: Type Quantity Diagram RFID Card Charger 3.2 Gather Tools Wall-Mounted Bracket Recommended Tools for Installation Expansion Bolt (M7) Type... -
Page 9: Installation Procedure
USER MANUAL USER MANUAL STEP 3 3.3 Installation Procedure Install the two brackets on the rear side of the charger into the grooves on the wall-mounted bracket. STEP 1 Insert Attach 4 pcs M7 expansion Bolts to the wall-mounted bracket. (Unit: mm) STEP 4 Fix the charger with 4 pcs M5x45 Bolts through the side of the wall-mounted bracket. -
Page 10: Operate Your Device
USER MANUAL USER MANUAL 4. Operate Your Device STEP 6 Fix the Gun Holder on the wall-mounted bracket with 4 pcs M6x20 Bolts. 4.1 starting up STEP 1 System Initialization. English español Français Waiting For Plug in Connector. STEP 7 Installing Cables 1.Fasten PE wires onto the connectors on the cabinet. -
Page 11: User Authorization
USER MANUAL USER MANUAL Plug in DC Charging Connector. Model2: Scan QR code. (CCS2 Plug) 4.2 User Authorization 4.3 Prepare for Charging STEP 2 STEP 3 Model1: Use RFID Card. After authorization and plug-in process, the charger will start communicating with the vehicle. Back Cancel Back... -
Page 12: In Charging
USER MANUAL USER MANUAL 4.4 In Charging 4.5 Stop Charging STEP 4 STEP 5 ● After successful communication with the car, enter the formal charging state. state 1: ● Charging respond to the needs of BMS in real time. When the battery has been fully charged or reaches the limit of the setting it will stop charging ●... -
Page 13: Finish Charging
USER MANUAL USER MANUAL 4.6 Finish Charging User also can tap the RFID or mobile app to stop charging. STEP 6 When charging is finished, your order details will appear. Back Cancel state 3: Unplug the charging connector from charging inlet of the EV and return the charging connector to If an emergency occurs push the Emergency Stop Button to stop charging immediately. -
Page 14: Troubleshooting And Warranty
USER MANUAL USER MANUAL 5. Troubleshooting and Warranty 5.1 General Troubleshooting 5.2 Warranty • The warranty period for this charger is two years. Fault Solution phenomenon • During the warranty period for any malfunction under normal use according to the User Manual (to ●... - Page 15 USER MANUAL USER MANUAL...
Need help?
Do you have a question about the EVD100/030 and is the answer not in the manual?
Questions and answers