Table of Contents
Advertisement
Quick Links
Advertisement
Table of Contents

Summary of Contents for SEP 5K UL
- Page 1 USER MANUAL Energy Storage System...
-
Page 2: Preface
Inverters must be installed by professional electrical engineers who have obtained relevant qualifications. Scope This manual is applicable to following inverter models: 5K UL 7.6K UL 6K UL 10K UL For battery models and other detailed information, please refer to the Appendix. -
Page 3: Table Of Contents
CONTENTS Preface About This Manual Target Group Scope Conventions 1 Safety 1.1 Symbols Used 1.2 Safety Precaution 2 Product Introduction 2.1 Overview 2.2 Product Appearance 3 Installation 3.1 Packing List 3.2 Selecting the Mounting Location 3.3 Mounting 4 Electrical Connection 4.1 Wiring Diagram 4.2 Grounding 4.3 GRID/BACKUP/GEN Connection... - Page 4 6 Commissioning 6.1 Inspection 6.2 Commissioning Procedure 7 User Interface 7.1 LED/LCD 7.2 App Setting Guide 8 Maintenance 8.1 Routine Maintenance 8.2 Inverter Troubleshooting 9 Technical Specifications Appendix...
-
Page 5: Safety
Safety 1 Safety Before using the inverter, please read all instructions and cautionary markings on the unit and in this manual. Put this manual to a place where you can take it easily. inverter strictly conforms to related safety rules in design and test. Please follow the local laws and regulations during installation, operation and maintenance. -
Page 6: Safety Precaution
Safety 1.2 Safety Precaution Installation, maintenance and connection of inverters must be performed by qualified personnel, in compliance with local electrical standards, wiring rules and requirements of local power authorities and/or companies. The temperature of some parts of the inverter may exceed 60℃ during operation. Do not touch the inverter during operation to avoid being burnt. -
Page 7: Product Introduction
Product Introduction Product Introduction 2.1 Overview Energy Storage System(ESS) Typically, an ESS consists of PV array, inverter, battery, loads and electricity sensor. The inverter is a high-quality which can convert solar energy to AC energy and store energy into battery. The energy generated by inverter can be preferentially supplied to its self consumption, stored in the battery for future use or fed into public grid. -
Page 8: Product Appearance
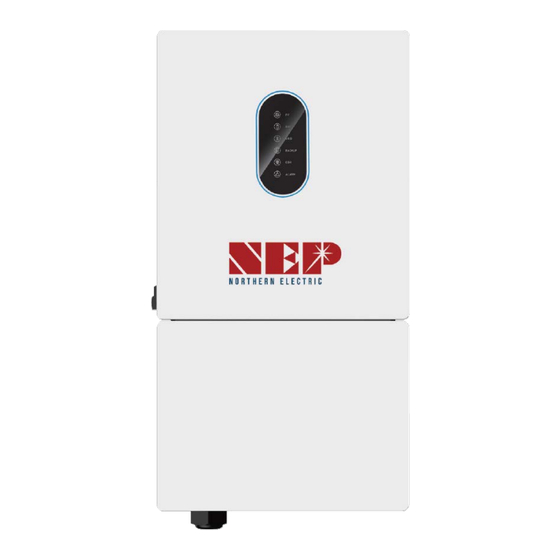
Product Introduction 2.2 Product Appearance 2.2.1 Inverter Appearance The External View of Inverter 16.54" 9.45" (420.0mm) (240.0mm) 31.50" (800.0mm) Inverter dimensions: Width Height Depth 16.54" 31.50" 9.45" (420.0mm) (800.0mm) (240.0mm) LED Details: Icon Description GRID BACKUP ALARM... - Page 9 Product Introduction The Side Views of inverter Description PV switch Toggle latch (for opening/closing the wire box cover) ON/OFF Button Handle Areas (right) (left) The Bottom View of inverter Description Battery connection port PV connection ports COM Port (GPRS/WIFI/LAN) Communication connection ports RS485, BMS, DRM, CT, DRY, RSD, PARA External grounding point GRID connection port...
-
Page 10: Installation
Installation Installation 3.1 Packing List After unpacking, please check the following packing list carefully for any damages or missing parts. If any damages or missing parts occurs, contact the supplier for help. Number Quantity Description Inverter Mounting bracket File package Meter (Optional) M6 Expansion screws M6 Security screw... -
Page 11: Selecting The Mounting Location
Installation 3.2 Selecting the Mounting Location 3.2.1 Installation Environment Requirements a. With an IP65 protection rating, the inverter can be mounted indoors or outdoors. b. The inverter is suitable for use in residential non-habitable spaces. c. The mounting location must be inaccessible to unrelated personnel since the enclosure and heat sinks are extremely hot during operation. - Page 12 Installation 3.2.3 Installation Space Requirements To ensure the inverter is normal and easy to operate, there are requirements on available spaces of the inverter, e.g. to keep enough clearance. Refer to the following figures. ≥19.69" 4.08" (500mm) (103.7mm) ≥13.78" (350mm) 9.06"...
-
Page 13: Mounting
Installation 3.3 Mounting Φ0.31" (8mm) Before mounting the inverter, you have to prepare a hammer drill, a hammer drill bit (Ø: 0.63" /16mm), and a marker. The dimension of mounting bracket 5.91" 10.17" is shown as below. (150mm) (258.3mm) 0.28" Step 1. -
Page 14: Electrical Connection
Electrical Connection 4 Electrical Connection This chapter shows the detailed electrical connections of ESS inverter. 4.1 Wiring Diagram Standard Non-parallel Wiring Diagram Diagram 01 120/240Vac Split Phase 120/208Vac 2/3 Phase The current flows from the grid to the inverter. Breaker PARA L�... - Page 15 Electrical Connection Split Phase Parallel Connection Mode-Scheme A (N=2) Diagram 02 PARA The current flows from the grid to Turn this switch the inverter. to “ON”. PARA RS485 L� GEN L� L� GRID L� L� BACKUP L� RS485 METER METER Breaker ①...
- Page 16 Electrical Connection Note: 1. BMS communication connection is only for lithium battery. 2. It is necessary to turn the matched resistance switch of No. 1 inverter and No. 2 inverter to “ON” in parallel connection mode. 3. With parallel connection mode, it is necessary to connect APP to one of the inverters and then go to Console >...
- Page 17 Electrical Connection Split Phase Parallel Connection Mode-Scheme B (2<N≤9) Diagram 03 PARA Turn this switch to “ON”. No.N Inverter PARA L� GEN L� L� GRID L� L� BACKUP L� RS485 RS485 METER METER PV Array ① Breaker ① No.2 Inverter PARA L�...
- Page 18 Electrical Connection Note: 1. BMS communication connection is only for lithium battery. 2. It is necessary to additionally purchase suitable CT and meter according to the specific requirements in parallel connection mode-Scheme B. Meter+CT Ratio is 100:1(optional). 3. It is necessary to turn the matched resistance switch of No. 1 inverter and No. N inverter to “ON” in parallel connection mode.
- Page 19 BMS Communication Cable...
- Page 20 Electrical Connection Note: 1. Detailed connection steps of each port have been illustrated in the following sections, please read carefully. 2. Make sure all inverters in parallel have the same firmware version by verifying the ‘DSP’, ‘CSB’, and ‘DC-DC converter’ version numbers on App, as shown in Figure 4-1. It is recommended to restore the firmware before three-phase connection to ensure the same parameter for each inverter, as shown in Figure 4-2.
- Page 21 BMS Communication Cable...
- Page 22 Electrical Connection Note: 1. Detailed connection steps of each port have been illustrated in the following sections, please read carefully. 2. Make sure all inverters in parallel have the same firmware version by verifying the ‘DSP’, ‘CSB’, and ‘DC-DC converter’ version numbers on App, as shown in Figure 4-6. It is recommended to restore the firmware before three-phase connection to ensure the same parameter for each inverter, as shown in Figure 4-7.
-
Page 23: Grounding
Electrical Connection 4.2 Grounding A protective earth (PE) terminal is equipped at the side of the inverter. Please be sure to connect this PE terminal to the PE bar for reliable grounding. AWG 2 or 4 yellow green cables are recommended. The bottom view Items Remark... -
Page 24: Grid/Backup/Gen Connection
Electrical Connection GRID/BACKUP/GEN Connection This section explains the requirements and procedures of PV connection. Read carefully before connecting. Before connecting the GRID/BACKUP/GEN terminal, ensure that both the AC terminal and the DC terminal are powered off and the PV switch is OFF. DANGER Otherwise there is a risk of high voltage shock. -
Page 25: Pv Connection
Electrical Connection PV Connection This section explains the requirements and procedures of PV connection. Read carefully before connecting. 1.Photovoltaic arrays exposed to sunlight will generate dangerous voltages! 2.Before connecting the PV terminal, ensure that both the AC terminal and the DANGER DC terminal are powered off and the PV switch is OFF. -
Page 26: Battery Connection
Electrical Connection 4.5 Battery Connection This section explains the requirements and procedures of battery connection. Read carefully before connecting. Before connecting the battery terminal, ensure that both the AC terminal and DANGER the DC terminal are powered off and the PV switch is OFF. Otherwise there is a risk of high voltage shock. -
Page 27: Communication Connection
Electrical Connection Communication Connection There are communication interfaces in the communication port on the bottom of the inverter as show below: PARA RS485 METER Interface Descriptions 4-Pin interface for parallel communication PARA A matched resistance switch for parallel communication 4-Pin interface for RS485 communication RS485 Demand response mode for Australia application For CT/Meter communication or Grid current sense... - Page 28 Electrical Connection 4.6.1 BMS Connection (Only for Lithium Battery) This manual ONLY illustrates the pinout sequence of BMS at INVERTER SIDE. For details about the pinout sequence at battery side, see the user NOTE manual of the battery you use, and the following pinout diagram of battery side is only for illustration.
- Page 29 Electrical Connection • BMS communication cable prepartion: ① Prepare RJ45 terminals and strip approperate length of COM cables. ② According to pin definitions and cable order, assemble the RJ45 terminals and crimp communication wires.There are two methods to assemble the RJ45 terminals. ③...
- Page 30 Electrical Connection 4.6.2 CT/Meter Connection A CT/Meter is applied to monitor electricity usage of all loads. • RJ45 Terminal Configuration for CT and Meter Communication Pin 12345678 Function RS485_ A RS485_ B CT2- CT2+ CT1+ CT1- Description • Cable connection overview Meter+CT: Pin 4 3 Pin 8 7 6 5...
- Page 31 Electrical Connection 4.6.3 RS485 Connection • 4-Pin Terminal Configuration of RS485 Communication Function RS485_A RS485_B Description • RS485 communication cable connection steps: a. Make the 4-Pin terminal according to above function description of each Pin definition. terminal 4-Pin RS485 cable Inverter RS485 side...
- Page 32 Electrical Connection 4.6.4 Parallel Communication Connection • 4-Pin Terminal Configuration of parallel Communication Function GND_S PARA_SYNC CAN_L CAN_H Description • Parallel communication cable connection overview No. 1 Inverter No. 2 Inverter No. N Inverter PARA PARA PARA ① BMS RS485 BMS RS485 RS485 METER...
- Page 33 Electrical Connection • Parallel communication cable connection steps: a. Make the 4-Pin terminal according to above function description of each Pin definition. terminal 4-Pin Parallel communication cable Inverter Another inverter side side b. Lead the Parallel communication cable through one COM port. And insert the 4-Pin terminal into PARA port.
- Page 34 Electrical Connection 4.6.5 NTC/RMO/DRY Connection(s) • 9-Pin Terminal Configuration of Auxiliary Communication Function Description GEN Control Pin 123456789 GEN Control NC1 (Normal Close) NO2 (Normal Open) NC2 (Normal Close) REMO OFF GND S (NTC BAT) NTC BAT+ • NTC/RMO/DRY communication cable connection steps: a.
- Page 35 Electrical Connection 4.6.6 RSD Connection(s) • 4-Pin Terminal Configuration of RSD Function Emergency Stop Signal Button Description • Emergency Stop Signal: PARA PARA L� GEN L� L� GRID L� L� BACKUP L� RS485 METER RS485 METER Normally Open Rapid Shutdown Signal Button •...
- Page 36 Electrical Connection 4.6.7 WIFI Module Connection For details, please refer to the corresponding Module Installation Guide in the packing. The appearance of module may be slightly different. The figure shown here is only for illustration. 0.8N·m Unscrew and remove the cover. Install and secure the module.
-
Page 37: System Operation
System Operation System Operation 5.1 Inverter Working Mode The inverter supports several different working modes. 5.1.1 Self-consumption Mode Go to the "Hybrid Setting" menu, and select the "Self-consumption mode". Under Self-consumption mode, the priority of PV energy consumption will be Load > Battery > Grid, that means the energy produced by PV gives priority to powering local loads, the excess energy is used to charge the battery and the remaining energy is fed into the grid. - Page 38 System Operation BACKUP Smart load Normal load is the sequence of loads consumption. 1 2 3 c) No PV Input The inverter will first discharge the battery energy for home load consuming when no PV input( such as in the evening or some cloudy or rainy days). If the demand is not met, the loads will consume grid energy.
- Page 39 System Operation a) Wealthy PV Energy When PV energy is wealthy, the PV energy will be first consumed by loads. If there is excess PV power, the power will be fed into grid. If there is still PV energy left after load consuming and grid feeding, then the remaining PV power will be used to charge the battery.
- Page 40 System Operation c) No PV Input The inverter will first discharge the battery energy for home load consuming when no PV input ( such as in the evening or some cloudy or rainy days). If the demand is not met, the loads will consume the grid energy.
- Page 41 System Operation 5.1.3 Back-up Mode Go to the "Hybrid Setting" menu, and select the "Back-up Mode". Under this mode, the priority of PV energy consumption will be Battery > Load > Grid. This mode aims at charging the battery quickly, and at the same time, you can choose whether to allow AC to charge the battery.
- Page 42 System Operation Allow AC charging In this situation, the battery can be charged both with PV and AC. a) Wealthy PV power When PV energy is wealthy, PV charges the battery first, then meets the loads, and the rest is fed into the grid.
- Page 43 System Operation 5.1.4 Forced Charge/Discharge Function According to the demands of application, the user can set the inverter to work on forced charge/discharge the battery in any working mode. There are three time periods in which you can set this function. Outside of the set periods, the inverter returns to its original working mode.
- Page 44 System Operation a) Wealthy PV power When PV energy is wealthy, the PV power will be first consumed by critical load, then charge the battery. BACKUP Smart load Normal load is the sequence of PV energy transmission. b) Limited PV power When PV energy is limited, BACKUP loads are first powered by PV and then supplemented by battery.
-
Page 45: Startup/Shutdown Procedure
System Operation Startup/Shutdown Procedure 5.2.1 Startup Procedure Before starting up, check whether the installation is secure and strong enough, and whether the system has been well grounded. Then make sure the connections of AC, battery, PV etc. are correct, and confirm the parameters and configurations conform to relevant requirements. AC Frequency 50/60Hz PV Voltage... -
Page 46: Commissioning
Commissioning 6 Commissioning Full commissioning of the inverter system is required as this can essentially protect the system from fire, electric shock or other damages or injuries. 6.1 Inspection Before commissioning, the operator or installer (qualified personnel) must inspect the system carefully and make sure: 1) The system is firmly and correctly installed according to this Manual, and there is an enough spaces for operation, maintenance and ventilation. -
Page 47: User Interface
User Interface 7 User Interface 7.1 LED/LCD 7.1.1 LED Introduction This section describes LED indicators, which include PV, BAT, GRID, BACKUP, COM, ALARM indicators. The table below explains the status and description of all indicators. Please read it carefully. LED+LCD LED Indicator Status Description PV input is normal. - Page 48 User Interface ALARM Grid BACKUP Details Code PV normal ● ◎ ◎ ◎ ◎ ○ No PV ○ ◎ ◎ ◎ ◎ ○ PV over voltage PV under voltage PV irradiation weak ★ ◎ ◎ ◎ ◎ ○ PV string reverse PV string abnormal On grid ◎...
- Page 49 User Interface BACKUP ALARM Grid Details Code WLAN/RS485/DB9/BLE/USB ◎ ◎ ◎ ◎ ◎ RS485/DB9/BLE/USB ★ Inverter over temperature Inverter over temperature Fan abnormal Fan abnormal Inverter in power limit state Inverter in power limit state ◎ ◎ ◎ ◎ ◎ ★...
- Page 50 User Interface 7.1.2 LCD Introduction LCD screen is optional for this series of inverters. If you choose a LCD screen, the following introduction will help you understand the function of each icon displayed. Note: LCD screen will be automatically turned off if there is no operation within 10 mins (which cannot be changed by default).
- Page 51 User Interface Example: Icon Display Area E-Day E-Tot al E-Day E-Tot al Data Unit K kWh Data Display Area Display Area Example: Icon Display Area Phase Data Unit Data Display Display Display Area Area Area Icon Introduction-2 The PV icon represents the power of PV. The Battery icon represents the current battery charge percentage or the voltage of battery..
- Page 52 User Interface Icon Status Description Icon Status Description Icon Name Light Description Any PV voltage exists ( it should be higer than the Min. PV Startup Voltage) . PV Voltage is lower than the Min. PV Startup Voltage. Grid Voltage and frequency are normal. Grid Grid overvoltage / undervoltage / overfrequency / underfrequency occurs.
-
Page 53: App Setting Guide
User Interface 7.2 App Setting Guide 7.2.1 Download App for Local Setting Scan the QR code on the inverter to download the App SolarHope. Download the APP from the App Store or Google Play. NOTE 1. The App SolarHope is only for local settings. Detailed information about remote monitoring, please refer to corresponding WIFI User Manual. - Page 54 User Interface 7.2.3 Local Setting Access Permission Before using the local setting, the APP should access some permissions. (You can allow them when you install the APP or grant permissions in your own phone setting.) When the APP asks for permission, please click Allow.
- Page 55 User Interface Quick Setting Go to Quick Setup page. Step 1 Set parameters for the inverter to connect to the power limit. Click each item to enter the information, then click Next. Step 2 Set parameters for the invetre to connect to the workmode. Click each item to enter the information, then click Next.
- Page 56 User Interface APP Power Chart The power chart is showed by Day, Month and Year in our APP. Data curves in the following figures are only for illustration. Day Chart...
- Page 57 User Interface Month Chart...
- Page 58 User Interface Year Chart...
- Page 59 User Interface Local Setting Homepage This page shows the basic information of inverter. Click to display the warning message. XXXXXXXX XXXXXXXX 19.1kWh 494kWh 19.1kWh 494kWh E-Today E-Total E-Today E-Total Self used mode Self used mode 405W 405W 2.71kW 2.71kW 60.0W 60.0W 2.21kW 0.00W...
- Page 60 User Interface XXXXXXXX 19.1kWh 494kWh E-Today E-Total Self used mode Console Maintenance 2.71kW 405W Go to Console page. And click Maintenance In this page, you can view the basic information like some version information, do some maintaining 2.21kW 0.00W 60.0W operations like turn off/on the inverter and manage data.
- Page 61 User Interface Access Management Go to Console > Access Management page. In this page, you can switch the login permission. XXXXXXXX XXXXXXXX When you log as administrator, Masking Fault Detection will be displayed on the interface.
- Page 62 User Interface Grid Parameters Go to Console > Grid Parameters page. In this page, you can set or change the parameters of Grid side, as shown in the figure. XXXXXXXX...
- Page 63 User Interface Feature Parameters Go to Console > Feature Parameters page. In this page, you can set or change the feature parameters, as shown in the figure. Power Limit Go to Console > Power Limit page. In this page, you can set or change the parameters of power limit, as shown in the figure.
- Page 64 User Interface Reactive Power Control Go to Console > Reactive Power Control page. In this page, you can set or change the Reactive Power Control parameters. Other Setting Go to Console > Other Setting page. In this page, you can set other setting parameters. XXXXXXXX Enable DRM Function...
- Page 65 User Interface Hybrid Setting Go to Console > Hybrid Setting page. In this page, you can set contents about work mode, battery, backup Load, generator and other. The setting interfaces are listed one by one. XXXXXXXX Work mode Work mode page, there are four work modes are available.
- Page 66 User Interface Work mode page, you can also find “Time-based Control” function. This function is designed to control the time setting of charging and discharging the inverter. You can set the following parameters based on your requirements: - Charge and discharge frequency: one time or daily - Charging start time: 0 to 24 hours - Charging end time: 0 to 24 hours - Discharge start time: 0 to 24 hours...
- Page 67 User Interface Battery Battery page, information including battery parameters, charging and discharging management and grid will be listed. Enter corresponding information if necessary. Choose whether to allow the grid to charge the battery, which is prohibited by default. When the battery capacity or voltage reaches the set value, the grid will stop charging the battery.
- Page 68 User Interface Backup Load Backup Load page, if enabling Backup Output, you can set parameters including the range of backup output voltage and Min. initiation/startup battery capacity when off-grid.
- Page 69 User Interface Generator Generator Generator Input Mode Generator Input Mode: Under this mode, the GEN port works as an input port from the generator while under off-grid condition. The generator input can charge the battery or take the backup load. The generator has two start-stop ways, one is controlled by dry contact of inverter, the other is controlled by manual.
- Page 70 User Interface All parameters have been set by default. Maximum Input power from Generator (W) Forbid the generator power larger than the setting value (W). Maximum GEN charger power (W) Maximum battery charge power from generator . Generator start SOC (%) Battery SOC below which the generator starts to charge the battery.
- Page 71 User Interface Note: 1.The total generator running time is equal to “Generator Max Runtime (Min)” plus “Generator down time (Min)”. Note: Go to Hybrid setting > Other > Capacity Mode, when you set Capacity Mode to voltage (V), as shown in below figure, parameter settings about Generator start SOC (%) will be changed to Generator start Bat.
- Page 72 User Interface The default values of Generator Input are as below: Note: The default value of Generator start Bat. Volt(V) is 48V; The default value of Generator end Bat. Volt(V) is 65V.
- Page 73 User Interface If the values are set as described above, Capacity Mode was set to SOC (%), the situations are as follows: the Generator Input will be ON or OFF depends on the battery SOC and - Under Off-Grid mode, Generator Max Runtime When the Battery SOC ≤...
- Page 74 User Interface Smart Load Output Mode Introduction Smart Load Output Mode: Under this mode, the GEN Port works as an output port for the Smart Load connected to the GEN terminal. Go to Hybrid Setting > Generator > Generator Port page and choose Smart Load Output as below.
- Page 75 User Interface Note: Go to Hybrid setting > other > Capacity Mode, when you set Capacity Mode to voltage (V), as shown in below figure, parameter settings about Battery SOC of Smart Load On (%) will be changed to Battery voltage of Smart Load On (V). Also, parameter settings about Battery SOC of Smart Load Off (%) will be changed to Battery voltage of Smart Load Off (V).
- Page 76 User Interface If the values are set as described above, the situations are as follows: Capacity Mode was selected to SOC (%), When is ON, if the grid is present, the Smart Load will be ON all the time. It is not Always On with Grid affected by the change of above parameters.
- Page 77 User Interface Inverter Input Mode Introduction Inverter Input Mode: Under this mode, the GEN Port works as an input port from other grid-tied inverter whose rated power should be less than the hybrid inverter. The grid-tied inverter should also support derating output power according to the output frequency. Note: The capacity of grid-tied inverter should be less than that of hybrid inverter Go to...
- Page 78 User Interface All parameters have been set by default. Battery SOC Of Inverter On (%) If battery SOC lower than the default value, the inverter powers on and starts charging the battery. Battery SOC Of Inverter Off (%) If battery SOC higher than the default value, the inverter powers off and stops charging the battery. AC couple Frequency high (Hz) This parameter is used to limit the output power of grid-tied inverter when the hybrid inverter works under off-grid mode.
- Page 79 User Interface The default values of Inverter Input are as below: Note: The default value of Battery Voltage of Inverter On(V) is 40V; The default value of Battery Voltage of Inverter Off(V) is 60V. If the values are set as described above, the situations are as follows: Capacity Mode was set to SOC (%), Under off-grid mode, the Inverter Input will be ON or OFF depends on the battery SOC.
- Page 80 User Interface Logic Diagram of Enable/Disable GEN Port Function Disable (default) GEN Port Off <500W Smart Load Off Off-Grid power ≥100% <80% Smart Load ON Smart Load Off ≥500W Battery <80% Smart Load Off On-Grid Smart Load Smart Load ON output Always ON Port...
- Page 81 User Interface Other Other page, options including Parallel mode, Buzzer ON, Support Normal Load are listed. Enable them when necessary. Enable Parallel Mode when applying parallel connection mode. Enable Buzzer On to open the Buzzer function. Parallel mode Other page, if enabling Parallel Mode, you can set the following parameters: •...
-
Page 82: Maintenance
Maintenance 8 Maintenance Before maintaining and commissioning inverter and its peripheral distribution CAUTION unit, switch off all the charged terminals of the inverter and wait at least 10 minutes after the inverter is powered off. 8.1 Routine Maintenance Maintenance Items Check Content Maintain Content Interval... -
Page 83: Inverter Troubleshooting
Maintenance 8.2 Inverter Troubleshooting When the inverter has an exception, its basic common warning and handling methods are shown below. Code Alarm Information Suggestions A� Grid over voltage �. If the alarm occurs occasionally, possibly the power grid voltage is abnormal temporarily, and no action is required. A�... - Page 84 Maintenance �. If the alarm occurs occasionally, possibly the power grid voltage is abnormal temporarily, and no action is required. C� Inverter over dc-bias current �. If the alarm occurs repeatedly, and the inverter fails to generate power, contact the customer service. �.
- Page 85 Maintenance �. If the alarm occurs occasionally, the inverter can be automatically recovered and no action is required. Internal communication �. If the alarm occurs repeatedly, the inverter cannot work properly. Pls. error contact the customer service center. �. If the alarm occurs occasionally, the inverter can be automatically recovered and no action is required.
- Page 86 Maintenance Ensure that Set phase position on APP is consistent with the power grid phase. There are two ways to clear this alarm: �. Power off each inverter, change the phase sequence for each inverter P� Phase Sequence abnormal and then power on inverter. �.
- Page 87 Maintenance �. Check whether the battery is disconnected. �. Check whether the battery is well connected with the inverter. �. Confirm that the battery is compatible with the inverter. It is Communication error recommended to use CAN communication. D� (Inverter-BMS) �.
-
Page 88: Technical Specifications
Technical Specification 9 Technical Specification Model 5KHB-130 6KHB-130 7K6HB-180 10KHB-210 Efficiency Max. Efficiency (PV to AC) 98.0% Max. Efficiency (BAT to AC) 94.5% Input (PV) Max. PV Configuration 200% Max. PV Input Power 7,500W 9,000W 12,000W 15,000W Max. PV Voltage 600V Start-up Voltage MPPT Operating Voltage Range... - Page 89 Technical Specification Model 5KHB-130 6KHB-130 7K6HB-180 10KHB-210 HMI & COM Display Bluetooth & APP + LED, LCD(optional) CAN/RS485(for BMS), DRM/RS485(for meter), RS485 Communication interface Optional:WiFi/LAN Mechanical DiamensionsW x H x D 16.5*31.5*9.4 inch (420*800*240mm) Weight 40Kg/88lb DC switch PV Connection Terminals Certification Grid...
Need help?
Do you have a question about the 5K UL and is the answer not in the manual?
Questions and answers