Table of Contents
Advertisement
Quick Links
Advertisement
Table of Contents

Subscribe to Our Youtube Channel
Related Manuals for VTech Switch & Go Dinos Hatch & Roaaar Egg Stegosaurus Hot Rod


Summary of Contents for VTech Switch & Go Dinos Hatch & Roaaar Egg Stegosaurus Hot Rod
- Page 1 Instruction Manual...
- Page 2 Exit Try-Me Mode Before playing, you will need to exit the battery-saving Try-Me Mode. Slide the Power Switch from Dino Mode to Vehicle Mode to exit Try-Me Mode and enter normal play mode. Step 1 Step 2...
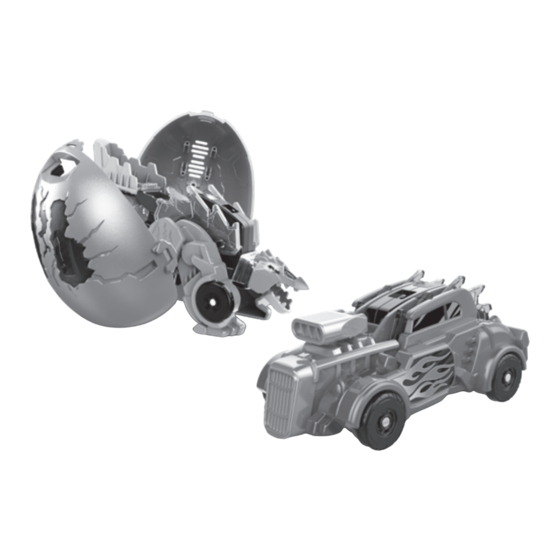
- Page 3 INTRODUCTION Thank you for purchasing Switch & Go Dinos Hatch & Roaaar ® Stegosaurus Hot Rod by VTech ! Assemble this awesome ® Stegosaurus, and then switch it in a few simple steps into a powerful Hot Rod! Enjoy dino roars and cool engine sound effects along with flashing lights as you play! It’s stomping time!
-
Page 4: Included In The Package
INCLUDED IN THE PACKAGE Switch & Go Hatch & Roaaar Egg • ® Stegosaurus Hot Rod (12 Build Pieces) • 2 Eggshell Halves • 1 Display Stand • Quick Start Guide WARNING All packing materials such as tape, plastic sheets, packaging locks, removable tags, cable ties, cords and packaging screws are not part of this toy, and should be discarded for your child’s safety. -
Page 5: Getting Started
GETTING STARTED Exit Try-Me Mode: The product is in try-me mode in the packaging. To exit try-me mode, just slide the Power Switch from Dino Mode to Vehicle Mode. WARNING: Adult assembly required for battery installation. Keep batteries out of reach of children. ATTENTION : Les piles ou accumulateurs doivent être installés par un adulte. -
Page 6: Important Battery Information
IMPORTANT: BATTERY INFORMATION • Insert batteries with the correct polarity (+ and -). • Do not mix old and new batteries. • Do not mix alkaline, standard (carbon-zinc) or rechargeable batteries. • Only batteries of the same or equivalent type as recommended are to be used. -
Page 7: Piles Rechargeables
IMPORTANT : INFORMATIONS CONCERNANT LES PILES Les piles fournies avec le produit permettent de tester le jouet en magasin mais ne sont pas des piles longue durée. • Mettre en place les piles ou les accumulateurs en respectant les polarités + et –. •... - Page 8 ASSEMBLY INSTRUCTIONS 1. Identify the following pieces for assembly: 01 CORE UNIT EGGSHELL BACK STAND...
- Page 9 2. Assemble Sections A-E as shown below and then follow steps 3 and 4 to combine those pieces. FLIP TAIL TO THE BACK/ CONNECT JAW TO THE BODY HEAD...
- Page 10 RIGHT LEGS LEFT LEGS TAIL...
- Page 11 3. Combine the assembled legs and the tail to the body. TAIL RIGHT LEGS LEFT LEGS 4. The dino assembly is now complete.
- Page 12 5. After the Dino is assembled, follow the below illustrations to connect the stand piece with the Dino and the eggshell. ATTACH THE STAND INSERT INTO THE SHELL EGGSHELL BACK Note: If you would like to switch the Dino into Vehicle Mode, the stand connection piece needs to be removed.
- Page 13 HOW TO SWITCH 1. Begin in Dino Mode. 2. Close the Dino’s mouth. 3. Flip the tail up toward the 4. On both sides, rotate the feet Dino’s head. up toward the Dino’s body.
- Page 14 5. On both sides, rotate the back 6. On both sides, rotate the legs to align with the front legs. aligned legs to align with the vehicle body. 7. The Dino is now in Vehicle Mode. Slide the Power Switch to Vehicle Mode to play Vehicle responses.
-
Page 15: Product Features
PRODUCT FEATURES 1. POWER SWITCH Slide the Power Switch to Dino Mode ( ) or Vehicle Mode ( to play. Slide the Power Switch to the Off position to turn the unit Off. 2. TALK BUTTON Press the Talk Button to hear fun phrases and cool dinosaur sounds in Dino Mode, or to hear fun phrases and great vehicle sounds... -
Page 16: Care And Maintenance
Canada, or by going to our website vtechkids.com and filling out our Contact Us form located under the Customer Support link. Creating and developing VTech products is accompanied by a responsibility that we take very seriously. We make every effort to ensure the accuracy of the information, which forms the value of our products. - Page 17 NOTE This equipment has been tested and found to comply with the limits for a Class B digital device, pursuant to Part 15 of the FCC Rules. These limits are designed to provide reasonable protection against harmful interference in a residential installation. This equipment generates, uses and can radiate radio frequency energy and, if not installed and used in accordance with the instructions, may cause harmful interference to radio communications.
-
Page 18: Choking Hazard
Product Name: Switch & Go Hatch & Roaaar Egg™ ® Stegosaurus Hot Rod Responsible Party: VTech Electronics North America, L.L.C. Address: 1156 W. Shure Drive, Suite 200 Arlington Heights, IL 60004 Website: vtechkids.com THIS DEVICE COMPLIES WITH PART 15 OF THE FCC RULES. - Page 19 Visit our website for more information about our products, downloads, resources and more. vtechkids.com vtechkids.ca Read our complete warranty policy online at vtechkids.com/warranty vtechkids.ca/warranty © 2023 VTech. All rights reserved. IM-569000-003 Version:0...
Need help?
Do you have a question about the Switch & Go Dinos Hatch & Roaaar Egg Stegosaurus Hot Rod and is the answer not in the manual?
Questions and answers