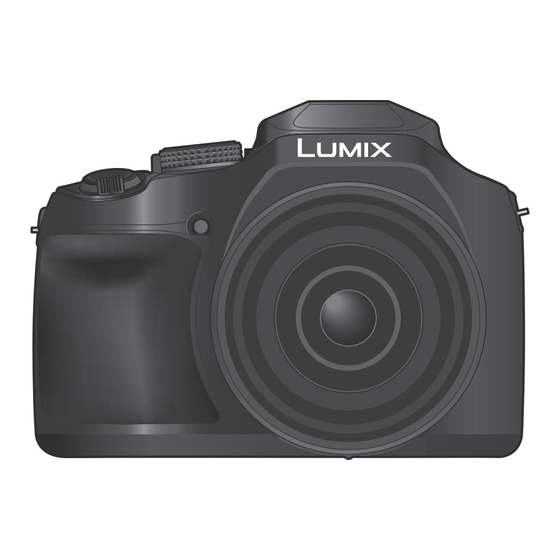
Panasonic LUMIX DC-FZ80DK Operating Instructions For Advanced Features

Panasonic LUMIX DC-FZ80DK Operating Instructions For Advanced Features

Hide thumbs Also See for LUMIX DC-FZ80DK:
Table of Contents

Advertisement

Model No.
Please read these instructions carefully before using this product,
Message Display
Q&A Troubleshooting
Finding the information you need
Contents
Contents by Function
Menu list
Register online at
http://shop.panasonic.com/support/register
(U.S. customers only)
Operating Instructions
for advanced features/
Owner's Manual
for advanced features
DC-FZ80D/DC-FZ82D
and save this manual for future use.
Digital Camera
→246
→248
→2
→4
→9
→170
DVQP3156ZA
M0624KZ0

Advertisement

Table of Contents
loading
Need help?

Need help?

Do you have a question about the LUMIX DC-FZ80DK and is the answer not in the manual?

Questions and answers

Lawry Sager
May 12, 2025

How do I save a picture that I've zoomed to view after it's recorded?

1 comments:
Mr. Anderson
May 20, 2025

To save a zoomed picture on the Panasonic DC-FZ80DK after recording:

1. Use the slide bar during enlarged display to make fine focus adjustments.
2. Touch the [ ] icon on the screen to save the picture.
3. The picture will be saved in JPEG format.

This answer is automatically generated

Robert Friedman
April 14, 2025

How to reset fz80 panasonic camera to factory settings

1 comments:
Mr. Anderson
April 15, 2025

To reset the Panasonic LUMIX DC-FZ80DK camera to factory settings:

1. Go to the [Setup] menu.
2. Select [Reset].
3. Confirm the reset.

This will reset the recording settings (except for [Face Recog.] and [Profile Setup]), drive mode, and setup/custom settings, including [World Time], [Travel Date], [Rotate Disp.], and [Picture Sort].

This answer is automatically generated

שאול קרוא
March 14, 2025

האם ניתן לצלם תמונה על גבי תמונה?

1 comments:
Mr. Anderson
May 14, 2025

Yes, the Panasonic DC-FZ80DK can create new pictures by editing existing ones using features like [RAW Processing], [Light Composition], [Clear Retouch], [Text Stamp], and [Cropping], which effectively allows generating a picture over another. However, it does not specifically mention overlaying one photo directly on top of another.

This answer is automatically generated

Summary of Contents for Panasonic LUMIX DC-FZ80DK

  • Page 1 Please read these instructions carefully before using this product, and save this manual for future use. Message Display →246 Q&A Troubleshooting →248 Finding the information you need →2 Contents →4 Contents by Function →9 Menu list →170 Register online at DVQP3156ZA http://shop.panasonic.com/support/register M0624KZ0 (U.S. customers only)
  • Page 2: Finding The Information You Need

    Finding the information you need In this “Operating Instructions for advanced features / Owner’s Manual for advanced features”, you can find the information you need from the following pages. By clicking a page number, you can jump to the linked page and quickly find the information.
  • Page 3: How To Use This Manual

    How to use this manual Recording mode icons Recording mode: In Recording modes that show icons in black, you can select and execute indicated menus and functions. has different functions depending on the recording mode that is registered. • Click a cross reference in the text to jump to the corresponding page. ■...
  • Page 4: Table Of Contents

    Contents ■ ■ Finding the information you need ..2 Contents by Function ......9 ■ How to use this manual ...... 3 Before Use ■ ■ Before use ......... 12 Names and Functions ■ of Main Parts ........15 Standard Accessories ......
  • Page 5 Contents Recording mode ■ ■ Taking pictures with Taking pictures automatic settings according to the scene (Intelligent Auto Mode) ..... 53 (Scene Guide Mode) ......67 Taking pictures using a handheld camera Types of Scene Guide Mode .....68 ■ ([iHandheld Night Shot]) ......56 Taking Pictures with Combining pictures into a single still different picture effects...
  • Page 6 Contents Focus, Brightness (Exposure) and Color tone Settings ■ ■ Taking pictures with Auto Focus ..82 Taking close-up pictures (Macro recording) ......95 Set the focusing operation to be ■ performed when the shutter button is Taking pictures with pressed halfway (AFS, AFF, AFC) .....83 Manual Focus ........
  • Page 7 Contents Stabilizer, Zoom and Flash ■ ■ Correcting jitter ....... 132 Setting the Flash Functions ... 140 ■ Using Zoom ........134 Changing the firing mode (Manual flash) ..........140 Zoom types and use ........134 Changing Flash Mode......141 Using the zoom by performing touch Setting the 2nd curtain sync ....144 operations (Touch zoom) ......137 ■...
  • Page 8 Contents Using Menu Functions ■ Menu list .......... 170 [Custom] ..........190 [Setup] .............200 [Rec] ............170 [Playback] ..........208 [Motion Picture] ........188 Connecting with other devices ■ ■ Enjoying 4K motion pictures ..225 Storing recorded still pictures and motion pictures on your PC ... 230 Viewing 4K motion pictures .....225 Downloading software ......231 Storing 4K motion pictures.......226...
  • Page 9: Contents By Function

    Contents by Function Recording Recording Exposure [Zoom Compose Assist] ........36 [Touch AE] ............44 Recording mode ...........38 [One Push AE] ..........66 [Preview] ............64 AF/AE Lock ...........98 Macro recording ..........95 Exposure Compensation ......99 [Time Lapse Shot] ........127 ISO sensitivity ..........100 [Stop Motion Animation] ......129 Exposure Bracket ........126...
  • Page 10 Contents by Function Setup/Custom Basic settings Customization [Format] ............28 [CUSTOM] in the Quick Menu ......48 [Clock Set] ............31 Function buttons ...........49 Display switching ........40, 41 Custom Mode ..........80 Diopter adjustment........34 [Custom] menu ...........190 How to set menu items .........45 [Q.MENU] .............47 [Beep]...
  • Page 11 Contents by Function Connecting with other devices Recorder Transferring images to a PC .......230 Dubbing ............235 PHOTOfunSTUDIO ........231 SILKYPIX ............232 Playing back pictures on a TV screen ..227 [VIERA Link] ..........229...
  • Page 12: Before Use

    Before Use Before use ■ Camera handling Keep the camera away from excessive vibration, force, or pressure. ● Avoid using the camera under the following conditions, which may damage the lens, monitor, viewfinder, or camera body. This may also cause the camera to malfunction or prevent recording. •...
  • Page 13 Before Use Before use ■ Always take a test shot first Before important events when you will use the camera (at weddings, for example), always take a test shot to make sure that pictures and sound record correctly. ■ No compensation for missed shots We cannot compensate for missed shots if technical problems with the camera or card prevent recording.
  • Page 14: Standard Accessories

    SD Memory Card, SDHC Memory Card and SDXC Memory Card are indicated as card in the text. ● Cards are optional. ● Consult the dealer or Panasonic if you lose the supplied accessories. (You can purchase the accessories separately.) ● Please dispose of all packaging appropriately. ●...
  • Page 15: Names And Functions Of Main Parts

    Before Use Names and Functions of Main Parts 18 17 Zoom lever (→35) Hot shoe (→238) Shutter button (→37) [AF/AE LOCK] button (→98) Motion picture button (→38) [LVF] button (→34) ] ([Zoom Compose Assist]) button Viewfinder (→34, 239) (→36) Diopter adjustment dial (→34) [Fn1] button (→49)
  • Page 16 Before Use Names and Functions of Main Parts Shoulder strap eyelet (→17, 18) Card/Battery door (→20, 26) Release lever [AF/AF /MF] button (→82, 95, 96) (→20, 26) ] (Playback) button (→162) Tripod mount (→258) Do not attach this unit to tripods that Cursor button (→39) have screws with a length of 5.5 mm...
  • Page 17: Preparations

    Preparations Attaching the Lens Cap/Shoulder Strap Attaching the Lens Cap Cover the lens with the lens cap to protect it when you are not taking pictures. We recommend attaching the lens cap to the camera using the lens cap string to prevent loss of the lens cap.
  • Page 18: Attaching The Shoulder Strap

    Preparations Attaching the Lens Cap/Shoulder Strap Attaching the Shoulder Strap We recommend attaching the shoulder strap when using the camera to prevent it from dropping. Pass the shoulder strap through the hole at the shoulder strap eyelet • Attach the shoulder strap so that the “LUMIX” Logo is on the outside.
  • Page 19: Charging Battery

    Please be advised that we are not liable for any accident or failure occurring as a result of use of a counterfeit battery pack. To ensure that safe products are used we recommend that a genuine Panasonic battery pack is used.
  • Page 20: Inserting The Battery

    To remove battery Move the lever in the card/battery compartment in the direction of the arrow. ● Always use genuine Panasonic batteries. ● If you use other batteries, we cannot guarantee the quality of this product. ● To remove the battery, turn the camera off and wait until the LUMIX indicator on the screen goes off.
  • Page 21: Charging The Battery

    Preparations Charging battery Charging the battery We recommend charging in a location where the ambient temperature is between 10 °C and 30 °C (50 °F to 86 °F) (same for the battery temperature). Insert the battery into the camera. Make sure that the camera is turned off. The battery can be charged from an outlet or through a PC.
  • Page 22 Preparations Charging battery ● If the computer enters sleep mode during charging, charging may be stopped. ● If a notebook computer that is not connected to an electrical outlet is connected to the camera, the battery of the notebook computer will be depleted. Do not leave the camera and notebook connected for a long period of time.
  • Page 23 Preparations Charging battery Notes on charging time Charging time When using the AC adaptor (supplied) Approx. 180 min. When using the AC adaptor Approx. 180 min. (optional: DMW-AC11) • The charging time indicated above is the time required for charging in case when the battery is completely used up.
  • Page 24 Estimated number of recordable pictures and operating time (DC-FZ80DP/DC-FZ80DPP) By CIPA (Camera & Imaging Products Association) standard When a Panasonic SDHC memory card and the supplied battery are used. ■ Recording still pictures (When using monitor) Number of recordable pictures Approx.
  • Page 25 Estimated number of recordable pictures and operating time (DC-FZ82DE/DC-FZ80DGA/DC-FZ80DGN) By CIPA (Camera & Imaging Products Association) standard When a Panasonic SDHC memory card and the supplied battery are used. ■ Recording still pictures (When using monitor) Number of recordable pictures Approx.
  • Page 26: Inserting And Removing The Card (Optional)

    Preparations Inserting and removing the card (optional) • Make sure that the camera is turned off. Slide the release lever to the [OPEN] [LOCK] [OPEN] position and open the card/battery door Release lever Insert the card all the way Do not touch the terminal •...
  • Page 27: About The Card

    Preparations About the Card The following SD standard-based cards can be used. • SD memory card, SDHC memory card, and SDXC memory card are referred to by the generic name of card in this document. SD memory card/ SDHC memory card/ The camera supports SDHC/SDXC memory cards compliant with Ι...
  • Page 28: Formatting The Card (Initialization)

    Preparations About the Card Formatting the card (initialization) Format the card before recording a picture with this unit. Since data cannot be recovered after formatting, make sure to back up necessary data in advance. → [Setup] → [Format] ● Take care not to turn off the camera while formatting is in progress. ●...
  • Page 29 Preparations About the Card Recording time capacity (motion pictures) (DC-FZ80DP/DC-FZ80DPP) • The recordable time is the total time of all the motion pictures which have been recorded. ([h], [m] and [s] indicate “hour”, “minute” and “second”.) When [Rec Format] is [AVCHD] [Rec Quality] 16 GB 32 GB...
  • Page 30 Preparations About the Card Recording time capacity (motion pictures) (DC-FZ82DE/DC-FZ80DGA/DC-FZ80DGN) • The recordable time is the total time of all the motion pictures which have been recorded. ([h], [m] and [s] indicate “hour”, “minute” and “second”.) When [Rec Format] is [AVCHD] [Rec Quality] 16 GB 32 GB...
  • Page 31: Setting The Clock

    Preparations Setting the clock The clock is not set when the camera is shipped. Set the Camera [ON/OFF] switch to [ON] • If the language select screen is not displayed, proceed to step Press [MENU/SET] while the message is displayed Press to select the language, and press [MENU/SET] •...
  • Page 32: Changing Time Settings

    Preparations Setting the clock When [The clock setting has been completed.] is displayed, press [MENU/SET] When [Please set the home area] is displayed, press [MENU/SET] Press to set your home area and press [MENU/SET] City or area name Current time Difference from GMT (Greenwich Mean Time) •...
  • Page 33: Basics

    Basics Holding the camera Hold the camera gently with both hands keeping your arms close to your body while standing with your feet slightly apart. • Do not block the flash, AF Assist Lamp, microphone, or speaker with your fingers or other objects.
  • Page 34: Buttons/Dials/Levers Used For Recording

    Basics Buttons/Dials/Levers Used for Recording [LVF] button (Recording pictures using the viewfinder) Press [LVF] button You can switch between monitor display and Viewfinder display. Viewfinder display Monitor display • If [Monitor Priority (Play)] (→204) of the [Setup] menu is set to [ON], pictures will be played back on the monitor after switching to playback mode ■...
  • Page 35: Zoom Lever (Use Zoom)

    Basics Buttons/Dials/Levers Used for Recording Zoom Lever (Use Zoom) You can adjust the area of a picture to be taken using the zoom lever. • You can also use the zoom function from the touch panel. (→137) • For details about zoom types and use, refer to (→134). Move the zoom lever T side: Telephoto, Enlarge the subject W side: Wide-angle, Capture a wider area...
  • Page 36: [Zoom Compose Assist] Button (Using The Zoom Compose Assist Function)

    Basics Buttons/Dials/Levers Used for Recording [Zoom Compose Assist] button (Using the Zoom Compose Assist function) If you lose the subject while zoomed in, you can make it easier to find the subject again by temporarily decreasing the zoom magnification. If you lose the subject while zoomed in: Press and hold [ ] ([Zoom Compose Assist]) button •...
  • Page 37: Shutter Button (Taking Pictures)

    Basics Buttons/Dials/Levers Used for Recording Shutter button (Taking pictures) • Press the [ ] button ( ) to set the drive mode to [ ] ([Single]). Press the shutter button halfway (press lightly) to focus on the subject Focus display ( When focus is aligned: illuminated When focus is not aligned: flashing) Aperture value...
  • Page 38: Motion Picture Button

    Basics Buttons/Dials/Levers Used for Recording Motion picture button (Recording motion pictures) Press the motion picture button to start recording • Immediately release the motion picture button after pressing it. Press the motion picture button again to end recording Mode dial (Select the recording mode) Set to the desired recording mode •...
  • Page 39: Rear Dial

    Basics Buttons/Dials/Levers Used for Recording Rear Dial There are 2 ways to operate the rear dial, rotating left or right, and deciding by pressing. Rotating: Selection of items or setting of values is performed during the various settings. Pressing: Operations that are the same as [MENU/SET] button, such as determine settings, etc., are performed during the various settings.
  • Page 40: (Switching The Display Information)

    Basics Buttons/Dials/Levers Used for Recording [DISP.] button (Switching the display information) Press [DISP.] button to switch the display • If the information on the screen is not displayed any longer because no operation was performed for some time, press the [DISP.] button or touch the screen to display the information again.
  • Page 41 Basics Buttons/Dials/Levers Used for Recording ■ ] Live View Finder style display layout (Example of viewfinder style display) With information (Detailed information) With information During playback With information Detailed information display Histogram display 10:00 1.DEC.2017 100-0001 1/98 100-0001 Without information Without information ([Highlight]) This screen is displayed only when [Highlight]...
  • Page 42: Touch Screen (Touch Operations)

    Basics Touch screen (Touch operations) Touch screen of this unit is capacitive. Touch the panel directly with your bare finger. Touch To touch and release the touch screen. Drag To touch and slide your finger across the touch screen. Pinch (spread/pinch) On the touch screen, spread (pinch out) your 2 fingers to zoom in, and pinch (pinch in) your 2 fingers to zoom out.
  • Page 43: Touching The Screen And Recording (Touch Shutter Function)

    Basics Touch screen (Touch operations) Touching the screen and recording (Touch Shutter function) Recording mode: This function enables you to focus and record still pictures simply by touching the subjects that appear on the screen. Touch [ Touch [ • The icon changes to [ ] and you can now proceed with touch shutter recording.
  • Page 44: Easily Optimizing The Brightness For A Specified Area ([Touch Ae])

    Basics Touch screen (Touch operations) Easily Optimizing the Brightness for a Specified Area ([Touch AE]) Recording mode: You can easily optimize the brightness for a touched position. When the face of the subject appears dark, you can brighten the screen according to the brightness of the face. Touch [ Touch [ •...
  • Page 45: Setting The Menu

    Basics Setting the menu You can use the menu to set camera and recording functions, operate playback functions, and perform other operations. • Menu settings can be made either by button or touch operation. Press [MENU/SET] to bring up the menu [Rec] You can perform settings for the aspect ratio, number of pixels, 4K (→170)
  • Page 46 Basics Setting the menu Press to select the menu item and press [MENU/SET] Item Page • You can switch to the next page by pressing [DISP.] button or rotating the zoom lever. With touch screen operations Touch the menu item •...
  • Page 47: Calling Frequently-Used Menus Instantly (Quick Menu)

    Basics Calling frequently-used menus instantly (Quick Menu) You can easily call some of the menu items and set them during recording. • Some items or settings cannot be selected depending on the mode or display style the camera is in. Press [Q.MENU/ ] button Press to select a menu item, and...
  • Page 48: Change The Quick Menu To Your Preferred Item

    Basics Calling frequently-used menus instantly (Quick Menu) Change the Quick Menu to your preferred item When [Q.MENU] in the [Custom] menu is set to [CUSTOM], the Quick Menu can be changed as desired. Up to 15 items can be set to the Quick Menu. After pressing the [Q.MENU/ ] button, press select [ ], and press [MENU/SET]...
  • Page 49: Assigning Frequently Used Functions To The Buttons (Function Buttons)

    Basics Assigning frequently used functions to the buttons (Function buttons) You can assign frequently-used functions to particular buttons ([Fn1] - [Fn3]) or icons displayed on the screen ([Fn4] - [Fn8]). • Certain functions cannot be assigned to some function buttons. •...
  • Page 50: Using The Function Buttons During Recording

    Basics Assigning frequently used functions to the buttons (Function buttons) Using the function buttons during recording Press the function button to use the assigned function. ■ Using function buttons with touch operations Touch [ Touch [Fn4], [Fn5], [Fn6], [Fn7] or [Fn8] •...
  • Page 51: Using The Function Buttons During Playback

    Basics Assigning frequently used functions to the buttons (Function buttons) ● When [Focus Area Set] is assigned to the function button, you can display the AF area or the MF Assist position setting screen. ● When [Cursor Button Lock] is assigned to a function button, operation of the cursor button and [MENU/SET] is disabled.
  • Page 52: Entering Text

    Basics Entering Text to select characters Press [MENU/SET] several times until the desired character is displayed • [ ]: Enter a blank. ■ To change the character type • Press [DISP.] button • Use to select [ ] and press [MENU/SET] ■...
  • Page 53: Recording Mode

    Recording mode Taking pictures with automatic settings (Intelligent Auto Mode) Recording mode: This mode is recommended for those who want to point and shoot as the camera optimizes settings to match the subject and recording environment. Set mode dial to [ •...
  • Page 54 Recording mode Taking pictures with automatic settings (Intelligent Auto Mode) Auto Focus, Face/Eye Detection, and Face Recognition [AF Mode] is automatically set to [ ]. If you touch the subject, the camera switches to ] and the AF tracking function starts operating. (→86) You can also switch to [ ] by pressing...
  • Page 55 Recording mode Taking pictures with automatic settings (Intelligent Auto Mode) Automatic Scene Detection When taking pictures [i-Portrait] [i-Scenery] [i-Macro] [i-Night Portrait] [i-Handheld Night [i-Night Scenery] [i-Food] [i-Baby] Shot] [i-Sunset] When scene does not correspond to any of the above Displayed only when using flash. When [iHandheld Night Shot] is [ON].
  • Page 56: Taking Pictures Using A Handheld Camera ([Ihandheld Night Shot])

    Recording mode Taking pictures with automatic settings (Intelligent Auto Mode) Taking pictures using a handheld camera ([iHandheld Night Shot]) Recording mode: If a night scene is detected automatically while the unit is being handheld, [iHandheld Night Shot] can record a still picture with less jitter and less noise without using a tripod by combining a burst of pictures.
  • Page 57: Combining Pictures Into A Single Still Picture With Rich Gradation ([Ihdr])

    Recording mode Taking pictures with automatic settings (Intelligent Auto Mode) Combining pictures into a single still picture with rich gradation ([iHDR]) Recording mode: When there is, for example, strong contrast between the background and the subject, [iHDR] records multiple still pictures with differing exposures and combines them to create a single still picture rich in gradation.
  • Page 58: Setting Brightness (Exposure)/Blurriness Of The Background (Defocus Control Function)

    Recording mode Taking pictures with automatic settings (Intelligent Auto Mode) Setting brightness (exposure)/blurriness of the background (Defocus control function) Recording mode: Press the rear dial to display the setting screen • Each press of the rear dial switches between brightness (exposure) setting operation, defocus control operation, and operation finish.
  • Page 59: Taking Pictures After Automatically Setting The Aperture Value And Shutter Speed (Program Ae Mode)

    Recording mode Taking pictures after automatically setting the aperture value and shutter speed (Program AE Mode) Recording mode: Take pictures using automatic aperture values and shutter speed settings in accordance with the brightness of a subject. Set mode dial to [ ] Press the shutter button halfway •...
  • Page 60: Taking Pictures By Setting The Aperture Value And Shutter Speed

    Recording mode Taking pictures by setting the aperture value and shutter speed Recording mode: • The effect of the aperture value and shutter speed you have set is not applied to the recording screen. To check the effect on the recording screen, use Preview Mode. (→64) •...
  • Page 61: Taking Pictures By Setting The Shutter Speed (Shutter-Priority Ae Mode)

    Recording mode Taking pictures by setting the aperture value and shutter speed Taking pictures by setting the shutter speed (Shutter-Priority AE Mode) When you set the shutter speed, the camera automatically optimizes the aperture value for the brightness of the subject. Set mode dial to [ Rotate the rear dial to set the shutter speed •...
  • Page 62: Taking Pictures By Setting The Aperture Value And Shutter Speed (Manual Exposure Mode)

    Recording mode Taking pictures by setting the aperture value and shutter speed Taking pictures by setting the aperture value and shutter speed (Manual Exposure Mode) Determine the exposure by manually setting the aperture value and the shutter speed. Set mode dial to [ Rotate the rear dial to set the aperture value and the shutter speed •...
  • Page 63 Recording mode Taking pictures by setting the aperture value and shutter speed Optimizing the ISO sensitivity for the aperture value and shutter speed When the ISO sensitivity is set to [AUTO], the camera sets the ISO sensitivity automatically so that the exposure will be appropriate for the aperture value and shutter speed.
  • Page 64: Checking The Effects Of The Aperture Value And Shutter Speed (Preview Mode)

    Recording mode Taking pictures by setting the aperture value and shutter speed Checking the effects of the aperture value and shutter speed (Preview Mode) Recording mode: You can use Preview Mode to check the effects of the selected aperture value and shutter speed.
  • Page 65 Recording mode Taking pictures by setting the aperture value and shutter speed Depth of field characteristic Aperture value Small Large Recording Focal length Telephoto Wide-angle conditions Distance to a subject Close Shallow (narrow) Deep (wide) Example: Example: Depth of field To take a picture by To take a picture by adjusting (Focus range)
  • Page 66: Easily Set Aperture Value / Shutter Speed For Suitable Exposure (One Push Ae)

    Recording mode Taking pictures by setting the aperture value and shutter speed Easily set aperture value / shutter speed for suitable exposure (One Push AE) Recording mode: When the exposure setting is too bright or too dark, you can use one push AE to achieve a suitable exposure setting.
  • Page 67: Taking Pictures According To The Scene (Scene Guide Mode)

    Recording mode Taking pictures according to the scene (Scene Guide Mode) Recording mode: If you select a scene to suit the subject and recording conditions with reference to the example images, the camera will set optimal exposure, color, and focus, allowing you to record in a manner appropriate to the scene.
  • Page 68: Types Of Scene Guide Mode

    Recording mode Taking pictures according to the scene (Scene Guide Mode) Types of Scene Guide Mode Displaying the description of each scene and recording tips Press [DISP.] button while the scene selection screen is displayed • When it is set to the guide display, detailed explanations and tips for each scene are displayed. Normal display Guide display List display...
  • Page 69 Recording mode Taking pictures according to the scene (Scene Guide Mode) 8: [Bright Blue Sky] 9: [Romantic Sunset Glow] 10: [Vivid Sunset Glow] 11: [Glistening Water] ● Star filter used in this mode may cause glistening effects on the objects other than water surface. 12: [Clear Nightscape] 13: [Cool Night Sky] 14: [Warm Glowing Nightscape]...
  • Page 70 Recording mode Taking pictures according to the scene (Scene Guide Mode) 20: [Appetizing Food] ● Degree of background defocusing can be changed by adjusting the aperture using the rear dial. ● For close-up recording, we recommend that you avoid using the flash. 21: [Cute Dessert] ●...
  • Page 71: Taking Pictures With Different Picture Effects (Creative Control Mode)

    Recording mode Taking Pictures with different picture effects (Creative Control Mode) Recording mode: This mode records with additional picture effects. You can set the effects to be applied to a picture by selecting a sample picture and checking them simultaneously on the screen. Set mode dial to [ Press to select the picture effect...
  • Page 72: Types Of Picture Effects

    Recording mode Taking Pictures with different picture effects (Creative Control Mode) Types of picture effects Displaying the description of each picture effect (Filter) Press [DISP.] button while the picture effect selection screen is displayed • When it is set to the guide display, explanations for each picture effect are displayed. Normal display Guide display List display...
  • Page 73 Recording mode Taking Pictures with different picture effects (Creative Control Mode) ● No audio is recorded for motion pictures. ● With camera models DC-FZ80DP/DC-FZ80DPP: When a motion picture is recorded, the finished recording will be approximately 1/10th of the actual recorded time period. (If you record a motion picture for 10 minutes, the resulting motion picture recording time will be approximately 1 minute.) The recordable time displayed on the camera is approx.
  • Page 74 Recording mode Taking Pictures with different picture effects (Creative Control Mode) Adjusting the picture effects according to your preferences You can easily adjust the setting conditions (such as degree and coloring of an effect) of the picture effects according to your preferences. Press to display the setting screen Rotate the rear dial to adjust the setting conditions of...
  • Page 75 Recording mode Taking Pictures with different picture effects (Creative Control Mode) Picture effect Items that can be set [Cross Process] Coloring Greenish coloring / Bluish coloring / Yellowish coloring / Reddish coloring • Select the desired color tone by rotating the rear dial, and press [MENU/SET].
  • Page 76 Recording mode Taking Pictures with different picture effects (Creative Control Mode) Setting brightness (exposure)/blurriness of the background (Defocus control function) Press the rear dial to display the setting screen • Each press of the rear dial switches between brightness (exposure) setting operation, defocus control operation, and operation finish.
  • Page 77: Recording Motion Pictures By Setting The Aperture/ Shutter Speed/Iso Sensitivity (Creative Video Mode)

    Recording mode Recording motion pictures by setting the aperture/ shutter speed/ISO sensitivity (Creative Video Mode) Recording mode: Set mode dial to [ Set the menu (→45) → [Motion Picture] → [Exposure Mode] Settings: [P] / [A] / [S] / [M] •...
  • Page 78: Recording Slow Motion Pictures ([High Speed Video])

    Recording mode Recording motion pictures by setting the aperture/shutter speed/ISO sensitivity (Creative Video Mode) Recording Slow Motion Pictures ([High Speed Video]) Slow motion pictures can be recorded by performing recording at a super high speed. When these recordings are played back, the motion is displayed slowly. •...
  • Page 79: Minimizing Operational Sounds During Motion Picture Recording

    Recording mode Recording motion pictures by setting the aperture/shutter speed/ISO sensitivity (Creative Video Mode) Minimizing operational sounds during motion picture recording The operational sound of the zoom or button operation may be recorded when it is operated during the recording of a motion picture. Using touch icons allows silent operation while recording motion pictures.
  • Page 80: Registering Your Own Settings And Recording (Custom Mode)

    Recording mode Registering your own settings and recording (Custom Mode) Recording mode: Registering your own settings ([Cust.Set Mem.]) Up to 4 sets of current camera settings can be registered using [Cust.Set Mem.]. ], [ ], [ ], [ • Initial setting of the Program AE Mode is registered as the custom settings initially. Preparations Select in advance the recording mode you wish to register and set the desired menu settings on the camera.
  • Page 81: Recording Using Registered Custom Set

    Recording mode Registering your own settings and recording (Custom Mode) Recording using registered custom set Set mode dial to [ ] / [ • In [ ], the last used custom set from [ ] to [ ] will be called up. ■...
  • Page 82: Focus, Brightness (Exposure) And Color Tone Settings

    Focus, Brightness (Exposure) and Color tone Settings Taking pictures with Auto Focus By setting the optimum Focus Mode or Auto Focus Mode for the subject or recording condition, you can let the camera automatically adjust focus in various scenes. Press [AF/AF /MF] button Press to select [AF] and press [MENU/SET] Press [...
  • Page 83: Set The Focusing Operation To Be Performed When The Shutter Button Is Pressed Halfway (Afs, Aff, Afc)

    Focus, Brightness (Exposure) and Color tone Settings Taking pictures with Auto Focus Set the focusing operation to be performed when the shutter button is pressed halfway (AFS, AFF, AFC) Recording mode: → [Rec] / [Motion Picture] → [AFS/AFF/AFC] The movement of the Settings subject and the scene Description...
  • Page 84: Switching [Af Mode]

    Focus, Brightness (Exposure) and Color tone Settings Taking pictures with Auto Focus Switching [AF Mode] Recording mode: This allows the focusing method that suits the positions and number of the subjects to be selected. Press [ ] button ( ) Press to select Auto Focus mode and press [MENU/SET]...
  • Page 85 Focus, Brightness (Exposure) and Color tone Settings Taking pictures with Auto Focus Taking front-on pictures of people (Face/Eye Detection) The camera automatically detects the faces and eyes of subjects. The camera adjusts the focus on the eye that is closer to the camera and the exposure using the face (when [Metering Mode] is set to [ ] (Multi Metering)).
  • Page 86 Focus, Brightness (Exposure) and Color tone Settings Taking pictures with Auto Focus Automatically locking the focus on a moving subject (tracking) With cursor button operations Align the AF Tracking area with the subject and press the shutter button halfway AF Tracking area When the subject is recognized, the AF tracking area turns green.
  • Page 87 Focus, Brightness (Exposure) and Color tone Settings Taking pictures with Auto Focus Subject not centered in picture (49-area-focusing) Focuses on the subject in the wide range area (up to 49-area- focusing) on the recording screen. Setting the shape of an AF area , etc.
  • Page 88 Focus, Brightness (Exposure) and Color tone Settings Taking pictures with Auto Focus Select the AF area Selected AF area When selecting [ ] / [ ] / [ Touch Operation Description operation Touch Moves position Pinch out / Changes the size (3 stages) Pinch in Restores to the initial [DISP.]...
  • Page 89 Focus, Brightness (Exposure) and Color tone Settings Taking pictures with Auto Focus Determined position for focus (1-area-focusing) / (Pinpoint-focusing) (1-area-focusing) Focuses on AF area in center of picture. (Recommended when focus is difficult to align) When the subject is not in the center of the composition in [ ], you can bring the subject into the AF area, fix the focus and exposure by pressing the shutter button halfway, move the camera to the composition you want with the shutter button pressed halfway, and then take the...
  • Page 90: Changing The Position And Size Of The Af Area

    Focus, Brightness (Exposure) and Color tone Settings Taking pictures with Auto Focus Changing the position and size of the AF area Recording mode: When [ ], [ ], [ ], or [ ] in Auto Focus Mode is selected, you can change the position and size of the AF area.
  • Page 91 Focus, Brightness (Exposure) and Color tone Settings Taking pictures with Auto Focus ■ When selecting [ You can set the focus position by selecting an AF area group. The AF area, which is configured with 49 points, is divided into groups consisting of 9 points each (6 points or 4 points for the groups located at the edges of the screen).
  • Page 92 Focus, Brightness (Exposure) and Color tone Settings Taking pictures with Auto Focus ■ When selecting [ You can enlarge the screen to perform more precise settings of the focus position. • You cannot set the focus position at the edges of the screen. Press [ ] button ( ) Select [...
  • Page 93: Setting The Af Area Position With The Touch Pad

    Focus, Brightness (Exposure) and Color tone Settings Taking pictures with Auto Focus Setting the AF area position with the touch pad Recording mode: You can move the AF area displayed on the viewfinder by touching the monitor. → [Custom] → [Touch Settings] → [Touch Pad AF] [EXACT] Moves the AF area of the viewfinder by touching a desired position on the touch...
  • Page 94: Optimizing The Focus And Brightness For A Touched Position

    Focus, Brightness (Exposure) and Color tone Settings Taking pictures with Auto Focus Optimizing the focus and brightness for a touched position Recording mode: You can optimize the focus and brightness for the position you have touched. → [Custom] → [Touch Settings] → [Touch AF] → [AF+AE] Touch the subject you want to optimize the brightness •...
  • Page 95: Taking Close-Up Pictures (Macro Recording)

    Focus, Brightness (Exposure) and Color tone Settings Taking close-up pictures (Macro recording) Recording mode: This mode allows you to take close-up pictures of a subject, e.g. when taking pictures of flowers. Press [AF/AF /MF] button Press to select the item and press [MENU/SET] You can take pictures of a subject as close as 1 cm (0.033 feet) from the ([AF Macro]) lens by rotating the zoom lever upmost to Wide.
  • Page 96: Taking Pictures With Manual Focus

    Focus, Brightness (Exposure) and Color tone Settings Taking pictures with Manual Focus Recording mode: Manual Focus is convenient when you want to lock the focus to take pictures or when it is difficult to adjust focus using Auto Focus. Press [AF/AF /MF] button Press to select [MF] and press [MENU/SET] Press [...
  • Page 97 Focus, Brightness (Exposure) and Color tone Settings Taking pictures with Manual Focus ■ To change the position of an enlarged display Press to move the position of the enlarged display • To return the position of the enlarged display to the center → Press [DISP.] button Press [MENU/SET] Operation Touch operation...
  • Page 98: Taking Pictures By Locking The Focus And/Or Exposure (Af/Ae Lock)

    Focus, Brightness (Exposure) and Color tone Settings Taking pictures by locking the focus and/or exposure (AF/AE Lock) Recording mode: The AF/AE Lock function is convenient, for example, when there is too much contrast with the subject and you cannot get appropriate exposure (AE Lock) or when you want to take a still picture composed with the subject outside the AF area (AF Lock).
  • Page 99: Taking Pictures With Exposure Compensation

    Focus, Brightness (Exposure) and Color tone Settings Taking pictures with Exposure Compensation Recording mode: Corrects the exposure when there is a backlight or when the subject is too dark or too bright. Press the rear dial to switch to Exposure Compensation operation Rotate the rear dial to compensate the exposure...
  • Page 100: Setting The Iso Sensitivity

    Focus, Brightness (Exposure) and Color tone Settings Setting the ISO Sensitivity Recording mode: Set ISO sensitivity (sensitivity to lighting). We recommend higher settings to take clear pictures in darker locations. Press [ ] button ( Select the ISO sensitivity by rotating the rear dial ISO sensitivity ISO sensitivity is automatically set in a range up to 3200 (with the flash...
  • Page 101 Focus, Brightness (Exposure) and Color tone Settings Setting the ISO Sensitivity Setting guide ISO sensitivity [80] [3200] Location Bright Dark (recommended) (outdoors) Shutter speed Slow Fast Interference High Subject blur High ● For details on the available flash range used when the ISO sensitivity is set to [AUTO], refer to (→139).
  • Page 102: Adjusting The White Balance

    Focus, Brightness (Exposure) and Color tone Settings Adjusting the White Balance Recording mode: In sunlight, under incandescent lights or in other such conditions where the color of white takes on a reddish or bluish tinge, this item adjusts to the color of white which is closest to what is seen by the eye in accordance with the light source.
  • Page 103 Focus, Brightness (Exposure) and Color tone Settings Adjusting the White Balance Under fluorescent lighting, LED lighting fixtures, etc., the optimal White Balance will vary depending on the lighting type, so use [AWB], [ ], [ ], [ ] or [ ●...
  • Page 104 Focus, Brightness (Exposure) and Color tone Settings Adjusting the White Balance Performing White Balance fine adjustments White Balance settings can be individually fine-tuned if colors still do not appear as anticipated. In step of “Adjusting the White Balance” (→102), select the White Balance and press to perform White Balance fine adjustments : A (amber: orangish colors)
  • Page 105 Focus, Brightness (Exposure) and Color tone Settings Adjusting the White Balance Bracket recording using White Balance Bracket settings are performed based on the fine adjustment values for White Balance, and three pictures with different coloring are automatically recorded when the shutter button is pressed once.
  • Page 106: 4K Photo And Drive Settings

    4K Photo and Drive Settings Recording with the 4K Photo function and selecting pictures to save Recording with the 4K Photo function Recording mode: You can take burst pictures of approximately 8 million pixels with a burst rate of 30 fps. You can select and save a frame from the burst file.
  • Page 107 4K Photo and Drive Settings Recording with the 4K Photo function and selecting pictures to save Recording with the 4K Photo function Press the shutter button halfway Press and hold the shutter button fully for as long as you want to perform recording •...
  • Page 108 4K Photo and Drive Settings Recording with the 4K Photo function and selecting pictures to save Press the shutter button fully • Auto Focus adjusts focus continuously, and except in Manual Exposure Mode, it also adjusts exposure continuously. • Images may not be displayed as smoothly as when recording with the normal recording screen.
  • Page 109: Selecting Pictures From 4K Burst File And Saving

    4K Photo and Drive Settings Recording with the 4K Photo function and selecting pictures to save Selecting pictures from 4K burst file and saving This section describes how to select pictures from a 4K burst file and save them. For details on how to record 4K burst files, refer to (→106). Select a picture with the [ ] on the playback screen, and press...
  • Page 110 4K Photo and Drive Settings Recording with the 4K Photo function and selecting pictures to save <Slide view screen> Position of the displayed frame Operation Touch operation Description Selects the frame you want to save as a picture Drag • You can select a frame from 60 frames (continuous burst time of approximately 2 seconds).
  • Page 111 4K Photo and Drive Settings Recording with the 4K Photo function and selecting pictures to save <4K burst playback screen> During pause During continuous playback Operation Touch operation Description Continuous playback / Pause (during continuous playback) Continuous rewind / Pause (during continuous rewind) Fast forward playback / Single-frame forward (while paused) Fast rewind playback / Single-frame rewind (while paused) —...
  • Page 112: Notes On The 4K Photo Function

    4K Photo and Drive Settings Recording with the 4K Photo function and selecting pictures to save Notes on the 4K Photo function ■ To change the aspect ratio Selecting [Aspect Ratio] in the [Rec] menu allows you to change the aspect ratio for 4K photos.
  • Page 113 4K Photo and Drive Settings Recording with the 4K Photo function and selecting pictures to save ■ Limitations on the 4K Photo function Certain limitations apply to some recording functions, menu items and other settings. • The following settings are fixed. [4K] (8M) [Picture Size] [4:3]: 3328×2496...
  • Page 114 4K Photo and Drive Settings Recording with the 4K Photo function and selecting pictures to save Battery drainage and camera temperature ● If the surrounding temperature is high or 4K photos are recorded continuously, [ ] may be displayed and recording may be stopped halfway through. Wait until the camera cools down. ●...
  • Page 115: Adjusting The Focus After Recording ([Post Focus]/[Focus Stacking])

    4K Photo and Drive Settings Adjusting the focus after recording ([Post Focus]/[Focus Stacking]) Recording mode: You can record 4K burst pictures while changing the focus point and then select a focus point after recording. This function is best for non-moving subjects. You can select multiple focus points and combine them into one picture.
  • Page 116 4K Photo and Drive Settings Adjusting the focus after recording ([Post Focus]/[Focus Stacking]) Press the shutter button fully to start recording Recording progress bar • The focus point changes automatically while recording. When the recording progress bar disappears, recording automatically ends. •...
  • Page 117: Select The Focus Point And Save The Picture ([Post Focus])

    4K Photo and Drive Settings Adjusting the focus after recording ([Post Focus]/[Focus Stacking]) Select the focus point and save the picture ([Post Focus]) On the playback screen, select the image with the ] icon and press • The same operation can be performed by touching [ Touch the focus point •...
  • Page 118: Select The Focus Range To Combine And Create A Single Picture ([Focus Stacking])

    4K Photo and Drive Settings Adjusting the focus after recording ([Post Focus]/[Focus Stacking]) Select the focus range to combine and create a single picture ([Focus Stacking]) Near Focus Distant Touch [ ] on screen in step of “Select the focus point and save the picture ([Post Focus])”...
  • Page 119 4K Photo and Drive Settings Adjusting the focus after recording ([Post Focus]/[Focus Stacking]) (When selecting [Range Merging]) Set/Cancel Set/Cancel Touch the focus point • Select positions at two or more points. • Focus points between the selected two positions will be selected.
  • Page 120: Notes On The [Post Focus]/[Focus Stacking]

    4K Photo and Drive Settings Adjusting the focus after recording ([Post Focus]/[Focus Stacking]) Notes on the [Post Focus]/[Focus Stacking] ■ Limitations in [Post Focus] recording • Since recording is performed in the same picture quality as 4K photos, certain limitations apply to recording functions and menu settings. For details, refer to “Limitations on the 4K Photo function”...
  • Page 121: Selecting A Drive Mode

    4K Photo and Drive Settings Selecting a Drive Mode Recording mode: You can switch the operation to be performed when you press the shutter button. Press [ ] button ( Press to select the drive mode and press [MENU/SET] Drive Mode When the shutter button is pressed, [Single] only one picture is recorded.
  • Page 122: Burst Function

    4K Photo and Drive Settings Selecting a Drive Mode Burst function ■ Setting [Burst Rate] After selecting [Burst] and pressing in step (→121), select the burst rate with and press [MENU/SET] (High speed) (Middle speed) (Low speed) [AFS] Speed (pictures/sec.) [AFF] / [AFC] Live View during burst recording None...
  • Page 123 4K Photo and Drive Settings Selecting a Drive Mode ● The burst speed may become slower depending on the following settings: [Sensitivity], [Picture Size], [Quality], [AFS/AFF/AFC], [Focus/Release Priority] ● When the burst speed is set to [H] and if many burst pictures are taken, the burst speed may be reduced while burst pictures are being taken.
  • Page 124: Taking Pictures With Self-Timer

    4K Photo and Drive Settings Selecting a Drive Mode Taking pictures with self-timer ■ Setting the self-timer operation After selecting [Self Timer] and pressing in step (→121), select the self-timer operation with , and press [MENU/SET] The shutter is activated after 10 seconds. The shutter is activated after 10 seconds and three pictures are taken at intervals of approximately 2 seconds.
  • Page 125: (Bracket Recording)

    4K Photo and Drive Settings Taking Pictures While Adjusting a Setting Automatically (Bracket Recording) Recording mode: You can take multiple pictures while automatically adjusting a setting by pressing the shutter button. Set the menu (→45) → [Rec] → [Bracket] → [Bracket Type] Press the shutter button to perform recording while adjusting (Exposure Bracket) the exposure.
  • Page 126: Exposure Bracket

    4K Photo and Drive Settings Taking Pictures While Adjusting a Setting Automatically (Bracket Recording) Exposure Bracket ■ About [More Settings] (step in (→125)) Sets the number of pictures to be taken and the exposure compensation range. [Step] ] (Takes three pictures with an interval of 1/3 EV) to [ (Takes seven pictures with an interval of 1 EV) [Sequence] Sets the order in which pictures are taken.
  • Page 127: Taking Pictures Automatically At Set Intervals [Time Lapse Shot]

    4K Photo and Drive Settings Taking pictures automatically at set intervals [Time Lapse Shot] Recording mode: You can preset data such as recording start time and time lapse to take still pictures automatically. This setting is convenient for taking pictures at constant intervals for landscape scenes, observation of the gradual changes in animals/plants, and other applications.
  • Page 128 4K Photo and Drive Settings Taking pictures automatically at set intervals [Time Lapse Shot] Select the motion picture creation method • [Rec Format]: [MP4] [Rec Quality] Sets the picture quality of the motion picture. Set the number of frames per second. The higher the number is, the [Frame Rate] smoother the motion picture will be.
  • Page 129: Creating Stop Motion Animation [Stop Motion Animation]

    4K Photo and Drive Settings Creating stop motion animation [Stop Motion Animation] Recording mode: You can stitch still pictures to create stop motion animation. • Complete the date and time settings in advance. (→31) • Still pictures that were captured using frame-by-frame recording are grouped into a single picture group.
  • Page 130 4K Photo and Drive Settings Creating stop motion animation [Stop Motion Animation] Touch [ ] to end the recording • You can also end the recording by selecting [Stop Motion Animation] in the [Rec] menu, and then pressing [MENU/SET]. • When [Auto Shooting] is set to [ON], select [End] on the confirmation screen.
  • Page 131 4K Photo and Drive Settings Creating stop motion animation [Stop Motion Animation] ● [Auto Shooting] may not be performed according to the preset interval because recording could take time under some recording conditions, such as when pictures are taken using a flash. ●...
  • Page 132: Stabilizer, Zoom And Flash

    Stabilizer, Zoom and Flash Correcting jitter Recording mode: Automatically detects and prevents jitter. → [Rec] / [Motion Picture] → [Stabilizer] Corrects vertical and horizontal jitter. (Normal) Corrects vertical jitter. This setting is ideal for panning (technique of recording a subject by matching the camera movement with the movement of a subject going (Panning) in a specific direction).
  • Page 133 Stabilizer, Zoom and Flash Correcting jitter ● When you use a tripod, we recommend setting [Stabilizer] to [OFF]. ● In the following cases, the [Stabilizer] will switch to [ ] (Normal), even if it is set to [ (Panning): • During motion picture recording •...
  • Page 134: Using Zoom

    Stabilizer, Zoom and Flash Using Zoom For details on zoom operations and the Zoom Compose Assist function, refer to (→35, 36). Zoom types and use The zoom ratio changes when the picture size is changed. Optical Zoom Recording mode: You can zoom in without degrading the picture quality. Maximum magnification: 60x ●...
  • Page 135 Stabilizer, Zoom and Flash Using Zoom To increase the zoom ratio further, the following zoom can be used in combination. [i.Zoom] Recording mode: You can use the camera’s Intelligent Resolution technology to increase the zoom ratio up to 2x higher than the original zoom ratio with limited deterioration of picture quality. →...
  • Page 136 Stabilizer, Zoom and Flash Using Zoom [Digital Zoom] Recording mode: Zoom 4x further than Optical/Extra optical zoom (Extended optical zoom). When [Digital Zoom] is used simultaneously with [i.Zoom], you can only increase the zoom ratio up to Note that, with Digital Zoom, enlarging will decrease picture quality. →...
  • Page 137: Using The Zoom By Performing Touch Operations (Touch Zoom)

    Stabilizer, Zoom and Flash Using Zoom Using the zoom by performing touch operations (Touch zoom) Touch [ Touch [ • The slide bar is displayed. Perform zoom operations by dragging the slide • The zoom speed varies depending on the touched position. ] / [ Slow zooming Fast zooming...
  • Page 138: Taking Pictures With Flash

    Stabilizer, Zoom and Flash Taking pictures with flash Recording mode: ■ Open/Close the built-in flash To open the flash Press [ ] (Flash open) button. • Be careful when opening the flash as the flash will jump out. To close the flash Press the flash until it clicks.
  • Page 139 Stabilizer, Zoom and Flash Taking pictures with flash ■ The available flash range Edges of a picture may become slightly dark if using flash at short distances without using zoom (close to max. Wide). This may be remedied by using a little zoom. Max.
  • Page 140: Setting The Flash Functions

    Stabilizer, Zoom and Flash Setting the Flash Functions Changing the firing mode (Manual flash) Recording mode: You can select whether the flash output is set automatically or manually. This item is available only when the built-in flash is being used. →...
  • Page 141: Changing Flash Mode

    Stabilizer, Zoom and Flash Setting the Flash Functions Changing Flash Mode Recording mode: Set the flash to match the recording. → [Rec] → [Flash] → [Flash Mode] Always takes pictures using the flash. : [Forced Flash On] • Ideal for taking pictures with a backlight or when a subject is located under bright lighting such as a : [Forced On/Red-Eye] fluorescent light.
  • Page 142 Stabilizer, Zoom and Flash Setting the Flash Functions ■ Shutter speeds for each flash mode Flash Mode Shutter speed (seconds) Flash Mode Shutter speed (seconds) 1/60 - 1/2000 1 - 1/16000 - 1/16000 The shutter speed is set to 4 seconds in Shutter-Priority AE Mode and Manual Exposure Mode. The shutter speed is set to 60 seconds in [Artistic Nightscape] (Scene Guide Mode).
  • Page 143 Stabilizer, Zoom and Flash Setting the Flash Functions ■ Flash settings for each Recording mode (○: Available, –: Not available) Recording mode Program AE Mode ○ ○ ○ ○ Aperture-Priority AE Mode Shutter-Priority AE Mode ○ ○ – – Manual Exposure Mode [Clear Portrait] ○...
  • Page 144: Setting The 2Nd Curtain Sync

    Stabilizer, Zoom and Flash Setting the Flash Functions Setting the 2nd curtain sync Recording mode: 2nd curtain sync is a recording method in which the flash fires just before the shutter closes when you take a picture of a moving subject (such as a car) using the flash with a slow shutter speed.
  • Page 145: Adjusting The Flash Output

    Stabilizer, Zoom and Flash Setting the Flash Functions Adjusting the flash output Recording mode: Adjust the flash output if a picture taken using the flash is too bright or too dark. → [Rec] → [Flash] → [Flash Adjust.] Press to set the flash output and press [MENU/SET] Settings: –2 EV to +2 EV (unit: 1/3 EV) When you do not want to adjust the intensity of the flash, select [±0 EV].
  • Page 146: Taking Pictures With Wireless Flashes

    Stabilizer, Zoom and Flash Taking Pictures with Wireless Flashes Recording mode: When you use the flashes (DMW-FL200L, DMW-FL360L, DMW-FL580L: optional) * with the wireless flash recording function, you can separately control the firing of the flashes in three groups and of the built-in flash (or the flash attached to the hot shoe of the camera). * Some optional accessories may not be available in some countries.
  • Page 147 Stabilizer, Zoom and Flash Taking Pictures with Wireless Flashes Preparation Either open the flash by pressing [ ] (Flash open) button, or attach a flash (optional) to this unit. Set the wireless flash to RC mode and position the flash •...
  • Page 148 Stabilizer, Zoom and Flash Taking Pictures with Wireless Flashes [TTL]: The flash output is automatically adjusted. [AUTO] : Sets the flash output using an external flash. [Firing Mode] [MANUAL]: Manually sets the flash ratio of an external flash. [OFF]: The flash of this unit fires only for a communication [Built-in light emission.
  • Page 149: Recording Motion Pictures

    Recording motion pictures Recording Motion Picture/4K Motion Picture Recording mode: You can record full high-definition quality images that comply with the AVCHD standard, as well as motion pictures recorded in MP4. You can also record a 4K motion picture in MP4.
  • Page 150 Recording motion pictures Recording Motion Picture/4K Motion Picture ● If the surrounding temperature is high, or a motion picture is recorded continuously, [ ] is displayed and recording may be stopped halfway through. Wait until the camera cools down. ● If Extra optical zoom/Extended optical zoom is used before pressing the motion picture button, these settings will be cleared, and the recordable area will be changed significantly.
  • Page 151: Setting The Format, Picture Size And Recording Frame Rate (Dc-Fz80Dp/Dc-Fz80Dpp)

    Recording motion pictures Recording Motion Picture/4K Motion Picture Setting the format, picture size and recording frame rate (DC-FZ80DP/DC-FZ80DPP) Set the menu (→45) → [Motion Picture] → [Rec Format] [AVCHD] This is a data format suitable for playback on high-definition TVs. This data format is suited for playing back motion pictures on a computer and other [MP4] such devices.
  • Page 152: Setting The Format, Picture Size And Recording Frame Rate (Dc-Fz82De/Dc-Fz80Dga/Dc-Fz80Dgn)

    Recording motion pictures Recording Motion Picture/4K Motion Picture Setting the format, picture size and recording frame rate (DC-FZ82DE/DC-FZ80DGA/DC-FZ80DGN) Set the menu (→45) → [Motion Picture] → [Rec Format] [AVCHD] This is a data format suitable for playback on high-definition TVs. This data format is suited for playing back motion pictures on a computer and other [MP4] such devices.
  • Page 153 Recording motion pictures Recording Motion Picture/4K Motion Picture • The quality becomes higher when the number of bit rate gets bigger. This unit uses the “VBR” recording method, and the bit rate is changed automatically depending on the subject to record. Therefore, the recording time is shortened when a subject with fast movement is recorded.
  • Page 154: Adjusting The Focus While Recording Motion Pictures ([Continuous Af])

    Recording motion pictures Recording Motion Picture/4K Motion Picture Adjusting the focus while recording motion pictures ([Continuous AF]) Recording mode: Focusing varies depending on the setting of focus and the setting of [Continuous AF] in the [Motion Picture] menu. → [Motion Picture] → [Continuous AF] Focus setting [Continuous AF] Setting...
  • Page 155: Pan Or Zoom While Recording With The Camera In A Fixed Position [4K Live Cropping]

    Recording motion pictures Pan or zoom while recording with the camera in a fixed position [4K Live Cropping] Recording mode: By cropping your motion picture down from the 4K angle of view to Full High Definition, you can record a motion picture that pans and zooms in/out while leaving the camera in a fixed position.
  • Page 156 Recording motion pictures Pan or zoom while recording with the camera in a fixed position [4K Live Cropping] Set the crop start frame Start Start Crop start frame • When making settings for the first time, a crop start frame of size 1920×1080 is displayed. (After setting the crop start frame and end frame, the start frame Size Size...
  • Page 157 Recording motion pictures Pan or zoom while recording with the camera in a fixed position [4K Live Cropping] ■ Changing the position and size of a crop frame Press [Fn1] button while the recording screen is displayed, and perform steps ■...
  • Page 158: Taking Still Pictures While A Motion Picture Is Being Recorded

    Recording motion pictures Taking still pictures while a motion picture is being recorded Recording mode: Press the shutter button fully during the motion picture recording • Up to 30 pictures can be recorded. • Simultaneous recording indicator is displayed while recording still pictures.
  • Page 159: Recording Snap Movies

    Recording motion pictures Recording Snap Movies Recording mode: You can specify the recording time in advance and record motion pictures casually like you take snapshots. The function also allows you to shift a focus at the start of recording and add fade in/out effects in advance. •...
  • Page 160 Recording motion pictures Recording Snap Movies ■ Changing the settings → [Motion Picture] → [Snap Movie] → [SET] [Record time] Sets the recording time of motion pictures. [Pull Focus] Allows dramatic imaging expression by shifting focus gradually at the start of recording.
  • Page 161 Recording motion pictures Recording Snap Movies Setting up [Pull Focus] Set the frames that specify the positions where the [Pull Focus] starts (first position) and stops (second position). Touch operation Touch a subject (first position), drag your finger to the desired location (second position), and release the finger.
  • Page 162: Playing Back And Editing Pictures

    Playing Back and Editing Pictures Viewing your pictures Press [ ] (Playback) button Press to select a picture to be displayed • When you press and hold , the pictures are displayed one after another. • Pictures can also be forwarded or rewound by rotating the rear dial or dragging the screen horizontally (→42).
  • Page 163: Viewing Motion Pictures

    Playing Back and Editing Pictures Viewing motion pictures This unit was designed to play motion pictures using the AVCHD and MP4 formats. • Motion pictures are displayed with the motion picture icon ([ Press to start playback Motion picture recording time •...
  • Page 164: Capturing Still Pictures From Motion Pictures

    Playing Back and Editing Pictures Viewing motion pictures Capturing still pictures from motion pictures Save a scene from a motion picture as a still picture. Display the picture that you want to capture as a still picture by pressing to pause a motion picture being played back on the camera •...
  • Page 165: Switching The Playback Method

    Playing Back and Editing Pictures Switching the Playback Method Zooming in and viewing “Playback Zoom” Move the zoom lever toward T side Current zoom position • Each time you move the zoom lever toward the T side, the magnification increases through four levels: 1x, 2x, 4x, 8x, and 16x.
  • Page 166: Viewing Pictures By Their Recording Date "Calendar Playback

    Playing Back and Editing Pictures Switching the Playback Method Viewing pictures by their recording date “Calendar Playback” Move the zoom lever toward the W side to display the calendar screen to select recording date and press [MENU/SET] TUEWEDTHU FRI SAT Selected date •...
  • Page 167: Viewing Group Pictures

    Playing Back and Editing Pictures Viewing group pictures You can consecutively play back multiple pictures in a group or play back group pictures one by one. ]: Group picture saved using [4K PHOTO Bulk Saving] (→214) 15 pic. 15 pic. ]: Group pictures recorded using [Time Lapse Shot] (→127) ]: Group pictures recorded using [Stop Motion...
  • Page 168 Playing Back and Editing Pictures Viewing group pictures Playing back group pictures one by one Press • The same operation can be performed by touching [ ] / [ 15 pic. 15 pic. to scroll through the pictures • [ ]: When you play back group pictures one by one, the option settings are displayed.
  • Page 169: Deleting Pictures

    Playing Back and Editing Pictures Deleting pictures Deleted pictures cannot be recovered. [Delete Single] Press [ ] button to delete displayed picture • The same operation can be performed by touching [ to select [Delete Single] and press [MENU/SET] To delete multiple (up to 100 )/To delete all pictures * A picture group (→167)
  • Page 170 Using Menu Functions Menu list [Rec] →170 [Custom] →190 [Playback] →208 [Motion Picture] →188 [Setup] →200 [Rec] • The [Photo Style], [Filter Settings], [AFS/AFF/AFC], [Metering Mode], [Highlight Shadow], [i.Dynamic], [i.Resolution], [Diffraction Compensation], [i.Zoom], [Digital Zoom], [Stabilizer], and [Conversion] * menu items are common for both [Rec] and [Motion Picture] menus.
  • Page 171: [Photo Style]

    Using Menu Functions Menu list [Photo Style] Recording mode: You can adjust the colors and picture quality according to the concept of the picture that you want to create. → [Rec] → [Photo Style] [Standard] Standard setting. [Vivid] Setting with slightly high contrast and saturation. [Natural] Setting with slightly low contrast.
  • Page 172 Using Menu Functions Menu list ■ Adjusting the picture quality Standard • Picture quality cannot be adjusted in the Intelligent Auto Plus Mode. Press to select the type of Photo Style Press to select an item and press to adjust Increases the contrast in a picture.
  • Page 173: [Filter Settings]

    Using Menu Functions Menu list [Filter Settings] Recording mode: This mode records with additional image effects (filters) just like in the [ ] mode. (→71) → [Rec] → [Filter Settings] → [Filter Effect] Settings: [ON] / [OFF] / [SET] ■ With touch screen operations Touch [ Touch the item you want to set...
  • Page 174 Using Menu Functions Menu list ■ Taking two still pictures with and without picture effects ([Simultaneous Record w/o Filter]) You can take two still pictures at the same time by pressing the shutter button once; one with effects and one without effects. →...
  • Page 175: [Picture Size]

    Using Menu Functions Menu list [Picture Size] Recording mode: Sets the picture’s image size. → [Rec] → [Picture Size] [Aspect Ratio] 16:9 [L] 18M [L] 16M [L] 13.5M [L] 13.5M 4896×3672 4896×3264 4896×2752 3664×3664 M] 9M M] 8M M] 8M M] 7M [Picture Size] 3456×2592...
  • Page 176: [Metering Mode]

    Using Menu Functions Menu list About RAW file In RAW file format the data is saved without any picture processing by the camera. To play back and edit RAW file pictures, you must use this unit or dedicated software. • You can develop the RAW file pictures using [RAW Processing] in the [Playback] menu. (→211) •...
  • Page 177: [Highlight Shadow]

    Using Menu Functions Menu list [Highlight Shadow] Recording mode: You can adjust the highlights and shadows in a picture while confirming the brightness of these areas on the screen. Set the menu (→45) → [Rec] → [Highlight Shadow] ([Standard]) No adjustments. Makes the highlighted areas brighter and shadowed areas ([Higher contrast]) darker.
  • Page 178: [I.dynamic]

    Using Menu Functions Menu list [i.Dynamic] Recording mode: Automatically adjusts contrast and exposure to give more lifelike colors when there is significant contrast between background and subject. → [Rec] → [i.Dynamic] Settings: [AUTO] / [HIGH] / [STANDARD] / [LOW] / [OFF] ●...
  • Page 179: [Hdr]

    Using Menu Functions Menu list [HDR] Recording mode: The camera can combine 3 still pictures taken at different exposures into a single properly exposed picture with rich gradation. The individual pictures used to create the HDR picture are not saved. You can minimize the loss of gradations in bright areas and dark areas when, for example, the contrast between the background and the subject is large.
  • Page 180: [Multi Exp.]

    Using Menu Functions Menu list [Multi Exp.] Recording mode: You can create an effect similar to the operation of up to four times of exposure on a single picture. → [Rec] → [Multi Exp.] Press to select [Start] and press [MENU/SET] Decide on your composition and take the first picture •...
  • Page 181 Using Menu Functions Menu list [Shutter Type] Recording mode: You can take pictures using two types of shutter modes: the mechanical shutter and electronic shutter. Mechanical shutter Electronic shutter Flash ○ – Shutter Speed - 1/2000 - 1/16000 (seconds) Mechanical shutter sound Shutter sound Electronic shutter sound Electronic shutter sound...
  • Page 182 Using Menu Functions Menu list [ISO Limit Set] Recording mode: You can set the upper limit of ISO sensitivity when ISO sensitivity is set to [AUTO] or → [Rec] → [ISO Limit Set] Settings: [200] / [400] / [800] / [1600] / [3200] / [OFF] ●...
  • Page 183: [Diffraction Compensation]

    Using Menu Functions Menu list [Diffraction Compensation] Recording mode: The camera raises the resolution by correcting the blurriness caused by diffraction when the aperture is closed. → [Rec] → [Diffraction Compensation] Settings: [AUTO] / [OFF] ● Noise in the periphery of the picture may stand out with higher ISO sensitivity. [Color Space] Recording mode: You can set the method for reproducing the colors to correctly display the recorded...
  • Page 184 Using Menu Functions Menu list [Face Recog.] Recording mode: The Face Recognition function recognizes a face similar to a registered face and automatically adjusts focus and exposure for the face with higher priority. Even if a person you want to focus on is standing at the back or corner in a group photo, the camera will automatically recognize the person and record this person’s face clearly.
  • Page 185 Using Menu Functions Menu list ■ Registering face pictures Up to 6 people’s face pictures can be registered along with such information as name and birthdate. to select [MEMORY] and press [MENU/SET] to select [New] and press [MENU/SET] Align the face with the guide and record •...
  • Page 186 Using Menu Functions Menu list Recording tips when registering face pictures Good example for registering a face • Make sure the subject’s eyes are open and mouth closed; have the subject face the camera directly, and make sure the outline of the face, the eyes and eyebrows are not hidden by hair.
  • Page 187 Using Menu Functions Menu list [Profile Setup] Recording mode: You can set a name or birthday of a baby or pet before taking a picture to record the name or age in months/years in the picture. ■ Setting the name and age in months/years →...
  • Page 188: Motion Picture

    Using Menu Functions Menu list [Motion Picture] • The [Photo Style], [Filter Settings], [AFS/AFF/AFC], [Metering Mode], [Highlight Shadow], [i.Dynamic], [i.Resolution], [Diffraction Compensation], [i.Zoom], [Digital Zoom], [Stabilizer], and [Conversion] * menu items are common for both [Rec] and [Motion Picture] menus. If a setting in one menu is changed, the setting with the same name in other menu will also be changed automatically.
  • Page 189 Using Menu Functions Menu list [Zoom Mic] Recording mode: Coupled to the zoom operation, it will more clearly record far sounds during enlarging image, and surrounding sounds with wide-angle. → [Motion Picture] → [Zoom Mic] Settings: [ON] / [OFF] ● When set to [ON] and performing zoom, the operation sound may be recorded enhanced in accordance with the surrounding sounds.
  • Page 190: [Silent Mode]

    Using Menu Functions Menu list [Custom] → [Custom] • [Cust.Set Mem.] (→80) • [Zebra Pattern] (→196) • [Silent Mode] (→190) • [Monochrome Live View] (→196) • [AF/AE Lock] (→98) • [Constant Preview] (→196) • [AF/AE Lock Hold] (→191) • [Expo.Meter] (→197) •...
  • Page 191 Using Menu Functions Menu list → [Custom] [AF/AE Lock Hold] Focus and exposure stays locked even if you press and release the [AF/AE LOCK] button (or the function button where [AF/AE LOCK] is registered). Press the button again to cancel the lock. [Shutter AF] Set whether or not the focus is adjusted automatically when the shutter button is pressed halfway.
  • Page 192 Using Menu Functions Menu list → [Custom] [AF Assist Lamp] Illuminates the AF Assist Lamp when the shutter button is pressed halfway when it is too dark to facilitate focusing. ● The AF Assist Lamp has an effective distance of 1.5 m (4.9 feet). ●...
  • Page 193 Using Menu Functions Menu list → [Custom] [AF+MF] You can manually perform fine focusing during AF Lock (pressing the shutter button halfway when [AFS/AFF/AFC] in [Rec] menu is set to [AFS] or setting AF Lock using the [AF/AE LOCK]). [MF Assist] When you press [ ] button ( ), MF Assist (enlarged screen) appears.
  • Page 194 Using Menu Functions Menu list → [Custom] [Peaking] When you perform Manual Focus operation, this function automatically adds color to the portions of the image that are in Focus (portions on the screen with clear outlines). ● When [Detect Level] in [SET] is set to [HIGH], portions to be highlighted are reduced, allowing you to achieve a more precise focus.
  • Page 195: [Center Marker]

    Using Menu Functions Menu list → [Custom] [Guide Line] Sets the pattern of the guidelines to be displayed while recording. ● When you select [ ], you can move the position of the guideline by pressing ● You can also set the position directly by touching [ ] on the guideline of the recording screen.
  • Page 196: [Zebra Pattern]

    Using Menu Functions Menu list → [Custom] [Zebra Pattern] You can check the area in a picture, which could result in overexposure, by displaying such an area using a zebra pattern. [ZEBRA1]: [ZEBRA2]: Select [SET] to set the brightness to be displayed for each zebra pattern. •...
  • Page 197 Using Menu Functions Menu list → [Custom] [Expo.Meter] Enabling/disabling the exposure meter display. Exposure meter ● When you set this function to [ON], an exposure meter is displayed during Program Shift, aperture setting, and shutter speed operation. ● Proper exposure is not possible in the range indicated in red. ●...
  • Page 198: [Auto Review]

    Using Menu Functions Menu list → [Custom] [Auto Review] Set the time to display the pictures you have taken after taking still pictures. ● When [HOLD] is selected, pictures are displayed until you press the shutter button halfway. ● During 4K Photo recording and [Post Focus] recording, the [Auto Review] settings items change to [ON] and [OFF].
  • Page 199 Using Menu Functions Menu list → [Custom] [Video Button] Enabling/disabling the motion picture button. [Touch Settings] Enabling/disabling the touch operation. [Touch Screen] All touch operations. Operations of tabs, such as [ ] displayed on the right side of the screen. [Touch Tab] Operation to optimize the focus [AF] or both the focus and brightness [Touch AF]...
  • Page 200 Using Menu Functions Menu list [Setup] → [Setup] • [Clock Set] (→31) • [Menu Resume] (→206) • [World Time] (→200) • [Menu Background] (→206) • [Travel Date] (→201) • [Menu Information] (→206) • [Beep] (→202) • [Language] (→206) • [Live View Mode] (→202) •...
  • Page 201 Using Menu Functions Menu list → [Setup] ■ To set daylight savings Press in step . (Press again to release the setting) • When daylight savings [ ] is set, the current time is advanced by 1 hour. If the setting is canceled, the time automatically returns to the current time.
  • Page 202: [Beep]

    Using Menu Functions Menu list → [Setup] [Beep] Sets the beep sounds or shutter sounds. ■ [Beep Volume] ■ [Shutter Vol.] ■ [Shutter Tone] ● When [Silent Mode] is set to [ON], [Beep] is not available. [Live View Mode] Sets the display speed and picture quality of the screen (Live View screen) when recording pictures.
  • Page 203 Using Menu Functions Menu list → [Setup] [Monitor Display] / [Viewfinder] Adjust brightness and color of the monitor or viewfinder. [Brightness] Adjusts the brightness. [Contrast] Adjusts the contrast. [Saturation] Adjusts the vividness of colors. [Red Tint] Adjusts red hues. [Blue Tint] Adjusts blue hues.
  • Page 204: [Power Save Mode]

    Using Menu Functions Menu list → [Setup] [Monitor Priority (Play)] Pictures are automatically played back on the monitor after the camera is switched from recording mode to playback mode by pressing [ ] (Playback) button. [ON] Pictures are played back on the monitor. Pictures are played back on the viewfinder or the monitor depending on which one was [OFF] used to play back pictures previously.
  • Page 205 Using Menu Functions Menu list → [Setup] [TV Connection] ■ [HDMI Mode (Play)] Set the format for the output. [AUTO] Automatically sets the output resolution based on information from a connected TV. Outputs pictures with a output resolution of 3840×2160 pixels using a progressive scan [4K] method for the number of effective scanning lines (2,160 lines).
  • Page 206 Using Menu Functions Menu list → [Setup] [m/ft] Select how distance is displayed, in Ft or M. * Depending on the country or area where the camera was purchased, this is not displayed due to differences in specifications. [Menu Resume] Save the last operated menu position.
  • Page 207: Setup/Custom

    Using Menu Functions Menu list → [Setup] [No.Reset] Reset picture file numbers. (The folder number is updated and the file number starts from 0001.) • To reset folder number to 100: First, format the card, and reset the file numbers using [No.Reset]. Then, select [Yes] on the folder number reset screen.
  • Page 208 Using Menu Functions Menu list [Playback] • [Slide Show] (→209) • [Stop Motion Video] (→220) • [Playback Mode] (→210) • [Resize] (→220) • [RAW Processing] (→211) • [Cropping] (→221) • [4K PHOTO Bulk Saving] (→214) • [Rotate] (→221) • [Light Composition] (→214) •...
  • Page 209: Display/Playback Settings [Slide Show]

    Using Menu Functions Menu list [Slide Show] Automatically plays back recorded pictures, one after another. You can organize slide shows composed of only still pictures or only motion pictures. Recommended when viewing on TV screen. → [Playback] → [Slide Show] to select the item and press [MENU/SET] •...
  • Page 210 Using Menu Functions Menu list ■ To change settings such as music or display time Select [Effect] or [Setup] and press [MENU/SET]. [Effect] This allows you to select the screen effects when switching from one picture to the next. [Setup] [Duration] •...
  • Page 211: [Raw Processing]

    Using Menu Functions Menu list [RAW Processing] You can use the camera to develop still pictures that were recorded in RAW format. The created still pictures are saved in JPEG format. → [Playback] → [RAW Processing] Press to select RAW file and press [MENU/SET] Press to select the item and then press [MENU/SET] to set...
  • Page 212 Using Menu Functions Menu list Press [MENU/SET] to finalize the setting • The screen in step reappears. To set another item, repeat steps Press to select [Begin Processing] and press [MENU/SET] ■ Setting each item When you select an item, the setting screen appears. Touch Operation Description...
  • Page 213 Using Menu Functions Menu list The following operating methods are available to make adjustments on the comparison screen. Current setting Touch Operation Description operation Drag Used to make adjustments [DISP.] [DISP.] Used to return to the setting screen Used to finalize an adjustment you [MENU/SET] [Set] just made and to return to the item...
  • Page 214: [4K Photo Bulk Saving]

    Using Menu Functions Menu list [4K PHOTO Bulk Saving] You can bulk save 5 seconds’ worth of 4K recording from a 4K burst file. → [Playback] → [4K PHOTO Bulk Saving] to select the 4K burst files and press [MENU/SET] •...
  • Page 215 Using Menu Functions Menu list ■ [Range Merging]: Selecting a range to combine Select the frame of the first picture and then press [MENU/SET] • The selection method is the same as in step of [Composite Merging] setting. Select the frame of the last picture and then press [MENU/SET] Select [Yes] at the confirmation screen and press [MENU/SET] •...
  • Page 216: [Clear Retouch]

    Using Menu Functions Menu list [Clear Retouch] You can erase unnecessary parts recorded on the pictures taken. • The erasure operation can only be performed by touching. [Clear Retouch] automatically enables the touch operation. → [Playback] → [Clear Retouch] to select a still picture and press [MENU/SET] Drag your finger over the part you want to erase •...
  • Page 217: [Title Edit]

    Using Menu Functions Menu list [Title Edit] You can enter characters (titles etc.) on a recorded picture. After text has been registered, it can be stamped in prints using [Text Stamp] (→218). → [Playback] → [Title Edit] Select a still picture (→208) •...
  • Page 218: [Text Stamp]

    Using Menu Functions Menu list [Text Stamp] You can stamp the recording date and time, names, travel destination, travel dates, etc. on the recorded still pictures. → [Playback] → [Text Stamp] Select a still picture (→208) • [ ] appears on screen if the picture is stamped with text. to select [Set] and press [MENU/SET] [Shooting Date] [W/O TIME]: Stamp recording date...
  • Page 219 Using Menu Functions Menu list [Video Divide] A single motion picture can be split into 2 parts. This is convenient when you want to keep just the necessary scenes, or if you wish to delete unnecessary scenes to increase free space on your card, such as when traveling.
  • Page 220: [Resize]

    Using Menu Functions Menu list [Stop Motion Video] You can create a motion picture from the pictures in a group that was recorded using [Stop Motion Animation]. The motion picture you created is saved in the MP4 recording format. → [Playback] →...
  • Page 221: [Rotate]/[Rotate Disp.]

    Using Menu Functions Menu list [Cropping] Enlarge your still pictures and crop unwanted areas. → [Playback] → [Cropping] to select a still picture and press [MENU/SET] Select area to crop and press [MENU/SET] • You can also touch [ ] / [ ] to enlarge/reduce.
  • Page 222: [Favorite]

    Using Menu Functions Menu list [Rotate Disp.] This mode allows you to display pictures vertically if they were recorded holding the camera vertically. → [Playback] → [Rotate Disp.] → [ON] ● When you play back pictures on a PC, they cannot be displayed in the rotated direction unless the OS or software is compatible with Exif.
  • Page 223: [Protect]

    Using Menu Functions Menu list [Protect] Set protection to disable picture deletion. Prevents deletion of important pictures. → [Playback] → [Protect] Select picture (→208) ■ To clear all Select [Protect] → [Cancel] → [Yes], and then press [MENU/SET] When you set the write-protect switch on the card to the “LOCK” position, the picture is not erased.
  • Page 224 Using Menu Functions Menu list [Picture Sort] You can set the display sequence used for playing back pictures on this unit. → [Playback] → [Picture Sort] Displays pictures in the folder name or file name sequence. This display [FILE NAME] format allows you to find the storage location of a picture on a card more easily.
  • Page 225 • When the [VIERA Link] setting on the camera is set to [ON] and the camera is connected to a VIERA Link (HDMI)-compatible Panasonic television (VIERA), the television automatically switches its input and the playback screen is displayed. For details (→229).
  • Page 226 Enjoying 4K motion pictures Storing 4K motion pictures By connecting the camera to a Panasonic Blu-ray disc recorder or DVD recorder, you can store the pictures and videos. (Images such as 4K videos may not be supported depending on your recorder.) ■...
  • Page 227 Connecting with other devices Viewing on TV screen You can view pictures on a TV screen by connecting your camera to your TV with the HDMI micro cable. Preparation Turn off both camera and TV. Connect camera to TV Check the plug direction and insert it straight in. (If the cable is inserted in the wrong direction, the plug could become deformed and cause faulty operation.) Also, do not insert into the wrong socket.
  • Page 228 Connecting with other devices Viewing on TV screen ● Bars may appear at the sides or at the top and bottom of the screen, depending on the aspect ratio setting. ● Change the screen mode on your TV if the picture is displayed with the top or bottom cut off. ●...
  • Page 229 CEC-compatible devices. Refer to your product manual to verify compatibility with VIERA Link (HDMI). ● This camera supports VIERA Link (HDMI) Version 5. This is the Panasonic standard that also supports previous Panasonic VIERA Link devices. Preparation Set [VIERA Link] to [ON] (→205).
  • Page 230 Connecting with other devices Storing recorded still pictures and motion pictures on your PC Still/motion pictures can be copied from the camera to your computer by connecting the two together. • Some computers can read directly from the camera’s memory card. For details, see the instruction manual for your computer.
  • Page 231 You can also correct still pictures, edit motion pictures, or write to DVD. Check the website below to download/install the software. https://panasonic.jp/support/global/cs/soft/download/d_pfs10ae.html (English only) Download expiration: January 2030 •...
  • Page 232 Connecting with other devices Storing recorded still pictures and motion pictures on your PC SILKYPIX Developer Studio SE This software develops and edits RAW file pictures. Edited pictures can be saved in a file format such as JPEG or TIFF that can be displayed on a PC, etc. Check the website below to download/install the software.
  • Page 233 Connecting with other devices Storing recorded still pictures and motion pictures on your PC Copying still pictures and motion pictures Preparations • Install “PHOTOfunSTUDIO” on your computer before starting the copying procedure. (→231) • Turn on the camera and computer. Connect camera to computer •...
  • Page 234 Connecting with other devices Storing recorded still pictures and motion pictures on your PC ■ Copying to your computer without using “PHOTOfunSTUDIO” You can save pictures to use on your computer by dragging and dropping folders and files into separate folders on your computer. •...
  • Page 235 Connecting with other devices Storing on a Recorder By connecting the camera to a Panasonic Blu-ray disc recorder or DVD recorder, you can store the pictures and videos. Getting started: • Turn on the camera and recorder. Connect the camera and recorder •...
  • Page 236 Others Optional accessories Some optional accessories may not be available in some countries. Conversion Lens (optional) By using the optional conversion lenses, you can record even more telephoto pictures. Set the [Rec] menu after mounting the lens. ■ Mounting the conversion lens Preparation Remove the lens cap.
  • Page 237 Others Optional accessories ■ Set the [Rec] menu Recording mode: Set the menu (→45) → [Rec] / [Motion Picture] → [Conversion] When you attach the tele conversion lens. [OFF] — • Always set to [OFF] when the conversion lens is taken off. Example: How to hold the camera during handheld recording when the tele conversion lens is attached ●...
  • Page 238 Others Optional accessories External Flash (optional) After attaching the flash (DMW-FL200L, DMW-FL360L, DMW-FL580L: optional), the effective range will be increased when compared to the camera’s built-in flash. Preparation Close the built-in flash and set the camera [ON/OFF] switch to [OFF]. Attach the external flash to the hot shoe and then turn on the camera and the external flash •...
  • Page 239 Others List of monitor/viewfinder displays • The following images are examples of when the display screen is set to [ ] (monitor style) in the monitor. • The information displayed, such as histograms, magnifications, and numeric values, are only for the purpose of reference. In recording [Peaking] (→194)
  • Page 240 Others List of monitor/viewfinder displays [Quality] (→175) Name (→187) 200fps 100fps [High Speed Video] (→78) Travel elapsed days (→201) [AFS/AFF/AFC] (→83)/ Age in years/months (→187) AFS AFF AFC MF (→96) Location (→201) AF Mode (→84) Current date/time Travel destination setting (→200) [Pull Focus] (→161)
  • Page 241 Others List of monitor/viewfinder displays Coloring (→58) [Dial Guide] (→197) Defocus control function White Balance Bracket (→105) (→58, 76) White Balance Fine Adjustment Brightness (exposure) (→104) (→58, 76) Type of defocus ([Miniature White Balance (→102) Effect]) (→72) Coloring (→57) [One Point Color] (→73) Number of recordable pictures (→28)
  • Page 242 Others List of monitor/viewfinder displays ■ On-monitor recording information Single (→121) Recording mode (→38) Burst (→122) [4K PHOTO] (→106) F2.8 Aperture value (→37) [Self Timer] (→124) 1/60 Shutter speed (→37) [AFS/AFF/AFC] (→83)/ Remaining battery (→23) AFS AFF AFC MF (→96) AF Mode (→84) [Quality]...
  • Page 243 Others List of monitor/viewfinder displays In playback 15 pic. 15 pic. 1ST DAY 1ST DAY 11 months 20 days 11 months 20 days Playback Mode (→210) Icon indicating the presence of a marker (→110, 111) Protected picture (→223) 4K Photo (4K burst file) (→106) Favorites (→222)
  • Page 244 Others List of monitor/viewfinder displays Clear Retouch completed icon Name (→185, 187) (→216) Location (→201) Acquiring information icon Title (→217) Playback (Motion Pictures) (→163) 1ST DAY Travel elapsed days (→201) Burst Picture Group Display Recording information (→168) [Time Lapse Shot] Picture Group Display (→168) Display for the Stop Motion...
  • Page 245 Others List of monitor/viewfinder displays ■ Detailed information display 10:00 1.DEC.2017 100-0001 Recording information [Aspect Ratio] (→174)/ [Picture Size] (→175) [Stabilizer] (→132) [Rec Format]/[Rec Quality] [i.Dynamic] (→178) (→151, 152) [HDR] (→179)/[iHDR] (→57) 200fps 100fps [High Speed Video] (→78) [i.Resolution] (→178) [Quality] (→175) [Color Space]...
  • Page 246 • Use a compatible card. (→27) ■ Battery [This battery cannot be used] • Use a genuine Panasonic battery. Consult the dealer or your nearest Service Center if display still remains. • Wipe any dirt away from the battery terminal.
  • Page 247 Others Message displays ■ Others [Some pictures cannot be deleted] [This picture cannot be deleted] • Non-DCF pictures (→162) cannot be deleted. Save needed data on a computer or other device, and then use [Format] on the camera. (→28) [Cannot be set on this picture] •...
  • Page 248 (→248 - 254) first. If the problem persists, Performing [Reset] in the [Setup] menu may resolve the issue (→207). Also, see the Panasonic support site for the latest support information. https://panasonic.jp/support/global/cs/dsc/ (This site is available in English only.) ■ Battery, power The charging lamp blinks.
  • Page 249 Others Q&A Troubleshooting ■ Recording Cannot record pictures. The shutter will not operate immediately when the shutter button is pressed. • When [Focus/Release Priority] is set to [FOCUS], the camera will not record until proper focusing is achieved. (→192) Recorded pictures look white. •...
  • Page 250 Others Q&A Troubleshooting Striping or flicker may appear under lighting such as fluorescent lighting and LED lighting fixture. • This is characteristic of MOS sensors which serve as the camera’s pickup sensors. This is not a malfunction. • If you are taking still pictures using the electronic shutter, the striping may be reduced by setting a slower shutter speed.
  • Page 251 Others Q&A Troubleshooting ■ Motion Picture Cannot record motion pictures. • When a large capacity card is used, you may not be able to take a picture for a while after you turn on the camera. Motion picture recording stops midway. •...
  • Page 252 Others Q&A Troubleshooting ■ Monitor/viewfinder The monitor/viewfinder is turned off although the camera is turned on. • If no operations are performed during the set time period [Auto LVF/Monitor Off] (→204) activated, and the monitor/viewfinder turns off. It may flicker for an instant or the brightness of the screen may change significantly for an instant.
  • Page 253 Others Q&A Troubleshooting ■ TV, computer No image appears on TV. Image blurred or not colored. • Not connected correctly (→227). • The television has not been switched to auxiliary input. VIERA Link (HDMI) is not working. • Is the camera’s [VIERA Link] setting set to [ON]? (→205) →...
  • Page 254 Others Q&A Troubleshooting ■ Others The lens makes a clicking noise. • When the camera is turned on or off, the lens is moved, or an aperture operation is performed, such a noise may be heard. This is not a malfunction. •...
  • Page 255 Others Usage cautions and notes When in use ● Keep this unit as far away as possible from electromagnetic equipment (such as microwave ovens, TVs, video games etc.). • If you use this unit on top of or near a TV, the pictures and/or sound on this unit may be disrupted by electromagnetic wave radiation.
  • Page 256 Others Usage cautions and notes Caring for your camera To clean your camera, remove the battery, card (optional), or disconnect the power plug from the outlet, and wipe with a soft, dry cloth. ● Use a damp cloth to remove stubborn stains, before wiping with a dry cloth. ●...
  • Page 257 Others Usage cautions and notes Lens ● Do not press the lens with excessive force. ● Do not irradiate the camera (lens) directly with strong light beams such as laser beams. Doing so may damage the image sensor and cause the camera to malfunction. ●...
  • Page 258 • Do not touch terminals on reverse of card or allow them to become dirty or wet. ● Recorded data may be damaged or lost if the camera breaks down due to inappropriate handling. Panasonic will not be liable for any damage caused due to loss of recorded data. ●...
  • Page 259 • Data containing personal information can be altered or lost due to malfunction, static electricity, accidents, breakdowns, repairs, or other operations. Panasonic will not be liable for any damage that occurs, direct or indirect, as a result of the alteration or loss of data containing personal information.
  • Page 260 Adobe is a trademark or registered trademark of Adobe Systems Incorporated in the United States and/or other countries. ● HDAVI Control™ is a trademark of Panasonic Holdings Corporation. ● “AVCHD”, “AVCHD Progressive” and the “AVCHD Progressive” logo are trademarks of Panasonic Holdings Corporation and Sony Corporation.
  • Page 261 [MENU/SET] → [Setup] → [Version Disp.] → [Software info]. At least three (3) years from delivery of this product, Panasonic will give to any third party who contacts us at the contact information provided below, for a charge no more than our cost of physically performing source code distribution, a complete machine-readable copy of the corresponding source code covered under GPL V2.0 or LGPL V2.1, as well as the...
  • Page 262 Others Usage cautions and notes Disposal of Old Equipment and Batteries Only for European Union and countries with recycling systems These symbols on the products, packaging, and/or accompanying documents mean that used electrical and electronic products and batteries must not be mixed with general household waste. For proper treatment, recovery and recycling of old products and used batteries, please take them to applicable collection points in accordance with your national legislation.

This manual is also suitable for:

Lumix dc-fz80dLumix dc-fz82d

Table of Contents

Save PDF