
Summary of Contents for Aussie Traveller 24" HD DVD CARAVAN TV
- Page 1 24" HD DVD CARAVAN TV USER MANUAL READ CAREFULLY BEFORE USING RETAIN MANUAL FOR FUTURE REFERENCE...
-
Page 2: Table Of Contents
CONTENTS IMPORTANT INSTRUCTIONS _________________________________________________ 2 Safety Instructions ________________________________________________________________________________ 2 Battery Handling & Usage _________________________________________________________________________ 3 Disposal Of Old Electrical Appliances _______________________________________________________________ 3 ACCESSORIES ___________________________________________________________ 4 FEATURES ______________________________________________________________ 4 GENERAL PARTS _________________________________________________________ 5 REMOTE CONTROL ________________________________________________________ 7 REMOTE CONTROL PREPARATION ____________________________________________ 9 Battery Installation ________________________________________________________________________________ 9 Service Life of Batteries ___________________________________________________________________________ 9 Remote Control Operation _________________________________________________________________________ 9... -
Page 3: Important Instructions
Read this installation instruction thoroughly. Incorrect installation or operation may void any warranty. Incorrect use or operation may cause serious injury. IMPORTANT INSTRUCTIONS SAFETY INSTRUCTIONS HAZARD SIGNAL DEFINITION The lightning flash and arrowhead within the triangle is a warning sign alerting you of “dangerous voltage”... -
Page 4: Battery Handling & Usage
IMPORTANT INSTRUCTIONS (cont.) CAUTION: To reduce the risk or personal injury or product/property damage: • This product is intended solely for non-commercial, non-industrial, personal use as a television. Do not use this product for any other purpose. • Ensure product is not subjected to violent shocks, extreme temperatures, or lengthy periods of direct sunlight. -
Page 5: Accessories
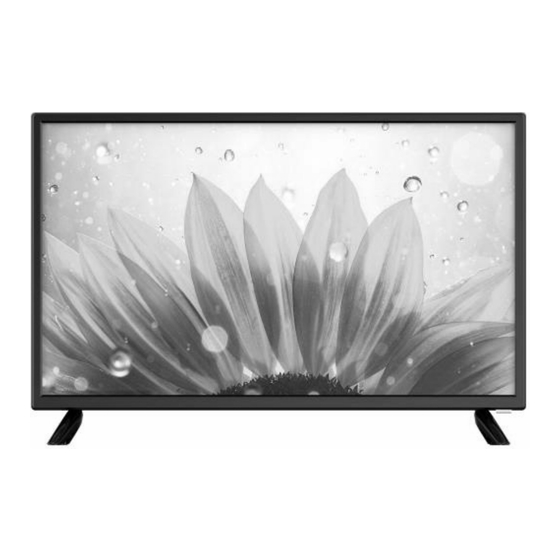
ACCESSORIES 1 × User Manual 1 × Remote Control 1 × Power Adaptor 1 × 12V Adaptor All the pictures in this manual are for your reference, appearance and display should subject to the final product. The user interface may vary due to software upgrades. FEATURES •... -
Page 6: General Parts
GENERAL PARTS 1. LED display screen. 2. Remote control sensor / Power indicator - In standby mode the indicator light is red; when switching on the unit the indicator light is blue colour. 3. Stand holder. 4. Disc slot - To insert a disc according to the silk screen on the side of this slot. 5. - Page 7 GENERAL PARTS (cont.) 1. Power input (DC). 2. EARPHONE output terminal. 3. USB input terminal. 4. COAXIAL output terminal. 5. CVBS and AUDIO L/R input terminals. 6. PC AUDIO input terminal. 7. VGA input terminal. 8. HDMI input terminal. 9. RF input terminal to connect the external TV antenna (DVB T/DVB T2/DVB C) 1300 663 868 | enquiries@aussietraveller.com.au | aussietraveller.com.au BRISBANE SHOWROOM: 11-15 Oasis Court, Clontarf QLD 4019 | MELBOURNE SHOWROOM: 235 Barry Road, Campbellfield VIC 3061...
-
Page 8: Remote Control
REMOTE CONTROL 1. STANDBY Set the unit in standby mode; press it again to switch it on. 2. TV/RADIO (TV) Switch the unit between TV and Radio. (DVD) Load/eject an available disc. 3. RED button (TV) GOTO (DVD) Start playing from a certain point. 4. - Page 9 REMOTE CONTROL (cont.) Stop playing. Play the next file. INDEX (TV) Display the record list or Teletext index. Play the previous file. 23. MENU Call out the main menu or return to previous menu. 24. AUDIO (TV) Switch the available soundtrack. LANG (DVD) Switch the available soundtrack language.
-
Page 10: Remote Control Preparation
REMOTE CONTROL PREPARATION BATTERY INSTALLATION: Install the batteries as the following pictures. Be sure + and – terminals are positioned as indicated in the battery compartment (Fig 1). SERVICE LIFE OF BATTERIES: • The batteries typically last for one year although this depends on how often the remote control is used. •... -
Page 11: Basic Connection
BASIC CONNECTION • Insert one end into the power jack on the back of the TV. • Plug the other end of the adapter into the mains socket. POWER CONNECTION: Adapter CONNECT EXTERNAL ANTENNA TO UNIT: Install external antenna into antenna jack for best picture. Antenna Outdoor antenna amplifier... -
Page 12: Coaxial Connection
BASIC CONNECTION (cont.) COAXIAL CONNECTION: Use a Coaxial cable (not included) to connect the unit with amplifier or other audio decoding devices for audio signal output. AV CONNECTION: For basic connection, use the composite Audio L/R (white/red) and CVBS (yellow) cable to connect the unit with other devices. -
Page 13: Pc/Vgc Connection
BASIC CONNECTION (cont.) PC/VGA CONNECTION: Use VGA cable and Audio cable to connect the unit with TV or PC, and use this product as a monitor. Audio cable VGA cable (Not included) (Not included) Back of PC HMDI CONNECTION: Use HDMI cable to connect the unit with other devices to receive high-definition multimedia signal. HDMI cable (Not included) Back of DVD/VCR... -
Page 14: Usb Connection
BASIC CONNECTION (cont.) USB CONNECTION USB stick (Not included) EARPHONE CONNECTION Earphone cable (Not included) BASIC OPERATIONS - DVD PLAYER • Ensure equipment and power plug has been connected properly and the unit is set in correct mode before operation. •... - Page 15 BASIC OPERATIONS - DVD PLAYER (cont.) SKIPPING AHEAD OR BACKWARD: SKIPPING AHEAD During playback, press button to skip to the next chapter (DVD) or a track (Video CD/CD). SKIPPING BACKWARD During playback, press button to skip to the previous chapter (DVD) or track (Video CD/CD). FAST FORWARD/FAST BACKWARD: During playback, press button or...
- Page 16 BASIC OPERATIONS - DVD PLAYER (cont.) MOVIE PLAYBACK: • Insert the disc which contains movie files and after a few seconds, the screen will show all the folders on the disc. • Select the folder you want to play by navigation buttons and press the OK button to confirm. •...
- Page 17 BASIC OPERATIONS - DVD PLAYER (cont.) FLIPPING PICTURES Press UP navigation button to flip the picture vertically. Press DOWN navigation button to flip the picture horizontally. PICTURE SHRINK/ZOOM Press ZOOM button repeatedly to enlarge or shrink picture to ZOOM 2, ZOOM 3, ZOOM 4, ZOOM 1/2, ZOOM 1/3, ZOOM 1/4, OFF.
- Page 18 BASIC OPERATIONS - DVD PLAYER (cont.) GOTO: Press GOTO button continuously to select the item you want to set and enter a time number, chapter number, track number, etc. Accordingly, the disc will be played from the selected point. DISPLAY: Press DISPLAY button to display the playing status of your disc.
- Page 19 BASIC OPERATIONS - DVD PLAYER (cont.) 1.2 OSD LANGUAGE - It is used to choose your desired OSD language. 1.3 SCREEN SAVER - If no operation is carried out for 5 minutes, screen saver will display on the screen when SCREEN SAVER is ON. 1.4 LAST MEMORY - Enter another input source during DISC playback, and then back to DVD input source again, this unit will resume playback from the point where last playback was stopped, if LAST MEMORY is ON.
-
Page 20: Basic Operations - Tv
BASIC OPERATIONS - TV NAVIGATION PRINCIPLES IN THE MENU: • Press the MENU button on the remote control to display the main menu. • Press to select different menus or settings. • Press the OK button to enter the sub-menu. •... - Page 21 BASIC OPERATIONS - TV (cont.) FIRST-TIME INSTALLATION: 1. TUNING SETUP Connect to power source and turn on this TV, logo page will display on the screen. Press UP/DOWN navigation buttons on remote control to select the language to be used for menus and message.
- Page 22 BASIC OPERATIONS - TV (cont.) 4. AUTO SEARCH Press UP/DOWN navigation buttons on remote control to select All, ATV, DTV. Press OK button on remote control to confirm selection. TV GUIDE (FOR TV MODE ONLY): • Press the EPG button on the remote control to display the program guide. •...
- Page 23 BASIC OPERATIONS - TV (cont.) FAVOURITE LIST: • When viewing an available channel, press FAV button on remote control to enter Favourite List menu page. • Press UP or DOWN navigation button to select preferred channel. • Press OK button to confirm selection. QUICK SELECT: •...
- Page 24 BASIC OPERATIONS - TV (cont.) RECORDER (FOR TV MODE ONLY): • Insert your USB memory device into USB slot first. • When watching digital programs, press (REC) button on remote control to call out a reminding message ; select “Yes” and press OK button on to start recording. •...
- Page 25 BASIC OPERATIONS - TV (cont.) 1. PHOTO Press the LEFT/RIGHT navigation button to select “Photo” in the main menu and press the OK button to enter it. Use the navigation buttons to select the desired folder or file. To delete files, press the RED button on remote control to call out reminding message and select “Yes” to delete files.
- Page 26 BASIC OPERATIONS - TV (cont.) 3. MOVIE Press the LEFT/RIGHT navigation button to select “Movie” in the main menu and press the OK button to enter the selection. Use the navigation buttons to select a desired folder or file. To delete files, press the RED button on remote control to call out reminding message and select “Yes” to delete files.
-
Page 27: Main Menu
BASIC OPERATIONS - TV (cont.) 5. REMOTE CONTROL OPERATIONS WHEN PLAYING MULTIMEDIA FILES: Press the button on the remote control to play or pause playing. Press the button on the remote control to stop playing. Press the button on the remote control to move fast backward. Press the button on the remote control to move fast forward. - Page 28 MAIN MENU (cont.) 1.1 PICTURE MODE Press UP/DOWN button to select Picture Mode, then press OK button to select. Options: - Standard - Dynamic - Movie - User 1.2 BRIGHTNESS/CONTRAST/SHARPNESS/COLOUR/TINT Press UP/DOWN but ton to select option, then press LEFT/RIGHT button to adjust. BRIGHTNESS - Adjust the visual perception output of the entire picture, it will affect the brightness of the picture.
-
Page 29: Sound
MAIN MENU (cont.) 2. SOUND • Press MENU button to display the main menu. • Press LEFT/RIGHT button select SOUND in the main menu, then press OK button to enter. 2.1 SOUND MODE Press the UP/DOWN button to select Sound Mode, then press OK button to select. Options: - Standard - Movie... -
Page 30: Channel Menu
MAIN MENU (cont.) 2.7 DIGITAL AUDIO OUTPUT Press UP/DOWN button to select Audio Description, then press RIGHT button to enter subpage. For Visual Impaired users, this function can assist then to know a certain scene or action through the narration. NOTE: Audio Description function works only when you are viewing programs that contain related narration information. -
Page 31: Feature Menu
MAIN MENU (cont.) 4. FEATURE MENU • Press MENU butt on to display the main menu. • Press LEFT/RIGHT button select Feature in the main menu, then press OK button to enter. 4.1 LOCK Press UP/DOWN button to select Lock, then press RIGHT button to enter subpage. NOTE: The factory default password is “0000”, you can change it, but you should keep it safe. - Page 32 MAIN MENU (cont.) 4.7 PVR/TIMESHIFT Press UP/DOWN button to select PVR/Timeshift, then press RIGHT button to enter to enter sub menu. - Partition Select - Auto Timeshift - Timeshift Buffer - Schedule - List - Record List - Recorder Start 4.8 HDMI CEC Press UP/DOWN button to select HDMI CEC, then press RIGHT button to enter to enter sub menu.
-
Page 33: Setup Menu
MAIN MENU (cont.) 5. SETUP MENU • Press MENU button to display the main menu. • Press LEFT/RIGHT button select Setup in the main menu, then press OK button to enter. 5.1 OSD TIMER • Press UP/DOWN button to select OSD Timer, then press RIGHT button to enter to select 5 Seconds/10 Seconds/15 Seconds/20 Seconds/25 Seconds/30 Seconds/Never. -
Page 34: Wall Mounting
WALL MOUNTING • Contact a professional for assistance when wall mounting your TV. We are not responsible for any damage to the product or injury to yourself if you mount the TV on your own. • Do not wall mount the TV while TV is turned on. It may cause personal injury due to electric shock. •... -
Page 35: Specifications
SPECIFICATIONS DISPLAY DEVICE 24" LED TV with DVD Player RESOLUTION 1366 × 768px DISPLAY COLOURS 16.7M CONTRAST RATIO 3000:1 ASPECT RATIO 16:9 LIFE TIME 30,000hrs MOVIE: AVI, MEPG, MKV, FLV, VOB USB MULTIMEDIA PLAYBACK FORMAT MUSIC: MP3 PHOTO: JPG/JPEG POWER SOURCE DC 12V POWER CONSUMPTION Max. -
Page 36: Warranty
Warranty will commence at the time the final retail customer makes payment for the Product to the wholesale purchaser. 3. If the Product is purchased directly from Aussie Traveller for use by final retail customer and not to be on sold in any way, the Warranty will commence at the time of the original purchase. - Page 37 If such inspection and testing find no defect in the Product, the final retail customer must pay Aussie Traveller’s usual costs of service work and testing. The final retail customer must bear the cost of the transport of the Product to and from Aussie Traveller or the authorised repair agent, and all insurance of the Product.
Need help?
Do you have a question about the 24" HD DVD CARAVAN TV and is the answer not in the manual?
Questions and answers