
Related Manuals for BODYMAX TM10


Summary of Contents for BODYMAX TM10
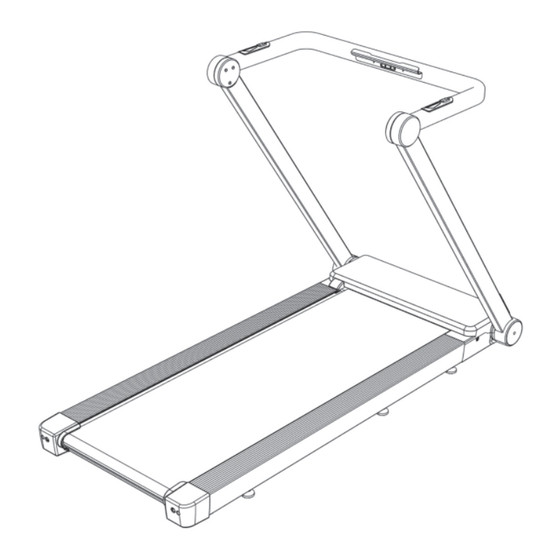
- Page 1 Assembly and Operating Instructions max. 125 kg ~ 30 Min. 38 kg L 147 | W 74 | H 100 BMTM10.01.01 SKU: BM-TM10 / BM-TM10-DESK BodyMax Treadmill TM10...
- Page 2 TM10...
-
Page 3: Table Of Contents
Content GENERAL INFORMATION Technical Data Personal Safety Electrical Safety Set-Up Place ASSEMBLY General Instructions Scope of Delivery Assembly OPERATING INSTRUCTIONS Walking and Running Mode Display Functions Button Functions 3.3.1 Remote Control General Settings and Information STORAGE AND TRANSPORT General Instructions Transportation Wheels Folding Mechanism 4.3.1 Folding the Treadmill... - Page 4 ORDERING SPARE PARTS Serial Number and Model Name Parts List Exploded Drawing WARRANTY CONTACT TM10...
- Page 5 Dear customer, Thank you for choosing training equipment from BodyMax. BodyMax is your reliable partner for home and commercial gym equipment. We are specialized in cardio and strength training machines for home and commercial use. Our products are not only strong, durable, and aff ordable but also designed to fi t your personal needs.
- Page 6 This notice indicates potentially hazardous situations which, if not avoided, will result in death or serious injuries! NOTICE This notice indicates further useful information. Retain these instructions in a safe place for future reference, maintenance or when ordering replacement parts. TM10...
-
Page 7: General Information
Folding dimensions (L x W x H) approx.: 150.5 cm x 73.4 cm x 12 cm Maximum user weight: 125 kg TM10 Treadmill Desk (Optional) Article weight (gross, incl. packaging) approx.: 1.8 kg Article weight (net, excl. packaging) approx.: 1.3 kg Packaging dimensions (L x W x H) approx.:... -
Page 8: Personal Safety
Make sure that nobody is within the range of motion of the equipment during training so as not to endanger you or other persons. ATTENTION Do not insert any objects of any kind into the openings of the device. TM10... -
Page 9: Electrical Safety
Electrical Safety ⚠ DANGER In order to reduce the risk of an electric shock, always unplug the equipment from the mains socket immediately after your workout, before assembly or dismantling, and before maintenance or cleaning. Do not pull on the cable. ⚠... -
Page 10: Set-Up Place
(over 70%) like swimming pools. A fl oor protective mat/equipment underlay can help to protect high-quality fl oor coverings (parquet, laminate, cork, carpets) from dents and sweat and can help to level out slight unevenness. Recommended free zone: TM10... -
Page 11: Assembly
ASSEMBLY General Instructions ⚠ DANGER Do not leave any tools, packaging materials such as foils or small parts lying around, as otherwise there is a danger of suff ocation for children. Keep children away from the equipment during assembly. ⚠ WARNING Pay attention to the instructions attached to the equipment in order to reduce the risk of injuries. -
Page 12: Scope Of Delivery
For the scope of delivery and assembly, the treadmill frame is referred to as part “A”. The treadmill frame consist of several frame parts with diff erent parts numbers. 70+78 Name Qty. Treadmill frame Upright side cover Magnet 70+78 Remote control with rope Safety key Power cord L-shaped wrench Allen wrench Lubrication oil Optional (BM-TM10-DESK) Dekstop TM10... -
Page 13: Assembly
Assembly Before assembly, take a close look at the individual assembly steps shown and carry out the assembly in the order given. NOTICE First loosely screw all parts together and check that they fi t properly. Tighten the screws using the tool only when you are instructed to do so. - Page 14 Step 2: Once the bolt is unlocked, lift up the upright tubes (1 & 2). Fold down the handle bar (3). TM10...
- Page 15 Step 3: To secure the handlebar, tighten the bolt on the left handle bar cover (18) with the L-shaped wrench (85) by turning clockwise. Attach the L-shaped wrench (85) to the round magnet (67).
- Page 16 The equipment must not be connected to a multiple socket, otherwise it cannot be guaranteed that the equipment will be supplied with suffi cient power. Technical errors can result. Plug the power plug into a wall outlet that complies with the instructions in the chapter on electrical safety. TM10...
- Page 17 Assembly of the Desk (Optional) The desk is available as an optional accessory for the treadmill. It is not included in the scope of delivery of the treadmill. Simply attach it to the rails like shown in the drawing below.
-
Page 18: Operating Instructions
To enable the safety key to detach from the contact point of the cockpit in the event of a fall, the safety key clip must be fi rmly attached to your clothing! Make sure that the safety key is not accessible to children. TM10... -
Page 19: Walking And Running Mode
Walking and Running Mode When the treadmill is folded fl at, it can be used as a walking pad. During walking mode, the speed range is from 1.0-6.0 km/h. Walking mode When the treadmill is unfolded, it can be used as a running treadmill. -
Page 20: Display Functions
Display of accumulated steps the same slot - STEPS Display range: 0.00 - 9999 they are shown in turn every 3 Display of the training distance in km seconds. DISTANCE Display range: 0.0 - 999.9 Setting range: 1.00 - 999 TM10... -
Page 21: Button Functions
Button Functions Press to start training START/PAUSE Press to pause during training STOP Press to stop training SPEED + Press to increase the speed SPEED - Press to reduce the speed ⚠ WARNING Your training equipment is not a medical device. The heart rate measurement of this equipment may be inaccurate. -
Page 22: Remote Control
Time) or 8 km/h (target programme: Distance). Main menu: After you have chosen one of the preset programmes, press this button to confi rm the setting. Main menu: Press this button directly to start the target programmes (distance or time) via a Quick Start function. TM10... -
Page 24: General Settings And Information
POWER SAVING FUNCTION This treadmill has an energy saving function. If no is action is registrered for 10 minutes, the system will enter into energy saving mode and the display will turn black. Use any button to turn on the display. TM10... -
Page 25: Storage And Transport
STORAGE AND TRANSPORT General Instructions ⚠ WARNING The storage location should be chosen so that improper use by third parties or children can be prevented. If your equipment does not have transportation wheels, the equipment must be disassembled before transportation. ATTENTION Make sure that the equipment is protected from moisture, dust and dirt in the selected storage location. -
Page 26: Folding Mechanism
Hold the right upright tube (Fig. C). Unlock the right upright tube by turning the bolt counterclockwise with the L-shaped wrench (Fig. D). Carefully fold down the upright tubes until they lat fl at (Fig. E). Fig. A Fig. B TM10... - Page 27 Fig. C Fig. D Fig. E...
-
Page 28: Troubleshooting, Care And Maintenance
Use a suitable chest strap (see Wrong position of chest No pulse display RECOMMENDED ACCESSORIES). strap Reposition chest strap and/or Chest strap defective or moisten electrodes battery empty Changing batteries Pulse display defective Check if pulse display by hand pulse possible TM10... -
Page 29: Error Codes And Troubleshooting
Error Codes and Troubleshooting The electronics of the equipment continuously carries out tests. In case of deviations, an error code appears on the display and normal operation is stopped for your safety. Please contact the contract partner for technical support. -
Page 30: Care And Maintenance
¼ turn anticlockwise. Then observe the mat for about 30 seconds, as the change is not immediately visible. Repeat this procedure until the running mat is straight again. If the running mat cannot be adjusted, please contact your contract partner. TM10... -
Page 31: Re-Tensioning The Running Mat
5.4.2 Re-tensioning the Running Mat If the running mat slips over the rollers during operation (if this is the case, there is a noticeable jerk during running), the running mat must be re tightened. In most cases, the slipping is caused by stretching of the mat through use. This is perfectly normal. ... -
Page 32: Maintenance And Inspection Calendar
The materials can be recycled as per their symbols. Through the reuse, recycling of materials or other forms of recovery of old equipment, you make an important contribution to the protection of the environment. TM10... -
Page 33: Recommended Accessories
RECOMMENDED ACCESSORIES To make your training experience even more effi cient and pleasant, we recommend that you add suiting accessories to your fi tness equipment. For treadmills this could for example be a fl oor mat, which makes your fi tness equipment stand more securely and also protects the fl oor from sweat or silicone spray to keep moving parts in good shape and lubricate the running mat. - Page 34 The serial number of your equipment is unique. It's located on a white sticker. The exact position of this sticker is shown in the following illustration. Enter the serial number in the appropriate fi eld. Serial number: Brand / Category: BodyMax / treadmill Model Name: TM10 / TM10 desk SKU: BM-TM10 / BM-TM10-DESK TM10...
- Page 35 Parts List Name Qty. No. Name Qty. Left upright tube Motor belt Right upright tube Running belt Handle bar Running board Adjustable tube Screw ST4.2*45mm Main frame Bolt M4*12mm Handle bar spacing(L) Screw ST4.2*16mm Handle bar spacing(R) Light board Device bottom holder Screw ST4.2*19mm Motor press piece Screw ST4.2*15mm...
- Page 36 Switch set Power wire Hand pulse with start/stop Hand pulse with speed L-shaped wrench Allen wrench Lubrication oil "PCB&Control board connection wire" Pulse wire Speaker Switch wire Light connection wire Power socket grounding wire Filter Inductance Filter wire(R) Filter wire(B) TM10...
- Page 37 Exploded Drawing (optional)
- Page 38 TM10...
- Page 39 WARRANTY Training equipment from BodyMax® is subject to strict quality control. However, if a fi tness equipment purchased from us does not work perfectly, we take it very seriously and ask you to contact our customer service as indicated. We are happy to help you by phone via our service hotline.
- Page 40 For that reason, we also want to resolve your queries quickly and in a straightforward manner. Thus, please always keep your customer number and the serial number of the faulty equipment handy. TM10...
- Page 41 CONTACT TECHNIK TEKNIK OG SERVICE TECHNIQUE & SERVICE �� �� �� +49 4621 4210-900 80 90 16 50 +33 (0) 189 530984 +49 4621 4210-945 +49 4621 42 10 933 �� +49 4621 4210-698 �� �� info@fi tshop.dk info@fi tshop.fr ��...
- Page 42 Visit us also on our social media platforms or our blog! TM10...
- Page 43 Notes...
- Page 44 Notes TM10...
- Page 46 BodyMax Treadmill TM10...
Need help?
Do you have a question about the TM10 and is the answer not in the manual?
Questions and answers