Advertisement
Table of Contents
DR
®
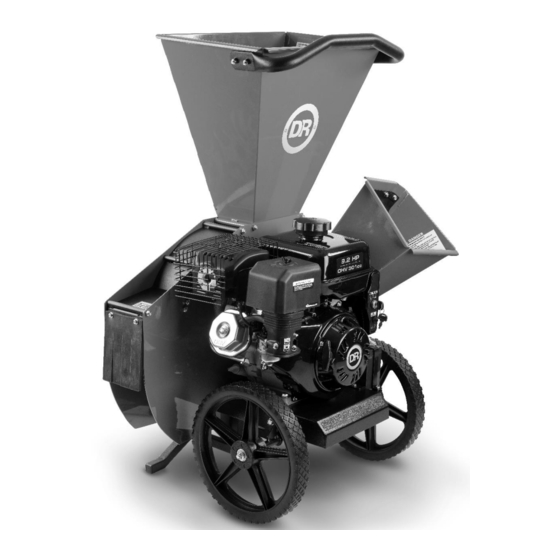
CHIPPER SHREDDER
SAFETY & OPERATING INSTRUCTIONS
Models:
PREMIER 320
PRO 420 M/S
PRO 420 E/S
Serial No.
Order No.
Read and understand this manual and all instructions before operating the DR CHIPPER SHREDDER.
DR Power Equipment
Toll-free phone: 1-800-DR-OWNER (376-9637)
Website: www.DRpower.com
Advertisement
Table of Contents

Summary of Contents for DR PREMIER 320
- Page 1 SAFETY & OPERATING INSTRUCTIONS Models: PREMIER 320 PRO 420 M/S PRO 420 E/S DR Power Equipment Serial No. Toll-free phone: 1-800-DR-OWNER (376-9637) Order No. Website: www.DRpower.com Read and understand this manual and all instructions before operating the DR CHIPPER SHREDDER.
- Page 2 Thia Page Intentionally Left Blank ® CHIPPER SHREDDER...
-
Page 3: Table Of Contents
Figure 1 Additional Information and Potential Changes DR Power Equipment reserves the right to discontinue, change, and improve its products at any time without notice or obligation to the purchaser. The descriptions and specifications contained in this manual were in effect at printing. -
Page 4: Chapter 1: General Safety Rules
Labels Your DR CHIPPER SHREDDER carries prominent labels as reminders for its proper and safe use. Shown below are copies of all the Safety and Information labels that appear on the equipment. Take a moment to study them and make a note of their location on your CHIPPER SHREDDER as you set up and before you operate the unit. - Page 5 Protecting Yourself and Those around You This is a high-powered machine, with moving parts operating with high energy. You must operate the machine safely. Unsafe operation can create a number of hazards for you, as well as anyone else in the nearby area. This machine can crush, grind, cut, and sever parts of your body if they enter the inlet or discharge area of your CHIPPER SHREDDER.
- Page 6 • Never operate your unit on a slippery, wet, muddy, or icy surface. Exercise caution to avoid slipping or falling. • See manufacturer’s instructions for proper operation and installation of accessories. Only use accessories approved by DR Power Equipment. •...
- Page 7 No list of warnings and cautions can be all-inclusive. If situations occur that are not covered by this manual, the operator must apply common sense and operate this DR CHIPPER SHREDDER in a safe manner. Contact us at www.DRpower.com or call Toll Free: 1-800-DR-OWNER (376-9637) for assistance.
-
Page 8: Chapter 2: Setting Up The Dr Chipper Shredder
Chapter 2: Setting Up the DR CHIPPER SHREDDER It may be helpful to familiarize yourself with the controls and features of your DR CHIPPER SHREDDER as shown in Figure 2 before beginning these procedures. If you have any questions at all, please feel free to contact us at www.DRpower.com. - Page 9 Specifications Model PREMIER 320 Chipper Shredder PRO 420 M/S Chipper Shredder PRO 420 E/S Chipper Shredder DR 6.6 HP (see engine manual DR 9.2 HP (see engine manual DR 9.2 HP (see engine manual Engine for more details) for more details)
- Page 10 Locknuts (outside) using a 1/2" Wrench and 3/16" Allen Wrench. Hopper Screws and Locknuts Attaching the Chipper Chute (PREMIER 320) Note: Leave the Bolt in place when the Locknuts are removed in step 1. Bolts and 1. Remove the Pre-assembled Locknut from the Bolt using two 1/2" Wrenches Locknuts (Figure 4a).
- Page 11 To get an accurate reading when checking the oil level: - The Engine MUST be level. - The dipstick Should Not be screwed down for DR Engines to ensure an accurate oil level reading. Tools and Supplies Needed: Fuel Fill •...
-
Page 12: Chapter 3: Operating The Dr Chipper Shredder
Chapter 3: Operating the DR CHIPPER SHREDDER This chapter covers the procedures for starting and stopping your new DR CHIPPER SHREDDER and discusses basic operation features. It may be helpful to better familiarize yourself with the features of your CHIPPER SHREDDER by reviewing Figure 2 in Chapter 2 before beginning the steps outlined in this chapter. - Page 13 Caution Label on the inside of the Shredder Hopper. Using the Chipper Chute The Chipper can chip twigs and branches ranging in size from 1/2" to 3" (PREMIER 320) or 3/4″ to 4″ (PRO 420) in diameter. Cut before your materials into manageable lengths feeding them into the Chipper Chute.
- Page 14 Branches smaller than 3/4" General Warnings • NEVER allow processed material to build up within 3" of the Discharge opening. Move the DR CHIPPER SHREDDER or the pile as needed. Failure to do so could result in unnecessary jamming of the machine. •...
- Page 15 This Page Intentionally Left Blank CONTACT US AT www.DRpower.com...
-
Page 16: Chapter 4: Maintaining The Dr Chipper Shredder
Chapter 4: Maintaining the DR CHIPPER SHREDDER Regular maintenance is the way to ensure the best performance and long life of your machine. Please refer to this manual and the Engine Manufacturer's Owner's Manual for maintenance procedures. Service intervals listed in the checklist below supersede those listed in the Engine Manufacturer's Owner's Manual. - Page 17 Plate to the side to align the holes with the Locknuts, and remove the Access Chute Plate (Figure 13). 2. Remove the three PREMIER 320 (Figure 14a), or four PRO 420 (Figure 14b), Locknuts Locknuts using one or two 1/2″ Wrenches as needed to remove the Chipper on Inside Chute.
- Page 18 Knife Sharpening • You should never attempt to sharpen the Chipper Knife freehand; take the Knife to a machine shop for proper sharpening. • It is extremely important to consistently maintain the 45-degree angle for proper performance. • Excessive heat generated during the sharpening process will damage Knives and weaken the metal. •...
- Page 19 Plate to the side to align the holes with the Locknuts, and remove the Access Plate (Figure 25). Figure 25 Note: There is 1 J Hammer and 1 Flat Hammer (PREMIER 320) or 2 Flat Hammers (PRO 420) on each Hammer Shaft. J Hammers are oriented in J Hammers on Hammers the opposite direction of those on adjacent Hammer Shafts (Figure 26).
- Page 20 Figure 28 after, or vice versa. Make sure to use a new Center Locknut. Flat NOTE: On the PREMIER 320 you will have one long Spacer and one short; the Flywheel J Hammer Hammer longer Spacer sits against the Flywheel.
- Page 21 This Page Intentionally Left Blank CONTACT US AT www.DRpower.com...
-
Page 22: Chapter 5: Troubleshooting
Most problems are easy to fix. Consult the Troubleshooting Table below for common problems and their solutions. If you continue to experience problems, contact us at www.DRpower.com or call toll-free 1-800-DR-OWNER (376-9637) for support. Shut down the Engine and wait 5 minutes for all parts to cool. Remove the Spark Plug Wire, keeping it away from the Spark Plug to prevent accidental starting before performing any maintenance procedure or inspection on the CHIPPER SHREDDER. - Page 23 Troubleshooting Table (Continued) Shut down the Engine and wait 5 minutes for all parts to cool. Remove the Spark Plug Wire, keeping it away from the Spark Plug to prevent accidental starting before performing any maintenance procedure or inspection on the CHIPPER SHREDDER. YMPTOM OSSIBLE AUSE...
-
Page 24: Chapter 6: Parts Lists And Schematic Diagrams
Chapter 6: Parts Lists and Schematic Diagrams Parts List – Hopper, Chute and Discharge Note: Part numbers listed are available through DR Power Equipment. Ref# Part# Description Ref# Part# Description A0001994505 Deflector, Discharge (PRO 420) 333311 Nut, Nylon Lock, Flanged, 1/4-20... - Page 25 Schematic – Hopper, Chute and Discharge CONTACT US AT www.DRpower.com...
- Page 26 Parts List – Drive Assembly Note: Part numbers listed are available through DR Power Equipment. Ref# Part# Description Ref# Part# Description A0001244985 Base (PRO 420) A0001294574 Bracket, Battery (420 E/S) A0001244996 Base (PREMIER 320) 286971 Pad, Battery, 2.5″ X 6.125″ (420 E/S)
- Page 27 Schematic – Drive Assembly CONTACT US AT www.DRpower.com...
- Page 28 Parts List – Cutting Chamber Note: Part numbers listed are available through DR Power Equipment. Ref# Part# Description Ref# Part# Description A0001244978 Sideplate, Engine Side (PRO 420) A0001539474 Spacer, Engine Mount (PRO 420) A0001244989 Sideplate, Engine Side (PREMIER A0001539473 Spacer, Engine Mount (PREMIER...
- Page 29 Schematic – Cutting Chamber CONTACT US AT www.DRpower.com...
- Page 30 Notes: ® PRO CHIPPER SHREDDER...
- Page 31 CHIPPER SHREDDER is fit for ordinary purposes for which a product of this type is used. DR Power Equipment however, limits the implied warranties of merchantability and fitness in duration to a period of two (2) years in consumer use, ninety (90) days for any other use.
- Page 32 • If your DR CHIPPER SHREDDER will be idle for more than 30 days, we recommend using a gas stabilizer. This will prevent sediment from gumming up the Carburetor. If there is dirt or moisture in the gas or tank, remove it by draining the tank.
Need help?
Do you have a question about the PREMIER 320 and is the answer not in the manual?
Questions and answers