Table of Contents
Advertisement
Available languages
Available languages
INSTALLER: Leave this manual with the appliance.
CONSUMER: Save these Instructions for future reference.
OPERATING INSTRUCTIONS
Model #
H80XL (ITEM# 5697561)
AND OWNER'S MANUAL
H140XL (ITEM# 4976271)
H3W80XL (ITEM# 4976284)
READ INSTRUCTIONS CAREFULLY: Please read this entire manual before installation and use of this
pellet fuel-burning room heater. Failure to follow these instructions could result in property damage, bodily
injury or even death. Do not allow anyone who has not read these instructions to assemble, light, adjust or
operate the stove. Place instructions in a safe place for future reference.
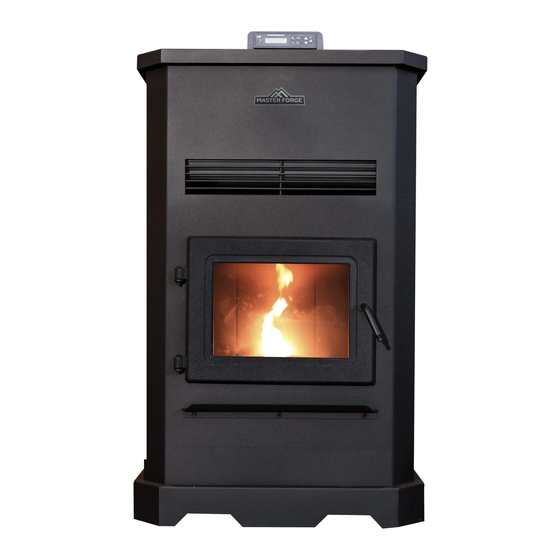
PELLET STOVE
H80XL
H3W80XL
Apple Store
Google Play Store
H140XL
THE AUTHORITY HAVING JURISDICTION (SUCH AS MUNICIPAL BUILDING DEPARTMENT, FIRE
DEPARTMENT, FIRE PREVENTION BUREAU, ETC.) SHOULD BE CONSULTED BEFORE INSTALLATION
TO DETERMINE ANY NEED TO OBTAIN A PERMIT. OBSERVE ALL LOCAL BUILDING CODES.
Enerco Group Inc.
SG241 18
4560 West 160th st Cleveland, Ohio 44135 1-833-950-1184
66730 REV I
Advertisement
Chapters
Table of Contents

Related Manuals for Master Forge H80XL

Summary of Contents for Master Forge H80XL
- Page 1 INSTALLER: Leave this manual with the appliance. CONSUMER: Save these Instructions for future reference. OPERATING INSTRUCTIONS Model # H80XL (ITEM# 5697561) AND OWNER’S MANUAL H140XL (ITEM# 4976271) H3W80XL (ITEM# 4976284) READ INSTRUCTIONS CAREFULLY: Please read this entire manual before installation and use of this pellet fuel-burning room heater.
-
Page 2: Table Of Contents
Connect the equipment into an outlet on a circuit different from that to which the receiver is connected. MAINTENANCE..........20 — Consult the dealer or an experienced radio/TV technician CLEANING SCHEDULE........24 for help. TROUBLESHOOTING...........27 WIRING DIAGRAM..........30 SERVICE PARTS...........31 Master Forge Wood Pellet Fire Stove Operating Instructions and Owner’s Manual... -
Page 3: Specifications
[Amperes] Auger Motor R.P.M. This manual describes the installation and operation of the brand “Master Forge” wood pellet fire stove. This stove meets the applicable U.S. Environmental Protection Agency’s emission limits for pellet fired heaters sold after 2020. Under specific test conditions these stoves have been shown to deliver heat at rates ranging from:... -
Page 4: Getting Started
Chimneys), or remote. ULC/ORD C441. Install per chimney manufacturer’s • Caution for ingestion. instructions (see page 9) WARNING: DO NOT DISPOSE OF BATTERIES IN FIRE. BATTERIES MAY EXPLODE OR LEAK. Master Forge Wood Pellet Fire Stove Operating Instructions and Owner’s Manual... -
Page 5: Safety Precautions
IT IS AGAINST FEDERAL REGULATIONS local regulations. TO ALTER THIS SETTING OR OTHERWISE OPERATE THIS WOOD HEATER IN A MANNER INCONSISTENT WITH OPERATING INSTRUCTIONS IN THIS MANUAL. Master Forge Wood Pellet Fire Stove Operating Instructions and Owner’s Manual... -
Page 6: Clearance To Combustibles
Additionally, the wood pellet fire stove shall be positioned such that: • It has at least 13” (330 mm) of clearance from the each side to the nearest body. Master Forge Wood Pellet Fire Stove Operating Instructions and Owner’s Manual... -
Page 7: Unpacking & Assembly
= 0.54 +0.54 + 0.434 = 1.514 BRICK BRICK BOARD Step 4. Because this combined R value is larger than the specification, this is a sufficient method for protecting the floor area underneath the stove. Master Forge Wood Pellet Fire Stove Operating Instructions and Owner’s Manual... -
Page 8: Installation
STOVE, YOUR CHIMNEY, AND YOUR HOME. YOUR WARRANTY MAY BECOME VOID. READ Termination Cap AND FOLLOW ALL INSTRUCTIONS. Contact Hose Clamp Master Forge with any comments, concerns, or questions. CAUTION: CONTACT LOCAL BUILDING OR FIRE OFFICIALS ABOUT RESTRICTIONS AND 2” Flex Hose INSTALLATION INSPECTION REQUIREMENTS IN YOUR AREA. - Page 9 Any such reducing performance and provides a collection point installation must satisfy Clause 4 of CSA Standard for ash deposits requiring more frequent cleaning. B365. Master Forge Wood Pellet Fire Stove Operating Instructions and Owner’s Manual...
- Page 10 • If using the air intake kit, ensure that there is at 1” (25mm) clearance least 12 inches clearance between the exhaust vent termination and the intake air inlet. Figure 7: ONLY APPROVED CANADIAN WALL PASS THROUGH Master Forge Wood Pellet Fire Stove Operating Instructions and Owner’s Manual...
- Page 11 24 gauge thickness. Fasteners used to secure chimney section shall not penetrate chimney flue liner. Master Forge Wood Pellet Fire Stove Operating Instructions and Owner’s Manual...
-
Page 12: Additional Mobile Home Requirements
NFPA 21 1 US or CAN/ — The duct must be made of metal exclusively, not CSA-B365. other materials such as plastic. Master Forge Wood Pellet Fire Stove Operating Instructions and Owner’s Manual... - Page 13 Bolted to floor Figure 15: Manufactured Chimney through Attic Only use components that all come from the same manufacturer. Do not mix brands of components for the same ventilation system. Master Forge Wood Pellet Fire Stove Operating Instructions and Owner’s Manual...
-
Page 14: Operation
• The pellets should be less then 30mm long, with a result in ignition difficulty, incomplete com- diameter between 5 and 6.5 mm. bustion, and the potential for a hopper fire. Master Forge Wood Pellet Fire Stove Operating Instructions and Owner’s Manual... - Page 15 CAUTION: AFTER THE COOLING CYCLE THE STOVE AUTOMATICALLY BEGINS NOTE: TO PREVENT STOVE FROM BEING OPERATED, THE PROCESS OF CYCLING ON. TURN OFF RED POWER SWITCH ON BOTTOM, REAR OF STOVE. Master Forge Wood Pellet Fire Stove Operating Instructions and Owner’s Manual...
-
Page 16: Smart Stove Wi-Fi Connection
“Add Device” button in the center of the screen should also be “quenched” with water. which you can select. Otherwise, select the + symbol in the top right of the screen. Master Forge Wood Pellet Fire Stove Operating Instructions and Owner’s Manual... -
Page 17: Wi-Fi Controls
Connection) you can remotely monitor and adjust the output operation of the stove. See below for explanation: Program and Preset (con’t on page 18): set stove configurations scheduled Figure 19: Wi-Fi Controls operation Master Forge Wood Pellet Fire Stove Operating Instructions and Owner’s Manual... -
Page 18: Multi Function Controls
H80XL, H140XL, AND H3W80XL MULTI FUNCTION CONTROLS Confirm Rate Select Remote Receiver Up Selector MULTI FUNCTION DISPLAY Display Screen Settings Time Power Down Selector Figure 20a: Mounted Multi Function Controls Panel Press to cycle between temperature reports Power (in Fahrenheit) display in the top right of the multi function display screen: •... -
Page 19: Manual Stove Operation
Pellet Drop Rate Settings. when the desired temperature has been reached. The stove will turn on to higher power settings once the room cools to a factory set temperature. Master Forge Wood Pellet Fire Stove Operating Instructions and Owner’s Manual... -
Page 20: Maintenance
ABRASIVE CLEANERS OR BY ANY OTHER the necessary maintenance. Use only the tested and PROCESS WHICH MAY SCRATCH OR recommended wooden pellets fuel. DAMAGE THE GLASS. Master Forge Wood Pellet Fire Stove Operating Instructions and Owner’s Manual... - Page 21 H80XL H140XL, H3W80XL on how to handle a chimney fire. Have a clearly Figure 21: Convection Blower Disassembly understood plan to handle a chimney fire. Master Forge Wood Pellet Fire Stove Operating Instructions and Owner’s Manual...
- Page 22 After gaining access to the back, the IGNITER OUT OF ITS HOUSING. auger can be disassembled part by part in the order indicated in Figure 23. Master Forge Wood Pellet Fire Stove Operating Instructions and Owner’s Manual...
- Page 23 If a low pressure is created in the firebox by a leak, stove. opening the door to the firebox, a blocked flue, or • To remove the H80XL side panels, remove the an unsealed ash drawer then the switch will shut screws securing it on the rear of the heater. Then the stove off as a precaution.
-
Page 24: Cleaning Schedule
For the Bayfront models: There are two exhaust ports on the top of the burn chamber. Verifying they are clear will ensure optimal airflow in the chamber. Master Forge Wood Pellet Fire Stove Operating Instructions and Owner’s Manual... - Page 25 3MM Allen key. A wire brush and a vacuum can be used to clean the airways. Master Forge Wood Pellet Fire Stove Operating Instructions and Owner’s Manual...
- Page 26 1. Check wires and connection points. ESC1 (Exhaust) 2. Contact Tech Support for assistance. 1. Check wires and connection points. Open circuit at temperature sensor #1 ESO1 2. Contact Tech Support for assistance. Master Forge Wood Pellet Fire Stove Operating Instructions and Owner’s Manual...
-
Page 27: Troubleshooting
2. Check that the auger is not blocked. If it is jammed, or pellets. blocked, remove the cause of the jamming. disconnected. 3. Check that the auger screw fastening the auger to the motor is secure. Master Forge Wood Pellet Fire Stove Operating Instructions and Owner’s Manual... - Page 28 4. Increase the cross sectional area of the ducting. 5. Increase the fan’s speed to increase the rate of combustion. 6. Contact the manufacturer for assistance. Master Forge Wood Pellet Fire Stove Operating Instructions and Owner’s Manual...
- Page 29 Heat exchange tubes or flue pass is Clean the heat exchanger tubes or flue pass. dirty. Master Forge Wood Pellet Fire Stove Operating Instructions and Owner’s Manual...
-
Page 30: Wiring Diagram
NOTE: IF ANY OF THE ORIGINAL WIRE AS SUPPLIED WITH THE APPLIANCE MUST BE REPLACED, IT MUST BE REPLACED WITH WIRING MATERIAL HAVING A TEMPERATURE RATING OF AT LEAST 105˚C AND RATED FOR 600V Master Forge Wood Pellet Fire Stove Operating Instructions and Owner’s Manual... - Page 31 Master Forge Wood Pellet Fire Stove Operating Instructions and Owner’s Manual...
- Page 32 Master Forge Wood Pellet Fire Stove Operating Instructions and Owner’s Manual...
-
Page 33: Service Parts
66641 Combustion Blower 66653 Door, Latch 66856 Data Cable Exhaust Sensor 66612 Circulation Blower 66654 66859 Door Pin 66742 Hopper Safety Sensor Rear Cover 66655 N/S - Not Shown Master Forge Wood Pellet Fire Stove Operating Instructions and Owner’s Manual... - Page 34 Please include the model number, date of purchase, and description of problem in all communication. LIMITED WARRANTY Enerco Group, Inc. (EGI) warrants Master Forge Pellet Fire Stoves to be free from imperfections in workmanship or material, at the date of manufacture. After installation, If covered components are found to be defective in...
- Page 35 INSTALADOR: Deje este manual con el artefacto. CONSUMIDOR: Guarde estas instrucciones para referencia futura. INSTRUCCIONES DE OPERACIÓN Modelo # H80XL (ART. No. 5697561) Y MANUAL DEL PROPIETARIO H140XL (ART. No. 4976271) H3W80XL (ART. No. 4976284) LEA CUIDADOSAMENTE LAS INSTRUCCIONES: Lea completamente este manual antes de instalar y utilizar este calefactor ambiental que quema gránulos de combustible.
- Page 36 PROGRAMA DE LIMPIEZA........24 — Pedirle ayuda al distribuidor o a un técnico en radio / televisión. SOLUCIÓN DE PROBLEMAS........27 DIAGRAMA DE CABLEADO........30 PIEZAS DE REPUESTO.........31 Estufa de gránulos de madera Master Forge Instrucciones de uso y manual del propietario...
-
Page 37: Especificaciones
[Amperios] RPM del motor del sinfín Este manual describe la instalación y funcionamiento de la estufa de gránulos de leña marca “Master Forge”. Esta estufa cumple con los límites de emisiones correspondientes de la Agencia de Protección Ambiental de EE. -
Page 38: Introducción
ADVERTENCIA: NO DESECHE LAS BATERÍAS según las instrucciones del fabricante de la AL FUEGO. LAS BATERÍAS PUEDEN EXPLOTAR chimenea (consulte la página 9). O PRESENTAR FUGAS. Estufa de gránulos de madera Master Forge Instrucciones de uso y manual del propietario... -
Page 39: Precauciones De Seguridad
REGLAMENTACIONES FEDERALES PROHÍBEN ALTERAR ESTE AJUSTE O UTILIZAR ESTA ESTUFA A LEÑA DE ALGUNA MANERA QUE NO ESTÉ INDICADA EN LAS INSTRUCCIONES DE OPERACIÓN DE ESTE MANUAL. Estufa de gránulos de madera Master Forge Instrucciones de uso y manual del propietario... -
Page 40: Distancia A Combustibles
Web de la NFPA: • Tenga al menos 13” (330 mm) de espacio libre https://www.nfpa.org/ desde cada lado hasta el cuerpo más cercano. Estufa de gránulos de madera Master Forge Instrucciones de uso y manual del propietario... -
Page 41: Desembalaje Y Armado
área del piso debajo de la estufa. Figure 2 Instalar el cable del panel de visualización Estufa de gránulos de madera Master Forge Instrucciones de uso y manual del propietario... -
Page 42: Instalación
FUNCIONARIOS LOCALES DE EDIFICIOS O INCENDIOS PARA AVERIGUAR LAS 2” Tubería flexible RESTRICCIONES Y LOS REQUISITOS DE INSPECCIÓN DE INSTALACIÓN EN SU ÁREA. Figura 5: Juego de admisión Estufa de gránulos de madera Master Forge Instrucciones de uso y manual del propietario... - Page 43 • Existe condensación excesiva en las ventanas en con tres tornillos para láminas de metal espaciados invierno. uniformemente. Estufa de gránulos de madera Master Forge Instrucciones de uso y manual del propietario...
- Page 44 CANADÁ especificadas por el fabricante de la ventilación. • Instale las terminaciones de ventilación de escape con las separaciones especificadas por el fabricante de la ventilación. Estufa de gránulos de madera Master Forge Instrucciones de uso y manual del propietario...
- Page 45 24. Los sujetadores utilizados para asegurar la sección de la chimenea no deben penetrar el revestimiento de la misma. Estufa de gránulos de madera Master Forge Instrucciones de uso y manual del propietario...
-
Page 46: Requisitos Adicionales Para Casa Rodante
— El conducto debe ser exclusivamente de metal, la última edición de NFPA 211 US o CAN/CSA-B365. no de otros materiales como plástico. Estufa de gránulos de madera Master Forge Instrucciones de uso y manual del propietario... - Page 47 Utilice únicamente componentes que provengan del Figura 15: Chimenea fabricada a través del ático mismo fabricante. No mezcle marcas de componentes para el mismo sistema de ventilación. Estufa de gránulos de madera Master Forge Instrucciones de uso y manual del propietario...
-
Page 48: Operación
• Los gránulos deben tener menos de 30 mm de largo incompleta y la posibilidad de que se y un diámetro de entre 5 y 6,5 mm. produzca un incendio en la tolva. Estufa de gránulos de madera Master Forge Instrucciones de uso y manual del propietario... - Page 49 EL PROCESO DE ENCENDIDO. NOTA: PARA EVITAR QUE LA ESTUFA SE ENCIENDA, APAGUE EL INTERRUPTOR ROJO DE ENCENDIDO EN LA PARTE INFERIOR TRASERA DE LA ESTUFA. Estufa de gránulos de madera Master Forge Instrucciones de uso y manual del propietario...
-
Page 50: Conexión Wi-Fi Estufa Inteligente
"apagarse" con agua. Estufa de gránulos de madera Master Forge Instrucciones de uso y manual del propietario... -
Page 51: Controles Wi-Fi
Programar y configurar continuación para obtener una explicación: (continúa Configuraciones el funcionamiento preestablecidas en la página 18): programado de la estufa Figura 19: Controles de Wi-Fi Estufa de gránulos de madera Master Forge Instrucciones de uso y manual del propietario... -
Page 52: Controles Multifunción
CONTROLES MULTIFUNCIÓN PARA H80XL, H140XL Y H3W80XL Confirmar Selección de potencia Receptor remoto Selector hacia arriba MULTI FUNCTION DISPLAY Ajustes Pantalla indicadora Tiempo Selector hacia abajo Encendido Figura 20a: Panel de controles multifunción montado Presione para alternar entre los informes de... -
Page 53: Funcionamiento Manual De La Estufa
P4 cuando se alcanza la temperatura deseada. La estufa se gránulos. volverá a encender a una potencia mayor una vez que la habitación se enfríe a la temperatura establecida de fábrica. Estufa de gránulos de madera Master Forge Instrucciones de uso y manual del propietario... -
Page 54: Mantenimiento
Limpie el brasero y la bandeja todos los días, antes al año. La quema de gránulos con alto contenido de cenizas puede requerir que el conducto se limpie con más frecuencia. Estufa de gránulos de madera Master Forge Instrucciones de uso y manual del propietario... - Page 55 H80XL H140XL, H3W80XL Figura 21: Desmontaje del soplador de convección Estufa de gránulos de madera Master Forge Instrucciones de uso y manual del propietario...
- Page 56 Figura 23. NOTA: DEPENDIENDO DEL MODELO DE ESTUFA, PUEDE SER NECESARIO REMOVER EL MOTOR DEL SINFÍN PARA PODER DESLIZAR EL ENCENDEDOR FUERA DE SU ALOJAMIENTO. Estufa de gránulos de madera Master Forge Instrucciones de uso y manual del propietario...
- Page 57 Si se crea una baja presión en la cámara de combustión debido a una fuga, por abrir la puerta • Para remover los paneles laterales del H80XL, saque de la cámara de combustión, por un conducto de los tornillos que los sujetan en la parte posterior del humos bloqueado o por un cajón de cenizas sin sellar,...
-
Page 58: Programa De Limpieza
Para los modelos Bayfront: Hay dos puertos de escape en la parte superior de la cámara de combustión. Verifique que estén limpios para garantizar un flujo de aire óptimo en la cámara. Estufa de gránulos de madera Master Forge Instrucciones de uso y manual del propietario... - Page 59 Allen de 3 mm. Puede utilizar un cepillo de alambre y una aspiradora para limpiar los conductos de aire. Estufa de gránulos de madera Master Forge Instrucciones de uso y manual del propietario...
- Page 60 1. Verifique los cables y los puntos de conexión. Cortocircuito en el sensor No. 2, temperatura ESC2 2. Comuníquese con el soporte técnico para obtener de la tolva. ayuda. Estufa de gránulos de madera Master Forge Instrucciones de uso y manual del propietario...
-
Page 61: Solución De Problemas
1. Aumente la velocidad del ventilador para aumentar la brasero. El combustible no se rápida de lo que velocidad de combustión. puede quemar completamente. puede soportar la combustión. Estufa de gránulos de madera Master Forge Instrucciones de uso y manual del propietario... - Page 62 1. Verifique que los cables al interruptor estén el interruptor de correctamente conectados. temperatura de 30 °C. 2. Reemplace el interruptor de temperatura de 30 °C. Estufa de gránulos de madera Master Forge Instrucciones de uso y manual del propietario...
- Page 63 Los tubos del intercambiador de Limpie los tubos del intercambiador de calor o el calor o el conducto de conducto de humos. humos están sucios. Estufa de gránulos de madera Master Forge Instrucciones de uso y manual del propietario...
-
Page 64: Diagrama De Cableado
NOTA: SI TIENE QUE REEMPLAZAR ALGUNO DE LOS CABLES ORIGINALES QUE VIENEN CON EL ARTEFACTO, REEMPLÁCELO POR UN CABLE APTO PARA UNA TEMPERATURA DE POR LO MENOS 105 Y QUE SOPORTE 600 V. Estufa de gránulos de madera Master Forge Instrucciones de uso y manual del propietario... - Page 65 Estufa de gránulos de madera Master Forge Instrucciones de uso y manual del propietario...
- Page 66 Estufa de gránulos de madera Master Forge Instrucciones de uso y manual del propietario...
-
Page 67: Piezas De Repuesto
66742 Cubierta trasera 66856 Cable de datos Sensor de seguridad de la 66655 66643 Sensor ambiental tolva 66859 Pasador de puerta N/S - No se muestra Estufa de gránulos de madera Master Forge Instrucciones de uso y manual del propietario... - Page 68 Por favor, incluya el número de modelo, la fecha de compra y la descripción del problema en todas sus comunicaciones. GARANTÍA LIMITADA Enerco Group, Inc. (EGI) garantiza que las estufas de gránulos Master Forge no tienen defectos de mano de obra o material, a la fecha de fabricación. Después de la instalación, si se descubre que los componentes cubiertos tienen defectos de mano de obra o de material durante el período de garantía aplicable, la empresa,...
Need help?
Do you have a question about the H80XL and is the answer not in the manual?
Questions and answers