
Related Manuals for LED Strip Studio REACTIVO 2

Summary of Contents for LED Strip Studio REACTIVO 2
- Page 1 REACTIVO 2 User Manual www.ledstripstudio.com www.ledstripstudio.com info@ledstripstudio.com info@ledstripstudio.com...
-
Page 2: Table Of Contents
2. CONTROL OPTIONS (LISTED FROM HIGHEST TO LOWEST PRIORITY) ....18 2.1 Test (Highest priority) ...................... 18 2.2 “Ethernet” = LED Strip Studio protocol (from LED Strip Studio 3 Software AKA LSS) ............18 2.3 Network synchronization ....................18 2.4 Art-Net™ ..........................19 2.5 Autoplay (Lowest priority) .................... - Page 3 FAQ ..........................52 WARRANTY ....................... 54 DISPOSAL OF YOUR OLD DEVICE .................55 CONTACT DETAILS ....................56 Trademark Credits Art-Net™ – Designed by and Copyright Artistic License Holdings Ltd. Madrix™ – registered trademarks of inoage GmbH ChamSys™ – registered trademarks of ChamSys Ltd grandMA™...
-
Page 4: Safety Instructions
SAFETY INSTRUCTIONS Installation should be performed only by a competent person or professional electrician. Make sure that the installation complies with the standards and rules that apply in your country. • Do not use the device if it seems to be damaged. •... -
Page 5: Device Specification
• Showcase Technical specification Art-Net™ (Wired or Wireless), Stand-alone, HTTP commands, Android/IOS mobile application, Web Controls over browser, External triggers, LED Strip Studio protocol (with license) 5-24V DC Operating voltage Self power consumption Power input connector DC jack 5.5mm/2.1mm Wired Ethernet port type... - Page 6 Special features/options synchronized using master/slave operation mode, wide variety of external trigger control like push buttons, switches, potentiometers, sensors, playlist... Any Art-Net™ controller/software, LED Strip Studio (with license), Android/IOS mobile application, Works with controller/software PC via web interface -10°C to 45°C Operating air temperature -10°C to 60°C...
-
Page 7: Device Variants
Top view Dimensions DEVICE VARIANTS REACTIVO 2 has no hardware variants, however there is an option to “activate” this device that enables you to control device with LED Strip Studio software by our custom Ethernet protocol. Without activation you can still use LED Strip Studio software using Art-Net™... -
Page 8: Device Compatibility
• ChamSys™ • Madmapper • and many others Activated REACTIVO 2 can be also used with LED Strip Studio software with- out need of Art-Net™ license for LED Strip Studio. For easier installations can be controlled by our Android/IOS mobile applica- tion, web browser, external triggers like push buttons, switches, potentiometers, sensors... -
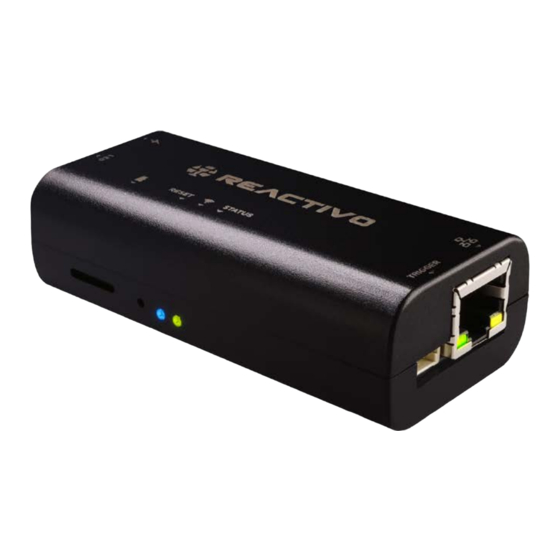
Page 9: Device Description
DEVICE DESCRIPTION Side View SD card slot Reset & WPS Button Power Status LED Status LED Pinout schemes Rear View Front View LED Output Trigger connector Power input +POWER +3.3V max. 50mA Trigger 1 Trigger 2 POWER INPUT connector type: DC jack 5.5/2.1mm TRIGGER connector type: 4pin JST ZH pitch 1.5mm LED OUTPUT connector type: 15EDGRC-3.5-04P Suitable cable connector: JST ZHR-4 + contacts SZH-002T-P0.5... -
Page 10: Device Block Diagram
DEVICE BLOCK DIAGRAM DEVICE DETAILS REACTIVO 2 is very compact versatile device and it has been designed to meet wide variety of use cases. Main function is to generate signal on its LED output which is able to power and control many kinds of individually addressable (AKA digital or SPI) LED strips or pixels. -
Page 11: Device Connection
DEVICE CONNECTION REACTIVO 2 always needs external DC power supply within its operating volt- age range. There are two ways how to provide suitable power for REACTIVO 2: • Power provided to Power input connector. This is recommended only if LED output current passing thru REACTIVO 2 will be small (less than about 5 Ampere) •... - Page 12 More detailed pixel LED connections are mentioned below in LED output con- nection diagrams section. Connecting REACTIVO 2 to network can be done by one of following ways: • direct wired connection • wired connection over a network switch • wirelessly in Wi-Fi client mode •...
- Page 13 REACTIVO 2 trigger inputs connection diagram:...
- Page 14 The power supply voltage MUST match the LED strip voltage rating. The power supply power rating MUST exceed the total power rating of the LED strip by 5W extra for the REACTIVO 2 controller. The total current MUST NOT exceed 7 Amperes.
- Page 15 The power supply voltage MUST match the LED strip voltage rating. The power supply power rating MUST exceed the total power rating of the LED strip by 5W extra for the REACTIVO 2 controller. POWER DIRECTLY TO LED STRIP WITH LED STRIP VOLTAGE DROP MINIMIZING The power supply voltage MUST match the LED strip voltage rating.
-
Page 16: Device Settings
DEVICE SETTINGS REACTIVO FW 4.3.0/E4.3.0 1. DEVICE USER INTERFACES & NETWORK CONDITIONS EXPLANATION RESET/WPS PUSH BUTTON • Short press: WPS procedure start/stop • Hold for 3-10 seconds: Reset Wi-Fi credentials (blue LED blinks slowly) • Hold for more than 10 seconds: Reset of all settings (blue LED starts to blink rapidly) •... -
Page 17: Wi-Fi
• Once active wired Ethernet connection is established (RJ45 cable connected to switch, router, PC...) Wi-Fi on REACTIVO 2 device is automatically switched OFF • In wired Ethernet mode REACTIVO 2 device can be set as DHCP client, DHCP server (192.168.3.1), or static IP... -
Page 18: Control Options (Listed From Highest To Lowest Priority)
• Always generate maximum possible pixel count signal for selected IC type 2.2 “ETHERNET” = LED STRIP STUDIO PROTOCOL (FROM LED STRIP STUDIO 3 SOFTWARE AKA LSS) • Device generate signal for pixel LEDs from LSS, which allows live con- trolled pixels on multiple devices from PC. -
Page 19: Art-Net
2.4 ART-NET™ 2.4.1. Art-Net™ Pixel mode Incoming Art-Net™ data are sent to pixel LEDs on device LED output based on settings. 2.4.2. Art-Net™ SD card mode Incoming Art-Net™ data are used to trigger desired animation file from SD card and effect parameters like speed, brightness and recolor. -
Page 20: Web Interface
• Control can be done by: Web interface HTTP commands external trigger sources (like push buttons, switches, sensors...) Android/IOS mobile application Autoplay control options has equivalent priority and latest takes precedence, so for example animation triggered by web interface can be changed by HTTP command and vice versa Can be used also as a “Zone”... -
Page 21: Page "Player
3.2 PAGE “PLAYER” • Is used to control Autoplay mode and it is divided into sub-pages (Playlist, Animation library, Colors) • Can be used ONLY in Autoplay (lowest priority) mode. • Operations performed are automatically saved to SD card if inserted. When the SD card is not inserted, all changes will disappear. - Page 22 3.2.1. Player Sub-page “Playlist” • Is used to create a short Playlist (from animation files on SD card) • Playlist is fully user programmable/ manageable. • In order to add files to Playlist use Select button on the bottom of sub-page “Animation library”...
- Page 23 3.2.2. Player Sub-page “Animation library” • Display all available .ln2 files based on their index on SD card and their duration in seconds • Is used for fast trigger of animation from SD card • Has “individual setting” for selected animation (contrast, speed) •...
- Page 24 3.2.3. Player Sub-page “Colors” • Display list of few basic static color presets • Is used to quick run static color to device pixel LED output • Static color is sent to ALL pixels on device pixel LED output • Has setting to adjust brightness •...
- Page 25 Name Black 255 (0) 255 (0) 255 (0) 0 (255) 12% White* 255 (0) 255 (0) 255 (0) 0 (255) 24% White* 255 (0) 255 (0) 255 (0) 0 (255) 37% White* 255 (0) 255 (0) 255 (0) 0 (255) 50% White* 255 (0) 255 (0)
-
Page 26: Page "Status
3.3 PAGE “STATUS” • Displays following device parameters: Controller name The name or identifier of the controller device Net state (variable) The current state of the network connection, indicating whether it is connected or disconnected Wi-Fi is (variable, hidable) A variable indicating the status of the Wi-Fi connection, with the option to hide this information Current Wi-Fi (variable, hidable) - Page 27 A variable indicating whether the device is set to automatically play output Activated (variable) A variable indicating whether the controller is activated to comunicate with LED Strip Studio 3 Software LED Strip type (variable) The type of the LED strip connected to the controller Color order (variable) The order in which color information is arranged for the LED strip (e.g., RGB, GRB)
-
Page 28: Page "Triggers
3.4 PAGE “TRIGGERS” • Allows user to add, remove, configure and reset trigger options • Allows user to set up various (and multiple) events based on external trigger input events • Each event is defined by following settings: Source defines trigger input using which event should be executed Trigger type defines a method of processing value... - Page 29 Advanced settings (only shown if desired) are separated from standard setting by a tab and are also color sepa- rated with following meaning: o dark purple: Trigger type o green: Source o blue: Action Default triggers are set to: Source: TRIG 1, Trigger type: press, Action: ANIMATION NEXT/PREV (NEXT) - connecting trigger1 input to GND will play next animation in library...
- Page 30 • Advanced settings are: INVERT Used to invert incoming value. So value used = 255 – incoming value. PRESS o Press Delay [ms] Time window between pressing button multiple times. DIGITAL o Minimal active time [ms] Minimal duration of the trigger pulse to activate the trigger.
- Page 31 o Duration [ms] Defines how long (in milliseconds) an event Action is performed ANALOG o Smooth (feature which provides input signal filtering) when enabled, value used is average of last 16 measurements o values dependent on Action: BRIGHTNESS/SPEED • Min Trigger [0-255 or 0-100% respectively] Sets minimum threshold value on which Action reacts Together with “Max Trigger”...
-
Page 32: Trigger Action
• Max Value [0-255 or 0-100% respectively] Together with “Min Value” defines an threshold levels of used value, which will be calculated by interpolation from range defined by “Min Trigger” and “Max Trigger” o ON/OFF Hysteresis - Range of a safe interval when both the bottom and top thresholds are triggered. - Page 33 o SPEED will set speed to desired value o SPEED UP/DOWN will change speed by defined step value o ON/OFF will disable/enable output blackout for Autoplay ANALOG o BRIGHTNESS will set brightness to trigger input value o SPEED will set speed to trigger input value o ON/OFF will disable/enable output blackout for Autoplay •...
- Page 34 • Main animation - is shown only when “Player mode” is set to Animation - shows only file indexes which exist on SD card - it is used to select animation to play • Select Color - is shown only when “Player mode” is set to Colors - it is used to select color to use o ANIMATION NEXT/PREV •...
- Page 35 ANALOG For each option Source value will be used as desired value (modified based on Trigger type settings) o BRIGHTNESS - nothing to set o SPEED - nothing to set o ON/OFF - nothing to set • Advanced settings: DIGITAL, PRESS o BRIGHTNESS - nothing to set o BRIGHTNESS UP/DOWN...
- Page 36 o ANIMATION (Color) - nothing to set o ANIMATION NEXT/PREV - nothing to set o SPEED - nothing to set o SPEED UP/DOWN Min - lowest possible value for parameter Max - highest possible value for parameter Step - value step size for parameter o ON/OFF - nothing to set ANALOG...
-
Page 37: Settings
3.6 SETTINGS • Used to set all REACTIVO 2 settings • Any change any change will be applied immediately (except network setting change) • Changes MUST be saved by user • All “save” buttons save all settings • An Android/iOS app can be also used to change Settings •... - Page 38 • Activate - used to load special activation file (sold on request), which enables to use device with LED Strip Studio 3 software - SD card not required for the activation - Once the device is activated, the ‘Activate’ feature is not...
- Page 39 • Default file - defines which file from Animation library play after device power on when no file is chosen, device will play last Autoplay state is used (SD card must be inserted) - Default value is: No selected o Art-Net™ settings - used to set parameters for Art-Net™...
- Page 40 • Number of pixels [1-1024] - define how many pixels from incoming Art-Net™ stream to process by REACTIVO 2 device - 1 pixel are 3 channels when RGB strip Art-Net Pixel mode Settings Section type is used or 4 channels when RGBW...
- Page 41 - default value is: 1024 • LEDs per pixel [1-1024] - defines how many pixels on REACTIVO 2 pixel LED output will act as 1 pixel of incoming data - Number of pixels * LEDs per pixel is limited by current led strip...
- Page 42 - Synchronization signal is processed based on Synchronization parameters - In Slave zone setting device has limited usability o Master settings section • Zone name - User adjustable zone name which is used for easy user zone identification in Android/IOS mobile application - Can be up to 18 characters - default value is: Zone #ID (Zone 1) •...
- Page 43 • Turn off after master signal lost - determine if device will be set to standard mode once synchroniza- tion signal is lost or not - when set to OFF, current animation triggered by master continues but is no more synchronized - when set to ON, device will exit synchronization mode after time specified (by synchronization keep alive duration) elapses and then it is possible to control device normally/manually till synchronization...
- Page 44 - It is important that on physical network only ONE DHCP server exist! Otherwise network issues may occur - IP address of REACTIVO 2 device is 192.168.3.1 and cannot be changed while its DHCP server is enabled • STATIC IP...
- Page 45 - It is important that on physical network only ONE DHCP server exist! Otherwise network issues may occur - IP address of REACTIVO 2 device is 192.168.3.1 and cannot be changed while its DHCP server is enabled • Static IP...
- Page 46 - It is important that on physical network only ONE DHCP server exist! Otherwise network issues may occur - IP address of REACTIVO 2 device is 192.168.3.1 and cannot be changed while its DHCP server is enabled • Static IP...
- Page 47 o Advanced settings • Use percentage values determine if some values will be in percentage or numeric values default value is: ON • Use advanced brightness used to enable/disable advanced brightness setting options: • OFF: Global Brightness sets Hardware and Software brightness together based on strip type (based on how any brightness steps currently...
- Page 48 SD card backup is stored to file: REACTIVO 2: „R2_XXXX.bcp“, where xxxx is device serial number backup file is related to serial number and IS NOT usable on any other device causes slightly longer time to save when user hits “save”...
-
Page 49: Update
UPDATE • Firmware version shows actual device firmware version in case special firmware is loaded, it will be indicated in the description Update Page • Firmware status shows what firmware is actually available online and if update is possible • Firmware change-log will redirect user to web page with detailed firmware/device change-log •... -
Page 50: Update Fw
After firmware update user have to check if firmware version is equal to firmware number in firmaware status CAUTION: update of REACTIVO 2 from FW 4.2.0 is NOT POSSIBLE if wired ethernet is connected! - Page 51 *.bin file • FW sources: link for actual firmware • Firmware file https://download.ledstripstudio.com/reactivo/REACTIVO 2.bin, or for devices with firmware 4.2.0 or lower https://download.ledstripstudio.com/reactivo/reactivo_eth.bin • Changelog: https://download.ledstripstudio.com/reactivo/versionDetails.txt for more firmware options you can contact us •...
-
Page 52: Faq
LED count per meter. Then there is a power limitation which can REACTIVO 2 deliver to its LED output. For example, in case of 12V LED strips with REACTIVO 2 pass thru current limit 7Ampere = 84W, minus 5W for REACTIVO2 is 79W. - Page 53 HOW MANY METERS OF SIGNAL CABLE CAN BE RUN FROM LED OUTPUT TO LED STRIP? General rule of thumb is that 5-10m works without problem in most cases. In case you need to use longer cable we suggest making a test to confirm if it is working.
-
Page 54: Warranty
WARRANTY This device has been designed and made using high quality components with several quality checks and testings. Therefore we are proud to provide 2 year limited warranty for this device. This limited warranty is valid for company or person (user) who purchased new device from us, or our authorized dealer/distributor and warranty period starts from date when user receive this device. -
Page 55: Disposal Of Your Old Device
For limited warranty claim process: • user must be able provide sufficient proof of purchase • use email info@ledstripstudio.com with detailed description of device failure • takes less than 30 days to resolve. This period starts from day we physical- ly recieve defective device (device return) DISPOSAL OF YOUR OLD DEVICE This device is an electronic device, and can be categorized as hazardous waste... -
Page 56: Contact Details
CONTACT DETAILS Showtacle Ltd. info@ledstripstudio.com Lubietovska 8, www.ledstripstudio.com 851 01 Bratislava Tel.: +421 948 280 393 Slovakia, Europe facebook.com/ledstripstudio linkedin.com/company/ledstripstudio youtube.com/LEDStripStudio instagram.com/ledstripworld/ is a product of Showtacle Ltd. company.
Need help?
Do you have a question about the REACTIVO 2 and is the answer not in the manual?
Questions and answers