
Summary of Contents for LeapFrog MAGIC ADVENTURES BINOCULARS
- Page 1 Instruction Manual This manual contains important information. Please keep it for future reference. Ce guide contient des informations importantes. Veuillez le conserver pour toute référence future. 91-004460-000...
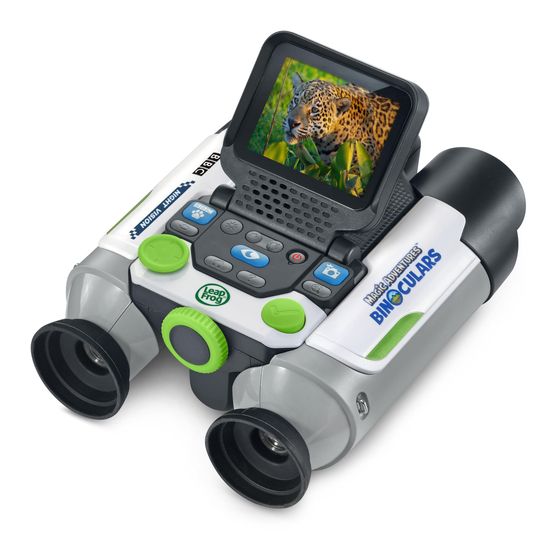
- Page 2 INTRODUCTION Thank you for purchasing the Magic Adventures™ Binoculars. Zoom in on nature with this fully functioning pair of binoculars and use the digital screen to take your own pictures day or night. Explore 340+ real-life photos and videos of animals, plants and fungi from the BBC, test your knowledge in the Field Guide Quiz, and navigate different habitats in search of animals in an exciting adventure game.
-
Page 3: Included In The Package
INCLUDED IN THE PACKAGE • Magic Adventures™ Binoculars • 1 Wrist Strap • 1 Instruction Manual WARNING: All packing materials such as tape, plastic sheets, packaging locks, removable tags, cable ties, cords and packaging screws are not part of this toy, and should be discarded for your child’s safety. NOTE: Please keep this Instruction Manual as it contains important information. -
Page 4: Getting Started
GETTING STARTED Battery Removal and Installation 1. Make sure the unit is turned Off. 2. Find the battery cover located between the Adjustable Binoculars Barrels, use a screwdriver to loosen the screw and then open the battery cover. 3. Remove old batteries by pulling up on one end of each battery. -
Page 5: Product Features
IMPORTANT The unit is in Try-Me mode. To exit this mode, follow the steps below: 1. Press the Power Button to 2. During the video, press and hold turn on the unit. these three buttons together for 5 seconds. 3. If Try-Me mode has been successfully turned off, “Try-Me mode has been disabled”... -
Page 6: Magnification Button
3. Check Mark Button Press the Check Mark Button to make a selection on a menu, take photos in Camera mode or Night Vision mode, play or stop fun facts in the BBC Field Guide, or perform actions in the Adventure Game. 4. - Page 7 12. LCD Screen Brightness Button Press the LCD Screen Brightness Button to adjust the brightness of the LCD screen. 13. Binoculars Focus Dial While looking through the binoculars, turn the Focus Dial to sharpen the image. 14. microSD Card Slot Use the microSD Card Slot to insert a microSD card (not included) and save more photos.
- Page 8 Wrist Strap Attachment Instructions Use the included Wrist Strap to avoid accidently dropping the device. To securely attach the binoculars to the Wrist Strap: Step 1: Locate the thread loop on the end of the strap. Insert it into the groove behind the bar and then push the loop through the opening.
- Page 9 3. Turn the Focus Dial until the image appears sharp and clear. If the Focus Dial makes a clicking sound, it has reached the end of its turning capacity and will no longer change the image’s sharpness or clarity until the Focus Dial is turned in the opposite direction. The best viewing distance of any object is at least 4 meters away (approximately), otherwise the Focus Dial may not be able to focus on or sharpen the image.
-
Page 10: Microsd Card Slot
Press the Night Vision Button to enter Night Vision mode. Press this • button again to exit Night Vision mode and go back to Camera mode. Press the Camera Button or the Check Mark Button to take photos • of what’s displayed on the screen. microSD Card Slot •... - Page 11 • Night Vision Timer Adjust how long it takes before Night Vision mode automatically shuts off. In order to preserve battery life, Night Vision mode will automatically turn off and enter Camera mode when no user input is detected for a certain length of time. BBC Field Guide Choose between 9 different categories to discover 340+ real-life photos and videos of...
- Page 12 Adventure Game Run, jump and climb through 5 natural habitats with 25 levels in search of unique animals and collect up to 100 animal photos. Avoid obstacles and be a friend to nature by not disturbing the different animals you discover along the way.
- Page 13 Copying Photos from the Binoculars to a Computer 1. Insert a microSD card** into the microSD Card Slot of the unit. 2. In the Gallery, select the Photo Transfer icon to transfer all of your saved photos from the unit’s internal memory to the inserted microSD card.
-
Page 14: Parent Menu
This may also cause unexpected behavior when trying to take more photos while in Camera mode or Night Vision mode: • The device may request to overwrite existing photos that share the same filename as the new photo being taken. Parent Menu A Parent Menu is available in case parents need to reset the device or reformat it. -
Page 15: Automatic Shut-Off
Automatic Shut-Off To preserve battery life, the Magic Adventures™ Binoculars will automatically dim the LCD screen (except Camera mode and Night Vision mode) after approximately 1.5 minutes without input, then power down after approximately 5 minutes without input. Press any button before the device shuts off to return the LCD Screen to its normal brightness level. - Page 16 Night Vision mode Replace batteries with new alkaline batteries. cannot be used Restart the unit by pressing the Power Button and try again. (1) Enter the Parent Menu (see the Parent Menu section for how to access this screen). (2) Select Option 2 and confirm. Once the process is Camera mode finished, it should be okay to take photos while in / Night Vision...
- Page 17 Use a different microSD card that does not contain any previously saved photos from the unit. Camera mode (1) Enter the Parent Menu (see the Parent Menu section / Night Vision for how to access this screen). mode (with (2) Select Option 2 and confirm. Once the process is microSD card finished, the overwrite prompt should no longer appear inserted) - an...
- Page 18 Use a different microSD card that does not contain any previously saved photos from the unit. Gallery (with (1) Enter the Parent Menu (see the Parent Menu section microSD card for how to access this screen). inserted) - new (2) Select Option 2 and confirm. Once the process is photos taken in finished, new photos taken in Camera mode or Night Camera mode...
-
Page 19: Care And Maintenance
CARE & MAINTENANCE 1. Do not point the binoculars directly at the sun and never leave the unit where direct sunlight can enter either the Binoculars Objective or Ocular Lens. Light ray concentration can damage the device and cause the binoculars to stop working. It can also cause fires and/or burns. - Page 20 If the problem persists, please call our Consumer Services Department at 1-800-701-5327 in the U.S. and Canada, or email support@leapfrog.com. Creating and developing LeapFrog products is accompanied by a responsibility that we take very seriously. We make every effort to ensure the accuracy of the information, which forms the value of our products.
-
Page 21: Other Notes
Dans l’éventualité peu probable d’une décharge électrostatique, un mauvais fonctionnement et une perte de mémoire de l’appareil peuvent se produire. L’utilisateur doit alors retirer et réinstaller les piles pour réinitialiser l’appareil. WARNING A very small percentage of the public, due to an existing condition, may experience epileptic seizures or momentary loss of consciousness when viewing certain types of flashing colors or patterns, especially on television. - Page 22 Note: This equipment has been tested and found to comply with the limits for a Class B digital device, pursuant to Part 15 of the FCC Rules. These limits are designed to provide reasonable protection against harmful interference in a residential installation. This equipment generates, uses and can radiate radio frequency energy and, if not installed and used in accordance with the instructions, may cause harmful interference to radio communications.
- Page 23 Trade Name: LeapFrog ® Model: 6186 Product Name: Magic Adventures™ Binoculars Responsible Party: LeapFrog Enterprises, Inc. Address: 2200 Powell Street, Suite 500, Emeryville, CA 94608 Website: leapfrog.com Publication Date: January 2024 THIS DEVICE COMPLIES WITH PART 15 OF THE FCC RULES.
- Page 24 Visit our website for more information about our products, downloads, resources and more. leapfrog.com leapfrog.ca Read our complete warranty policy online at leapfrog.com/legal LeapFrog Enterprises, Inc. A subsidiary of VTech Holdings Limited. © 2024 LeapFrog Enterprises, Inc. All rights reserved. Printed in China. 91-004460-000...
Need help?
Do you have a question about the MAGIC ADVENTURES BINOCULARS and is the answer not in the manual?
Questions and answers
MicroSD missing- My grandchildren got the binoculars as a Christmas gift but there was no Micro SD card included. Can you send one to me?
No, the LeapFrog Magic Adventures Binoculars do not come with a microSD card included.
This answer is automatically generated
Is there a specific way to insert the microSD card into the magic adventures binoculars?
The document does not provide specific instructions on how to insert the microSD card into the LeapFrog Magic Adventures Binoculars. However, it does mention that the device has a microSD Card Slot and supports microSD cards up to 32GB.
This answer is automatically generated