Table of Contents
Advertisement
Quick Links
Advertisement
Table of Contents

Related Manuals for Ryobi RRT130-230


Summary of Contents for Ryobi RRT130-230
- Page 1 RRT130-230...
-
Page 2: Intended Use
cord suitable for outdoor use reduces the risk of electric IMPORTANT! shock. It is essential that you read the instructions in this manual ■ If operating a power tool in a damp location is before assembling, operating, and maintaining the product. unavoidable, use a residual current device (RCD) Subject to technical modifications. - Page 3 ■ Maintain power tools and accessories. Check for chips and cracks, sanding drum for cracks, tear or misalignment or binding of moving parts, breakage excess wear, wire brush for loose or cracked wires. of parts and any other condition that may affect the If power tool or accessory is dropped, inspect for power tool’s operation.
-
Page 4: Kickback And Related Warnings
■ Do not operate the power tool near flammable loading and susceptibility to twisting or snagging of the materials. Sparks could ignite these materials. wheel in the cut and the possibility of kickback or wheel breakage. ■ Do not use accessories that require liquid coolants. Using water or other liquid coolants may result in ■... -
Page 5: Maintenance
■ Do not reach in the area of the spinning bit. The Please read the instructions carefully before proximity of the spinning bit to your hand may not always starting the product. be obvious. ■ The product is not intended for use as a dental drill Wear eye protection. -
Page 6: Speed Dial Settings
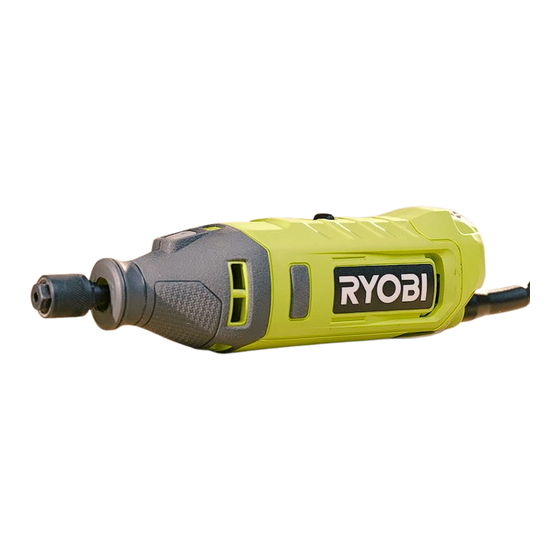
SPEED DIAL SETTINGS* Speed 7,000 RPM 20,000 RPM 25,000 RPM 30,000 RPM 35,000 RPM Type of Hard Laminates Aluminum, Shell / Soft Wood Steel Ceramic Glass Accessory Wood Plastics Brass, Etc. Stone Cut-off Discs 15-35K 15-35K 5-15K — — — Fiberglass Cut- 15-35K 15-35K... - Page 7 Speed control dial Power cord On/off switch Spindle lock Collar Quick-change collet Tool hanger Accessories Operator’s manual Know your product...
- Page 8 1. Press the on/off switch to the "O" position. 2. Disconnect the product from the power supply. NOTE: Insert the sanding drum into the drum sander mandrel. 1. Insert the flat end of the wrench (included) into the slot of the screw on top of the drum sander mandrel. 2.
- Page 9 1. Press and hold the spindle lock button, and turn the shaft by hand until the spindle lock engages. 2. With the spindle lock engaged, turn the quick-change collet counterclockwise to open the outer sleeve. 3. Select an accessory that fits the collet and that is suitable for the intended application. Fully insert the accessory into the collet.
- Page 10 QUICK-CHANGE COLLET 1. Slide the on/off switch to O to turn off the product. 2. Use the wrench to loosen and tighten the quick-change collet. WARNING: Do not use hands. 3. Press the spindle lock button. Use the wrench to loosen the quick-change collet. Remove the quick-change collet.
- Page 11 6. Insert the accessory into the quick-change collet. Press the spindle lock button. Turn the quick-change collet clockwise to tighten and secure the accessory. 7. Insert the rotary tool attachment (not included) over the accessory and quick- change collet. Operation...
- Page 12 HANGING THE PRODUCT 1. Turn off the product and remove the accessories. 2. Swing the tool hanger out. NOTE: Hang the product on a suitable, stable structure. Storage...
- Page 13 I N S T A L L I N G / R E M O V I N G ACCESSORIES FROM A JAMMED COLLET 1. Press the spindle lock button to lock. Turn the quick-change collet counterclockwise by hand. Remove the accessory. WARNING! Do not press the spindle lock button to lock and turn the quick-change collet clockwise.
- Page 14 INSTALLING ACCESSORIES INTO A JAMMED COLLET If the accessory cannot be inserted into the quick-change collet, perform the following steps: 1. Slide the on/off switch to O to turn off the product. 2. Press the spindle lock button. Use the wrench to loosen the quick-change collet.
- Page 15 REMOVING ACCESSORIES FROM A JAMMED COLLET If the accessory cannot be released from the quick-change collet, perform the following steps: 1. Slide the on/off switch to O to turn off the product. 2. Press the spindle lock button. Turn the quick-change collet clockwise by hand.
-
Page 16: Product Specifications
Rotary tool standardised test and may be used to compare one tool with Model RRT130-230 another. They may be used for a preliminary assessment of exposure. Voltage 230 V - 240 V... - Page 20 Techtronic Industries Australia Pty Ltd 31 Gilby Road, Mount Waverley, VIC 3149 Melbourne, Australia Techtronic Industries N.Z. Limited Unit C, 70 Business Parade South, Highbrook, Auckland 2013, New Zealand RYOBI is a trade mark of Ryobi Limited, and is used under license. 961075804-01...
Need help?
Do you have a question about the RRT130-230 and is the answer not in the manual?
Questions and answers