Table of Contents
Advertisement
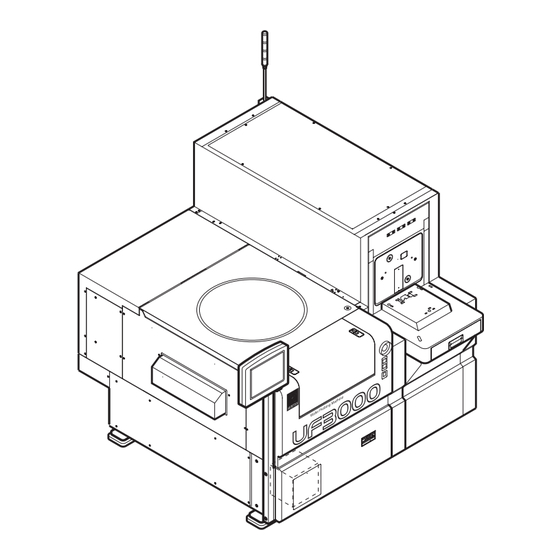
USER'S MANUAL
―CONTROL PARAMETERS―
Before operation, be sure to read this manual and obtain
full knowledge about this device through training.
Keep this manual safely in a specified place.
WARNING
TOKYO SEIMITSU CO., LTD.
Document No.
Date Issued
FULLY AUTOMATIC
PROBER
UF3000
UF2000
: FT22000-R002-E0
: 2006-2-16
Advertisement
Table of Contents

Summary of Contents for Tokyo Seimitsu ACCRETECH UF2000
- Page 1 : 2006-2-16 USER’S MANUAL FULLY AUTOMATIC ―CONTROL PARAMETERS― PROBER UF3000 UF2000 WARNING Before operation, be sure to read this manual and obtain full knowledge about this device through training. Keep this manual safely in a specified place. TOKYO SEIMITSU CO., LTD.
- Page 2 Preface PREFACE This manual contains instructions of the parameters used for our full-auto Prober “UF3000”/”UF2000". In order to cover as many parameters as possible except for very specific ones, the operating level (System Mode) of each model is assumed to ‘System’. Further, this Manual explains the parameters of optional functions that many customers would like to use, which will not appear on the display for Probers not containing the options.
-
Page 3: Table Of Contents
CONTENTS CONTENTS 1 SETTING/CHANGING PARAMETER 1.1 Device Parameter Settings ..............1-2 1.2 Basic Operational Parameter Settings ...........1-4 2 DEVICE DATA 2.1 Button Functions..................2-1 2.2 Unit System Settings................2-2 2.2.1 When Pushing <Multi Probing Settings> Button ......... 2-5 2.2.2 When Changing The Displayed Unit System........2-6 2.3 Wafer Reference Dir. - Page 4 CONTENTS 5 MARKING DATA 5.1 Marking Settings..................5-2 5.2 Fail Mark Inspection Settings..............5-8 5.3 Mark Count Sequence Settings.............5-12 6 PROBING CHECK AND NEEDLE CLEANING 6.1 Yield Check Settings ................6-3 6.2 Continuous Fail Check Settings .............6-9 6.3 Needle Mark Inspection Settings ............6-14 6.3.1 Needle Cleaning Method..............
-
Page 5: Setting/Changing Parameter
1 SETTING/CHANGING PARAMETER Device Parameter Settings..........1-2 Basic Operational Parameter Settings......1-4... - Page 6 1 SETTING/CHANGING PARAMETERS 1 SETTING/CHANGING PARAMETERS This Chapter shows the grouping of individual parameter and list page numbers of their descriptions in the following chapters. To set up device parameters for a new device or to change the registered device parameters, touch the <Device Parameter Change>...
-
Page 7: Device Parameter Settings
1 SETTING/CHANGING PARAMETERS 1.1 Device Parameter Settings [Device Parameter Settings] menu Page 1/4 Individual parameters explained in Chapter 2. [Device Parameter Settings] menu Page 2/4 Category Data for Multi Pass Probing Wafer Reference Dir. Settings: Page 2-7 Wafer Thickness Measurement Method: Page 2-8 Alignment Data Settings: Page 3-3 Reference Die Data Settings: Page 3-9 Group Index Data Settings: Page 2-12... - Page 8 1 SETTING/CHANGING PARAMETERS [Device Parameter Settings] menu Page 4/4 Pass/Fail Category Settings: Page 9-2 Print Settings: Page 9-3 Unit System Settings: Page 2-2...
-
Page 9: Basic Operational Parameter Settings
1 SETTING/CHANGING PARAMETERS 1.2 Basic Operational Parameter Settings [Basic Operational Parameter Settings] menu Wafer Load Settings: Page 7-2 Visual Inspection Settings: page 7-4 Classified Unloading Settings Wafer ID Settings: Page 7-6 Alignment Sequence Settings: Page 3-7 Wafer Thickness Measurement Settings: 2-10 Set-up Sequence Settings: Page 3-17 Probing Settings: Page 4-12 Yield Check Settings: Page 6-8... -
Page 10: Device Data
2 DEVICE DATA Button Functions ..............2-1 Unit System Settings ............2-2 2.2.1 When Pushing <Multi Probing Settings> Button ......2-5 2.2.2 When Changing The Displayed Unit System ........2-6 Wafer Reference Dir. Settings..........2-7 Wafer Thickness Measurement Method......2-8 Group Indexing ..............2-11 2.5.1 Outline and Restrictions of Group Indexing Function....2-11 2.5.2 Group Index Data Settings............2-12... -
Page 11: Button Functions
2 DEVICE DATA 2 DEVICE DATA This Chapter explains the functions of buttons appearing on both of [Device Parameter Settings] and [Basic Operational Parameter Settings] menus at first, and then details of the device data, and parameters under the sub-menus [Unit System Settings], [Wafer Reference Dir. Settings], and [Wafer Thickness Measurement Method]. -
Page 12: Unit System Settings
2 DEVICE DATA 2.2 Unit System Settings Device Up to 16 alphabetical letters, numerals and signs (Space, ‘-’, ‘.’ are available). Wafer size In mm, 125, 150, 200 or 300; in inch, 5, 6, 8 or 12. The mm/inch selection depends on the setting under [Unit System Settings] sub-menu on [Device Parameter Settings] menu Page 4/4. - Page 13 2 DEVICE DATA Delay after Reaching Temperature To be used in a cold temp. testing for applying a delay time from the wafer loading and the Chuck temperature reaching the setup temp. until the probing start. Probing Mode When either “Sample” or “Sample & Regular” is selected, the sampling method must be registered under [Mapping Settings] sub-menu.
- Page 14 2 DEVICE DATA # of 1 Wafer Contact If the needle cleaning is conducted using a cleaning wafer with contact count for several lots and under the condition of parametric test or sample probing of lot process with low card contact count, input assumed contact number of each wafer.
-
Page 15: When Pushing
2 DEVICE DATA 2.2.1 When pushing <Multi Probing Settings> button When pushing <Multi # Change> button on the Multi-Site Probing screen as shown left, a blinking cursor will appear in the entry point of “MULTI-SITE #”. Enter a site number by touching the panel. In the center of grid area the site arrangement figure will change according to the site number.Button -
Page 16: When Changing The Displayed Unit System
2 DEVICE DATA 2.2.2 When changing the displayed Unit System When Changing the displayed unit system of “wafer size” or index size X/Y, push “Unit System Settings” Page 4/4. The screen will change to [Unit System Settings] menu below. Push Unit System Settings and change meter system or inch system. -
Page 17: Wafer Reference Dir. Settings
2 DEVICE DATA 2.3 Wafer Reference Dir. Settings [Device Parameter Settings] menu Page 2/4 Touching “Wafer Reference Dir Settings” brings up the [Wafer Reference Dir. Settings] sub-menu. Flat/Notch Specifies the angle reference for the wafer placed on Chuck, orientation flat or notches. Reference Flat (Multiple Flats) Sets the reference flat. -
Page 18: Wafer Thickness Measurement Method
2 DEVICE DATA 2.4 Wafer Thickness Measurement Method [Device Parameter Settings] menu Page 2/4 Touching “Wafer Thickness Measurement Method” on [Device Parameter Settings] menu brings up [Wafer Thickness Measurement Method] sub-menu Page 1/2 as shown to the left. Wafer Thickness Calculation “5 Point Compensation”... - Page 19 2 DEVICE DATA Calculation of Broken Wafer Center Keep to “Manual”. Calculation of Measurement Position of Broken Wafer Thickness Keep to “Manual”. Remark: In 5-point compensation, the surface slope from wafer center to each quadrant compensates thickness variation. Slope is changed for each quadrant. Moreover, because slopes are determined with 3-point data, calculated compensation may not match with the real wafer under the condition of slope variation within the quadrant.
- Page 20 2 DEVICE DATA [Basic Operational Parameter Settings] menu Page 1/3 When “Wafer Thickness Measurement Settings” is pushed, the screen will change to [Wafer Thickness Measurement Settings] menu below. [Wafer Thickness Measurement Settings] sub-menu opened from [Basic Operational Parameter Settings] menu contains parameters common to the above Device parameters.
-
Page 21: Outline And Restrictions Of Group Indexing Function
2 DEVICE DATA 2.5 Group Index 2.5.1 Outline and Restrictions of Group Indexing Function (Device) (Device) (Device) (Device) Index X Index X Index X Index X (Device) Index Y Group (Device) index Y Index Y (Device) Index Y Group index X For a wafer pattern where streets of different widths run regularly at fixed intervals of dice as shown in the above figure, individual dice can be probed with the help of the optional Group Indexing function. -
Page 22: Group Index Data Settings
2 DEVICE DATA 2.5.2 Group Index Data Settings [Device Parameter Settings] menu Page 2/4 Touching “ Group Index Data Settings ” opens the following menu Page 1/1. Use Group Index? Using or not using the Group Indexing function when the option is provided. # Of Die Inside One Group X/Y Refer to the previous instruction and make a setting. -
Page 23: Alignment/Setup Data
3 ALIGNMENT/SETUP DATA Alignment Data Settings.............3-3 Reference Die Data Settings ..........3-9 3.2.1 Target Sensing Operation and Device Type (TEG/Corner) Difference ......3-12 Needle Alignment Data Settings ........3-14 Setup Sequence Settings..........3-17 Chuck Revise ..............3-24 Needle Contact Correct Settings ........3-25... - Page 24 3 ALIGNMENT/SETUP DATA 3 ALIGNMENT/SETUP DATA This Chapter explains the parameter groups under [Alignment Data Settings], [Reference Die Data Settings], [Needle Alignment Data Settings] and [Needle Contact Correct Settings] sub-menus accessible from [Device Parameter Settings] menu, and those under [Alignment Sequence Settings], [Set-up Sequence Settings] and [Chuck Correct] sub-menus contained in [Basic Operational Parameter Settings] menu respectively.
- Page 25 3 ALIGNMENT/SETUP DATA [Basic Operational Parameter Settings] Page 1/3 [Alignment Sequence Settings]: Page 3-7 [Setup Sequence Settings]: Page 3-17 [Basic Operational Parameter Settings] Page 3/3 [Chuck Revise]: Page 3-24...
-
Page 26: Alignment Data Settings
3 ALIGNMENT/SETUP DATA 3.1 Alignment Data Settings [Device Parameter Settings] Page 2/4 When touching “Alignment Data Settings” in [Device Parameter Settings] menu Page 4/7, the [Alignment Data Settings] menu Page 1/3 will open. Size of Block Printed by Stepper X/Y Range for both X and Y is 1~10. - Page 27 3 ALIGNMENT/SETUP DATA Perform Auto Focusing? Ordinarily, select “No” and the focus of the alignment camera is automatically adjusted using the results of the wafer thickness measurement. At “Yes”, the auto-focusing takes place before the wafer alignment. Perform Defocusing? Determine whether to use the defocusing (forcible focus displacement).
- Page 28 3 ALIGNMENT/SETUP DATA Registration of Reference Pattern On the initial wafer of a new device, the reference model pattern for alignment should be automatically searched or manually selected. If the automatic search has failed, the manual selection will be demanded; so set to “Auto” usually. Low (High) MAG Reference Model Size Valid if “Registration of Reference Pattern”...
- Page 29 3 ALIGNMENT/SETUP DATA Alignment Pass Mode Specifies whether to process wafers on the chuck without alignment. (Displayed when using an alignment pass option.) When “ Alignment Model Evaluation Data Settings ” is touched, the display will change to the screen shown lower.
- Page 30 3 ALIGNMENT/SETUP DATA [Basic Operational Parameter Settings] menu Page 1/3 Selecting “ Alignment Sequence Settings ” on [Basic Operational Parameter Settings] menu Page 1/3 will bring up [Alignment Sequence Settings] sub-menu Page 1/1. Except for “Renewal of Alignment Model in First Wafer”...
- Page 31 3 ALIGNMENT/SETUP DATA As for alignment parameters in the table below, the change becomes valid or invalid depending on the setting change timing. The setting in the device initial wafer is always valid in the initial wafer and succeeding each lot and wafer. However, the first wafer in lot and the setting change during lot processing may become invalid.
-
Page 32: Reference Die Data Settings
3 ALIGNMENT/SETUP DATA 3.2 Reference Die Data Settings [Device Parameter Settings] Menu Page 2/4 Touching “ Reference Die Data Settings ” on [Device Parameter Settings] menu Page 2/4, the screen will change to [Reference Die Data Settings] sub-menu Page 1/1. Reference Die Setting At selecting “Wafer Center or Edge”, determine the choice and enter the reference die coordinates on... - Page 33 3 ALIGNMENT/SETUP DATA When selecting “Target Sense” on “Reference Die Setting”, touch “ Target Sense Settings ” to specify the target sensing conditions. (Target Sense function detects specific Die or Blank Die inside and outside the map on each wafer for the devices whose map position may vary or misalign on wafers.
- Page 34 3 ALIGNMENT/SETUP DATA Target Sense Model Type Settings ‘Standard model’ registers the normal die pattern as model images. ‘Special model’ uses the special patterns like TEG die as model images. Target die remains to be a special die like TEG, etc. Relative Coordinates (Center Origin) X/Y For Target Sense Die Range: -511~511...
-
Page 35: Target Sensing Operation And
3 ALIGNMENT/SETUP DATA 3.2.1 Target Sensing Operation and Device Type (TEG/Corner) Difference For devices, which perform target sensing, model patterns for target sensing needs to be registered by the initial wafer. However, when the automatic registration is specified, the model pattern on the last die that was used on the initial wafer alignment is displayed. - Page 36 3 ALIGNMENT/SETUP DATA Target (Model) Search in Initial Wafer: If the target sensing die, which is specified by the relative coordinate value from the center die on the initial wafer of the device performing target sense, is a normal die or incorrect target; model search is performed for peripheral dice of TEG/Corner Target.
-
Page 37: Needle Alignment Data Settings
3 ALIGNMENT/SETUP DATA 3.3 Needle Alignment Data Settings [Device Parameter Settings] Page 2/4 When “ Needle Alignment Data Settings ” is touched on [Device Parameter Settings] menu, the screen will change to [Needle Alignment Data Settings] menu Page 1/3 as shown below. - Page 38 3 ALIGNMENT/SETUP DATA Needle Alignment Mode At “Auto Select”, a number of pads within the number input in “Maximum Needle Alignment Pads” below and their corresponding probe tips are automatically chosen for the pad alignment. At “All Pads”, all the registered pads and corresponding probes are aligned.
- Page 39 3 ALIGNMENT/SETUP DATA Tolerant Error of Needle Position (from Pad Edge) In the calculation of the pad alignment results, if any probe tip is found existing in the NG width from its pad edge, Prober will alarm-stop. See the illustration shown at left.
-
Page 40: Setup Sequence Settings
3 ALIGNMENT/SETUP DATA 3.4 Setup Sequence Settings [Basic Operational Parameter Settings] Page When “ Setup Sequence Settings ” in [Basic Operational Parameter Settings] menu Page 1/3 is ON, the screen will change to [Setup Sequence Settings] sub-menu Page 1/3. Coordinate Origin For the reference die determining coordinates of all the dice on wafer, whether to use the wafer center die or an edge die;... - Page 41 3 ALIGNMENT/SETUP DATA DATA IN at Sampling Start Die? Specification is able also on “Map Settings” under “Device Parameter Settings” menu page 3/4. (See page 4-5.) Recovery at Target Sense Error Prober’s action at the failure of target sensing, alarm-stop or unloading the current wafer and proceeding to the next wafer.
- Page 42 3 ALIGNMENT/SETUP DATA Perform Needle Alignment after TEST HEAD Operation? If “Yes” is selected in case of a device with a sensor which detects the test head operation during the lot processing, needle re-alignment is performed when restarting the probing after the test head resetting. (Invalid when no “Test Head Check Option.”) Needle Alignment by Lot Start If “Yes”...
- Page 43 3 ALIGNMENT/SETUP DATA Feedback to Device Parameter? “Needle Height on Probe Card”, “Probe Card Center Offset X/Y” and “Low MAG Lighting” in the [Needle Alignment settings] menu of the device parameter are re-written by the values optimized during the automatic needle alignment processing.
- Page 44 3 ALIGNMENT/SETUP DATA Feedback to Device Parameter? “Needle Alignment Fine Adjustment Data X/Y”, “Needle Alignment Die Coordinates X/Y” in the “Needle Alignment Data Settings” menu are re-written by the values optimized during the automatic needle alignment processing. However, if “Yes” is set here, the re-written data is saved in HD with device data.
- Page 45 3 ALIGNMENT/SETUP DATA For a Prober equipped with a Hot Chuck, Soak Time Setting function is optionally available; its control parameters are accessible from “Soak Time Settings” of [Set Up Sequence Settings] Page 3/3. This function is aimed to compensate for the probe mark position variation due to the probe card thermal expansion at a high temperature by means of preheating/probe-pad re-alignment, and repetitive probe-pad alignment at die or wafer interval.
- Page 46 3 ALIGNMENT/SETUP DATA Pressing “ Make Preheat A Unit of Chip ” in “SOAK TIME Settings” menu Page 2/2, the menu changes to the figure below. When the certain regulated time has elapsed from the test end until the test start of the next chip, the preheat function for each chip heats the needle tip for the proper period of time.
-
Page 47: Chuck Revise
3 ALIGNMENT/SETUP DATA Chuck Revise [Basic Operational Parameter Settings] menu Page 3/3 [Chuck Revise] corrects chuck height measuring the height of wafer upper side when the setting temperature of the variable temperature chuck changes more than +/-20°C. This measurement and correction are done also for the first lot processing after the prober initialization. -
Page 48: Needle Contact Correct Settings
3 ALIGNMENT/SETUP DATA 3.6 Needle Contact Correct Settings Outline of Needle Contact Correction function: Wafer In a multi-site probing on or over 8 sites, the probe Chuck pressure may have tilted Chuck around a fulcrum (rotation center) in the Chuck mechanism after the overdriving, resulting in variation of probe marks over the sites because actual overdrive amounts of individual probes have become different with the Chuck tilting. - Page 49 3 ALIGNMENT/SETUP DATA [Device Parameter Settings] menu Page 3/4 Touching “ Needle Contact Correct Settings ” under [Device Parameter Settings] menu Page 3/4 opens [Needle Contact Correct Settings] menu Page 1/1 as below. Standard Movement The reference value of the Chuck lateral shift amount (in the actual case, the chuck is shifted in the reverse direction after the die positioning) which is calculated from the following equation:...
- Page 50 3 ALIGNMENT/SETUP DATA Needle Contact Condition Correction flowchart Chuck drive START Probe contact condition correction? 8 or more sites card in long shape? Overdrive more than 40 µm? Usual Chuck driving Current card position out of central area? Calculation of the shift amount Chuck driving up to the contact height Chuck driving up to + preset overdrive amount...
- Page 51 3 ALIGNMENT/SETUP DATA As optional needle contact correction functions, correction method 1 described on pages 3-25 to 3-27, and correction method 2 which executes finer chuck operation at the time of needle tip contact, are available. The followings are control parameters of correction method 2. For the details of the function of correction method 2, refer to ACT contact correction manual.
-
Page 52: Map/Probing Condition Settings
4 MAP/PROBING CONDITION SETTINGS Mapping Settings ..............4-3 Map Display/Print Settings..........4-6 Probing Settings ...............4-10 Multi Pass Probing Settings ..........4-14... - Page 53 4 MAP/PROBING CONDITION SETTINGS 4 MAP/PROBING CONDITION SETTINGS This Chapter explains Device parameters under [Mapping Settings], [Probing Settings] and [Multi-pass Probing Settings] sub-menus; and Basic Operational parameters in [Probing Settings], [Multi-pass Probing Settings], and [Map Display/Print Settings] sub-menus. Map setting data include the various conditions used in creating a wafer map as well as setting methods for sample dice.
- Page 54 4 MAP/PROBING CONDITION SETTINGS [Basic Operational Parameter Settings] Page 1/3 [Probing Settings]: Page 4-12 [Basic Operational Parameter Settings] Page 2/3 [Multi-Pass Probing Settings]: Page 4-16 [Basic Operational Parameter Settings] Page 3/3 [Map Display/Print Settings]: Page 4-6...
-
Page 55: Mapping Settings
4 MAP/PROBING CONDITION SETTINGS 4.1 Mapping Settings [Device Parameter Settings] Page 3/4 Touching “Mapping Settings” on [Device Parameter Settings] will bring up [Mapping Settings] sub-menu Page 1/2 as shown below. Test Area Determination ‘Wafer Shape Width’ is for automatically determining the test die area by adding or reducing the wafer margin (set on the next parameter) to/from the wafer edge (radius). - Page 56 4 MAP/PROBING CONDITION SETTINGS Perform Skipping Dice? Choose whether to specify the skipping dice or not. Marking Die Setting If “All Dice Except Test Dice” is selected, outside the range specified by “Test Area Determination”, the die which has an area (%) more than the value set by “Marking Die Margin”...
- Page 57 4 MAP/PROBING CONDITION SETTINGS For the sample die testing, open [Mapping Settings] sub-menu Page 2/2 and touch “Sampling Test Die Settings”; the display changes to [Sampling Test Die Settings] menu Page 1/1 as shown below. DATA IN At Sampling Start Die? This parameter is used to select the specification of sampling start die in the lot first wafer.
-
Page 58: Map Display/Print Settings
4 MAP/PROBING CONDITION SETTINGS 4.2 Map Display/Print Settings [Basic Operational Parameter Settings] menu Page 3/3 The parameters in “Map Display/Print Settings” sub-menu are to determine the manner of wafer map indication and/or printout before the probing start and after the test finish of each wafer. Perform Site-1 Blink? This parameter is used to determine whether to display the each die position blinking of site 1 in the test result... - Page 59 4 MAP/PROBING CONDITION SETTINGS At touching “Map Display Attribute Settings”, the display will change to [Map Screen Display Settings] page. Display Items After Probing For specifying the indication of each die test result on the wafer map shown during probing. Touch an item area from “Needle Inspection Error Die”, “Category Data”, “Pass Die”, and “Fail Die”.
- Page 60 4 MAP/PROBING CONDITION SETTINGS When touching the “Category Data” item area in the “Display Item After Probing” line and turning its “Display ON/OFF” to ON with <Display / No Display Setting> button, the display will change to [Category Display Char.] screen shown in the second at left. Operation on this screen: Leave the category number system 1 ~ 64 (prober side standard) unchanged, or change it to 0 ~ 63.
- Page 61 4 MAP/PROBING CONDITION SETTINGS The screen below appears when “Map Print Attribute Settings” is ON. Print Items After Probing For specifying characters to represent the test results of individual dice on the wafer map printed at the wafer end. Choose an item area from “Needle Inspection Error Die”, “Category Data”, “Pass Die”, and “Fail Die”, and push <Printout/ No Display Setting>...
-
Page 62: Probing Settings
4 MAP/PROBING CONDITION SETTINGS 4.3 Probing Settings [Device Parameter Settings] menu Page 3/4 Touching “Probing Settings” on [Device Parameter Settings] menu Page 3/4 brings up [Probing Settings] sub-menu Page 1/1. Probing height Probing overdrive Contact height Clearance Clearance height (at indexing) Probing Overdrive µm: 0 ~ 500 mil: 0 ~ 19.69... - Page 63 4 MAP/PROBING CONDITION SETTINGS Using the hot chuck, if the interval from the die test result reception until the next die chuck UP exceeds the set value, “Make Contact Preheat a Unit of Chip” function performs chuck UP and contacts, preheats and extends the needle tip, and then starts the test.
- Page 64 4 MAP/PROBING CONDITION SETTINGS [Basic Operational Parameter Settings] menu Page 1/3 Touching “Probing Settings” on [Basic Operational Parameter Settings] menu Page 1/3 brings up [Probing Settings] sub-menu Page 1/2. The parameters of this sub-menu Page 1/2 such as “Direction of Probing Start”, “Clearance”, “Restart Position of Probing”...
- Page 65 4 MAP/PROBING CONDITION SETTINGS Contact Position Control of Probe Card In a multi-site probing, some sites (channels) will normally overrun the wafer edge. At ‘Don’t Move to Out of Wafer’ chosen, the indexing near the wafer edge can be controlled so that all the sites can be always kept to On-wafer;...
-
Page 66: Multi Pass Probing Settings
4 MAP/PROBING CONDITION SETTINGS 4.4 Multi Pass Probing Settings [Device Parameter Settings] menu Page 3/4 Touching “Multi Pass Probing Settings” on [Device Parameter Settings] menu Page 3/4 will open [Multi Pass Probing Settings] sub-menu Page 1/1. If “Kind of Regular & Multi-Pass Probing” in “Device Parameter Settings”... - Page 67 4 MAP/PROBING CONDITION SETTINGS Touching “Multi Pass Probing Operation Settings” will open [Multi Pass Probing Operation Settings] sub-menu Page 1/1. Dice for Multi Pass Probing Selection of retesting dice from a test result wafer map, the all dice tested previously, Fail dice only, Pass dice only, or those dice of a specific category.
- Page 68 4 MAP/PROBING CONDITION SETTINGS [Basic Operational Parameter Settings] menu Page 2/3 Touching “Multi Pass Probing Settings” on [Basic Operational Parameter Settings] menu Page 2/3 will open [Multi Pass Probing Setting] sub-menu Page 1/1. Each parameter can be set in the device parameters. (Refer to the previous page.) 4-16...
-
Page 69: Marking Data
5 MARKING DATA Marking Settings ..............5-2 Fail Mark Inspection Settings ..........5-8 Mark Count Sequence Settings ........5-12... - Page 70 5 MARKING DATA 5 MARKING DATA This Chapter explains the parameter groups such as [Marking Settings] of Device Parameter Settings page 3/4, and [Marking Settings], [Fail Mark Inspection Settings] and [Mark Count Sequence Settings] of Basic Operational Parameter Settings page 2/3. By the way, Perimeter Marking, Fail Mark Inspection and Mark Count functions are optional.
-
Page 71: Marking Settings
5 MARKING DATA 5.1 Marking Settings [Device Parameter Settings] menu Page 3/4 Touching “Marking Settings” on [Device Parameter Settings] will bring up [Marking Settings] sub-menu Page 1/2 as shown below. Perform Marking? Select ‘No’ when performing marking with another marking device. Another Area Marking Position from Die Center X/Y Manual adjusting amount of marking position within +/- 1/2 indexes (+X;... - Page 72 5 MARKING DATA Reserved Marking by Marking Die Margin: Reserved Marking by the Marking Die Margin is automatic marking function for useless dice over the wafer margin without conducting a test. (See page 4-4 if ‘Marking Die Settings’ under Device parameter [Map Settings] is performed with ‘All Dice Except Probing Die.
- Page 73 5 MARKING DATA “Perimeter Marking Distance from Flat” Perimeter marking limit is changed to the segment which keeps the distance between wafer circumference and circular limit in the angle area against the oriental flat. Set the distance ‘d’ from the flat of perimeter marking inside the limit against the flat. Periphery marking boundary By the way, if there are several flat portions, set the same limit...
- Page 74 5 MARKING DATA [Basic Operational Parameter Settings] menu Page 2/3 Movement conditions of marker are set by basic operational parameters. Check of Marker Adjustment When the mark position is offset from die center at marker setup adjustment, the offset amount which were over n% of die size would be cancelled with an alarm call.
- Page 75 5 MARKING DATA # of Actuations Per Marking This is available for after marking; 1 ~ 127. Marking Clearance µm: 0 ~ 999 mil: 0 ~ 39.3 See the following page for clearance definition. Appointment of Drive Marker by Category Two markers can be operated one by one or simultaneously by category # resulted from test judgment.
- Page 76 5 MARKING DATA Chuck Movement of Z Axis Direction and Marking Clearance Probing height Overdrive amount Probe tip contact height Probing clearance Probing indexing height Home position Off-site marking height Marking clearance Off-site marking indexing height <Simultaneous Marking> Simultaneous marking performs fail die marking at the point of die measurement finish. Simultaneous marking is not available on more than three-die multiprobing.
-
Page 77: Fail Mark Inspection Settings
5 MARKING DATA 5.2 Fail Mark Inspection Settings [Basic Operational Parameter Settings] For models with the optional fail mark inspection function, Page 2/3 turn ‘Fail Mark Inspection Settings’ to ON and input inspection performance conditions. Perform Fail Mark Inspection? ‘Size’ is for judgment according to minimum tolerant value, medium warning value and maximum tolerant value registered on ‘Fail Mark Size Settings’... - Page 78 5 MARKING DATA Fail Mark Die Margin In relation to ‘Fail Mark Wafer Margin’ above, mark inspection shall be conducted to the dice which locates over the inspection area limit and whose % dimension in the area are more than the value set in this parameter Remark: If ‘Fail Mark Wafer Margin’...
- Page 79 5 MARKING DATA Fail Mark Inspection Size Settings Register the mark judgment standard. The screen will change below. Size of Inspection Window X/Y Input the size of window used for fail mark displacement judgment. It is not necessary, however, to input value here because each value is automatically changed according to scaling the window at marker setup operation.
- Page 80 5 MARKING DATA Inspection Result Display Settings After mark inspection, specify the method of inspection result display on the left side. The screen will change below by turning to ON. Display Result of Fail Mark Inspection? Specify whether the mark inspection result is displayed on the screen or not.
-
Page 81: Mark Count Sequence Settings
5 MARKING DATA 5.3 Mark Count Sequence Settings [Basic Operational Parameter Settings] Page 2/3 For the models which are attached with optional mark count function, set ‘Mark Count Sequence Settings’ to ON and input the inspection execution conditions. Perform mark Count? If the fail mark shall be counted, select ‘Yes’. -
Page 82: Probing Check And Needle Cleaning
6 PROBING CHECK AND NEEDLE CLEANING Yield Check Settings............6-3 Continuous Fail Check Settings ........6-9 Needle Mark Inspection Settings........6-14 6.3.1 Needle Cleaning Method...............6-19 Needle Cleaning Settings..........6-21 Correlation Settings............6-30... - Page 83 6 PROBING CHECK AND NEEDLE CLEANING 6 PROBING CHECK AND NEEDLE CLEANING This Chapter will explain the parameter groups “Yield Check Settings”, “Continuous Fail Check Settings”, “Needle Mark Inspection Settings”, and “Needle Cleaning Settings” in [Device Parameter Settings] menu Page 3/4. Here will be also discussed the corresponding Basic Operation parameters groups under “Yield Check Settings”...
- Page 84 6 PROBING CHECK AND NEEDLE CLEANING [Basic Operational Parameter Settings] menu Page 1/3 [Yield Check Settings]: Page 5-8 [Continuous Fail Check Settings]: Page 5-10 [Basic Operational Parameter Settings] menu Page 2/3 [Needle Mark Inspection Settings]: Page 5-17 [Needle Cleaning Settings]: Page 5-21...
-
Page 85: Yield Check Settings
6 PROBING CHECK AND NEEDLE CLEANING 6.1 Yield Check Settings [Device Parameter Settings] menu Page 3/4 Touching “Yield Check Settings” will produce [Yield Check Settings] sub-menu Page 1/2 as shown at left in the second. Perform Yield Checking? The yield check counts the die test results and compares the Pass die percentage or numbers with the corresponding limit. - Page 86 6 PROBING CHECK AND NEEDLE CLEANING Pass Die Percentage For Sampling This appears when the above “Method Of Yield Checking For Sample & Regular Probing” is set at ‘Pass Die Percentage’. Gross Of Sampling Die Divisor to calculate the pass die percentage for sample dice.
- Page 87 6 PROBING CHECK AND NEEDLE CLEANING When “Timing for Yield Checking” is set to ‘Block-by-Block’, the following parameters, “# of Die in Judgment Block (1 ~ 9999)” and “# of Judgment Blocks (1 ~ 999)”, will appear. # of Die in Judgment Block (1~9999) The yield checking block size (number of successive testing dice).
- Page 88 6 PROBING CHECK AND NEEDLE CLEANING The last four items on [Yield Check Settings] sub-menu Page 3/3 can be used to monitor the wafer testing process differently from the usual yield check. “PASS Count Check for DUT Setting” and “BIN Count Check for DUT Setting”...
- Page 89 6 PROBING CHECK AND NEEDLE CLEANING [Appointment CAT. Yield Check Settings] Perform Appointment Category Yield Check? With ‘Yes’ chosen, the following two parameters are produced. Timing for Category Checking Wafer end: Comparing the value set in “Category Limit Setting” with the measured value, perform checking. Die by die: In probing, an error is generated when the measured value exceeds the value set in “Category Limit Setting,”...
- Page 90 6 PROBING CHECK AND NEEDLE CLEANING [Basic Operational Parameter Settings] menu [Yield Check Settings] sub-menu Page 1/1 will appear Page 1/3 when “Yield Check Settings” is touched on the [Basic Operational Parameter Settings] menu Page 1/3. “Recovery At Yield Error” “Perform Marking After Yield Error?”...
-
Page 91: Continuous Fail Check Settings
6 PROBING CHECK AND NEEDLE CLEANING 6.2 Continuous Fail Check Settings Touching “Continuous Fail Check Settings” to ON in the [Device Parameter Settings] menu Page 3/4 will open [Continuous Fail Check Settings] sub-menu Page 1/1. Perform Continuous Fail Checking? ‘Yes (Fail Check)’ is for continuous Fail die detection without Check-back, and ‘Yes (Fail Check Back)’... - Page 92 6 PROBING CHECK AND NEEDLE CLEANING “In Wafer Fail Check” is an option for a special continuous Fail check applicable at a multi-site probing, where DUT check or Total check mode is selectable; the DUT check is to watch continuous Fails at individual DUTs (sites) with different continuous Fail limits, and the Total check for monitoring the continuous Fails through the sites (DUT 1 to DUT n) alike the usual continuous Fail...
- Page 93 6 PROBING CHECK AND NEEDLE CLEANING “Stop of Continuous Appointed Category” is an option for the alarm-stop when a selected category (categories) has continued by a preset count. STOP of Continuous Appointed Category? For using or not using this function. Tolerant # of Continuous? Allowable limit of the same continuous category results.
- Page 94 6 PROBING CHECK AND NEEDLE CLEANING “Continuous Fail Between Chips Settings” is an optional function. In the multi-site probing, if the count maximum difference (maximum count – minimum count) between sites in the specified category exceeds the tolerant value, the prober alarm-stops. Continuous Check Between Chips? This parameter is used to set whether to use this function.
- Page 95 6 PROBING CHECK AND NEEDLE CLEANING [Basic Operational Parameter Settings] menu Page 1/3 Touching “Continuous Fail Check Settings” will open “Continuous Fail Check Settings” sub-menu Page 1/3. “Recovery at Continuous Fail Error”, “Perform Needle Cleaning at Check Back”, “Recovery at CONT. Fail Reject”...
-
Page 96: Needle Mark Inspection Settings
6 PROBING CHECK AND NEEDLE CLEANING 6.3 Needle Mark Inspection Settings [Device Parameter Settings] menu Page 3/4 Touching “Needle Mark Inspection Settings” will open [Needle Mark Inspection Settings] sub-menu Page 1/2 below. Perform Needle Mark Inspection? ‘Yes (Position)’ for judging whether a probe-mark does exist within the window (frame) formed on its pad. - Page 97 6 PROBING CHECK AND NEEDLE CLEANING Brightness Setting This parameter is used to specify the brightness of the needle mark images against the pad surface. Lighting This parameter is used to specify whether to use slanted optical illumination or coaxial illumination from the top. (Normally coaxial illumination is used.
- Page 98 6 PROBING CHECK AND NEEDLE CLEANING Perform CONT. Fail Die Inspection? Whether to inspect or not the probe-marks of the last Fail die on occurrence of the continuous Fails. Inspect After Needle Cleaning? Not effective at present. Selection Of Needle Inspection Pads At ‘Auto’...
- Page 99 6 PROBING CHECK AND NEEDLE CLEANING Touching “Needle Mark Execution Sites” will open [Needle Mark Execution Sites] sub-menu Page 1/2 below. Each screen of [Needle Inspection Execution Sites] lists buttons corresponding to site number (channel number) 1 ~ 32, 33 ~ 64. For wanted inspecting sites, touch the buttons to turn the indication to ‘YES’.
- Page 100 6 PROBING CHECK AND NEEDLE CLEANING [Basic Operational Parameter Settings] menu Touching “Needle Mark Inspection Settings” on the Page 2/3 [Basic Operational Parameter Settings] menu Page 2/3 will bring up [Needle Inspection Settings] sub-menu Page 1/2. The parameters in the sub-menu are the same as those under [Needle Inspection Settings] of the Device parameters.
-
Page 101: Needle Cleaning Method
6 PROBING CHECK AND NEEDLE CLEANING 6.3.1 Needle Cleaning Method Three types of cleaning tools can be selected. • Cleaning wafer • Cleaning unit (Rectangular ceramic disk) • Brush Cleaning unit and brush are optionally available. Cleaning Wafer Cleaning Wafer Sequence 3 mm width of the external margin of the cleaning wafer is unused area to protect needle tips. - Page 102 6 PROBING CHECK AND NEEDLE CLEANING Brush Brush Structure The optional cleaning brush is installed on the left side(in the case of ‘UF3000’*). This brush moves vertically in the F axis same as the cleaning unit, and left to right and back and forward on the XY stage. The brush is installed with its tip being flush with the disk upper side.
-
Page 103: Needle Cleaning Settings
6 PROBING CHECK AND NEEDLE CLEANING 6.4 Needle Cleaning Settings [Device Parameter Settings] menu Page 3/4 Touching “Needle Cleaning Settings” will open [Needle Cleaning Settings] sub-menu as shown below. Remark: All the device parameter under [Needle Cleaning Settings] are the same to those of Basic Operational Parameters, simply reflecting the settings. - Page 104 6 PROBING CHECK AND NEEDLE CLEANING Touching “Needle Cleaning Settings” brings up [Needle Cleaning Settings] sub-menu as shown below. Touching <UNIT ONLY>, <WAFER ONLY> or <UNIT + WAFER>, “ON” and “OFF” is switched together with display color. Select one of these and touch <SETTING END>. The screen returns to “Needle Cleaning Settings”...
- Page 105 6 PROBING CHECK AND NEEDLE CLEANING Touching “Wafer Needle Cleaning Settings”, the parameter menu using the cleaning wafer is displayed as below. Perform Wafer Needle Cleaning? This parameter is used to set whether to execute the needle tip cleaning by the cleaning wafer. Needle Cleaning at Contact Height This parameter becomes valid when executing the needle tip cleaning with horizontal movement at the...
- Page 106 6 PROBING CHECK AND NEEDLE CLEANING Use Data for Cleaning WF for Flat/Notch Dir. “Device parameter” is used when calculating the angle of the cleaning wafer in accordance with the orientation flat/notch specification and angle setting of the target device. Also, “Basic Operational Parameters” are used when using the input data of the next orientation flat/notch setting parameter.
- Page 107 6 PROBING CHECK AND NEEDLE CLEANING Recovery at Cleaning Limit Over This parameter is used to select whether to let the execution proceed, or apply alarm-stop, when the number of times the cleaning wafer is used reaches the tolerant value. Cleaning Area Margin from Wafer Edge This parameter is used to specify the film outer margin for the wafer with cleaning film using the distance from...
- Page 108 6 PROBING CHECK AND NEEDLE CLEANING If “Unit Needle Cleaning Settings” is selected, the parameter menu when using the cleaning unit is displayed as shown in the figure below. Perform Unit Needle Cleaning? If “Yes” is selected, the following parameters will be displayed.
- Page 109 6 PROBING CHECK AND NEEDLE CLEANING Cleaning Touchdown Limit: 1 ~ 32000 The tolerant number of times the unit is used. When the total surface of the cleaning unit disk is used in accordance with the prober internal control data, each corresponding counter increases +1.
- Page 110 6 PROBING CHECK AND NEEDLE CLEANING When using the optional cleaning brush, touch “Brush Needle Cleaning Settings” and set the operation method. Perform Brush Needle Cleaning? This parameter is used to specify whether to use the brush cleaning. Die Interval for Brush Cleaning This parameter is used to set the die interval of the brush cleaning.
- Page 111 6 PROBING CHECK AND NEEDLE CLEANING [Basic Operational Parameters Settings] menu Page 2/3 Touching “Needle Cleaning Settings” will open [Needle Cleaning Settings] sub-menu as shown below. Refer to 6-21 ~ 6-28 for the settings of each parameter. The basic operational parameter can be used to set the needle cleaning even when the system mode is set to engineer level.
-
Page 112: Correlation Settings
6 PROBING CHECK AND NEEDLE CLEANING 6.5 Correlation Settings [Device Parameter Settings] menu Page 3/4 Setting “Correlation Settings” is set to ON in the “Device Parameter Settings” screen Page 3/4, “Correlation Settings” menu Page 1/1 is displayed as shown below. Timing for Correlation Probing This parameter is used to select whether to stop immediately the wafer test on the chuck and start the... - Page 113 6 PROBING CHECK AND NEEDLE CLEANING [Correlation Settings] screen Page 1/1 is a sub-menu screen. Selecting each item, relevant parameter screen is displayed. [Correlation Yield Check Settings] screen: Perform Yield Checking? This parameter is used to select whether to execute the yield judgment in the correlation test.
-
Page 114: Wafer Handling And Lot Management
7 WAFER HANDLING AND LOT MANAGEMENT Wafer Load Settings ............7-2 Visual Inspection Settings ..........7-4 Wafer ID Settings ..............7-6 Lot Management Settings ..........7-10... - Page 115 7 WAFER HANDLING AND LOT MANAGEMENT 7 WAFER HANDLING AND LOT MANAGEMENT This Chapter will explain the parameter groups such as “Wafer Load Settings”, “Visual Inspection Settings”, “Wafer ID Settings” on [Basic Operational Parameter Settings] menu Page 1/3, and “Lot Management Settings”...
-
Page 116: Wafer Load Settings
7 WAFER HANDLING AND LOT MANAGEMENT 7.1 Wafer Load Settings [Basic Operational Parameter Settings] menu Page 1/3 Touching “Wafer Load Settings” brings up [Wafer Load Settings] sub-menu Page 1/2 shown below. Wafer Load/Unload Method ‘Bottom Up’ for loading wafers from the bottom slot; ‘Top Down’... - Page 117 7 WAFER HANDLING AND LOT MANAGEMENT Unload Flat/Notch Direction Cassette frame At ‘0°’, each wafer after return to the cassette has the main orientation flat/notch facing outward from the slot aperture. At an angle entered here, each wafer takes the angle measured CCW from the 0° position after being returned into the cassette.
-
Page 118: Visual Inspection Settings
7 WAFER HANDLING AND LOT MANAGEMENT 7.2 Visual Inspection Settings [Basic Operational Parameter Settings] menu Page 1/3 Touching “Visual Inspection Settings”, brings up [Visual Inspection Settings] screen Page 1/1. Perform Visual Inspection? This parameter is used to specify whether to execute the visual inspection of the wafer out of prober. - Page 119 7 WAFER HANDLING AND LOT MANAGEMENT Tolerant # Of Buffering Wafers For Visible Inspection Tolerant number of buffering wafers which load the visible inspection target wafers temporarily in the cassette. Output Message After Unloading to Tray This parameter is used to specify whether to output the message when the target wafer is loaded in the inspection tray.
-
Page 120: Wafer Id Settings
7 WAFER HANDLING AND LOT MANAGEMENT 7.3 Wafer ID Settings [Basic Operational Parameter Settings] menu Page 1/3 Touching “Wafer ID Settings” brings up [Wafer ID Settings] sub-menu Page 1/3 shown below. Perform Wafer ID Reading? Select to perform the wafer ID reading or not. Method Of Wafer ID Reading At ‘0’... - Page 121 7 WAFER HANDLING AND LOT MANAGEMENT Brightness For Wafer ID Reading This can be set automatically through the brightness adjustment in the calibration on the initial wafer. Reading Window Size (Horizontal/ Vertical) The horizontal and vertical sizes of the wafer ID reading window to be created in the ID image processing;...
- Page 122 7 WAFER HANDLING AND LOT MANAGEMENT Touching “Character Settings” brings up [Wafer ID Character Settings] screen shown below. Depending on the number of characters entered in “Wafer ID Length” on Page 1/3, ‘?’ marks (or the previous setting) will appear on the CURRENT line. When specific character types are assigned to individual digits, entry of alphabet (a), numeric (n), blank ( ), minus (-), or dot (.) to the digits can make the reading accuracy higher.
- Page 123 7 WAFER HANDLING AND LOT MANAGEMENT Touching “Wafer ID. Position Settings” brings up [Wafer ID. Position Settings] sub-menu Page 1/2 shown below. (4”, 4.5”, 5”, 6”, 8”, 12”) Wafer Reference Position Assuming that orientation flat is 0 degree, counterclockwise rotation of 90, 180 or 270 can be selected.
-
Page 124: Lot Management Settings
7 WAFER HANDLING AND LOT MANAGEMENT 7.4 Lot Management Settings [Basic Operational Parameter Settings] menu Page 2/3 Touching “Lot Management Settings” on [Basic Operational Parameter Settings] menu Page 2/3 will open [Lot Management Settings] sub-menu Page 1/2. The lot management is a processing that summarizes each lot’s test results by lot number, cassette number, slot number, or wafer ID. - Page 125 7 WAFER HANDLING AND LOT MANAGEMENT Lot # Of Characters Enter the number of digits (1-20) for the lot number used in the lot management. Lot # Of Offset A number of upper digits of the lot number that must be deleted in the indication or printout.
-
Page 126: Prober External Control Settings
8 PROBER EXTERNAL CONTROL SETTINGS TTL Interface Settings ............8-3 GP-IB Interface Settings.............8-6 Serial Interface Settings .............8-9... - Page 127 8 PROBER EXTERNAL CONTROL SETTINGS 8 PROBER EXTERNAL CONTROL SETTINGS There are 7 types of external control that directs Prober operations under the control of Tester: TTL, GP-IB, RS-232C, RDP, and their combinations. (They are optional except for the TTL method.) This Chapter explains the control parameters accessible from “External Control Settings”...
- Page 128 8 PROBER EXTERNAL CONTROL SETTINGS Pass Fail Category? Can be used with any interface method. At ‘Yes’ chosen in any parameters, [Pass/Fail Category Settings] item will appear. Touching “Pass/Fail Category Settings” to ON brings up [Pass/Fail Category Settings] screen Page 1/4. The “Pass”...
-
Page 129: Ttl Interface Settings
8 PROBER EXTERNAL CONTROL SETTINGS 8.1 TTL Interface Settings Touching “TTL Interface Settings” brings up [TTL Interface Settings] sub-menu Page 1/2. (Parameters displayed on the screen are only changeable control items for TTL interface. Refer to the relevant specifications for information about other control items.) Wafer End Signal At CONT. - Page 130 8 PROBER EXTERNAL CONTROL SETTINGS Repeat Touchdowns at Specified Category “Specified Category” re-tests the category die specified in “Category # For Repeat Touchdown”. In “Setting of Existence Every Category”, two or more categories can be specified for repeat contact execution. Category # For Repeat Touchdown Enter a category number (1 ~ 32) for re-testing each die.
- Page 131 8 PROBER EXTERNAL CONTROL SETTINGS Check Time (MIN.) Input range: 1 ~ 127 The wait time limit of receiving the Test End signal from Tester after the output of Test Start signal (Test End signal timeout). This can be used under the TTL receive timeout check option.
-
Page 132: Gp-Ib Interface Settings
8 PROBER EXTERNAL CONTROL SETTINGS 8.2 GP-IB Interface Settings Touching “GP-IB Interface Settings” brings up [GP-IB Interface Settings] sub-menu Page 1/3 shown below. (Parameters displayed on the screen are only changeable control items for GP-IB interface. Refer to the relevant specifications for information about other control items and commands.) GP-IB Text Delimiter... - Page 133 8 PROBER EXTERNAL CONTROL SETTINGS Marking To Marking Die at On Site Marking? As a general rule, the GP-IB interface does not position forced marking dice in the in-place marking. At ‘Yes’ chosen, if the next die is a forced marking die after receiving J command, marking will be done on the die and then the next testing die will be positioned.
- Page 134 8 PROBER EXTERNAL CONTROL SETTINGS Output TTL signal on GPIB I/F This parameter is used to set whether to output the TTL signal with the external control is set at GPIB. A-PM-6000A Compatible Mode This parameter is used to enable the lot end processing of A-PM-6000A prober.
-
Page 135: Serial Interface Settings
8 PROBER EXTERNAL CONTROL SETTINGS 8.3 Serial Interface Settings Touching “Serial Interface Settings” will open [Serial Interface Settings] sub-menu Page 1/1. (Parameters displayed on the menu are only changeable control items for the serial interface. Refer to the relevant specifications or the operation manual for information about other control items.) Wafer Auto Load? For automatically unloading the current wafer at the... -
Page 136: Miscellaneous Condition Settings
9 MISCELLANEOUS CONDITION SETTINGS Pass/Fail Category Settings..........9-2 Print Settings...............9-3 Logging Sequence Settings..........9-4 Map Output Settings ............9-6 Map Input Settings..............9-7 Display Screen Settings .............9-8 Miscellaneous Settings ............9-9... - Page 137 9 MISCELLANEOUS CONDITION SETTING 9 MISCELLANEOUS CONDITION SETTING This Chapter explains the parameter groups “Pass/Fail Category Settings” and “Print Settings” on the [Device Parameter Settings] menu Page 4/4; “Logging Sequence Settings”, “Map Output Settings” and “Map Input Settings” on the [Basic Operational Parameter Settings] menu Page 2/3, and “Display Screen Settings”...
-
Page 138: Pass/Fail Category Settings
9 MISCELLANEOUS CONDITION SETTING 9.1 Pass/Fail Category Settings [Device Parameter Settings] Page 4/4 Touching “Pass/Fail Category Settings” brings up [Pass/Fail Category Settings] sub-menu Page 1/1 shown below. Remark: It is possible to set ‘Pass/Fail Category Settings’ with “Pass/Fail Category Settings” in [External Control Settings] sub-menu under the Basic Operational Parameter Settings menu Page 3/3. -
Page 139: Print Settings
9 MISCELLANEOUS CONDITION SETTING 9.2 Print Settings [Device Parameter Settings] menu Page 4/4 Touching “Print Settings” will open [Print Settings] sub-menu Page 1/1 as shown below. The Print Setting allows converting the physical slot numbers determined by the parameter “Position of Slot No. 1”... -
Page 140: Logging Sequence Settings
9 MISCELLANEOUS CONDITION SETTING 9.3 Logging Sequence Settings [Basic Operational Parameter Settings] menu Touching “Logging Sequence Settings” brings up Page 2/3 [Logging Sequence Settings] sub-menu Page 1/2 shown below. Logging is a function that records and prints the test results of each wafer or lot (cassette) and the prober operating conditions. - Page 141 9 MISCELLANEOUS CONDITION SETTING Print Out At Error? For printing each error message indicated on the display. Print Out At Wafer ID Error? For printing the wafer ID reading condition for a wafer at the ID reading failure. Site & Category Print Setting For printing individual site summaries and/or category counts at the test end of each wafer, cassette or lot.
-
Page 142: Map Output Settings
9 MISCELLANEOUS CONDITION SETTING 9.4 Map Output Settings [Basic Operational Parameter Settings] menu Touching “Map Output Settings” brings up [Map Page 2/3 Output Settings] sub-menu Page 1/1 as below. Map output is a function that transmits wafer map data to the selected media after the completion of each wafer test. -
Page 143: Map Input Settings
9 MISCELLANEOUS CONDITION SETTING 9.5 Map Input Settings [Basic Operational Parameter Settings] menu Page 2/3 Touching “Map Input Settings” brings up [Map Input Settings] sub-menu Page 1/1. Map input is a function that reads into Prober wafer map data saved in a medium. Marking machine requires the map input. -
Page 144: Display Screen Settings
9 MISCELLANEOUS CONDITION SETTING 9.6 Display Screen Settings [Basic Operational Parameter Settings] menu Page 3/3 Touching “Display Screen Settings” to ON brings up [Display Screen Settings] sub-menu Page 1/1. Select the items to be displayed during normal probing (see the screen example as shown below). Display Total, Pass &... -
Page 145: Miscellaneous Settings
9 MISCELLANEOUS CONDITION SETTING 9.7 Miscellaneous Settings [Basic Operational Parameter Settings] menu Touching “Miscellaneous Settings” brings up Page 2/3 [Miscellaneous Settings] sub-menu Page 1/3. Maintenance/Adjustment Mode This parameter is used for test run of the prober or maintenance/adjustment. Chuck-up time at demonstration: 1 ~ 30000 ms The holding time after increasing the chuck height to the probing height in the prober single drive. - Page 146 9 MISCELLANEOUS CONDITION SETTING Prober Mode Setting Select ‘Marking Machine’ when using Prober as a marking machine for wafers tested by the other Probers. Similarly, select ‘Mark Count Machine’ when using Prober to mark-count marked wafers with the other Probers. Device List Date Display? The device list shows the date of each device data file.
- Page 147 9 MISCELLANEOUS CONDITION SETTING Perform Counter Re-calculating at Wafer End For the repeat test of the same die by the test target die change operation in the middle of sequence back or probing, this parameter is used to specify whether to re-calculate pass/fail/category count at the time of wafer end.
- Page 148 9 MISCELLANEOUS CONDITION SETTING With “Perform Card Data Management?” set to ‘Yes’, pushing <Card Change> button on the Prober status screen at the actual card change will produce the screen <Probe Card Installation> shown at left in the second. A particular card can be managed with “Card Type” and “Card Name”;...
- Page 149 9 MISCELLANEOUS CONDITION SETTING Index Size X/Y Index sizes of applicable devices. # Of Multi Test Sites At touching this line, the display changes to “Multi-Site Probing” screen. (Refer to Page 2-5.) Location # For specifying a location No. different from the default No.
- Page 150 9 MISCELLANEOUS CONDITION SETTING After the registration of a new card type, push <Setting End> button on [Card Type Data] menu; the initial “Probe Card Installation” screen will come back. In order to register the new card name, touch <Individual Card Data Change>...
Need help?
Do you have a question about the ACCRETECH UF2000 and is the answer not in the manual?
Questions and answers