Table of Contents
Advertisement
Quick Links
Advertisement
Table of Contents

Summary of Contents for Electrozirve ML Series
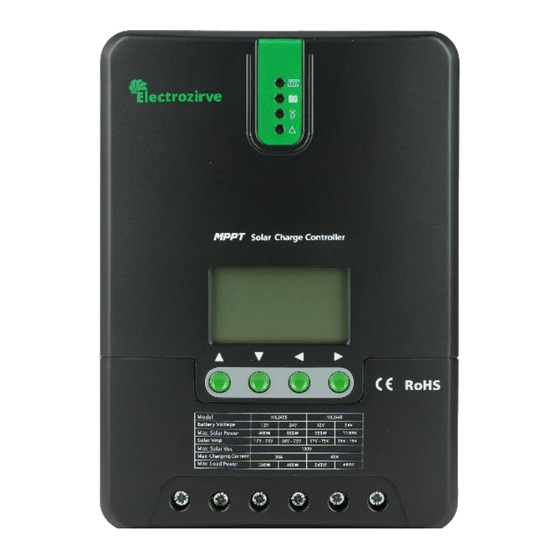
- Page 1 ML SERIES MPPT SOLAR CHARGE CONTROLLER ML2420/ML2430 ML2440 MODEL ML2420 ML2430 ML2440 Battery Voltage 12V/24V 100V (25℃) ;90V (-25℃) Max. PV Open Circuit Voltage Charge Current Discharging Current Version: 1.03 The above information is subject to change without prior notice.
-
Page 2: Safety Instructions
Dear users, Thank you very much for choosing our products! SAFETY INSTRUCTIONS 1. As this controller deals with voltages that exceed the top limit for human safety, do not operate it before reading this manual carefully and completing safety operation training. 2. -
Page 3: Product Introduction
1. PRODUCT INTRODUCTION 1.1 Product Overview This product can keep monitoring the solar panel's generating power and tracking the highest voltage and current values (VI) in real time, enabling the system to charge the battery in maximum power. It's designed to be used in offgrid solar photovoltaic systems to coordinate operation of the solar panel, battery and load, functioning as the core control unit in off-grid photovoltaic systems. - Page 4 1.3 Exterior and Interface No.1 Definition Transmitting terminal TX Receiving terminal RX Power supply grounding/Signal grounding Power supply grounding/Signal grounding Power supply positive Power supply positive 8 9 10 11 12 13 15 Item Item Charging indicator Battery "+" interface Battery indicator Battery "-"...
-
Page 5: Boost Charging
battery's voltage is around 12V, when charging with a conventional charge controller, the solar panel's voltage will stay at around 12V, failing to deliver the maximum power. However, the MPPT controller can overcome the problem by adjusting the solar panel's input voltage and current in real time, realizing a maximum input power. -
Page 6: Product Installation
Equalizing charging Warning: Risk of explosion! In equalizing charging, an open lead-acid battery can produce explosive gas, therefore the battery chamber shall have good ventilation conditions Note: risk of equipment damage! Equalizing charging may raise the battery voltage to a level that may cause damage to sensitive DC loads. Check and make sure that allowable input voltages of all the loads in the system are greater than the set value for battery equalizing charging. - Page 7 connections are tightened securely. Wires had better be fixed properly with ties, and when needs arise to move things, avoid wire swaying so as to keep connections from loosening. When connecting the system, the output terminal's voltage may exceed the top limit for human safety. If operation needs to be done, be sure to use insulation tools and keep hands dry ...
- Page 8 Step 1: Choose the installation site Do not install the controller at a place that is subject to direct sunlight, high temperature or water intrusion, and make sure the ambient environment is well ventilated. Step 2: First place the installation guide plate at a proper position, use a marking pen to mark the mounting points, then drill 4 mounting holes at the 4 marked points, and fit screws in.
- Page 9 Warning: Risk of electric shock! We strongly recommend that fuses or breakers be connected at the photovoltaic array side, load side and battery side so as to avoid electric shock during wiring operation or faulty operations, and make sure the fuses and breakers are in open state before wiring.
-
Page 10: Product Operation And Display
3. PRODUCT OPERATION AND DISPLAY 3.1 LED Indicators PV array indicator Indicating the controller's current charging mode. BAT indicator Indicating the battery's current state LOAD indicator Indicating the loads' On/ Off and state. Indicating whether the controller is functioning ERROR indicator normally. -
Page 11: Load Indicator
LOAD indicator: Indicator State Load State Load turned off Quick flashing (a cycle of 0.2s with on and off each lasting for 0.1s) Load overloaded/ short-circuited ERROR indicator: Indicator State Abnormality indication System operating normally Steady on System malfunctioning 3.3 LCD Startup and Main Interface 3.3.1 Startup Interface During startup, the 4 indicators will first flash successively, and after self-inspection, the LCD screen starts... - Page 12 3.3.2 Main Interface 3.4 Load Mode Setting Interface 3.4.1 Load Modes Introduction This controller has 5 load operating modes which will be described below: Mode Descriptions Sole light control When no sunlight is present, the solar panel voltage is lower than the light (nighttime on and control on voltage, and after a time delay, the controller will switch on the daytime off)
- Page 13 3.4.2 Load Mode Adjustment Users can adjust the load mode as needed on their own, and the default mode is debugging mode (see "load modes introduction"). The method for adjusting load modes is as follows: 3.5 System Parameter Setting Under any interface other than load modes, press and hold the Set key to enter into the parameter setting interface.
-
Page 14: Product Protection Function And System Maintenance
Parameter settinh cross-reference setting Displayed item Description Parameter range Default setting TYPE OF BAT Battery type User/flooded/Sealed/Gel Sealed VOLT OF SYS System Voltage 12/24V AUTO EQUALIZ CHG Equalizing charging voltage 9.0V~17.0V 14.6V BOOST CHG Boost charging voltage 9.0V~17.0V 14.4V FLOAT CHG Floating charging voltage 9.0V~17.0V 13.8V... - Page 15 Reverse charging protection at night This protection function can effectively prevent the battery from discharging through the solar panel at night. TVS lighting protection. Over-temperature protection. When the controller temperature exceeds the set value, it will decrease the charging power or halt charging. See the following diagram: 4.2 System Maintenance ...
-
Page 16: Product Specification Parameters
4.3 Abnormality Display and Warnings Error display Description LED indicationk No abnormality ERROR indicator off Battery over-discharge BAT indicator flashing slowly ERROR indicator steady on System over-voltage BAT indicator flashing quickly ERROR indicator steady on Battery under-voltage warning ERROR indicator steady on Load short circuit LOAD indicator flashing quickly ERROR indicator steady on Load overloaded... - Page 17 5.2 Battery Type Default Parameters (parameters ser in monitor software) Setting Voltage Sealed Lead- Gelled Lead- Open Lead-Acid LI Battery Usser (User-Defined) Battery Type Acid Battery Acid Battery Battery Overvoltage 16.0V 16.0V 16.0V ---- 9~17V Disconnect Voltage Equalizing 14.6V ---- 14.8V ---- 9~17V...
-
Page 18: Conversion Efficiency Curve
6.CONVERSION EFFICIENCY CURVE 6.1 12V System Conversion Efficiency 6.2 24V System Conversion Efficiency... -
Page 19: Product Dimensions
7.PRODUCT DIMENSIONS...
Need help?
Do you have a question about the ML Series and is the answer not in the manual?
Questions and answers