Table of Contents
Advertisement
Quick Links
Advertisement
Table of Contents

Summary of Contents for HEINRICH H500-C8
- Page 1 User Manual...
- Page 2 Introduction built-in wired telephone function, which can be connected to the RJ11 telephone line to make calls. Built-in high-performance 2.4G WiFi and Bluetooth communication module, with communication, communication, office, chat and other functions, which can meet your individual needs. Before you use this smart phone, please carefully read all the information we provide randomly.
-
Page 3: Product Overview
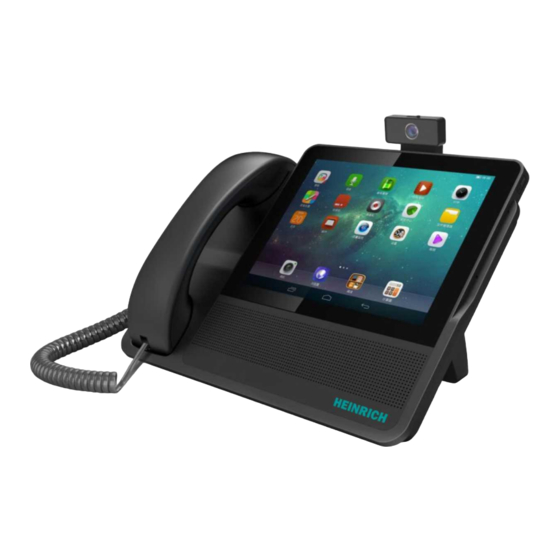
Product overview 1.1 Packing list · Scope of application: This product is suitable for the company's front desk, office, meeting room, restaurant, bedroom, living room, hotel, etc. · Variety and specifications: 8-inch horizontal screen display. · Using environment: placed indoors under normal temperature and humidity. ·... - Page 4 6.Switch button 8.Teleph Handle one line interface interface Powe Network USB interface r cord cable interface interfac...
-
Page 5: Technical Specifications
Video call Switch button Switch smart phone Base Support the phone on the desktop Telephone line H500-C8 1 telephone line interface for connecting interface to PSTN telephone line Network cable Can be plugged into the network cable to connect to the... - Page 6 Use Crash Routine function On/off: Power on: Press and hold the "POWER" button for 3 seconds and then the system will power on. Shut down: Press the "POWER" button until a pop-up window appears and choose to shut down or press and hold the "POWER" until the system automatically shuts down. Screen wake up: After the screen automatically sleeps or the screen saver, touch the screen or press the "POWER"...
- Page 7 After turning on the phone, please plug the phone line into the corresponding port 1) Phone line connection is normal Connect to WIFI in the settings or directly plug in the network cable 2) WIFI connectio n is normal...
- Page 8 Networ k cable connect ion is normal Register a SIP account (for details, please refer to the SIP phone usage method 3) below) SIP default account SIP account registered successfully SIP account registration failed...
-
Page 9: Line Switching
Line switching When the phone is plugged in and a SIP account is registered, if you want to check whether the phone is in the "analog line" state or the "IP line" state, you can check the account status in the upper left corner of the phone. The status shown in the figure shows that the phone is on an IP line. -
Page 10: Make A Call
How to use PSTN phone 3.1 Make a call Method 1: Pick up the handset directly, and the dial pad will pop up on the phone interface. After entering the number, click PSTN to call Method 2: Click the dial icon , the phone will pop up the dial pad, enter the number and select PSTN call... - Page 11 Method 3: Click the dial icon , the phone will pop up the dial pad, enter the number and select PSTN call Method 4: Click the address book icon , find the person you want to call and click to enter, click the dial icon and then select the number in the pop-up interface and click to dial out...
- Page 12 Method 5: Click the call log icon , find the person you want to call, and click directly to make the call...
-
Page 13: Pstn Settings
After the call is successfully dialed, you can select the corresponding function according to your needs Flash Mute Recording Hands-free Digital disc Volume adjustment Hang up 3.2 PSTN settings Click to enter "Phone Settings", select PSTN settings, you can perform extension settings/local area code/flash settings/recording files/recording settings... - Page 14 Extension settings: fill in the required outgoing number and time in 1) the external line preemption code...
- Page 15 Local area code: When you use an analog phone, you must fill in this 2) item, otherwise the phone will not be able to dial the local number normally. Flash setting: select the corresponding flash time in the pop-up flash 3)...
- Page 16 Recording file: directly click on the file in the pop-up recording file interface to 4) check and listen to the recording file Recording setting: In the pop-up recording setting interface, you can manually turn 5) on/off the automatic recording button...
- Page 17 3.3 Matters needing attention Attribution of the dialed number Telephone line connection type Local number Foreign number Outside line (straight Dial directly line) Inside line (branch Add an outgoing number to dial line) Note: For analog phones, you must set the phone settings — PSTN settings —...
- Page 18 SIP account registered successfully SIP account registration failed Click this to enter the configuration details, you can set audio and video encoding, call transfer, etc.
- Page 19 Method 2: Web-side registration. First check the IP address of the phone, enter the IP address of the phone + port number 8080 in the browser address, for example: 192.168.0.131:8080, you can successfully log in to the Web terminal...
- Page 20 Enter the default account: admin, password: admin, enter the web settings interface, select "account", the account in the list can be selected from account 1 to account 6, the enabled state is turned on, enter the user name, password, server address, and submit to successfully register Account 4.2 Make a call Method 1: Pick up the handset directly, and the dial pad will pop up on...
- Page 21 Method 2: Click the dial icon, the phone will pop up the dial pad, enter the number and select VOIP call Method 3: Click any account in the SIP account list, the phone will pop up the dial pad, enter the number and select VOIP call...
- Page 22 Method 4: Click the address book icon , find the person you want to call and click to enter, click the dial icon and then select the number in the pop-up interface and click to dial out...
- Page 23 Method 5: Click the call log icon , find the person you want to call, and click directly to make the call...
-
Page 24: Operations During A Call
4.3 Operations during a call When an IP phone makes a call, the default outgoing call is a video call, and the call can be converted to audio after the call is connected. You can also perform the following operations during a call: hands-free/dialpad/add call/hang up/call hold/mute/start recording/call transfer. -
Page 25: Voip Settings
4.4 VOIP settings Click to enter "Phone Settings", select VOIP settings, you can set Do Not Disturb/Auto Answer/Auto Registration/Check Voice Mail/Set Voice Mail Feature Code/Set Default VOIP Account/VOIP Video Recording File/Set VOIP Recording File Address 4.4.1 Voicemail Voicemail informati prompt First, set the voice mail feature code, which must be consistent with the feature code set in the server. -
Page 26: Address Book
The second step is to check the voice mailbox. There are 2 ways to view, the first is to click to view the voice mailbox in the VOIP settings; the second is to directly enter the feature code in the dialing interface to dial and listen Directly enter the Click to listen feature code to call... - Page 27 The address book at this location can be used to add contacts/search contacts, and enter from this address book to set avatars/PSTN dialing/VOIP dialing/deleting contacts, etc.
- Page 28 5.2 Detailed version of the address book Search Delete contact Share contacts Adding contacts 5.2.1 Add a contact in the address book interface Click the "Add Contact" icon, then fill in the relevant information in the pop-up [Add Contact] interface, and click OK, as shown in the figure: 5.2.2 Search for contacts in the address book interface...
- Page 29 Enter the name, number or pinyin first letter of the contact you want to find in the search box on the contact interface to search. This function supports fuzzy query; you can also slide the leftmost column of letters for quick query (according to the contact’ s first letter) , As shown in the figure: 5.2.3 Delete a contact in the address book interface Click...
- Page 30 5.2.4 Share contacts in the address book interface Click the icon button, select the share contact in the pop-up information bar interface, select the contact you want to share, and then click the share button to share the contact.
- Page 31 Select the Bluetooth Select a contact, device to be paired click share for pairing After the reception is successful, click the file on the mobile phone, and then return to the mobile phone address book to find the shared contact 5.2.5 Make a call in the address book interface Select the contact you want to call in the contact list, click to the interface as shown in the figure, and select the dialing method to make the call...
- Page 32 5.3 Bluetooth address book Open the Bluetooth address book, the interface will jump to the notification interface, turn on the switch button of the Bluetooth address book, and return to the Bluetooth address book to use it normally 5.3.1 Bluetooth import address book operation Step 1: Device Bluetooth status: After clicking the "Turn on"...
- Page 33 Sync address book open Click on “I” button from BT Step 3: Click on the device in the paired devices, select "Get Address Book" and follow the operations shown in the figure to complete the Bluetooth importing address book operation. As shown Step Below: 1.
-
Page 34: Corporate Directory
5.4 Corporate Directory Click to enter the corporate address book interface, click the "+" in the lower right corner, there are 3 icons in this option, the first icon is whether to allow access to the notification; the second icon is to manually add contacts; the third icon is Close the "+"... - Page 35 5.4.1 Enterprise address book import operation Step 1: First connect the phone to the computer with a USB cable, pull down the phone menu and click "Charging this device via USB". If there is no such notification, it means that the phone is not successfully connected to the computer.
- Page 36 Step 2: In the pop-up dialog box, select "Transfer File" Step 3: Open "My Computer or Computer" to find the phone disk, and open "Internal Shared Storage" Step 4: Copy the Excel form of the contacts to be imported on the computer to any folder in the internal shared storage space...
- Page 37 Note: The title of the Excle form must contain the following content, and all the content under the title does not need to be filled in. Step 5: Click on the phone "Corporate Contacts" and select the new/old version of the Excel form to import contacts...
- Page 38 Step 6: Find the copied contact folder and import it according to the steps Select and click on the correct contact form...
-
Page 39: Delete Call Log
Do you want to import contacts from vCard? Click ok Than Import Complete Call log Delete call log Delete a single call record: select the call record information to be deleted, click the icon to enter the call details page, click the icon shown in the figure to delete the call record... - Page 40 Delete all missed/received/dialed/all call records: If you want to delete all dialed calls, switch the call record interface to the dialed call interface, and press and hold a number, the interface will pop up a clear call record dialog box. Click OK to delete all dialed call records...
-
Page 41: Add To Address Book
Add to address book Select the call record information to be added to the address book, click the icon to enter the call details page, click the icon shown in the figure to store the number in the address book... - Page 42 Add shortcut number to widget 7.1 Add shortcut number to widget Long press the blank area of the phone screen, the "Widget" button will pop up and click the widget, the interface will jump to the following icon: Click on the widget, the interface jumps to this screen, find the address book and click and drag the address book icon...
- Page 43 Pop up the address book, select the contact you want to add fast dial You can add a quick dial through the widget to add it successfully. This way of adding a quick dial can freely drag the added contact to other locations or swap locations with other apps.
-
Page 44: Web Management
7.2 Delete the "widget add shortcut number" operation Delete and add a shortcut number: Long press the added shortcut number button, and a "Remove" button will pop up. Drag the shortcut number button to the "Remove" position to delete the added shortcut number, as shown in the figure: Web management 8.1 Web management login... -
Page 45: Web Management Settings
192.168.0.131:8080 Account number: admin Password: admin 8.2 Web management settings In the above figure, we can see that the web management is divided into 6 major items: Status/Basic Settings/Account/TR069/Network Configuration/Upgrade 1) Status: In the status item, we can view the phone's IP address, MAC address, and the registration status of each account... - Page 46 2) Basic settings: you can set whether the automatic answer, automatic registration, and do-not-disturb functions are enabled 3) Account: Register: select the account to be registered, enable the account, enter the user name and password, and fill in the server address to register a VOIP account. The content of other options such as transmission method, STUN server address, etc.
- Page 47 Basic: Voice mail can be set: feature code, video resolution, transfer and other settings Codec: Includes settings for voice codec, voice function, and video codec...
- Page 48 TLS certificate: If TLS is selected as the transmission method on the registration page, you need to upload the relevant file certificate in the TLS certificate interface...
- Page 49 4) TR069: TR069 is an application layer protocol with wide applicability and no access restrictions. The TR069 standard allows users to manage all common devices, regardless of the type and manufacturer of the device. This specification ensures that the device can be easily and safely managed remotely and centrally through the network.
-
Page 50: Matters Needing Attention
Already the latest version, no need to update! Matters needing attention 1. Keep the machine away from strong magnetic fields, which may cause damage to the machine. 2. Do not drop the machine or hit it against hard objects during use, otherwise it may cause the machine surface to fray, the battery falls off, the data is lost or other hardware is damaged, and the machine cannot be turned on. - Page 51 8. Some videos, music, and pictures may have copyrights. Playing these files without permission will violate the copyright law. 9. When the use of wireless devices is prohibited or the use of the devices will cause interference or danger, please do not turn on the device. 10.
Need help?
Do you have a question about the H500-C8 and is the answer not in the manual?
Questions and answers