Advertisement
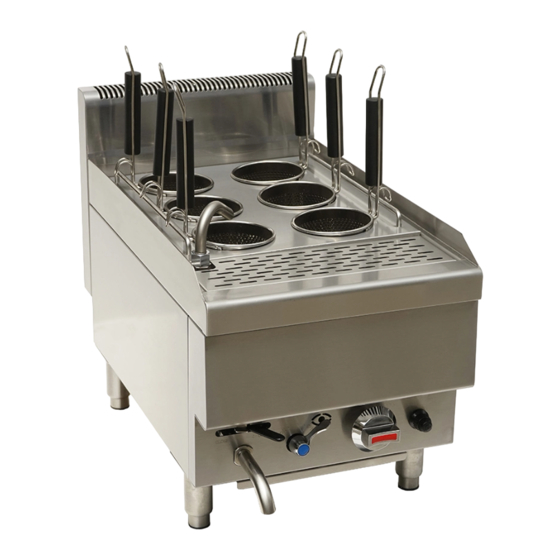
COUNTER TOP GAS PASTA BOILER
Installation and operation manual
Important:
1. You are advised to read these instructions first before installation commences.
2. This manual must be handed to the end user after installation and commissioning.
3. These instructions are only valid if the country code appears on the appliance. If the code does
not appear on the appliance, refer to the technical instructions for adapting the appliance to the
conditions for use in that country.
1. General information
⚫
The appliance is equipped with stainless steel tubular burner. It has flame failure protection function, thermostatic
control function, pilot flame standby function, and pulse ignition function.
⚫
Before installing the appliance, please read the instructions in this manual carefully, as they contain important
information on how to install, use and service the appliance safely, properly, and effectively.
⚫
Keep this manual in a safe place so that it can be used as reference by other operators of the appliance.
⚫
This appliance should be installed following the instructions provided by the manufacturer and in compliance with all
applicable local regulations. This appliance should be connected to the gas supply by qualified personnel only.
⚫
All personnel in charge of using this appliance should be specifically trained in its operation.
6G-TRM40 6G-TRM60
Page 1
Advertisement
Table of Contents

Related Manuals for Adexa 6G-TRM40

Summary of Contents for Adexa 6G-TRM40
- Page 1 COUNTER TOP GAS PASTA BOILER 6G-TRM40 6G-TRM60 Installation and operation manual Important: 1. You are advised to read these instructions first before installation commences. 2. This manual must be handed to the end user after installation and commissioning. 3. These instructions are only valid if the country code appears on the appliance. If the code does not appear on the appliance, refer to the technical instructions for adapting the appliance to the conditions for use in that country.
- Page 2 ⚫ In the event of failure or malfunction, switch off the appliance. The periodic functional checks requested in this manual should be carried out according to the instructions. Have the appliance serviced by a technically qualified person duly authorized by the manufacturer that uses genuine spare parts. ⚫...
- Page 3 Picture 1 4.2 Installation ◆ Before installing the product, verify that the type of gas (natural or propane) agrees with the specifications on the naming plate which is located at the rear part of the unit. ◆ If gas cylinder is used, please choose as per local standard. The max diameter is 40cm, the max length is 1.2 meter. put it in dry cool position.
- Page 4 ◆ The appliance should be connected to a potable water supply in accordance with national regulations. ◆ Installing the appliance should be in accordance with EN1717 and national water regulations in force. ◆ The appliance is not suitable for built-in installation. Because the appliance will be working without enough oxygen supplying due to the restriction space and the combustion products cannot be discharged from the kitchen immediately and completely, which is very harmful for the operators’...
- Page 5 Sealing screw Picture 2 Pressure port The appliance can not be used empty. Ensure to fill water before operation. The rear side of vessel carry a permanently punched mark indicating the maximum and minimum operating level of filling. Fill Water till level is between maximum and minimum mark. If water is below minimum mark, fill water. 5.1 Ignition (picture 3, picture 4) (Picture 3) (Picture 4)
- Page 6 flame. ◆ After piping has been checked for leaks, fully purge gas pipes to remove air. ◆ Rotate the knob counter-clockwise; make sure the mark on the knob pointing to the position 0. ◆ Then push the knob, and press the impulse ignition device at the same time. (picture 6) ( It may take several times to ignite the flame, because there will exist air in the pipe, only after air comes out then gas flow in and ignition can work.) ◆...
- Page 7 (Picture 6) Move the base of nozzle left and right to adjust the 左右移动喷嘴座 primary air 可调节一次空气 adjust the orifice to desired position. In the below picture you can find the suggested position. The distance is between burner base and orifice. 6.1 Replace the nozzle of main burner ( see picture 5) ◆...
-
Page 8: Pilot Burner
It is no need to adjust the primary air. Thermocouple Pilot Burner Ignition Needle Picture 7 Pilot Nozzle Picture 8 5. Technical specifications table Model 6G-TRM40 6G-TRM60 Dimension (mm) 400×652×540 600×652×540 Height of working table Capacity (L) Drainage outlet size R 1/2″... -
Page 9: Use And Maintenance
8. Use and Maintenance 8.1 Attention to use ◆ The appliance is designed to cook pasta. Any other usages are not permitted. ◆ Before using, please clean the water tank first: a. Use the towel to wash it clean with neutral detergent, and finally rinse it with water. b. -
Page 10: Ec Declaration Of Conformity
Unit 1 Swift Point, Cosford Lane, Swift Valley Industrial Estate, Rugby, CV21 1QN, UK T:+44 1788 222 410 service@adexa.co.uk www.adexa.co.uk EC Declaration of Conformity Adexa Direct Limited declares that: Gas pasta boiler Equipment Type: 6G-TRM40, 6G-TRM60 Model: Imported By: ADEXA DIRECT LIMITED Unit 1 Swift Point, Cosford Lane, Swift Valley Industrial Estate, Rugby, CV21 1QN, UK Brand: ... -
Page 11: Declaration Of Conformity
Unit 1 Swift Point, Cosford Lane, Swift Valley Industrial Estate, Rugby, CV21 1QN, UK T:+44 1788 222 410 service@adexa.co.uk www.adexa.co.uk Declaration of Conformity Adexa Direct Limited declares that: Gas pasta boiler Equipment Type: 6G-TRM40, 6G-TRM60 Model: Imported By: ADEXA DIRECT LIMITED Unit 1 Swift Point, Cosford Lane, Swift Valley Industrial Estate, Rugby, CV21 1QN, UK Brand: ADEXA Application of Council Directive(s): (EU) 2016/426...
Need help?
Do you have a question about the 6G-TRM40 and is the answer not in the manual?
Questions and answers