
Related Manuals for Forza FIO-G21K24


Summary of Contents for Forza FIO-G21K24
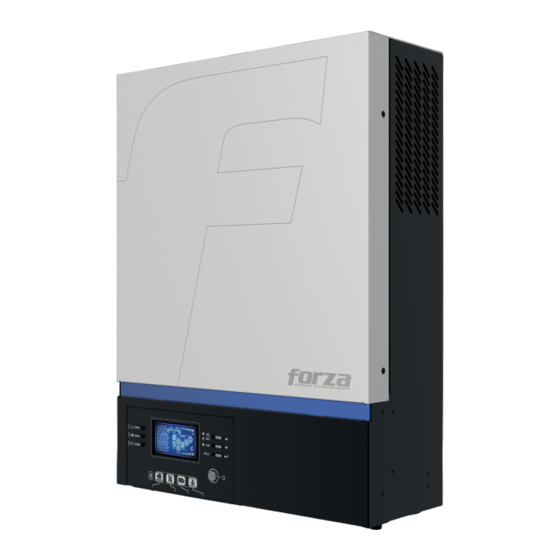
- Page 1 User Manual Off-grid hybrid solar inverter and charger FIO-G21K24 FIO-G23K24 FIO-G25K48 1.5KW/3KW/5KW...
-
Page 2: Table Of Contents
MPPT charger, the GAMMA optimizes energy harvesting while reducing system maintenance and operational costs. As the inverter has been conceived to easily integrate with the Forza battery and the embedded application, it provides seamless status monitoring along with remote management, all in real-time. -
Page 3: Product Overview
• Wide DC input range 2. Product overview • Selectable input voltage range for home appliances and personal computers • Configurable AC/Solar input priority via LCD • Detachable LCD module with remote control up to 20m (using a wired connection) •... -
Page 4: Hardware Connections
Preparation For proper ventilation and heat dissipation, allow clearances of approximately 20cm (8in) to either side 1. Start by unfastening the two screws holding the bottom cover in place, as shown below. and 50 cm (20in) above and below the unit. When more than one unit is installed, make sure to position them at the same level. -
Page 5: Ac Connections
2. Assemble the battery ring terminals based on the 4.1 AC connections recommended battery cable and terminal size. This step only applies to the 3KW/5KW models. Before any connections are made, open all disconnect devices on both AC and DC sources. 3. - Page 6 ) must be connected first. configurations are laid out in the table below. Ground (yellow-green) SOLAR INPUT LINE (brown or black) For the FIO-G21K24, a minimum of 5 pieces in series and a maximum of Qty of Total input Neutral (blue) Solar panel spec.
-
Page 7: Remote Display Panel Installation
Step 1. Remove the screw on the bottom of LCD panel and pull out the module from the case. Detach the cable from the remote communication port. Recommended tool: 4mm flat blade screwdriver Step 2. Make sure to replace the retention plate back to the inverter case. 4. -
Page 8: Operation
Communication options Battery Management System (BMS) communication The inverter supports several forms of communication. It is recommended to purchase a special communication cable if you are connecting to lithium-ion battery banks. Please refer to the BMS communication installation section for details. A. -
Page 9: Display Panel
5.5. LCD display icons 5.2. Display panel The display contains a variety of icons showing the status and operation mode of the inverter. The detachable module features an LCD display with status and system information in real time, six LED indicators plus six configuration buttons. -
Page 10: Advanced Operation
Mode of operation Battery data Indicates that the unit is connected to an AC source Battery level indicator at 0-24%, 25-49%, 50-74%, and 75-100% of its capacity In battery mode, the number of bars shows the remaining charge Indicates that the unit is connected to a PV panel In line mode, the number of bars indicate how much charge it will need to reach its full capacity Indicates that the inverter is operating in bypass mode... - Page 11 The total input generated 60A (default) This setting ranges from 10A to Restart disable (default) Restart enable by solar and AC sources 60A for the 1.5KW model, and combined from 10A to 100A for the (Max. charging current = 3KW/5KW model. Auto-restart when an utility charging current + Increments are 10A per click.
- Page 12 Available options in the 1.5KW/3KW model When the inverter/charger operates in standby, line or fault mode, the charger source can be programmed as shown below 23.0V (default) The setting ranges from 22.0V to 25.50V in increments of 0.5V per Solar for battery first Solar energy will charge the battery click.
- Page 13 Alarm on (default) Alarm off 1.5KW/3KW default 5KW default setting: 54.0V setting: 27.0V Beeps when the primary source is interrupted Float charging voltage This is selectable when item 05 is set to USER-DEFINED. Bypass disable (default) Bypass enable Available settings are: - 25.0V to 31.5V for the 1.5KW/3KW model - 48.0V to 61.0V for the 5KW model.
- Page 14 1.5KW/3KW default 5KW default setting: 58.4V Not reset (default) Reset setting: 29.2V Reset all stored data for PV generated power and output load energy Equalization voltage Available settings are: - 25.0V to 31.5V for the 1.5KW/3KVA model - 48.0V to 61.0V for the 5KVA model. Do not reset (default) Reset Increments of 0.1V per click.
-
Page 15: Function Buttons
6.2. Function buttons Minutes can be configured from 0 to 59 There are three buttons on the display panel designed to implement special functions, such as USB OTG, timer settings for output source priority and timer settings for charger source priority. Time setting –... - Page 16 Error notifications for USB On-The-Go functionality: Press the “ ” button to configure the Solar first timer. Press the “ ” button to select the start time. With the “ ” or “ ” selection button, set the desired values followed by the “ ”...
-
Page 17: Display Information
6.3. Display information Charging current from utility and PV AC and PV charging current=50A sources The LCD display has three sections with system information and readings. These readings can be switched to display the different parameters. The order illustrated in the table is the order of the screens when the UP and DOWN selection keys are pressed: Selection parameter LCD display... - Page 18 Battery voltage (with decimal) Battery voltage=25.5V / Output voltage=230V Load in watts When the load size is less than 1kW, the left field The upper left field displays the BATT voltage, while the The lower left field displays a W marker will display the W marker, as shown below section below continues to show the output voltage.
-
Page 19: Battery Charging Modes
6.4. Battery charging modes Total amount of PV energy generated / Total Total PV energy production = 38.8MWh / Total energy output output to power the loads= 98.8MWh. Mode Description LCD display Standby mode In this state, the unit does Charging from utility and PV power The charger can operate not supply any output to the... - Page 20 Line mode In this mode, the inverter Charging from utility and PV sources Battery mode The unit will provide output Power from battery and PV sources can provide output power power from battery and/or from the mains, while PV sources charging the battery at the same time Charging from an AC source...
-
Page 21: Fault Codes And Warning Indicators
BATTERY EQUALIZATION However, when the cycle time expires and the battery voltage fails to reach the equalization point, then the time will be extended to ensure that this occurs. If battery voltage drops below the equalization voltage when Equalization mode is used for Flood and User-defined batteries. the timeout is reached, the charger will then return to Float to prevent battery damage. -
Page 22: Troubleshooting
8. Troubleshooting Output voltage is too low The inverter has indications for error or warning conditions. An error is defined as a critical fault that shuts the unit PV voltage over the specified limit down. A warning is a non-critical fault that allows the unit to continue operating. Some warnings may become errors if unattended. -
Page 23: Approximate Runtime Chart
10. Technical specifications Fault code 51 Overcurrent or surge Table 1 Bus voltage is too low Line mode specifications The temperature of internal Restart the unit, if the error Fault code 52 Buzzer beeps converter components is over persists, return to service center INVERTER MODEL 1.5KW continuously and... -
Page 24: Table 3
Table 4 Low DC cut-off voltage 21.5VDC 43.0VDC General specifications For a load < 50% 21.0VDC 42.0VDC For a load ≥ 50% INVERTER MODEL 1.5KW High DC recovery voltage 32VDC 62VDC Operating temperature -10°C to 50°C High DC cut-off voltage 33VDC 63VDC Storage temperature... - Page 25 3. Installation and operation If communication between the inverter and the battery is successful, then the battery icon on the LCD display will blink. The process of establishing communications will normally take longer than one minute. After the equipment configuration, follow the steps below for installing the LCD panel with the inverter and lithium battery.
- Page 26 If communication between the inverter and the battery is successful, then the battery icon on the LCD If communication between the inverter and the battery is successful, then the battery icon on the LCD display will blink. The process of establishing communications will normally take longer than one minute. display will blink.
Need help?
Do you have a question about the FIO-G21K24 and is the answer not in the manual?
Questions and answers