Table of Contents
Advertisement
Quick Links
Advertisement
Table of Contents

Subscribe to Our Youtube Channel
Related Manuals for Visionix VX36

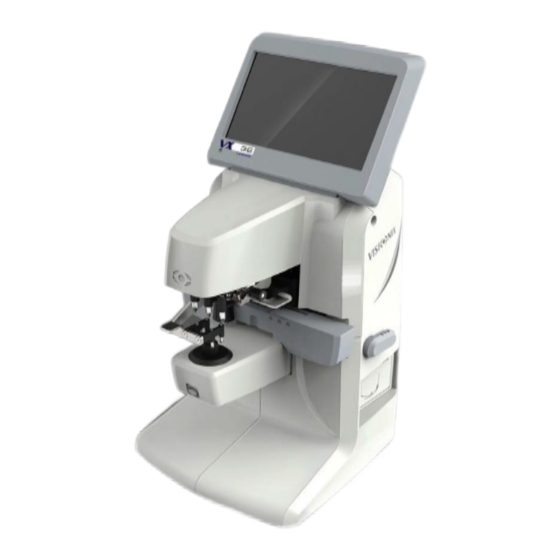
Summary of Contents for Visionix VX36
- Page 1 Visionix VX36 User Manual UM 8236-0000-ENG 26/02/2020...
-
Page 2: Table Of Contents
5. Configuring the Unit ............................24 5.1 Accessing the Configuration Settings......................25 5.2 Overview of the Configuration Tabs ......................25 Measurement settings 1 ..........................25 Measurement settings 2 ..........................26 Device Setting ............................... 27 Printer settings ............................. 28 Vx36 User manuel Page | 1... - Page 3 9.3 EMC Electromagnetic compatibility......................48 Electromagnetic immunity ........................... 49 9.4 Waste Electrical and Electronic Equipment (WEEE) Directive ..............51 9.5 Glossary of Terms ............................51 9.6 Manufacturer .............................. 52 9.7 Contact Information ........................... 53 Vx36 User manuel Page | 2...
-
Page 4: Introduction
1.Introduction Vx36 User manuel Page | 3... -
Page 5: Warning
The VX36 is an Automatic Lensmeter which has two major functions, namely, a measuring function (namely the ultraviolet transmission of a lens) and a marking function for marking the optical center. The Automatic Lensmeter also contains the P.D. (pupillary distance) and P.H. (pupillary height) measurements. -
Page 6: Safety
2.Safety Vx36 User manuel Page | 5... -
Page 7: General Safety
To avoid risk of electric shock or bodily injury, do not handle the electrical plugs with wet hands. • To avoid risk of electric shock or fire, make sure the VX36's power cord is not damaged before plugging it into an electrical outlet. -
Page 8: Symbols
Do not place the VX36 in a hot air current (e.g. above a heater). • Keep the screen surface clean. Protect it from dust, fingerprints, and shocks. • When you switch off the VX36, wait at least 5 seconds before switching it on again. 2.4 Symbols Symbol Description... -
Page 9: Equipment And Installation
3. Equipment and Installation Vx36 User manuel Page | 8... -
Page 10: List Of Equipment Supplied
3.1List Of Equipment Supplied The VX36 package contains the following items: • VX36 unit • Contact lens holder • Power cable • Dust cover • 1 printer paper roll in the box and 1 roll already installed • User manuel 3.2 Equipment Parts... -
Page 11: Side View
Enables to hold and store data Side view Description Printer Prints out readings. For paper-loading instructions, see Loading Paper into the Printer Power button Turns the power supply to the unit on and off Vx36 User manuel Page | 10... -
Page 12: Under View
Connects a computer for data collection to the EMR software. 3.3 Installation Procedures Site Requirements The VX36 unit should be placed on a clear table or desktop close to a power outlet, in a clean environment, clear from dust, heavy humidity and light. Unpacking the unit •... -
Page 13: Electrical Connection
3.4 Turning the unit on and Off To Turn the unit on: On the unit, press the Power Button located at the left side of the vx36 To Turn the unit off: On the unit, press the Power Button located at the left side of the vx36... -
Page 14: Using The Unit
4.Using the Unit Vx36 User manuel Page | 13... -
Page 15: General
4.1 General The vx36 is operated through the application, which the user accesses by touching the touch screen. N° Description Settings To access the screen settings Lens mode button Initiates the Lens mode UV mode button Initiates the UV mode (UV-A) - Page 16 Selects the reading mode, either manual or automatic. Measurements mode button Indicates which lens type is selected, there are four choices, it can be progressive lens mode, Normal lens, Auto detection or contact lens mode Vx36 User manuel Page | 15...
-
Page 17: Lens Mode
Pupillary Distance/Pupillary Height, in this case for the right lens PD/dPH Total PD/ Difference PH between R&L lenses Left Notation Power of the left lens Readout is printable: S: sphere C: cylinder A: Axis Add: add power between near and far vision Vx36 User manuel Page | 16... - Page 18 LPD/LPH Pupillary Distance/Pupillary Height, in this case for the left lens Lens Measure Area: Progressive Lens Single vision lens Vx36 User manuel Page | 17...
-
Page 19: Contact Lens Mode
4.3 Contact Lens Mode This mode allows you to measure the power of contact lenses, to enable it you have to select it in the “Measurement mode button” (CL). And put the contact lens support: Vx36 User manuel Page | 18... -
Page 20: Uv-A - Blue Light Mode
Push on the measurement button (8), the green, blue, and UV transmission level of the lens will be displayed on the screen. To make another measurement switch to the other side of the frame (right or left). Vx36 User manuel Page | 19... -
Page 21: Ruler Mode
Values of height (height for left lens, delta of height right/left and height for right lens) according to the positions of the cursors (13&15) Cursors to determine the central position of left lens Nose indication to help to center properly the spectacles Vx36 User manuel Page | 20... -
Page 22: How To Use The Ruler Mode
➢ Align the right cursor on the mark of the right lens using the buttons (7&8&9&10). ➢ If the border of the spectacles is thick, move up the cursors and rules using (5) button. ➢ Read the PD (11) and height (12). Vx36 User manuel Page | 21... -
Page 23: Diameter Mode
Values of height for the selected (right or left side) cursor Cursor in the center of concentric circles of 55-66-75mm for the blue circles and 60-70 mm for the black circles. Nose indication to help to center properly the spectacles Vx36 User manuel Page | 22... -
Page 24: How To Use The Diameter Mode
➢ Align the left cursor on the mark of the left lens using the buttons (1&2&3&4). ➢ Read the diameter: the good diameter corresponds to the smallest circle which includes the shape of the lens everywhere. ➢ Select right side (6). ➢ Do the same actions. Vx36 User manuel Page | 23... -
Page 25: Configuring The Unit
5. Configuring the Unit Vx36 User manuel Page | 24... -
Page 26: Accessing The Configuration Settings
5.1 Accessing the Configuration Settings The use of the vx36 may be customized through five different settings tabs. To access on the settings button, click on this , it is always located at the top right of the screen. 5.2 Overview of the Configuration Tabs Measurement settings 1 N°... -
Page 27: Measurement Settings 2
Measurement settings 2 N° Description WaveLenght Light source wavelength standard choice PD-PH To enable, or not, the measure of the PD Auto R/L To activate the auto side change when you make measurement Auto ADD Vx36 User manuel Page | 26... -
Page 28: Device Setting
Enables to select the interface language Screen Sleep Enables to schedule or not the automatic sleeping of the screen. Brightness Enables to adjust the brightness of the screen. There are 4 choices from weak to strong. Vx36 User manuel Page | 27... -
Page 29: Printer Settings
Enables to activate or not the printer. When the automatic mode is selected a printout is automatically generated once a measurement is completed. Time Print Enables to print the time on the ticket. User Print Vx36 User manuel Page | 28... -
Page 30: Export Settings
Device settings Touch it to go to the device screen settings Printer settings Touch it to go to the printer screen settings Export settings Touch it to go to export screen settings Export Settings Vx36 User manuel Page | 29... - Page 31 Touch it to go to the first page Directory Enables to choose the directory in the in the device IP you have choose before Vx36 ID Enables to choose the VX36 ID Return Touch it to return at the main measurement screen Measurement settings 1...
- Page 32 Touch it to go to the measurement screen settings (2) Device settings Touch it to go to the device screen settings Printer settings Touch it to go to the printer screen settings Export settings Touch it to go to export screen settings Vx36 User manuel Page | 31...
-
Page 33: How Do I
6. How do I… Vx36 User manuel Page | 32... -
Page 34: How Do I Place Uncut Lenses
• Slowly lower the lens pressing device to fix the lens. • Locate the VX36 nose in the middle of the frame if you wish to measure the Pupillary Distance. 6.3 How do I place contact lenses • Remove the framed lens support •... -
Page 35: How Do I Measure Single Vision Lenses
Note: if the lens side is specified after measurement, the measured data will be cleared • Align the lens, by moving the lens target to the center of the alignment circle. Note: If you measure framed lenses, make sure the frame touches the lens table. Vx36 User manuel Page | 34... -
Page 36: How Do I Measure Multifocal Lenses
First measure the far vision area: align the lens, by moving the lens target to the center of the alignment circle and press the Measurement button located on the front of the VX36 (to hold and store the measured data). -
Page 37: How Do I Measure Contact Lenses
First measure the far vision area: align the lens, by moving the lens target to the center of the alignment circle and press the measurement button located at the front of the VX36 (to hold and store the measured data). -
Page 38: How Do I Measure Pd And Ph
In manual mode • Press the measurement button located on the front of the VX36, to hold and store the measured data. Note: in order to be more accurate, move the left and right lens towards the same direction during alignment. -
Page 39: How Do I Change The Cylinder Convention
The icon on the left is he selected one. 6.12 How do I change lens type? The vx36 unit automatically detects the lens type, but in order to save some time, you can manually change the lens type. In the configuration screen Click on the settings button The Configuration screen is displayed (refer to Overview of the Configuration Tabs). -
Page 40: How Do I Clear Data
The preparation should be done by a technician. > Connection • Connect the VX36 unit to the target device (phoropter, computer) using a serial cable connection or via a wireless connection like: RS-232 cable or RS 232 to Bluetooth adaptor. > Settings... - Page 41 Note: the data communication terminal is not isolated from the internal circuits. Connecting inappropriate device(s) with VX36 which do not follow RS-232C protocols, may damage the unit. It is recommended to contact your local distributor before using the data communication terminal.
-
Page 42: What Should I Do If
7. What Should I do if …? Vx36 User manuel Page | 41... -
Page 43: Troubleshooting
Troubleshooting You may encounter some of the following common problems while working with the VX36. If you do, try following the suggested solutions listed. If the problem persists and the suggested solution does not remedy it, contact a qualified service representative or your local distributor. -
Page 44: Maintenance
8. Maintenance Vx36 User manuel Page | 43... -
Page 45: Cleaning The Unit
8.3 Loading Paper into the Printer The printer is mounted on the left side of the vx36 unit. If the paper roll is used up, a red line appears on the printer paper. -
Page 46: Replacing The Self Inking Pens (Eu Version)
Touching the Tip may result in damage to the tip of the pen and the dots marked on the lens may not be accurate CAUTION: Fastening the screw too tightly may result in damage to the ink cartridge. Vx36 User manuel Page | 45... -
Page 47: Appendices
9. Appendices Vx36 User manuel Page | 46... -
Page 48: Technical Specifications
-10°C to + 55°C Hygrometry Relative Humidity below 90% Air pressure 700 hPA- 1060 hPA Transport condition Temperature -20°C to + 55°C Hygrometry Relative Humidity below 90% Air pressure 700 hPA- 1060 hPA Measurement specification Vx36 User manuel Page | 47... -
Page 49: Conformity To International Directives And Standards
Date of first CE marking 11/2017 9.3 EMC Electromagnetic compatibility The vx36 is intended for use in the electromagnetic environment specified below. The customer or the user of the VX36 should assure that is used in such an environment Emission test Compliance Electromagnetic environment –... -
Page 50: Electromagnetic Immunity
IEC 61000-3-3 Electromagnetic immunity The vx36 is intended for use in the electromagnetic environment specified below. The customer or he user of the VX36 should assure that it is used in such an environment Immunity test Test level IEC 60601... - Page 51 If the measured field strength in the location in which the VX36 is used exceeds the applicable RF compliance level above, the VX36 should be observed to verify normal operation. If abnormal performance is observed, additional measures may be necessary, such as reorienting or relocating the VX36.
-
Page 52: Waste Electrical And Electronic Equipment (Weee) Directive
It can also be relevant to binoculars: they must be adjusted to suit the user's Vx36 User manuel Page | 51... -
Page 53: Manufacturer
The process occurring when light strikes the surface of separation of two different media such that some is thrown back into the original media. 9.6 Manufacturer LUNEAU TECHNOLOGY OPERATIONS 2 rue Roger Bonnet 27340 Pont de l’Arche France Vx36 User manuel Page | 52... -
Page 54: Contact Information
Fax: (+35)1 214 170 227 Linha Verde: 800 205 142 Luneau Technology USA Inc. 224 W James St Bensenville, IL 60106 Tel : +1 800 729 1959 contact.us@luneautech.com Export Technical Support Tél.: (+33) 977556335 techsupport@luneautech.com Vx36 User manuel Page | 53...
Need help?
Do you have a question about the VX36 and is the answer not in the manual?
Questions and answers