
Related Manuals for Audiotec Fischer HELIX BT HD STREAMER

Summary of Contents for Audiotec Fischer HELIX BT HD STREAMER
- Page 1 BT HD STREAMER High Definition Bluetooth Audio Receiver ® User Manual Bedienungsanleitung...
-
Page 2: Table Of Contents
Inhaltsverzeichnis 1. Allgemeine Hinweise ......................4 2. Anschluss und Bedienelemente ..................5 3. Hardware-Konfiguration ....................6 3.1 Anschluss einer digitalen Signalquelle im SPDIF Format ..............6 3.2 Anschluss des optischen Digitalausgangs im SPDIF Format ..............6 3.3 Konfiguration des Standby-Modus (STBY) ....................6 3.4 Optional: Freisprechmikrofon anschließen ...................6 3.5 Optional: Konfiguration des Freisprechprotokolls ................6 3.6 Anschluss des Multifunktion-Power Connectors ..................7 3.7 Koppeln (Pairing) eines Bluetooth... - Page 3 Audio Receivers. ® Der BT HD STREAMER wurde von uns nach neuesten technischen Erkenntnissen entwickelt und zeichnet sich durch eine hervorragende Verarbeitung und eine überzeugende Anwendung ausgereifter Technologien aus. Viel Freude an diesem Produkt wünscht Ihnen das Team von AUDIOTEC FISCHER...
-
Page 4: Allgemeine Hinweise
1. Allgemeine Hinweise Um alle Möglichkeiten des Produktes optimal ausschöpfen zu können, lesen Sie bitte sorgfältig die nachfolgenden In- stallationshinweise. Wir garantieren, dass jedes Gerät vor Versand auf seinen einwandfreien Zustand überprüft wurde. Wir empfehlen, die Installation von einem Einbauspezialisten vornehmen zu lassen, da der Nachweis eines fachge- rechten Einbaus und Anschlusses des Gerätes Voraussetzung für die Garantieleistungen sind. -
Page 5: Anschluss Und Bedienelemente
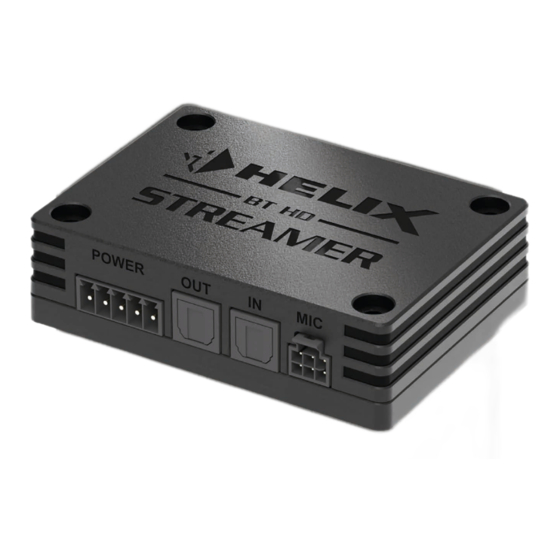
2. Anschluss und Bedienelemente Multifunktion-Power Connector Pair-Taster Seite 7, Punkt 3.6 Seite 9, Punkt 4.1 Optischer Digitalausgang Status LED Seite 6, Punkt 3.2 Seite 9, Punkt 4.2 Optischer Digitaleingang Freisprechprotokoll-Schalter Seite 6, Punkt 3.1 Seite 6, Punkt 3.5 Mikrofoneingang Standby-Schalter Seite 6, Punkt 3.4 Seite 6, Punkt 3.3 Pin-Belegung des Multifunktion-Power Connector... -
Page 6: Hardware-Konfiguration
3. Hardware-Konfiguration Konfigurieren Sie den BT HD STREAMER in der nachfolgenden Reihenfolge. Um Anschlussfehler und Beschädigungen zu vermeiden, fragen Sie im Zweifelsfall Ihren Einbauspezialisten und be- achten Sie zwingend die allgemeinen Anschluss- und Einbauhinweise (siehe Seite 4). Anschluss einer digitalen Signalquelle im SPDIF Format Sofern Sie über eine Signalquelle mit optischem Digitalausgang verfügen, kann diese an den optischen Digi- taleingang (3) des BT HD STREAMERs angeschlossen werden. -
Page 7: Anschluss Des Multifunktion-Power Connectors
Anschluss des Multifunktion-Power Connectors Eine Übersicht der Pin-Belegung des Multifunktion-Power Connectors finden Sie auf Seite 5. Verwenden Sie zum Anschluss ausschließlich die mitgelieferten Power Input Stecker mit integrierten Schraubklemmen. +12 V / +24 V: Anschluss für die Plusleitung. Das Versorgungskabel ist entweder direkt an den Pluspol der Batterie oder an einen Stromverteiler anzuschließen, der mit dem Pluspol der Batterie verbunden ist. -
Page 8: Koppeln (Pairing) Eines Bluetooth ® -Geräts
3. Hardware-Konfiguration Koppeln (Pairing) eines Bluetooth -Geräts ® Nachdem Sie den BT HD STREAMER wie zuvor beschrieben angeschlossen und konfiguriert haben, können Sie eine Signalquelle, wie beispielsweise ein Smartphone, wie folgt per Bluetooth verbinden: ® 1. Pairing-Modus aktivieren Aktivieren Sie den Pairing-Modus des BT HD STREAMERs mit Hilfe des Pair-Tasters (Seite 5, Punkt 5), über den Schalteingang des optionalen HELIX BT HD Hands-Free Microphone Kit oder über einen optionalen, externen Taster, welcher am Bluetooth -Pairing Anschluss (Seite 7, Punkt 3.6) des Multifunktion-Power Connecors ange-... -
Page 9: Weitere Funktionen
4. Weitere Funktionen Pair-Taster Dieser Taster dient zum Ausführen verschiedener Pairing-Funktionen des BT HD STREAMERs. Die Status LED (Punkt 4.2) gibt Informationen zum aktuellen Verbindungs-Status. - Kurzer Tastendruck (<3s): Reconnect → Verbindet sich automatisch zum zuletzt gekoppelten Gerät, sofern beim Tastendruck kein Gerät verbunden ist oder Disconnect →... -
Page 10: Anschlussbeispiele
5. Anschlussbeispiele BT HD STREAMER als externer Bluetooth Receiver ® Der BT HD STREAMER wird als externer Bluetooth Receiver als zusätzliche Signalquelle in das Soundsystem in- ® tegriert. Dabei erfolgt die Einschaltung des BT HD STREAMERs über das Remote-Ausgangssignal des angeschlos- senen DSPs / DSP-Verstärkers. -
Page 11: Bt Hd Streamer Als Externer Bluetooth ® Receiver Mit Zusätzlicher Digitaler Signalquelle
BT HD STREAMER als externer Bluetooth Receiver mit zusätzlicher digitaler Signalquelle ® Der BT HD STREAMER wird wie im Beispiel 5.1 als zusätzliche Signalquelle in das Soundsystem integriert. Zudem wird eine weitere Signalquelle über den optischen Digitaleingang des BT HD STREAMERs in das Soundsystem einge- bunden. -
Page 12: Stand-Alone Applikation
5. Anschlussbeispiele Stand-Alone Applikation Der BT HD STREAMER wird als Hauptsignalquelle integriert und schaltet das komplette Soundsystem ein- und aus. Dafür wird das Gerät im Standby-Modus betrieben (STBY-Schalter = On), so dass sich die Bluetooth -Signalquelle ® jederzeit mit dem Bluetooth -Receiver verbinden kann. -
Page 13: Stand-Alone Applikation In Verbindung Mit Einer Head Unit
Stand-Alone Applikation in Verbindung mit einer Head Unit Der BT HD STREAMER wird parallel zur Head Unit als Signalquelle integriert. Beide Signalquellen können nun das komplette Soundsystem ein- und ausschalten. Die Head Unit schaltet dabei das Soundsystem automatisch über die Lautsprecherausgänge ein. Sollte die Head Unit ausgeschaltet sein oder nicht genutzt werden, kann auch der BT HD STREAMER das komplette Soundsystem über eine Bluetooth -Signalquelle, wie im Beispiels 5.2, einschalten. -
Page 14: Anschluss Des Optionalen Helix Bt Hd Hands-Free Microphone Kit
6. Anschluss des optionalen HELIX BT HD Hands-Free Microphone Kit Im nachfolgenden Abschnitt werden nun die wichtigsten Schritte zum Anschluss des HELIX BT HD Hands-Free Microphone Kit beschrieben. Im Sinne der Unfallsicherheit muss das Mikrofon und dessen Kabel sicher befestigt werden, damit es keine Gefahr für die Insassen und/oder das Fahrzeug während der Fahrt oder einer kritischen Fahrsituation, wie bei- spielsweise einer Gefahrenbremsung, darstellt. - Page 15 5. Verlegen des Kabels Verlegen Sie das Kabel des Mikrofons so, dass es nicht zu Behinderungen während der Fahrt führt, und dass kei- ne Klemm-, Quetsch- oder Bruchgefahr besteht. Bei scharfen Kanten (Blechdurchführungen) müssen alle Kabel gegen Durchscheuern gesichert sein. 6.
- Page 16 6. Anschluss des optionalen HELIX BT HD Hands-Free Microphone Kit 8. Freisprechprotokoll am BT HD STREAMER aktivieren Stellen Sie den Freisprechprotokoll-Schalter (HFP) auf „On“. Hinweis: Die Aktivierung muss zwingend im ausgeschalteten Zustand vorgenommen werden. 9. Mobilgerät neu verbinden Starten Sie Ihr Soundsystem und aktivieren Sie den Pairing-Modus des BT HD STREAMERs entweder mit dem Pair-Taster (Seite 5, Punkt 5) oder einem externen Taster.
-
Page 17: Problembehandlung
7. Problembehandlung Problem: Keine Bluetooth -Verbindung: ® Mögliche Ursache: Der BT HD STREAMER kann keine Verbindung zur Bluetooth -Signalquelle herstellen. ® Möglicherweise liegt eine Inkompatibilität zwischen dem BT HD STREAMER und der Bluetooth -Signalquelle vor, oder es gibt Probleme mit der Bluetooth -Verbindung. -
Page 18: Technische Daten
8. Technische Daten 78.3 mm 3.08“ Betriebsspannung 10,5 - 32 Volt (max. 5 Sek. bis zu 6 Volt) Leistungsaufnahme DC 12 / 24 V 100 mA max. (+ bis zu 200 mA Remote-Ausgangsstrom) Standby-Leistungsaufnahme ~3 mA (Sandby-Schalter On) Max. Remote-Ausgangsstrom 200 mA Bluetooth Standard... -
Page 19: Rechtliche Hinweise
Die Bluetooth Wortmarke und die Logos sind eingetragene Warenzeichen der Bluetooth SIG, ® Inc. und jegliche Nutzung dieser Marken durch die Audiotec Fischer GmbH geschieht unter Lizenz. Andere Handelsmarken und Handelsnamen gehören den jeweiligen Inhabern. Hinweise zur Entsorgung Dieses Symbol bedeutet, dass das Produkt nicht über den Hausmüll entsorgt werden darf, sondern bei einer entsprechenden Sammelstelle zum Recycling abgegeben werden muss. - Page 20 Table of contents 1. General information ......................22 2. Connectors and control units ..................23 3. Hardware configuration ....................24 3.1 Connection of a digital signal source in SPDIF format ................ 24 3.2 Connection of the optical digital output in SPDIF format ..............24 3.3 Configuration of the standby mode (STBY) ..................24 3.4 Optional: Connection of a hands-free microphone ................24 3.5 Optional: Configuration of the hands-free protocol ................24...
- Page 21 Congratulations on purchasing this High Definition Bluetooth Audio receiver. ® We developed the BT HD STREAMER based on state-of-the-art engineering which is reflected in its exceptional quality and the impressive use of sophisticated technologies. We hope you enjoy using this product AUDIOTEC FISCHER Team...
-
Page 22: General Information
1. General information To make optimal use of all the possibilities this product provides, please carefully read through the following installation instructions. We guarantee that the flawless condition of every device has been checked before delivery. We recommend appointing a specialist to install the product, as the verification of professional installation and connec- tion of the device is a prerequisite for the warranty services. -
Page 23: Connectors And Control Units
2. Connectors and control units Multi-purpose Power Connector Pair pushbutton Page 25, point 3.6 Page 27, point 4.1 Optical output Status LED Page 24, point 3.2 Page 27, point 4.2 Optical input Hands-free Protocol switch Page 24, point 3.1 Page 24, point 3.5 Microphone input Standby switch Page 24, point 3.4... -
Page 24: Hardware Configuration
3. Hardware configuration Configure the BT HD STREAMER in the following order. To avoid connection errors and damage, ask your installation specialist in case of doubt and be sure to observe the general connection and installation instructions (see page 22). Connection of a digital signal source in SPDIF format If you have a signal source with an optical digital output, this can be connected to the BT HD STREAMERs optical digital input. -
Page 25: Connection Of The Multi-Purpose Power Connector
Although the current consumption of the HELIX BT HD STREAMER is very low at approx. 100 mA (additionally, plus up to 200 mA due to the maximum output current of the remote output), cables with a cross-section of at least 1 mm²... -
Page 26: Pairing Of A Bluetooth ® Device
3. Hardware configuration Pairing of a Bluetooth device ® Once you have connected and configured the BT HD STREAMER as described before, you can connect a signal source, such as a smartphone, via Bluetooth via the following steps: ® 1. Activate pairing mode Activate the pairing mode of the BT HD STREAMER using the pair pushbutton (page 21, point 5), via the gate input of the optional HELIX BT HD Hands-Free Microphone Kit or via an optional external pushbutton connected to the Bluetooth... -
Page 27: Additional Functions
4. Additional functions Pair pushbutton This button is used to execute various pairing functions of the BT HD STREAMER. The Status LED (point 4.2) provides information on the current connection status. - Short button press (<3s): Reconnect → Automatically connects to the last paired device if no device is connected when the button is pressed Disconnect →... -
Page 28: Connection Examples
5. Connection examples BT HD STREAMER as external Bluetooth receiver ® The BT HD STREAMER is integrated into the sound system as an external Bluetooth receiver and additional signal ® source. The BT HD STREAMER is switched on via the remote output signal of the connected DSP / DSP amplifier. Standby mode is switched off (STBY switch = off). -
Page 29: Bt Hd Streamer As External Bluetooth ® Receiver With Additional Digital Signal Source
BT HD STREAMER as external Bluetooth receiver with additional digital signal source ® The BT HD STREAMER is integrated into the sound system as an additional signal source, as in the example 5.1. In addition, another signal source is integrated into the sound system via the optical digital input of the BTHD STREAMER. In this case, the sound system is switched on via an external remote signal or the automatic switch-on function of the DSP / DSP amplifier. -
Page 30: Stand-Alone Application
5. Connection examples Stand-alone application The BT HD STREAMER is integrated as main signal source and switches the entire sound system on and off. To do this, the device is operated in standby mode (STBY switch = on) so that the Bluetooth signal source can connect to ®... -
Page 31: Stand-Alone Application In Combination With A Head Unit
Stand-Alone application in combination with a head unit The BT HD STREAMER is integrated as one signal source parallel to the head unit. Both signal sources can now switch the entire sound system on and off. The head unit automatically switches the sound system on via the loudspeaker outputs. -
Page 32: Connection Of The Optional Helix Bt Hd Hands-Free Microphone Kit
6. Connection of the optional HELIX BT HD Hands-Free Microphone Kit The following section describes the most important steps for connecting the HELIX BT HD Hands-Free Microphone Kit. For safety reasons the microphone and its cable harnesses must be installed professionally to prevent hazard to the vehicle and / or risk of injury to the passengers during a critical driving situation such as an emergency braking. - Page 33 5. Installing the cable harness Install the microphone cable in such a way that it does not cause any disturbance while driving and prevent risks of pinching hazards or crushing. Make sure that the wiring is fully protected from cutting or wear at sharp edges. 6.
- Page 34 6. Connection of the optional HELIX BT HD Hands-Free Microphone Kit 8. Activate hands-free protocol on the BT HD STREAMER Set the hands-free protocol switch (HFP) to "on". Note: Activation must be done when the device is switched off. 9. Reconnect mobile device Start your sound system and activate the pairing mode of the BT HD STREAMER either with the pair pushbutton (see page 23, point 5) or an external pushbutton.
-
Page 35: Trouble Shooting
7. Trouble shooting Problem: No Bluetooth connection: ® Possible reason: The BT HD STREAMER cannot establish a connection to the Bluetooth signal source. ® There may be an incompatibility between the BT HD STREAMER and the Bluetooth signal source, ® or there may be problems with the Bluetooth connection. -
Page 36: Technical Data
8. Technical data 78.3 mm 3.08“ Operating voltage 10.5 - 32 Volts (max. 5 sec. down to 6 Volts) Power rating DC 12 / 24 V 100 mA max. (+ up to 200 mA remote output current) Standby power consumption ~3 mA (Sandby switch on) Max. -
Page 37: Legal Information
Bluetooth SIG, Inc. ® and any use of such marks by Audiotec Fischer GmbH is under license. Other trademarks and trade names are those of their respective owners Correct disposal of this product This symbol means the product must not be discarded as household waste, and should be delivered to an appropriate collection facility for recycling. - Page 38 Audiotec Fischer GmbH Hünegräben 26 - 28 · 57392 Schmallenberg ·Germany Tel.: +49 2972 9788 0 · Fax: +49 2972 9788 88 E-mail: helix@audiotec-fischer.com · Internet: www.audiotec-fischer.com Made in China...
Need help?
Do you have a question about the HELIX BT HD STREAMER and is the answer not in the manual?
Questions and answers