Table of Contents
Advertisement
Quick Links
Advertisement
Table of Contents

Related Manuals for Genea BIOMEDX Gavi


Summary of Contents for Genea BIOMEDX Gavi
- Page 1 User Manual...
- Page 2 GENEA BIOMEDX QFRM168-14-022020...
- Page 3 This manual and all contents contained herein are subject to copyright. All rights reserved. No part of this user manual may be reproduced, copied, translated or transmitted in any form or by any means without the prior written approval of Genea Biomedx. Technical Support...
-
Page 4: Table Of Contents
GENEA BIOMEDX QUICK VIEW Warnings & Cautions VIII Safety Instructions About Gavi Installation & Setup Operating Gavi Error Alerts User Maintenance Test Index Notes QFRM168-14-022020... - Page 5 GAVI USER MANUAL GAVI USER MANUAL TABLE OF CONTENTS INTRODUCTION Warnings & Cautions Definition of Symbols List of Icons XIII 1. SAFETY INSTRUCTIONS 1.1. Perishables 1.2. Electrical 1.3. Heating 1.4. Liquid Nitrogen 1.4.1. Handling 1.4.2. Ventilation 1.5. Hazardous Material 1.6. Electromagnetic Compatibility 1.7.
- Page 6 4.2.1. Indications for Use/Intended Use 4.2.2. Consumable Provided 4.2.3. Storage & Stability 4.2.4. Preparation & Directions for Use 4.3. Gavi Tip & Seal Cartridge 4.3.1. Indications for Use/Intended Use 4.3.2. Consumable Provided 4.3.3. Storage & Stability 4.3.4. Preparation & Directions for Use 4.4.
- Page 7 7.1. List of General Equipment Needed 7.2. Warming Setup Instructions 7.2.1. Preparation of Culture Dishes 7.2.2. Preparation of Equipment 7.3. Warming Instructions 7.3.1. Retrieval of the Gavi Pods to be Warmed 7.3.2. Warming Procedure: Oocyte Stage 7.3.3. Warming Procedure: Cleavage Stage QFRM168-14-022020...
- Page 8 11.3.2. Preparing the Gavi Pods with VitBase 11.4. Commencing the Protocol Run 11.5. Check Number One: Drain Volume 11.6. Check Number Two: Final Volume 11.7. Sealing & Vitrification of the Gavi Pods 11.8. Warming & Seal Checks 11.8.1. Preparing the Workspace 11.8.2. Warming the Gavi Pods 11.8.3.
- Page 9 GAVI USER MANUAL 11.8.4. Check Number Four: Post-Peel Seal Check 11.9. Pass/Fail Assessment 11.9.1. Maintenance Test Failures 11.10. Cleanup & Filing 11.11. Appendix A: User Maintenance Test Record 12. INDEX 13. NOTES QFRM168-14-022020...
- Page 10 GENEA BIOMEDX QFRM168-14-022020...
-
Page 11: Warnings & Cautions
GAVI USER MANUAL INTRODUCTION It is the owner’s responsibility to ensure that all users of Gavi have read and understood this user manual before operating the instrument. This user manual is for readers who are familiar with clinical and laboratory techniques, instruments, and personal safety procedures and equipment. - Page 12 Do not use the Gavi Pod, the Tip & Seal Cartridge, and the Medium Cartridge if they have passed their expiration dates or if the packaging appears damaged. • Do not use the Gavi Pod and the Tip & Seal Cartridge if they appear to be damaged or look defective. •...
- Page 13 • Do not attempt to carry Gavi alone; the instrument weighs 59 kg. • To minimize the risk of injury, Gavi should be carried by two people using the appropriate good-lifting and safe-carrying procedures. WARNING: Before use, inspect the Gavi Pod for debris or contamination. Discard the Gavi Pod if contaminated.
- Page 14 When fewer than four Gavi Pods are to be vitrified, the Gavi Pods should be arranged sequentially starting at the end closer to the Cassette’s Label Area. For example, if two Gavi Pods are to be vitrified, the Gavi Pods must be placed only in Location A and Location B.
- Page 15 WARNING: When an Error Alert appears on Gavi, the first priority is the survival of the oocyte/ embryo. Always return the oocyte/embryo to the VitBase dish if the error cannot be corrected within a short time.
-
Page 16: Definition Of Symbols
GENEA BIOMEDX Definition of Symbols Manufacturer Date of Manufacture Batch Code Serial Number Reference Use By Keep Away from Sunlight Sterile Using Irradiation Do Not Resterilize Single Use Only. Do Not Re-use Caution. Consult the User Manual Do Not Use if the Package is Damaged... -
Page 17: List Of Icons
Indicates Medium Cartridge position on the Operating Tray Indicates Tip & Seal Cartridge position on the Operating Tray Add. Used to indicate the number of Gavi Pods to be processed Subtract. Used to indicate the number of Gavi Pods to be processed... - Page 18 Access Service Settings Warning: Gavi Pod Error Warning: Medium Cartridge Error Warning: Tip & Seal Cartridge Error Warning: Gavi Door Close Error Warning: Lid Seal Error Warning: Liquid Nitrogen Error, Missing LN Bucket Warning: SD Card Error, Missing or Full SD Card...
-
Page 19: Safety Instructions
Cartridge if they have passed their expiration dates or if the packaging appears damaged. • Do not use the Gavi Pod and the Tip & Seal Cartridge if they appear to be damaged or look defective. • Do not use the Medium Cartridge if the vials appear to have any leaks. -
Page 20: Electrical
GENEA BIOMEDX 1.2. Electrical WARNING: Gavi contains no user serviceable parts. All repairs must be carried out only by an authorized service technician. WARNING: To reduce the risk of electric shock: • Do not attempt to repair or modify any part of the instrument •... -
Page 21: Handling
GAVI USER MANUAL CAUTION: To reduce the risk of instrument damage: • Do not open the Gavi Access Door while the LN Bucket containing liquid nitrogen is being removed from or placed into the instrument. 1.4.1. Handling WARNING: • Always take care when transferring or handling liquid nitrogen. -
Page 22: Electromagnetic Compatibility
2012 Ed 2). These limits are designed to provide reasonable protection against harmful interference in a typical laboratory environment. 1.7. Installation & Maintenance Installation, inspection, calibration and service of Gavi must be carried out only by an authorized service technician. QFRM168-14-022020... -
Page 23: About Gavi
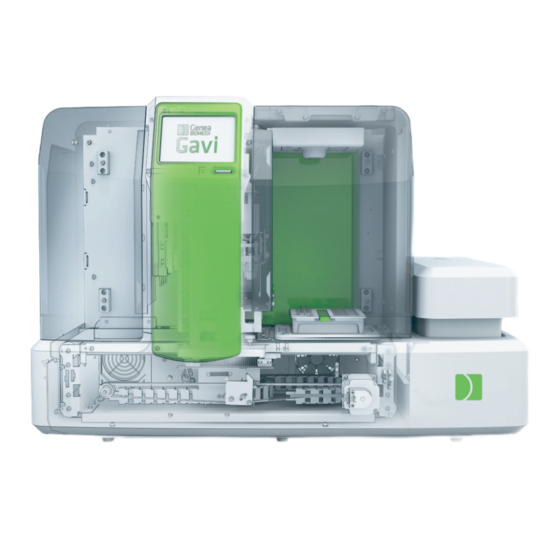
GAVI USER MANUAL 2. ABOUT GAVI 2.1. Indications for Use/Intended Use Gavi is intended for use in a clinic or laboratory environment for the preparation and vitrification of oocyte, zygote, cleavage and blastocyst stage embryos. 2.2. Instrument Description Gavi is designed to automate the equilibration steps in the vitrification process to minimize the variability that occurs during cryopreservation. -
Page 24: Rear Of The Instrument
GENEA BIOMEDX 2.4. Rear of the Instrument Rear Air Vents VGA Connection Service Mode Only 2.5. Side of the Instrument Power Switch Power Cord Connection QFRM168-14-022020... -
Page 25: Installation & Setup
Do not attempt to carry Gavi alone; the instrument weighs 59 kg. • To minimize the risk of injury, Gavi should only be carried by two people using the appropriate good-lifting and safe-carrying procedures. Gavi must be installed and tested only by an authorized service technician. During installation, testing and calibration of the instrument are performed to ensure correct operation. -
Page 26: Instrument Settings
3. Switch mains power supply on. 4. Switch on Gavi’s Power Switch. 5. Power on Gavi using the Power Switch located on the side of the instrument. The Genea Biomedx logo will appear on the User Interface followed by the Warm-Up Screen. -
Page 27: Installing & Removing The Sd Card
Once the Date & Time settings have been confirmed, the Home Screen will be displayed. NOTE: Gavi will not automatically update for local time conditions and will need to be manually adjusted for changes in time, such as daylight savings. -
Page 28: About The Consumables
GENEA BIOMEDX 4. ABOUT THE CONSUMABLES 4.1. General Information 4.1.1. Labeling Symbols Manufacturer Date of Manufacture Batch Code Serial Number Reference Use By Keep Away from Sunlight Sterile Using Irradiation Do Not Resterilize Single Use Only. Do Not Re-Use Caution. Consult the User Manual... -
Page 29: Quality Control
GAVI USER MANUAL 4.1.2. Quality Control Each lot of consumables (Gavi Pod, Gavi Tip & Seal Cartridge, and Gavi Medium Cartridge) is tested for: • Endotoxin by a limulus amebocyte lysate (LAL) test Endotoxin level < 0.25EU/mL (except for the solutions in the Medium Cartridge <... -
Page 30: Gavi Pod
Gavi Pods are stable until the expiration date shown on the product label. The Gavi Pods cannot be resterilized after opening and must be discarded after use. Do not use the Gavi Pods if the expiration date has passed or if the seal or packaging appears damaged or broken. -
Page 31: Gavi Tip & Seal Cartridge
Gavi Pods. The Cartridge also contains the Lid Seal to seal the Gavi Pod and prevent cross-contamination between samples. 4.3.2. Consumable Provided The Gavi Tip & Seal Cartridge is supplied in a package of 20. It is supplied sterile and is for single use only. 4.3.3. Storage & Stability The Tip &... -
Page 32: Gavi Medium Cartridge
(13.5 mg/mL), dimethyl sulfoxide (DMSO) 16%, ethylene glycol 16% and 0.68M trehalose. The Gavi Medium Cartridge is supplied in a package of 20. It is supplied sterile and is for single use only. 4.4.3. Storage & Stability Before use, the Gavi Medium Cartridge must be stored in the clear plastic packaging tray at all times to ensure traceability. -
Page 33: Gavi Vial Decapper
4.5. Gavi Vial Decapper GAVI-VDC-01 4.5.1. Indications for Use/Intended Use The Gavi Vial Decapper is intended to be used to remove the Twist-Top Caps from the Gavi Medium Cartridges. 4.5.2. Accessory Provided The Gavi Vial Decapper is supplied as a single unit. -
Page 34: Gavi Cassette
Gavi Pods for vitrification and long-term cryogenic storage. The Cassette’s Handle has two Label Areas for patient identification. 4.6.2. Accessory Provided The Gavi Cassette is supplied in a package of 20. It is supplied non-sterile and is for single use only. 4.6.3. Preparation & Directions for Use See “Preparing the Consumables &... -
Page 35: Gavi Labels & Recommended Printer/Ribbon
The Gavi Labels are intended to be used to identify consumable/accessory items that are used in Gavi. Each set of Gavi Labels has twelve small labels that can be used to label Gavi Pods and Cassettes, and two large labels that can be used to label Cassettes, dishes and documents. -
Page 36: Gavi Operating Tray
Tip & Seal Cartridge Dock 4.8.1. Indications for Use/Intended Use The Gavi Operating Tray is intended for use in Gavi. The Operating Tray is designed to hold the Cassette and Gavi Pods, Gavi Medium Cartridges and Tip & Seal Cartridges securely in place during instrument operation. -
Page 37: Gavi Ln Bucket
Liquid Nitrogen Fill Line Handle 4.9.1. Indications for Use/Intended Use The Gavi LN Bucket is intended to hold liquid nitrogen. The Cassette and Gavi Pods are dunked into the liquid nitrogen contained in the LN Bucket to complete the vitrification process. The LN Bucket can be removed from the Gavi to transport the Cassette and Gavi Pods to long-term cryogenic storage. -
Page 38: Gavi Tweezers
4.10. Gavi Tweezers GAVI-TWE-01 4.10.1. Indications for Use/Intended Use The Gavi Tweezers are intended to be used to hold the Cassette as it is dunked into the Bucket. 4.10.2. Accessory Provided The Gavi Tweezers are supplied and packaged as a single unit. The Gavi comes supplied with one pair of Gavi Tweezers. -
Page 39: Gavi Storage Dividers
Round Storage Dividers Square Storage Dividers 4.11.1. Indications for Use/Intended Use The Gavi Storage Dividers are intended to be used with cryogenic storage canisters to provide an orderly organization of Cassettes and Gavi Pods. There are two types of Canister Divider Kits: •... -
Page 40: Gavi Working Station
4.12. Gavi Working Station GAVI-WST-01 4.12.1. Indications for Use/Intended Use The Gavi Working Station is intended to hold liquid nitrogen and is used to assist the removal of Gavi Pods from the Cassette. 4.12.2. Accessory Provided The Gavi Working Station consists of three parts: the Working Station bucket, a lid, and a metal block designed to fit in the bucket to provide a platform for the placement of the Cassette and Gavi Pods. -
Page 41: Preparing Gavi For Vitrification
Ensure that all tubes and culture dishes are suitable for use with oocytes/embryos. WARNING: It is essential that all Gavi users are familiar with the entire Gavi process before using the instrument for the first time, in particular, preparing the Gavi Pods with VitBase and loading the oocytes/embryos. -
Page 42: Preparing The Consumables & Accessories
To prepare the VitBase Dishes: 1. Prepare and label a 4-well culture dish. 2. Add 500 µL of VitBase to each required well (for example, if three Gavi Pods are to be vitrified, add 500 µL of VitBase to each of the three wells). -
Page 43: Preparing The Operating Tray
To ensure traceability, the Gavi Medium Cartridges should be loaded into the Gavi Operating Tray directly from the clear plastic packaging tray. • Each Gavi Pod to be frozen needs a Gavi Medium Cartridge and a Gavi Tip & Seal Cartridge. •... -
Page 44: Loading The Operating Tray Into Gavi
Medium Cartridge Tip & Seal Cartridge 5.3. Loading the Operating Tray into Gavi To Load the Operating Tray: Open the Gavi Access Door and gently place the Operating Tray over the Gavi Operating Tray Dock. Operating Tray Dock with Operating Tray... -
Page 45: Preparing The Gavi Pods & Cassette
Cassette’s Pod Bracket and the Pod Handle sits over the Magnetic Location Holder on the Cassette. 4. Place a Gavi Label (or identification mark) on the Label Area of each Gavi Pod to be used. 5. Place the Cassette onto the benchtop (to minimize the chance of debris falling into the empty Gavi Pods, the Cassette may be placed upside down on the benchtop). -
Page 46: Preparing The Gavi Ln 2 Bucket
Bucket with liquid nitrogen up to the Liquid Nitrogen Fill Line (see below). Liquid Nitrogen Fill Line 3. Return the LN Bucket to Gavi. 4. Place the lid on the LN Bucket to reduce liquid nitrogen evaporation. 5. Ensure that the Gavi Tweezers are within easy reach. QFRM168-14-022020... -
Page 47: Equilibrating The Oocytes/Embryos In Vitbase
GAVI USER MANUAL 5.3.3. Equilibrating the Oocytes/Embryos in VitBase VitBase is the initial holding solution for oocytes/embryos being processed by Gavi. Oocytes/embryos require equilibration in VitBase before being loaded into the Gavi Pods. The following items are required to equilibrate the oocytes/embryos: •... -
Page 48: Final Instrument Preparation
Preparing the Gavi Pods with VitBase) are to be completed within the five- minute period during which the oocytes/embryos are equilibrating in VitBase. 1. Remove the Twist-Top Caps from the Medium Cartridge vials using the Gavi Vial Decapper. 2. Remove the Covers from the Tip & Seal Cartridges. -
Page 49: Preparing The Gavi Pods With Vitbase
• Ensure that the Divot is full of VitBase and has no bubbles. If a bubble forms in the Gavi Pod Divot please discard the Gavi Pod and prepare a new one. • The Pipette Tip Well must be filled properly with VitBase. - Page 50 NOTE: To ensure the VitBase fills the entire Gavi Pod Channel (the area between the red lines in the image below), gently drag the pipette tip around the edge of the Gavi Pod Channel. After the VitBase is added to the Gavi Pod it will appear as in the following image. Gavi Pod...
-
Page 51: Loading The Oocytes/Embryos Into The Gavi Pods
Location C, and the final oocyte/embryo into the Gavi Pod at Gavi Pod Location D. Ensure that each embryo is correctly positioned in the Gavi Pod Divot. NOTE: The Gavi Pod can hold up to two oocyte, zygote or cleavage stage embryos or one blastocyst stage embryo. -
Page 52: Loading The Cassette Into Gavi
1. Gently place the distal end of the Cassette into the Operating Tray Cassette Dock and lower the Cassette Handle onto the tray, ensuring that the Cassette sits flush against the back of the Operating Tray. The magnets in the Cassette and Gavi Pods will clip into place ensuring correct positioning. -
Page 53: Operating Gavi
The Cassette should be dunked into the liquid nitrogen within two seconds of removal from Gavi. WARNING: Take care to limit the exposure of the vitrified Gavi Pods to room temperature during moving and storage. Exposure time should be less than two seconds. WARNING: Liquid nitrogen can cause serious injury or death. - Page 54 Bucket Lid and have the Gavi tweezers ready. 4. Listen for the second and final Warning Alarm. 5. When the second Warning Alarm sounds, open the Gavi Access Door and use the tweezers to retrieve the cassette from the Operating Tray.
- Page 55 10. Observe the dialogue box Do not remove tray and Tap on the User Interface to begin the Tip Eject process. 11. After the completion of the Tip Eject process, remove the Operating Tray from Gavi. on the Remove waste and consumables dialogue box. 12. Tap 13.
-
Page 56: Powering Off
6.3. Standby Mode If no selection is made from the Gavi Home Screen within 45 minutes, the instrument will go into Standby Mode. To prevent Gavi from entering Standby Mode, select the desired Protocol from the Home Screen. Once the Protocol is selected Gavi will begin an internal warm-up process. -
Page 57: Gavi Pod Warming Procedure
• It is recommended calibration of equipment is performed periodically WARNING: • All Gavi users should be trained in the handling and use of liquid nitrogen. WARNING: • Before your first time warming oocytes/embryos vitrified using Gavi, it is recommended that you are familiar with the entire Gavi process. -
Page 58: Warming Setup Instructions
6. Allow the solutions to equilibrate to 37°C for oocyte warming or room temperature for cleavage/blastocyst stage warming. 7. Prepare sufficient dishes for the number of Gavi Pods to be warmed. NOTE: It is recommended that each dish only be used for a maximum of two rounds of warming. -
Page 59: Warming Instructions
Bucket, retrieve the Cassette containing the Gavi Pods to be warmed from the long-term storage Dewar. 2. Place the Cassette onto the magnets on the side of the Gavi working station block. 3. Using tweezers retrieve the Gavi Pods to be warmed and place them onto the individual magnets of the Gavi working station block. -
Page 60: Warming Procedure: Cleavage Stage
7. Gently add 10µL WarmSol 1 from the preloaded pipette directly into the Gavi Pod’s divot. 8. Leave the cleavage stage embryo in the WarmSol 1 in the Gavi Pod for one minute. 9. During this one minute locate the embryo. If necessary, change the microscope focal plane and light source angle to assist. -
Page 61: Warming Procedure: Blastocyst Stage
9. During this one minute locate the blastocyst. If necessary, change the microscope focal plane and light source angle to assist. 10. After one minute in the WarmSol 1 in the Gavi Pod, transfer the blastocyst to the WarmSol 2 in well 2 of the warming dish and leave for three minutes. -
Page 62: Error Alerts
NOTE: • If the Protocol Run is restarted, Gavi will assume that the user has loaded any missing consumables and will run the Protocol for the number of Gavi Pods selected on the User Interface. •... -
Page 63: Door Close Error Mode
GAVI USER MANUAL 8.2. Door Close Error Mode The Door Close Error Alert indicates that the Gavi Access Door is not closed. If the Access Door is not properly closed, ensure there is nothing preventing the Access Door from closing and then close the door correctly. -
Page 64: Sd Card Error Mode
If required, backup the SD Card and then reformat it. 8.5. Lid Seal Error Mode The Lid Seal Error Alert indicates that Gavi has detected a malfunction while in the process of transferring a Lid Seal onto a Gavi Pod. -
Page 65: Temperature Error Mode
The Temperature Error Alert indicates that Gavi is outside the recommended normal operational temperature range, or the Peltier Module in Gavi is outside of its acceptable temperature range. Ensure that the room temperature is between 18 °C and 27 °C. -
Page 66: Maintenance & Service
9.2. Cleaning and Disinfection The outer/inner surfaces of the Gavi instrument can be wiped down with purified water or a mild detergent solution. Always wear protective gloves (latex or nitrile) when cleaning Gavi. -
Page 67: User Maintenance Test
NOTE: The User Maintenance Test is to be completed by the user, not by the authorized service technician. In order to ensure optimal Gavi performance, regular inspections are necessary for early detection of possible malfunctions. A User Maintenance Test must be conducted on a quarterly basis (see “User Maintenance Test”... -
Page 68: Decontamination
GENEA BIOMEDX 9.4. Decontamination If the Gavi is to be returned to the manufacturer or scrapped, the instrument will require decontamination. Decontamination must be carried out by an authorized service technician or an approved Genea Biomedx delegate. 9.5. Servicing Gavi Gavi must undergo an annual maintenance service by an authorized service technician. -
Page 69: Technical Specifications
>8 000 °C/min Medium Cartridge vial solution volume 300 µL 10.3. Instrument Life The life of the instrument is deemed to be five years. Genea Biomedx is not responsible for the instrument after this time period. 10.4. Technical Support Manufacturer... -
Page 70: User Maintenance Test
3 x User Maintenance Test Record printouts (see “Appendix A: User Maintenance Test Record” on page 60). 11.2. Preparation 11.2.1. Preparing Gavi 1. Power on Gavi using the Power Switch located on the side of the instrument. 2. Tap from the Tool Bar on the Home Screen. 3. Tap Check. -
Page 71: Preparing The Equipment
GAVI USER MANUAL Once the Protocol has been selected Gavi will take a few minutes to warm up and reach the Protocol Ready Screen. Continue with the following steps while Gavi warms up. 11.2.2. Preparing the Equipment WARNING: Liquid nitrogen can cause serious injury or death. Always follow your laboratory’s or clinic’s liquid nitrogen protocols and safety instructions. -
Page 72: Preparing The Gavi Pods With Vitbase
1. Set the pipette with the flexible tip to 2 µL and aspirate 2 µL of VitBase from the culture dish. 2. Place the pipette tip into the Gavi Pod Divot and slowly fill from the Divot Area, ensuring no bubbles are created. -
Page 73: Commencing The Protocol Run
2. Tap to start the Protocol Run. When Gavi displays the Run ID on the User Interface, copy it to the Gavi Run ID field in a new User Maintenance Test Record printout. Also enter the initials of the user conducting the Test in the Tester field. -
Page 74: Check Number Two: Final Volume
3. When the second Warning Alarm sounds open the Gavi Access Door. (The Operating Tray should be seen moving back to its original position.) 4. When the Operating Tray has come to a complete stop, use the Gavi Tweezers to grip the Cassette Handle. -
Page 75: Warming & Seal Checks
4. Remove the Cassette from the water. 11.8.3. Check Number Three: Pre-Peel Seal Check 1. Inspect the Gavi Pod Seal Lid on each of the Cassette’s Gavi Pods. The Seals should be concave or flat (not convex or popped). 2. Record the result by ticking the appropriate box in Check #3 of the User Maintenance Test Record printout. - Page 76 2. Tick whether the Check is a pass or fail according to the criteria in the table above 3. If all Checks have passed for each kit then Gavi has passed the User Maintenance Check – go to Section 11.10.
- Page 77 11.10. Cleanup & Filing If Gavi passes the User Maintenance Test: 1. Dispose of the used Gavi consumables in accordance with your laboratory’s procedures. 2. Retain the completed User Maintenance Test Records for future reference.
- Page 78 GENEA BIOMEDX 11.11. Appendix A: User Maintenance Test Record QFRM168-14-022020...
-
Page 79: Index
Lid Seal, 46 error alert, Operating Tray loading, 44 Electrical, Labels, 17 specifications, 51 loading the embryos into the Gavi Pods, 33 warning, 2 loading the Gavi Pods into the Cassette, 27 Embryos, preparing the Gavi Pods with VitBase, 31... - Page 80 56 checks, 57 User Maintenance Test, warming and seal warming, 39 checks, 57 Gavi Storage Dividers. See Storage Dividers, Gavi Tip & Seal Cartridge. See Tip & Seal Maintenance, Cartridge, cleaning, 49 Gavi Tweezers. See Tweezers, User Maintenance Test, 49, 52 Gavi Vial Decapper. See Vial Decapper, Medium Cartridge, Gavi Working Station.
- Page 81 21 VitBase, about, 29 Support, equilibrating embryos in VitBase, 29 authorized European representative, 51 preparing the Gavi Pods with VitBase, 31 manufacturer, 51 Switching off. See Gavi, powering off, Vitrification, preparing Gavi For vitrification, 23 Switching on. See Gavi, powering on,...
-
Page 82: Notes
GENEA BIOMEDX 13. NOTES QFRM168-14-022020... - Page 83 GAVI USER MANUAL QFRM168-14-022020...
- Page 84 QFRM168-14-022020...
Need help?
Do you have a question about the Gavi and is the answer not in the manual?
Questions and answers